Through Guest Messages you are able to set up information and policies for your property, to communicate to your guests. Examples are your Cancellation Policy, or Terms and Conditions. These messagages will appear in some areas of your Frontdesk Anywhere, like on the Booking Engine, or on your Templates. Templates are the actual messages that your guests will receive. Examples are Confirmation Email or Cancellation Email.
Guest Messages
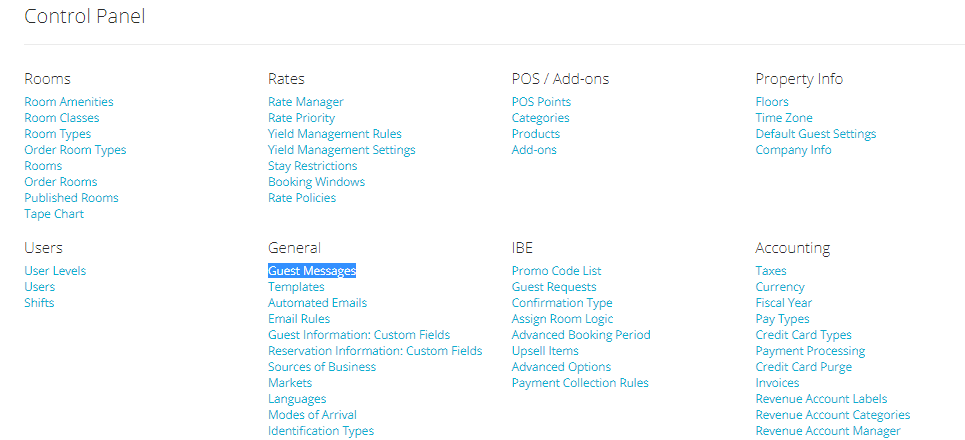
- In the Admin Settings, click on the link Guest Messages under section General:
- You will see different panels, each one editable and with a title on the top that should give you some guidance on what sort of information you should type in the editable box:
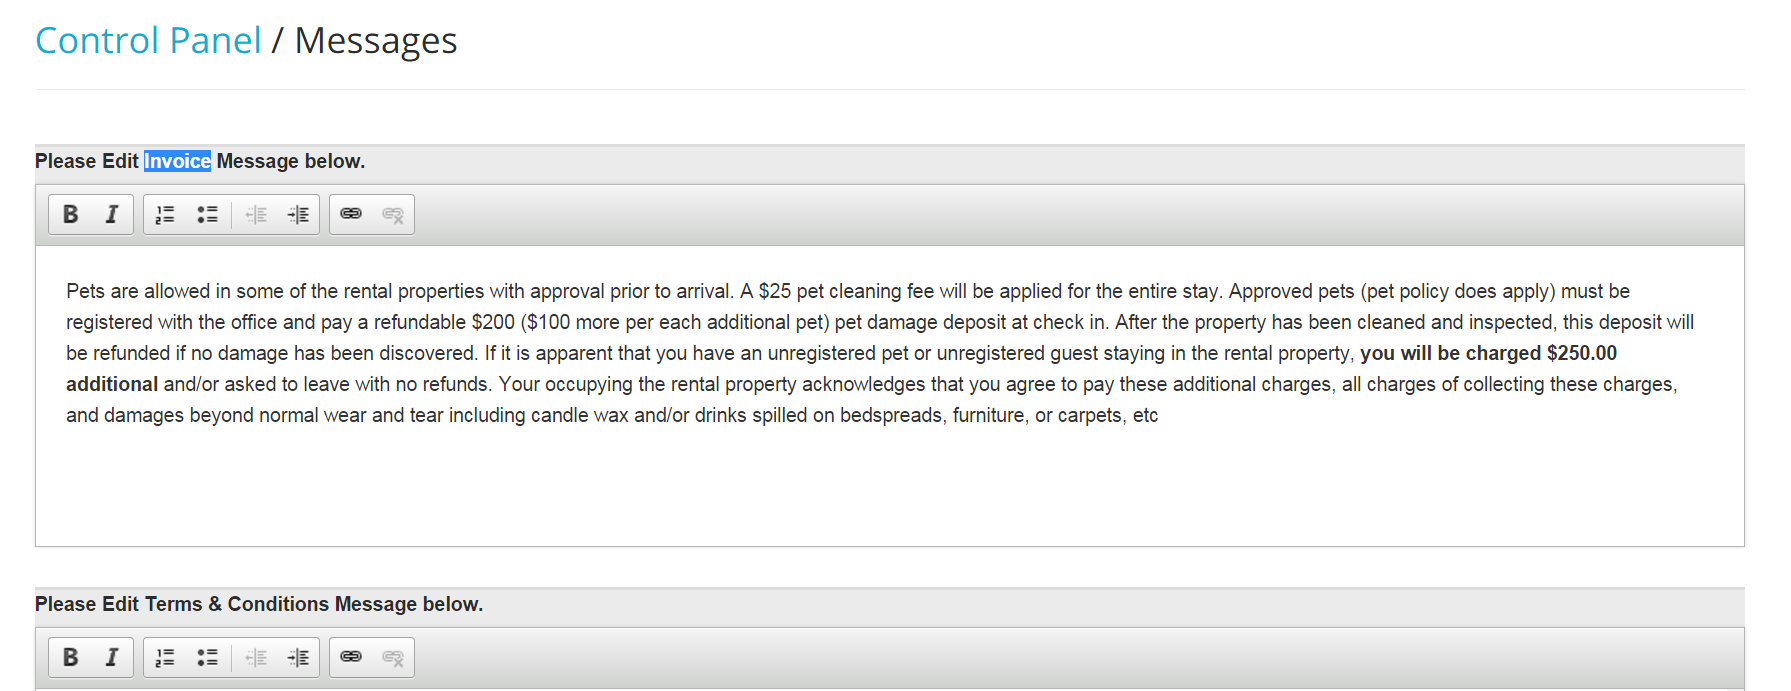
- The first one is the Invoice Message: this is a message that will appear in each of your property invoices:

- Proceed to edit the Terms and Conditons message: the latter will show up on your Online Booking Engine, and your confirmation email:

- The third message will be the Room Cancellation message: as the text in the box says, this will appear both on your Booking Engine and in your cancellation email:

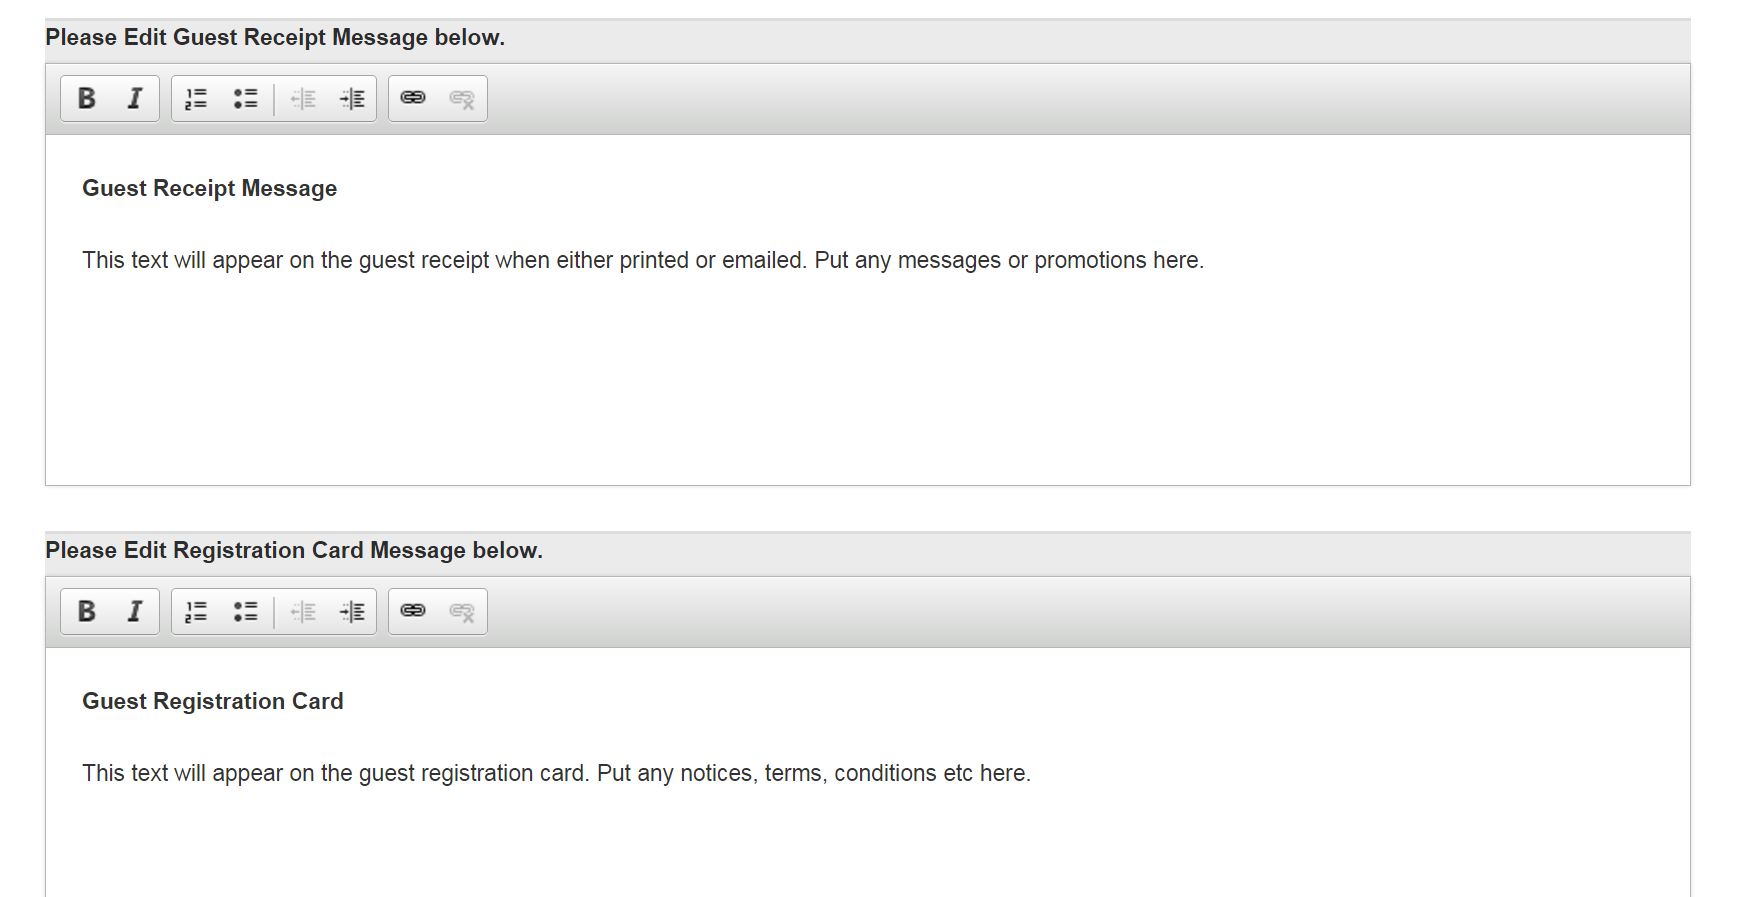
- Finally, edit your Guest Receipt and your Registration Card messages:
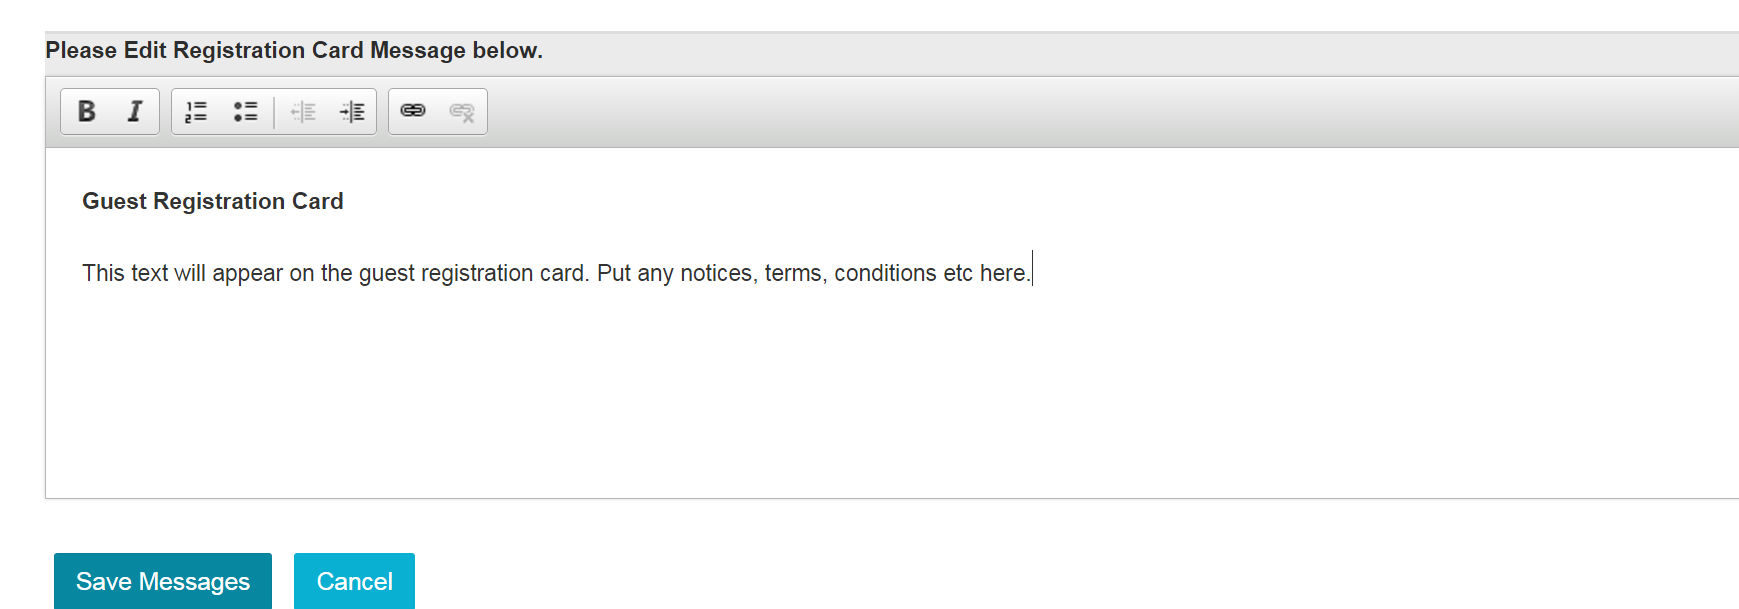
- When finished, scroll at the bottom of the page and click on the blue button Save:
Templates
Frontdesk Anywhere allows you to customize all communications with your guests: all templates are in a html format, and their content can be easily editable!
Warning: Be aware that the templates design have been built so to ensure they will render good when sent via emails on both computers and mobile devices. If you want to change the design, we do not guarantee that the template will render as good as the default ones.
Click here to check out all available variables you can use in the html templates!
- In the Admin Settings, click on the blue link Templates under section General:
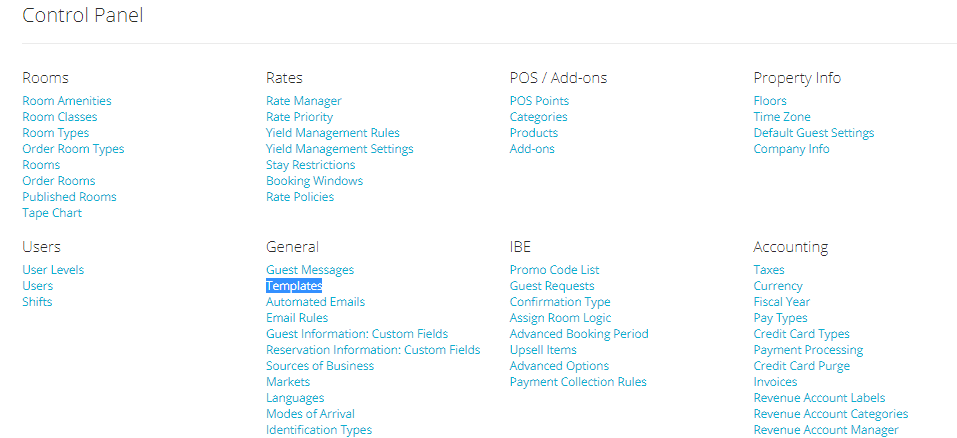
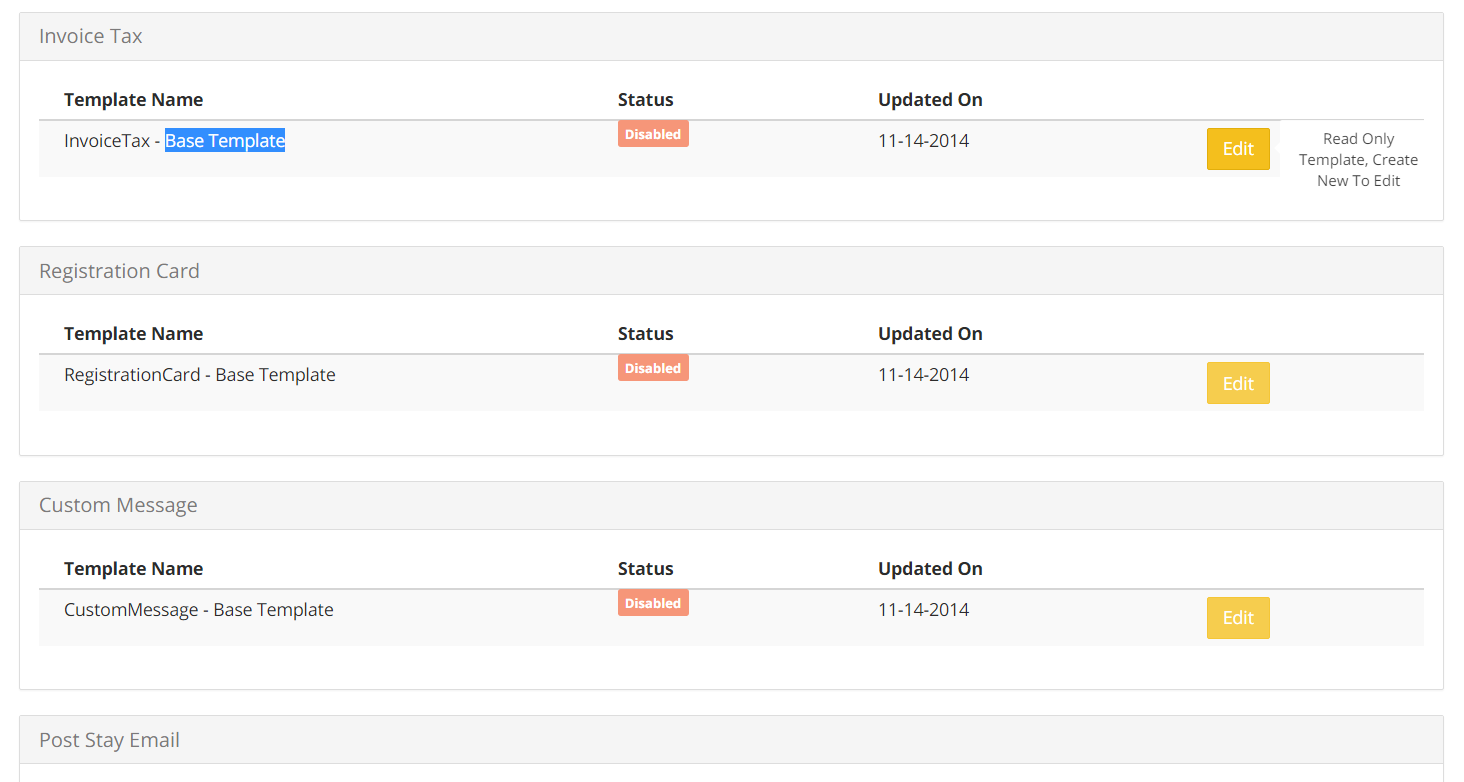
- You will see a list of all the types of templates that the system offers: the name of each template appears on the top left hand side of each message panel.

- Under each section you will see one disabled template already listed: these templates are only used as a guidance, and they are non-editable:
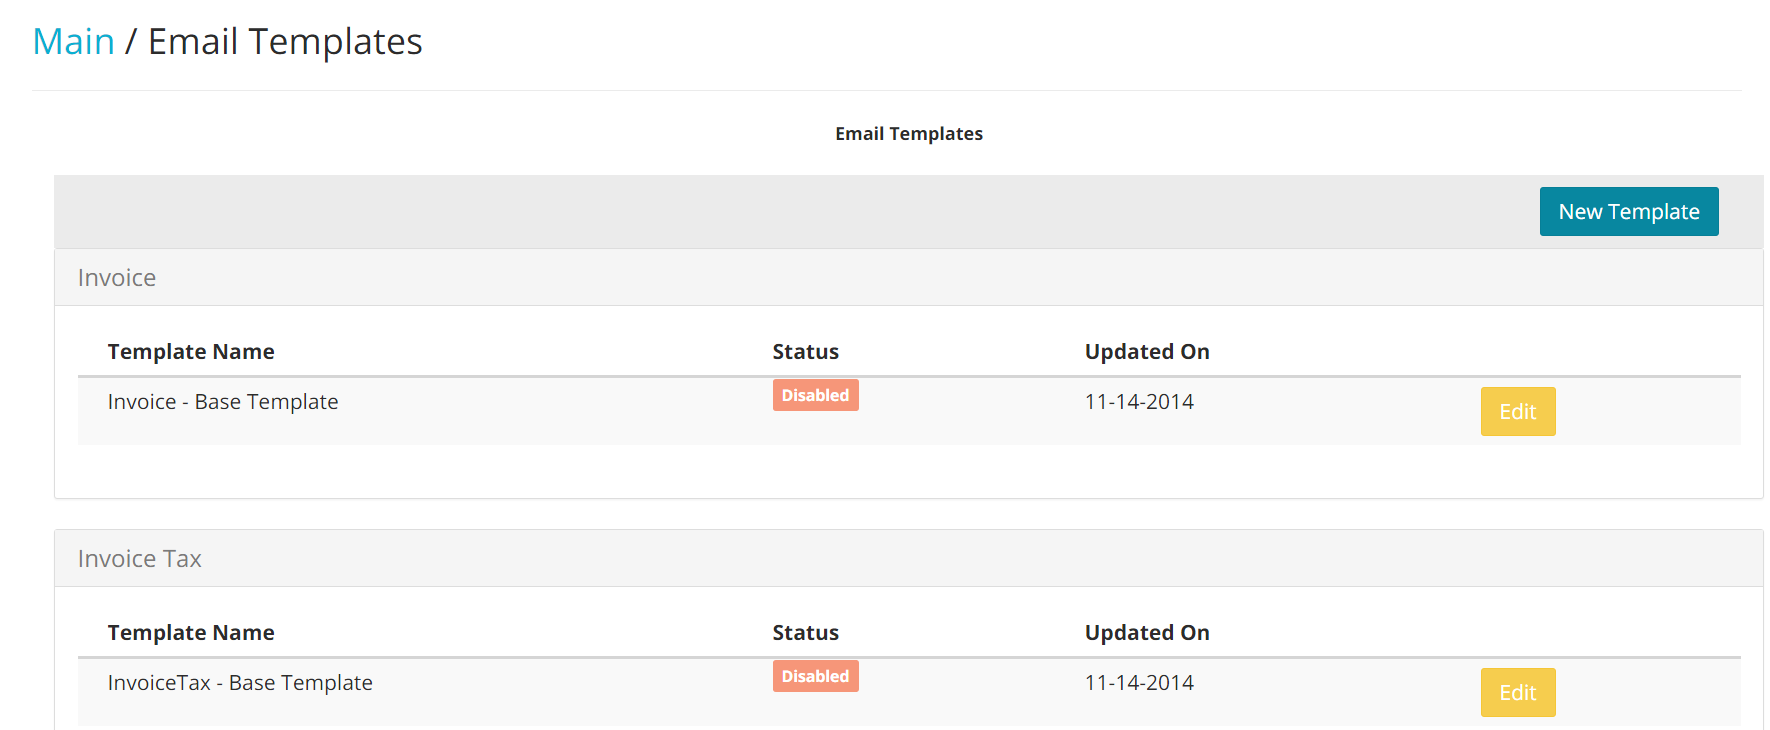
- To create a new template, click on the blue button New Template on the top left hand side of the screen:
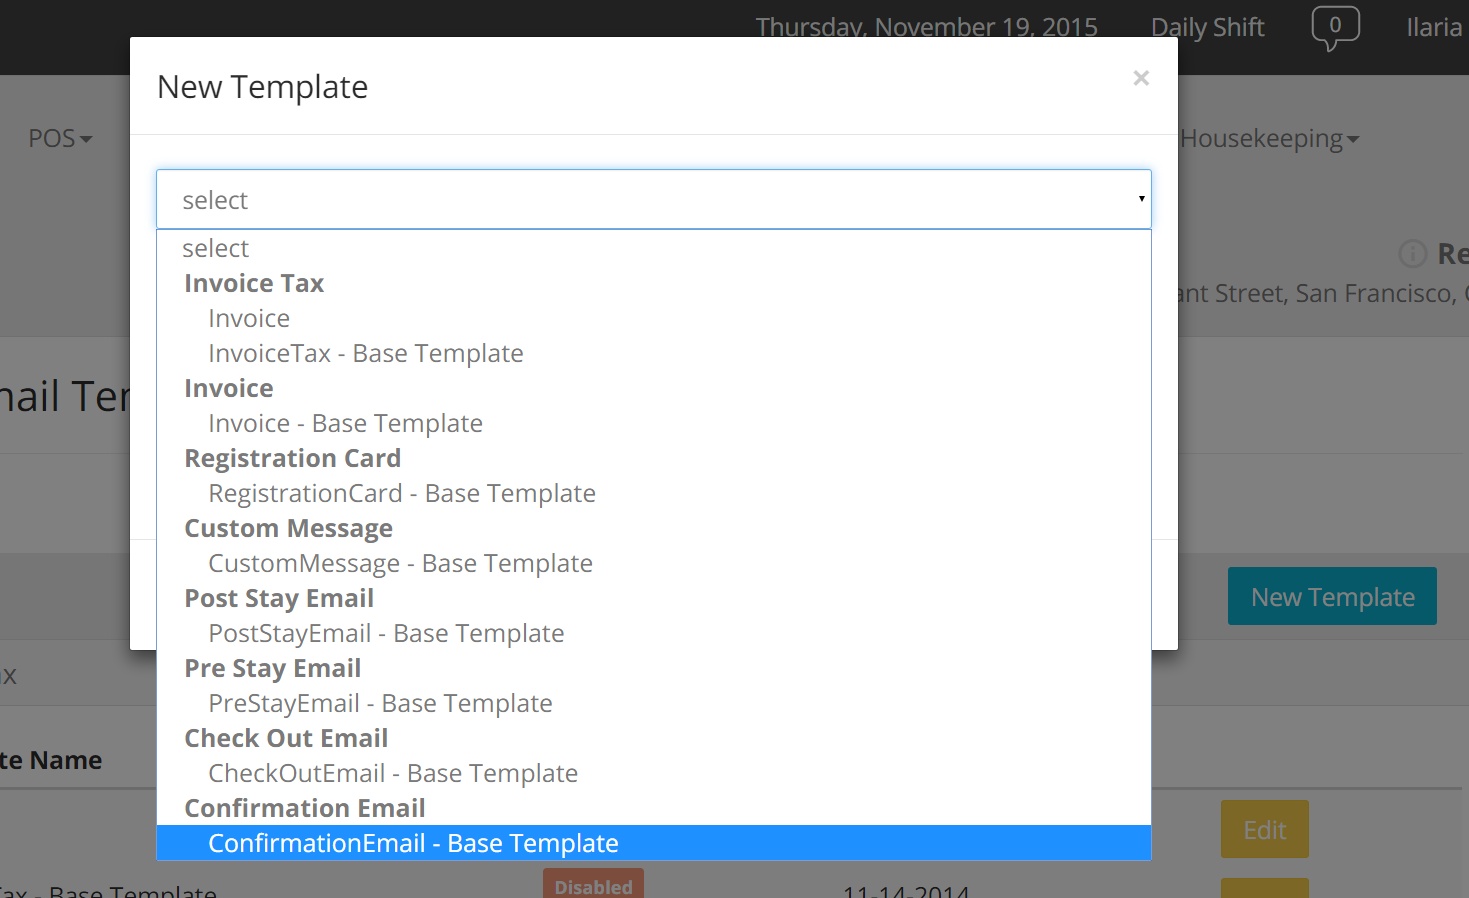
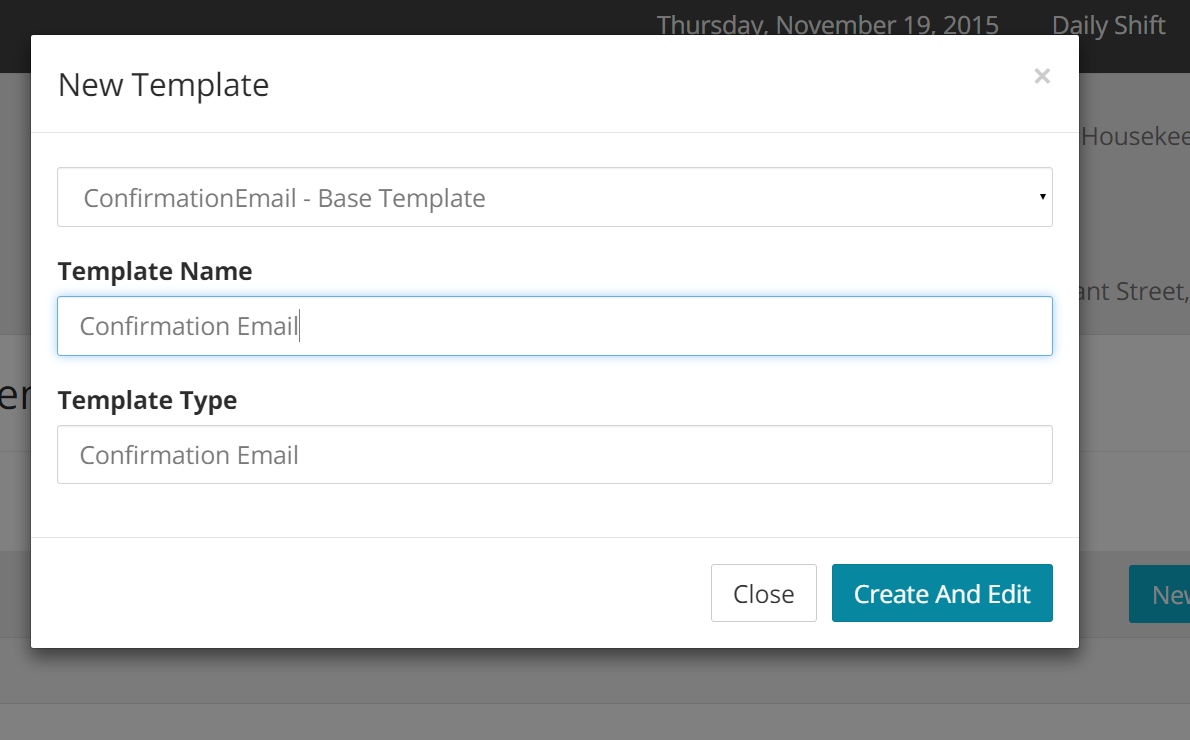
- Select the template you want to create by clicking on the right option in the scroll down menu:
- Give a name to the template and click on the blue button Create and Edit:
- The template you have just created will be listed under the apposite header:

- Once the template has been created, it also needs to be enabled. Click on the yellow button Edit on the right hand side of the newly created template:

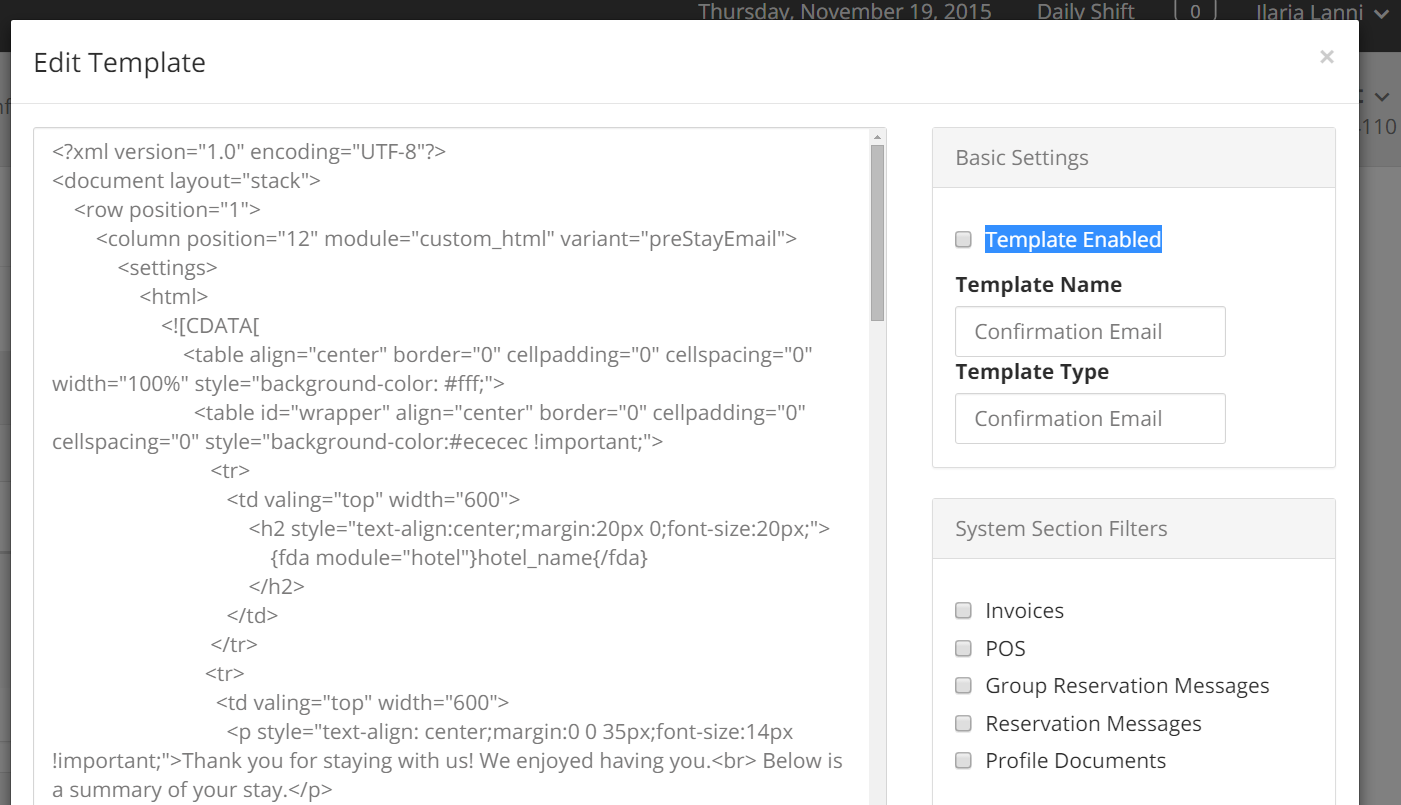
- Enable the template by checking the box next to the tag Template Enabled:
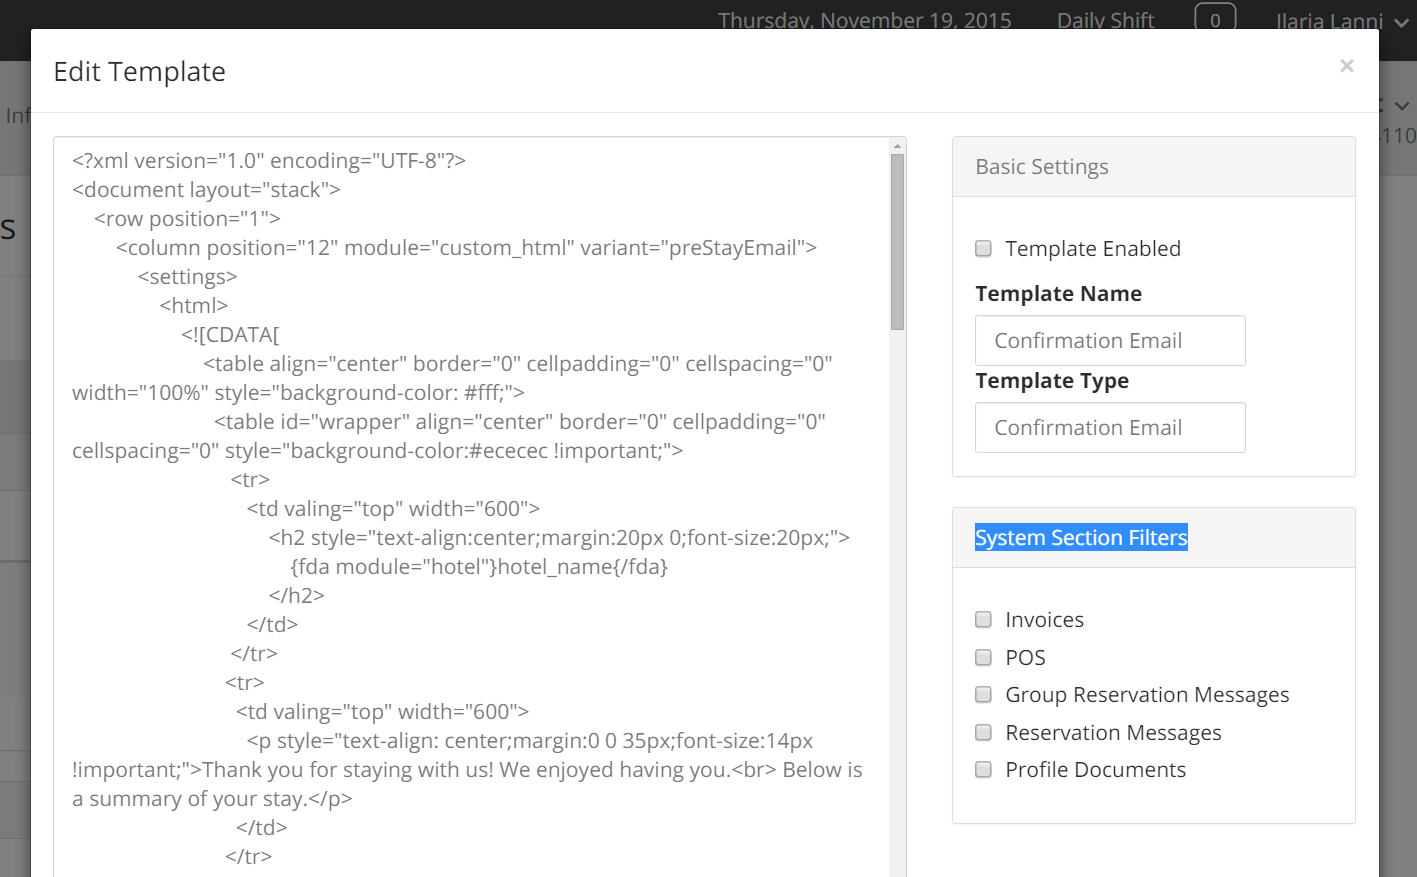
- Select where you want the template to apply and appear, by checking the right boxes under the written System Section Filters:
- To DELETE a template, just click on the red button Remove next to the relevant template:

Here is a quick breakdown of what each box means:
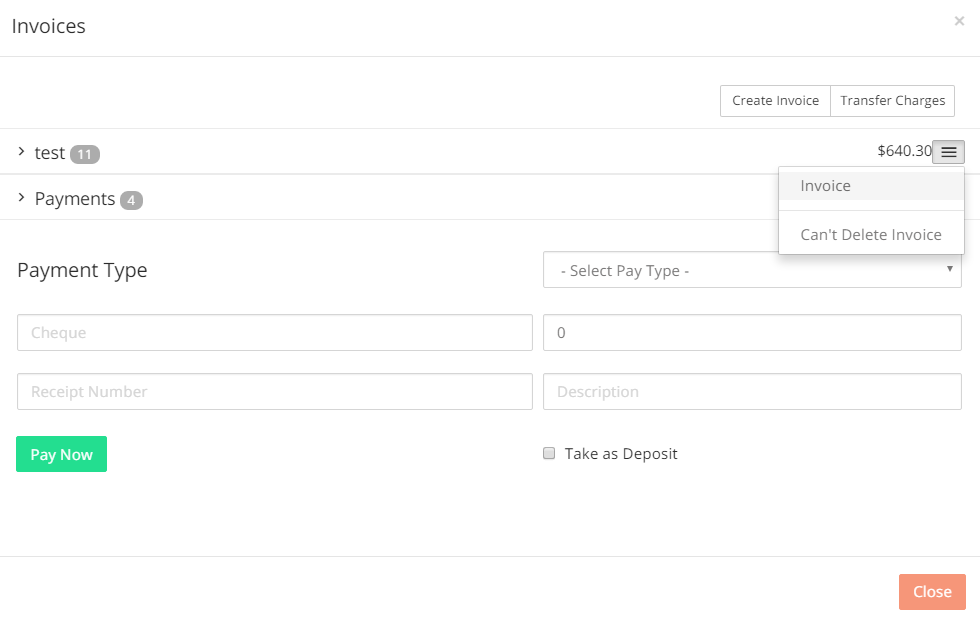
If you check the box Invoices, your template will show up in any reservation folio, in the Invoice section of the link Payments:
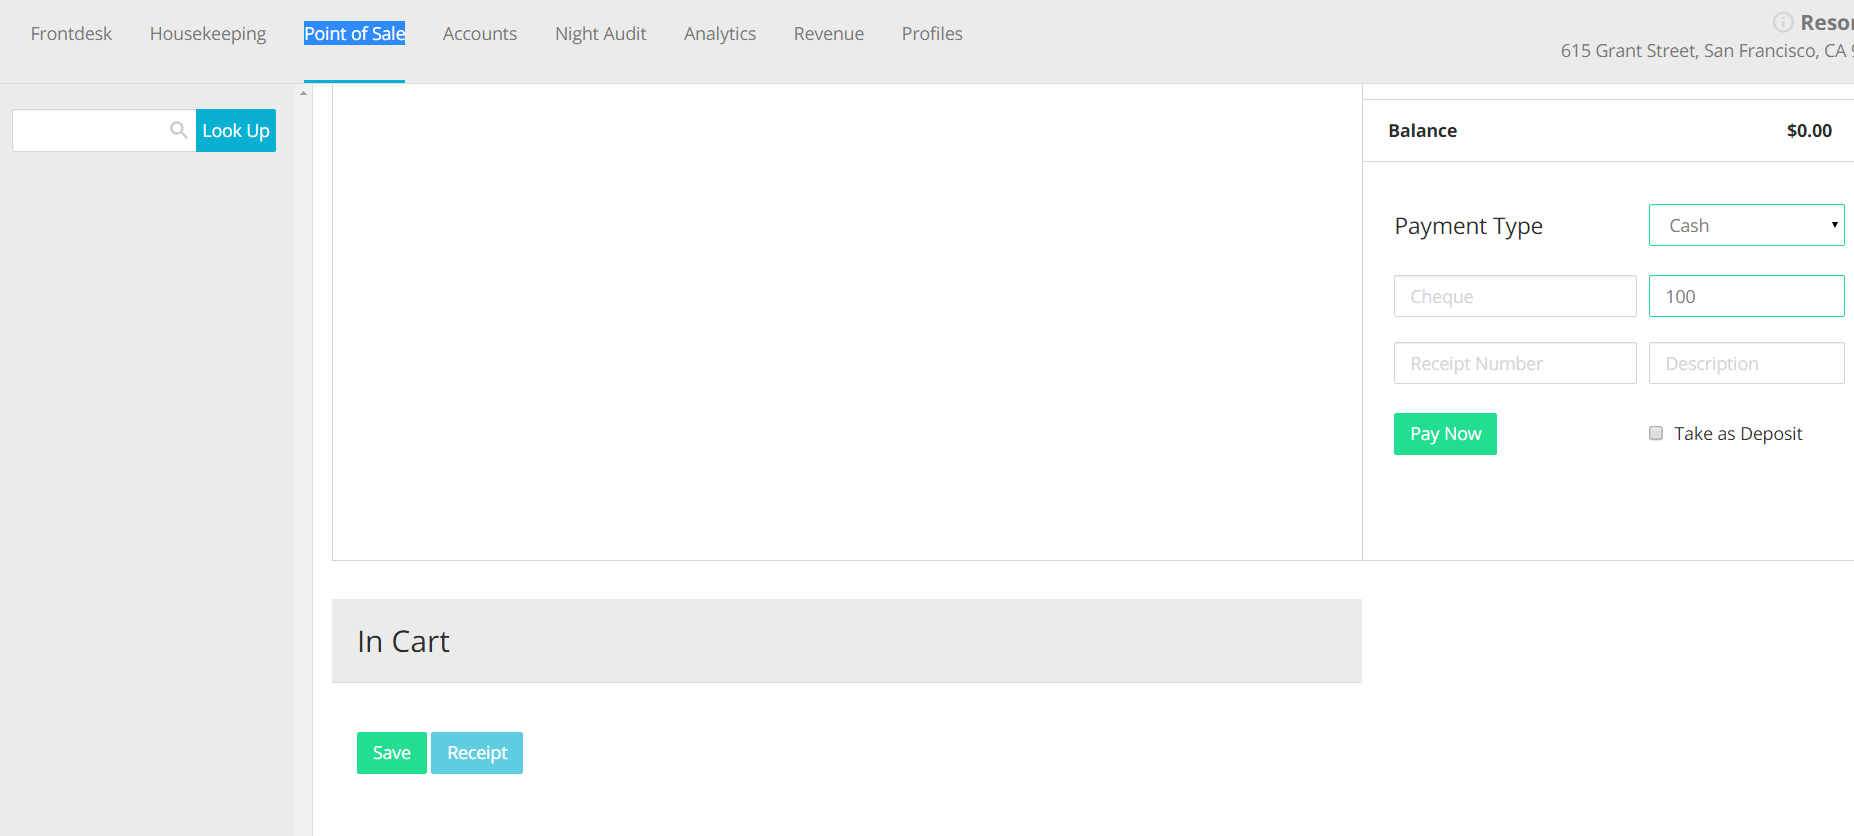
If you check the box POS, the template will show up as a Receipt in the Point of Sale area of your PMS:
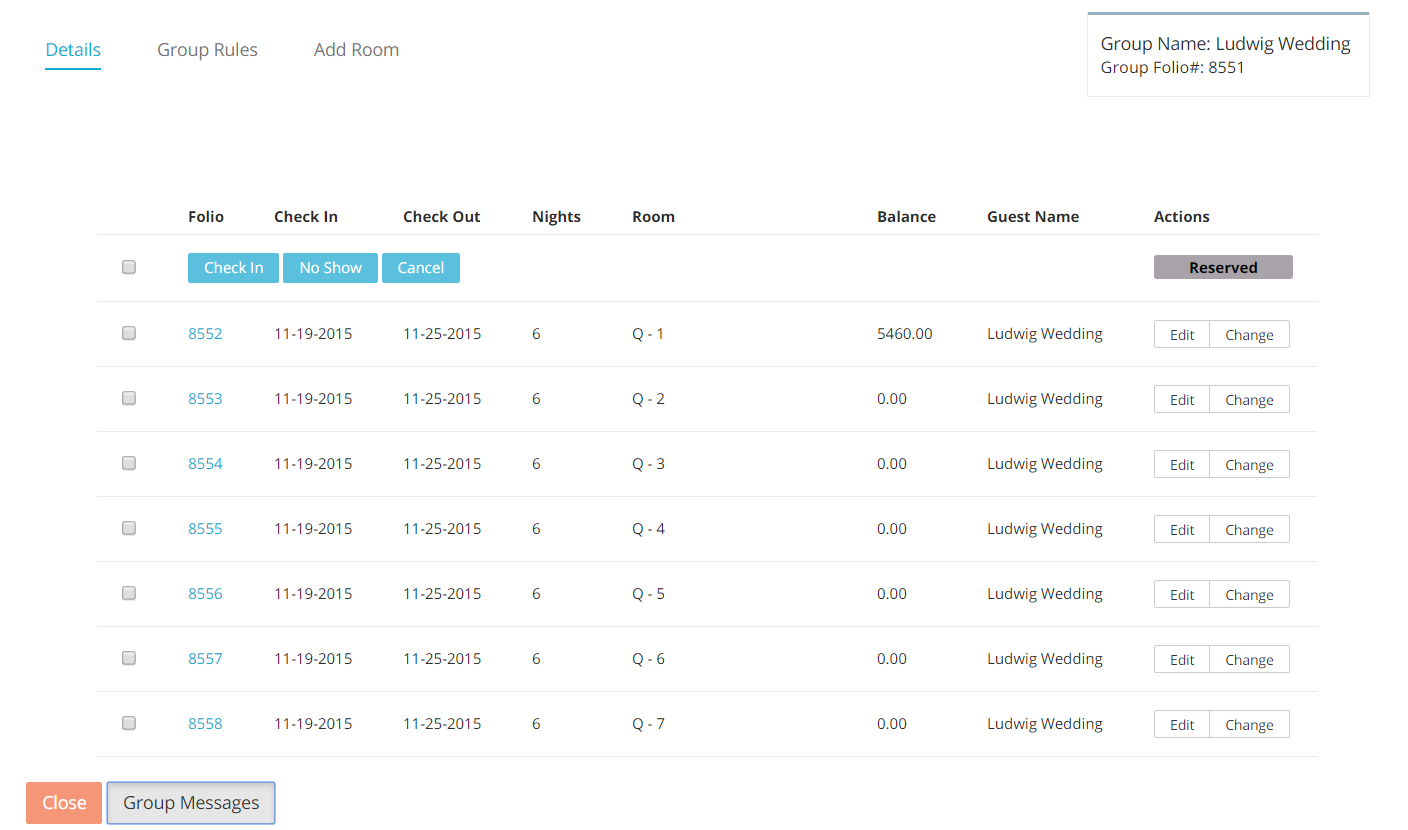
If the box Group Messages is checked, the newly create template will appear in any Group Folio, at the bottom:
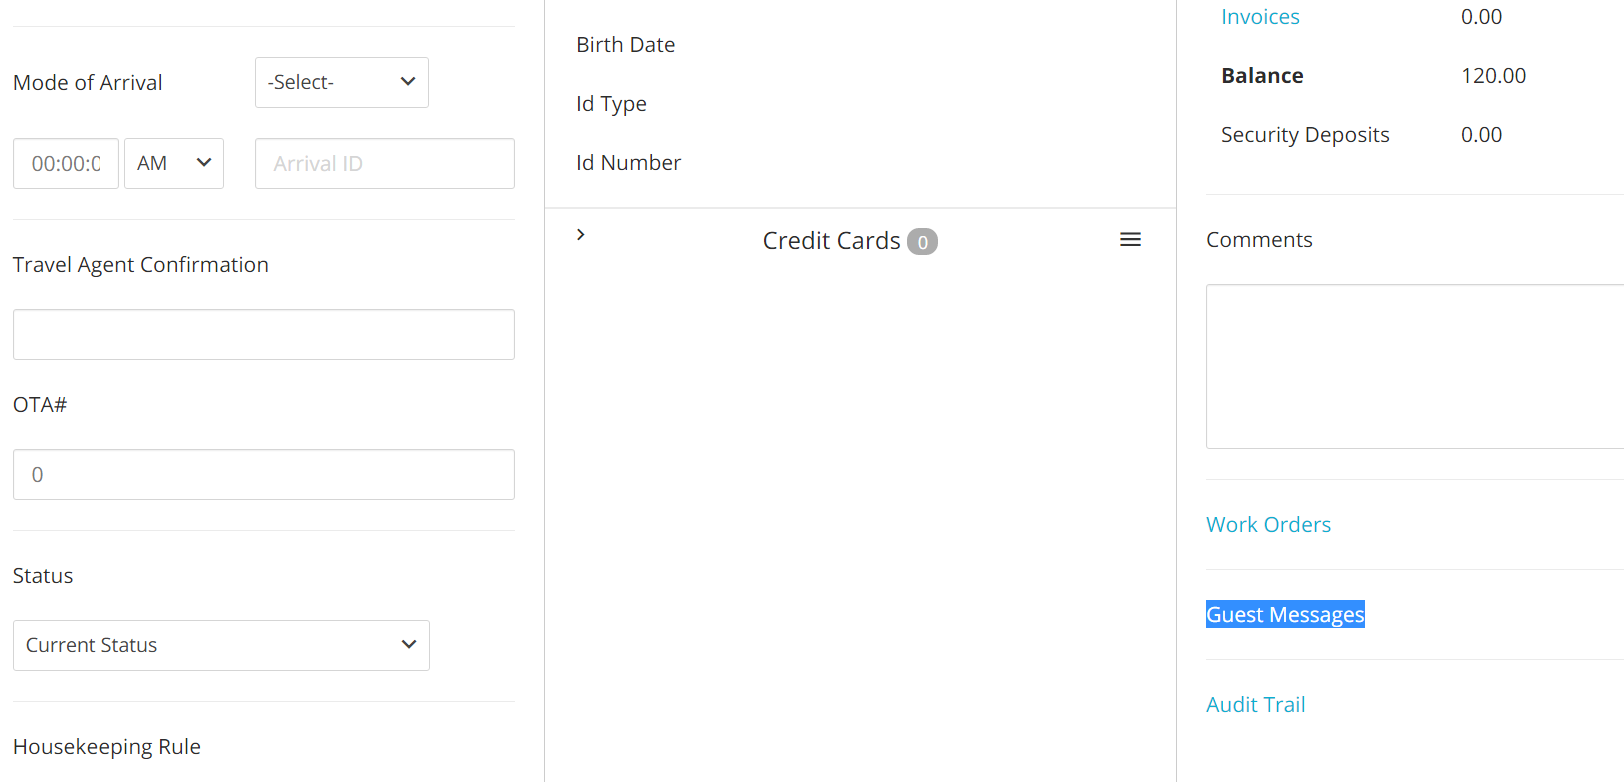
If you check the box Reservation Messages, the template will appear on the bottom left side of each reservation folio:
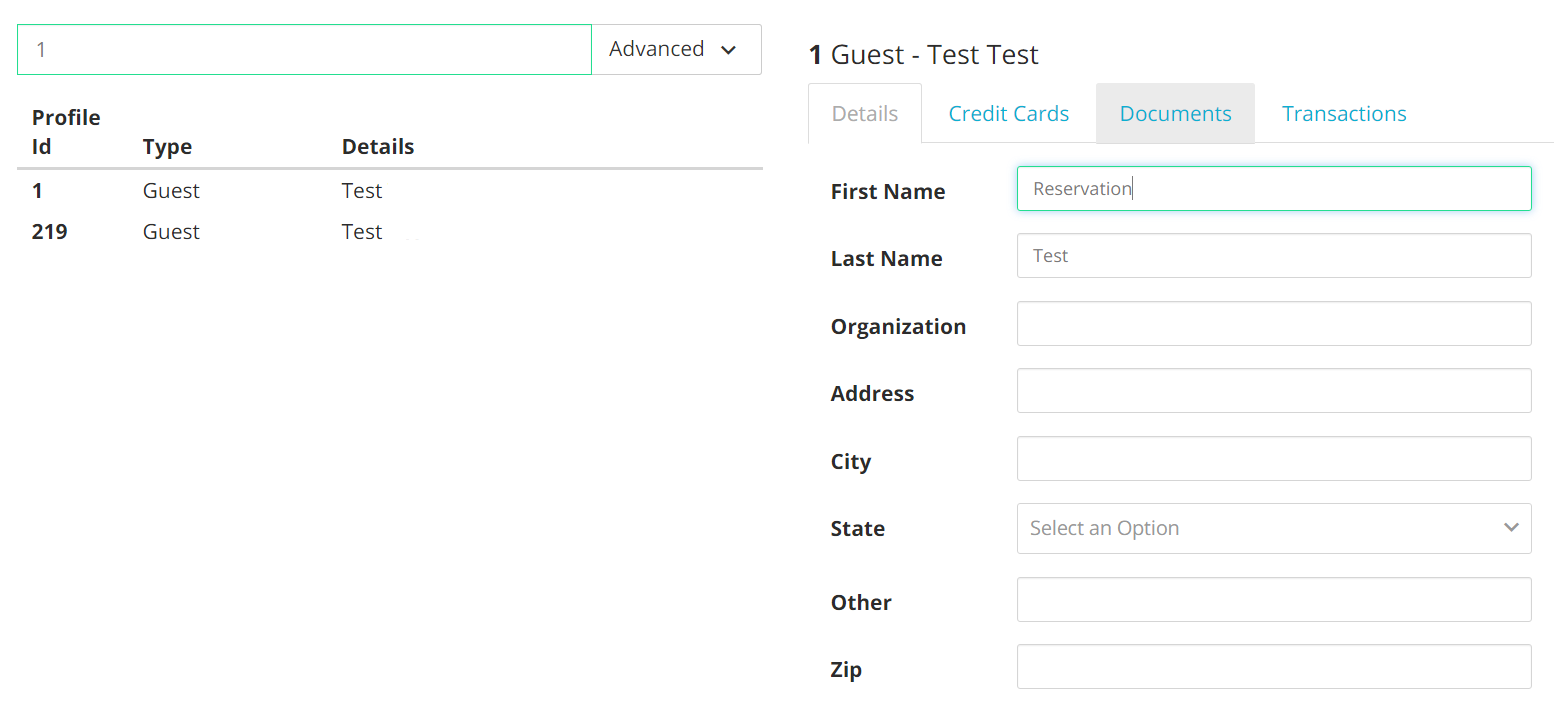
Finally, if you check on the Profile Documents, the template will show in the Profiles area:
- When finished, click on the button Save at the bottom of the screen.
Note: If your property has any inclusive tax or fee that you want to show on your Invoice tax, please contact our team at help@frontdeskanywhere.com: our team will be able to change the template for you!
Automated Emails
Once your Email Templates are set up, you can configure the system to automatically send those templates to your guests at key points during their reservation process and stay.
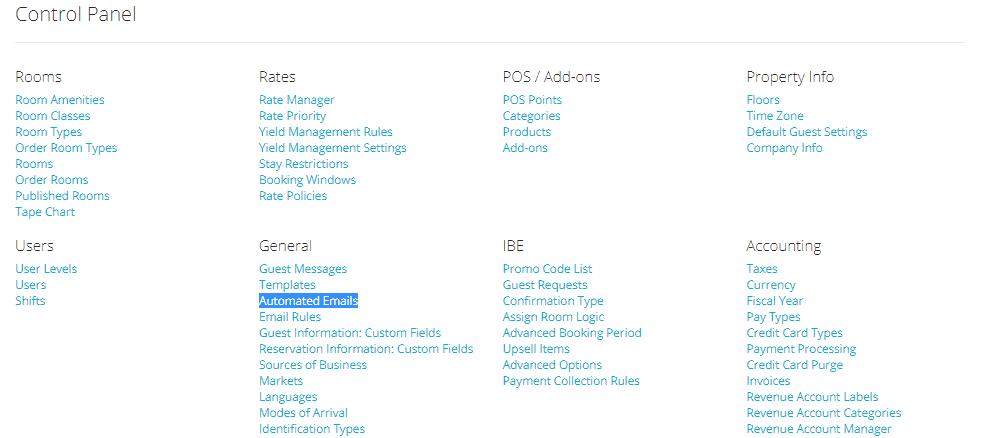
- In the Admin Settings, click on the link Automated Emails under section General:
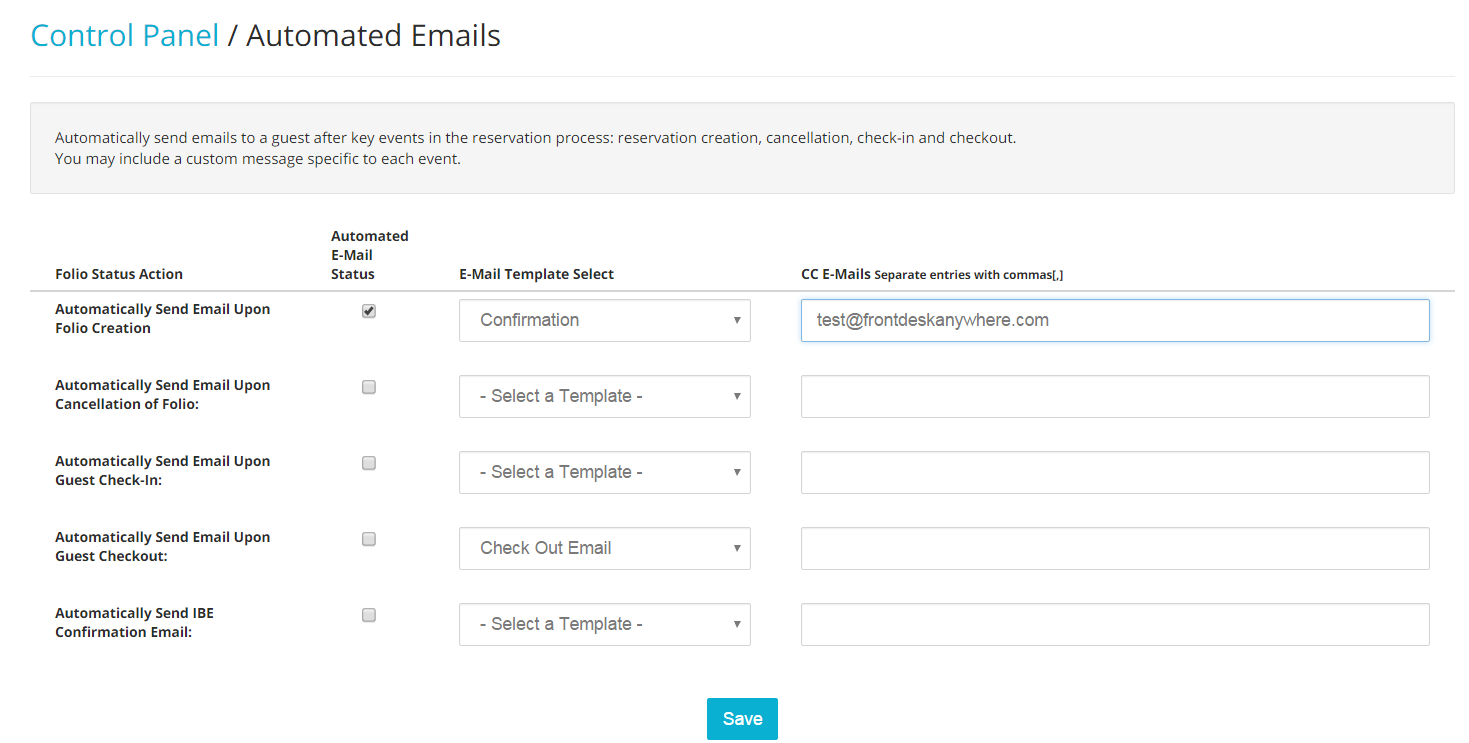
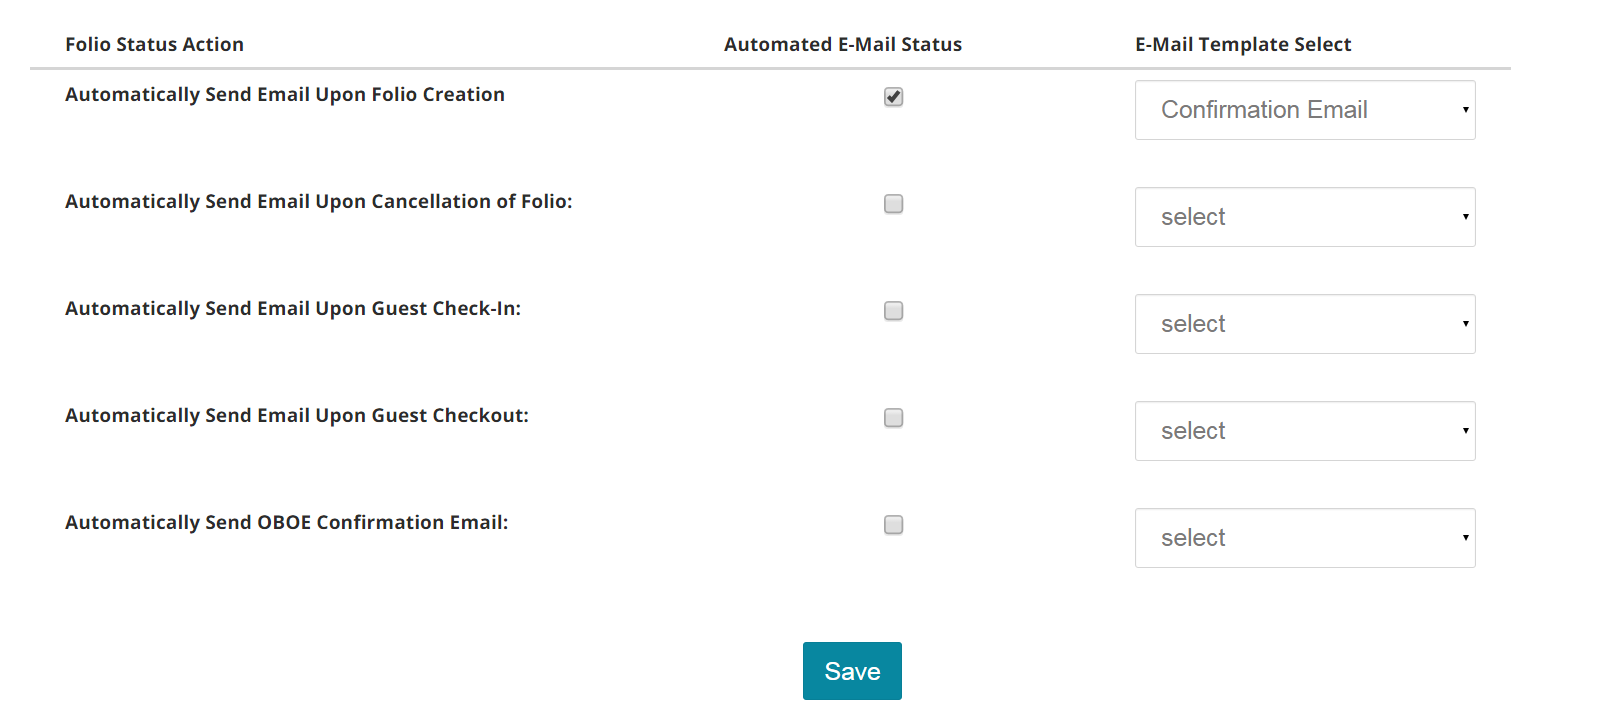
- The first column Folio Status Action identifies what change of reservation status will trigger the automatic email.
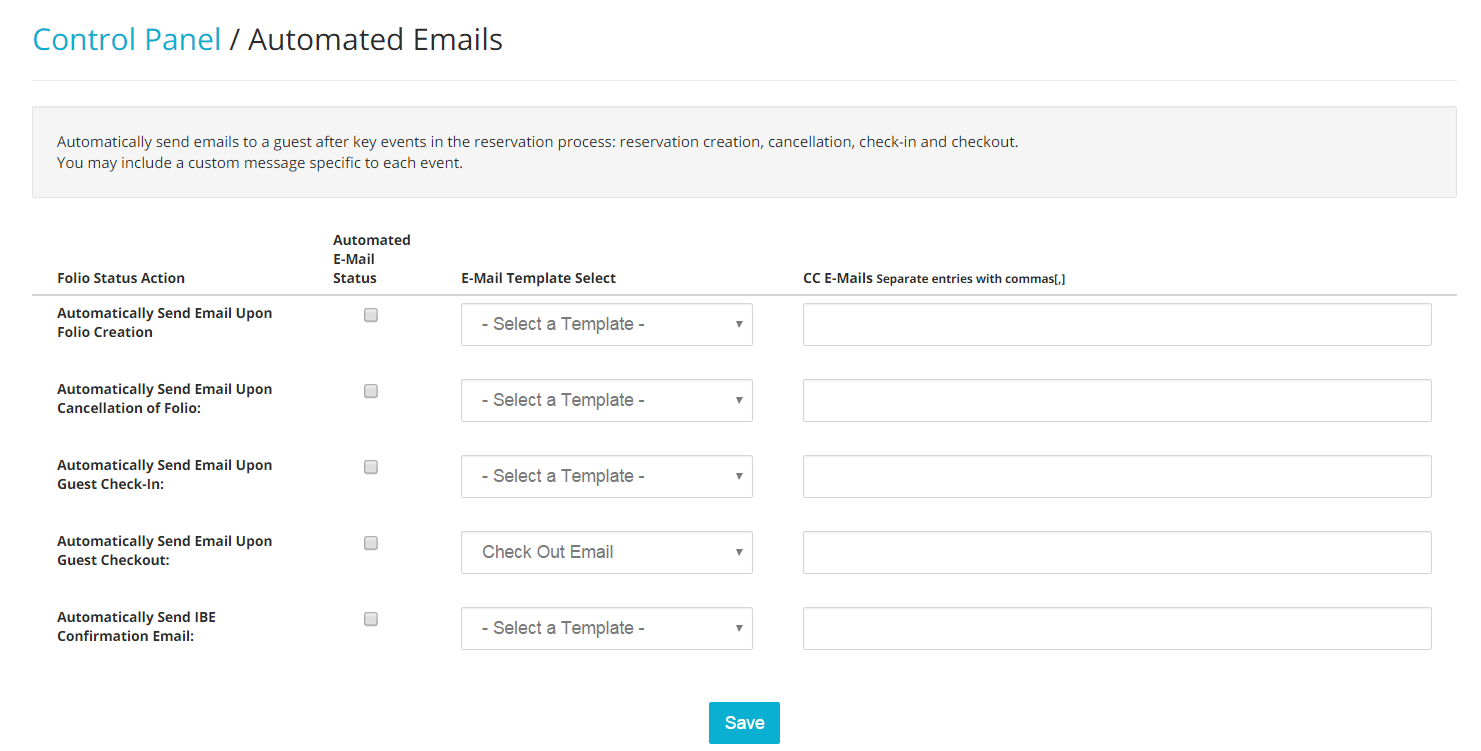
Note that the status Automatically Send Email Upon Folio Creation only interests those folios manually created on your Tape Chart. If you want to have the system send an automatic email when your guests book online, you will need to active the Automatically Send IBE Confirmation Email.
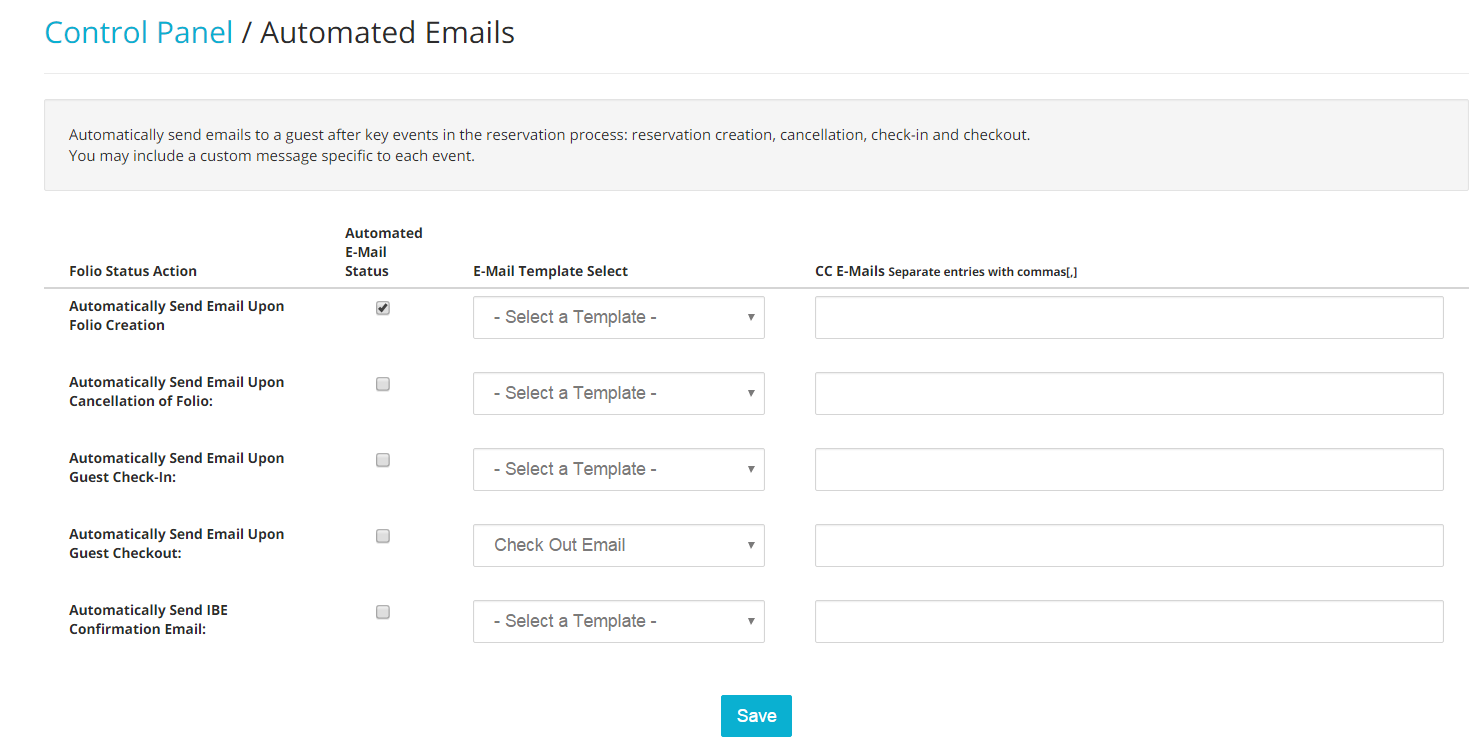
- Under column Automated E-mail Status check the box corresponding to the action you want the system to perform. In the example below I am choosing to have the system to send an automatic email any time a reservation is created on the Tape Chart:
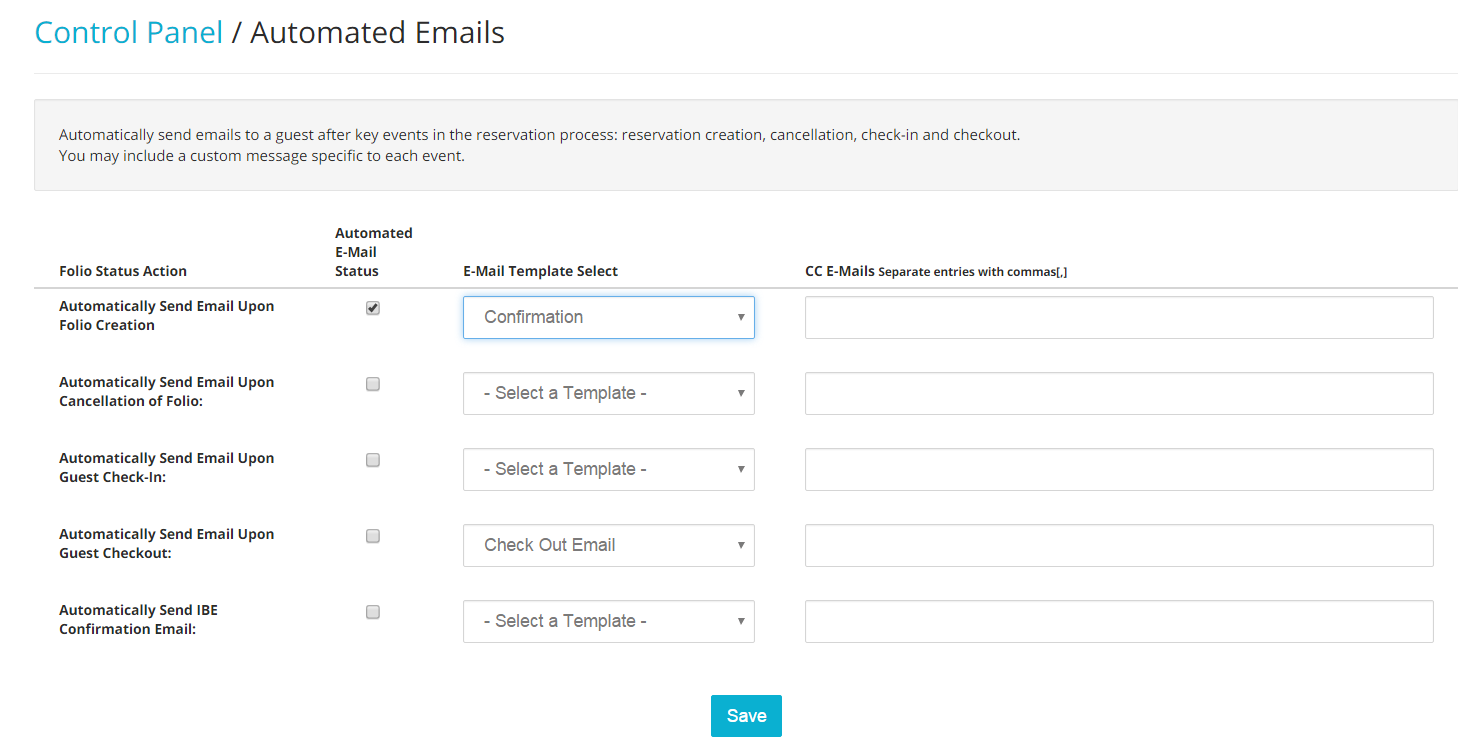
- Select what email template you want to use by choosing one from the available options in the scroll down menu:
- Finally, enter the email address you want to send a copy of the email to:
- When finished, click on the blue button Save at the bottom of the page:
Email Rules
Email rules is the tool that enables you to send automatic emails outside the sphere of any folio activity (reservation confirmation, check-in, check-out, and cancellation). Differently from the Automated Emails where those emails are triggered by some change in the status of a reservation folio, Email Rules do not have any constrain in terms of the time at which the email is sent: you simply set the condition yourself! This comes useful when you want to send a remainder to your guests for their upcoming arrival or at times when you want to send a “thank you” message to your guests after their stay.
Important: You will have to have both Email Templates enabled and Guest Messages set up before placing Email Rules.
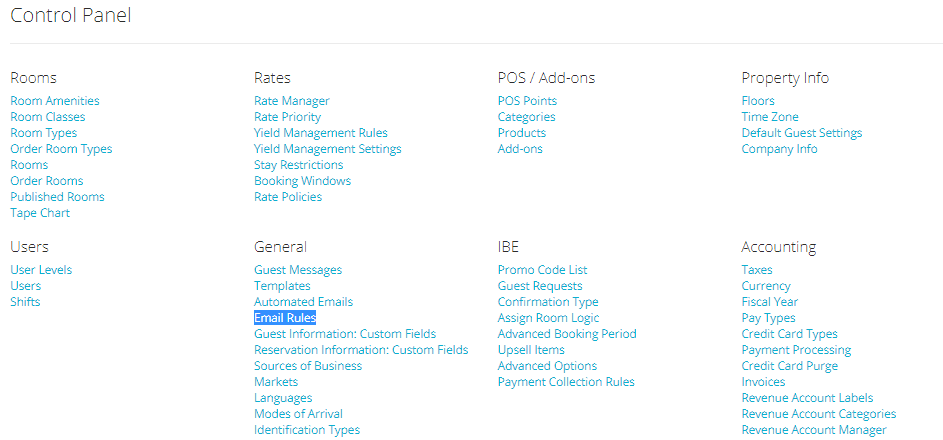
- In the Admin Settings, click on the link Email Rules under section General:
- Start by clicking on the blue button Add:

- You will be promopted to fill in some fields:
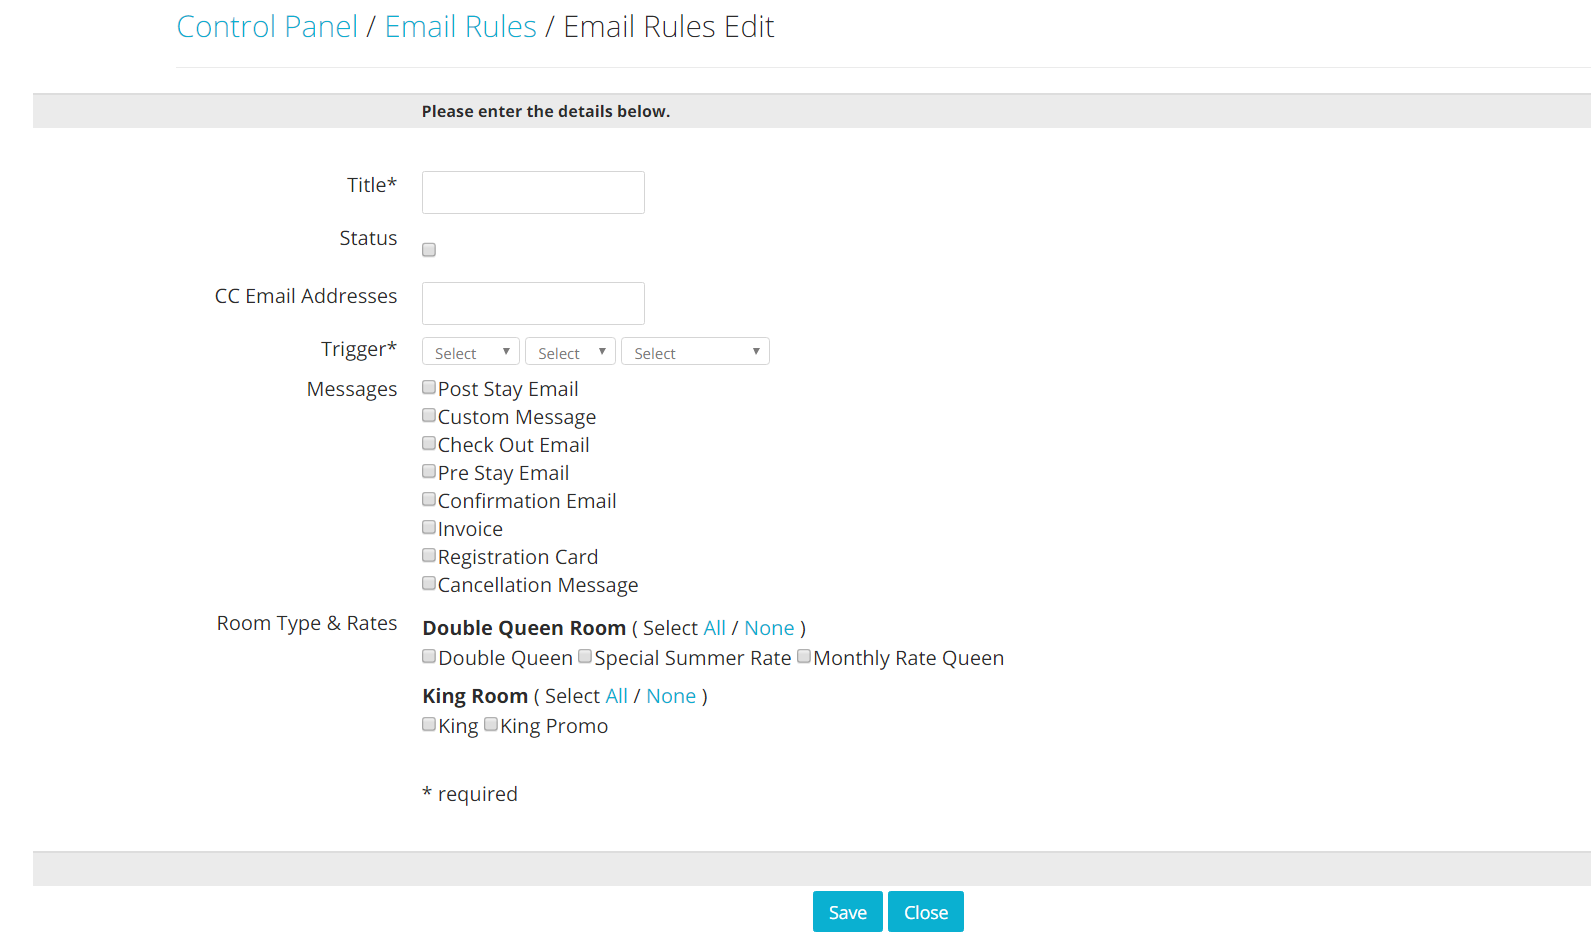
Title: the Title field will appear as the email subject of the message.
Status: the Status checkbox controls whether the email rule is active or not.
CC Email Addresses: you can insert this field if you want to have a copy of each message that gets sent. Note that you can enter multiple addresses, just make sure to have them separated by one coma.
Trigger: this is how you decide when to send the message. You will see three drop down menus, you will simply need to make your selection.
Messages: this is where you decide which message you want to include in the email: the list of messages will reflect the templates that you have currently active.
Room Type & Rates: emails to be sent are individuated on a rate level: for each room type, select the rate/s you want the rule to include. For example, if you check the box King, the email will be sent only to those folios to which this particular rate is assigned.
- When finished, click on the blue button Save at the bottom of the page.