You can create solo reservations easily with a simple click on the Tape Chart. You will need to make sure that the room you are trying to book for the chosen dates is available for the date range the reservation is for.
Displaying Availability
The first way you can start creating a single reservation is by clicking directly on the empty box on your Tape Chart, corresponding to the day and room you want to book.
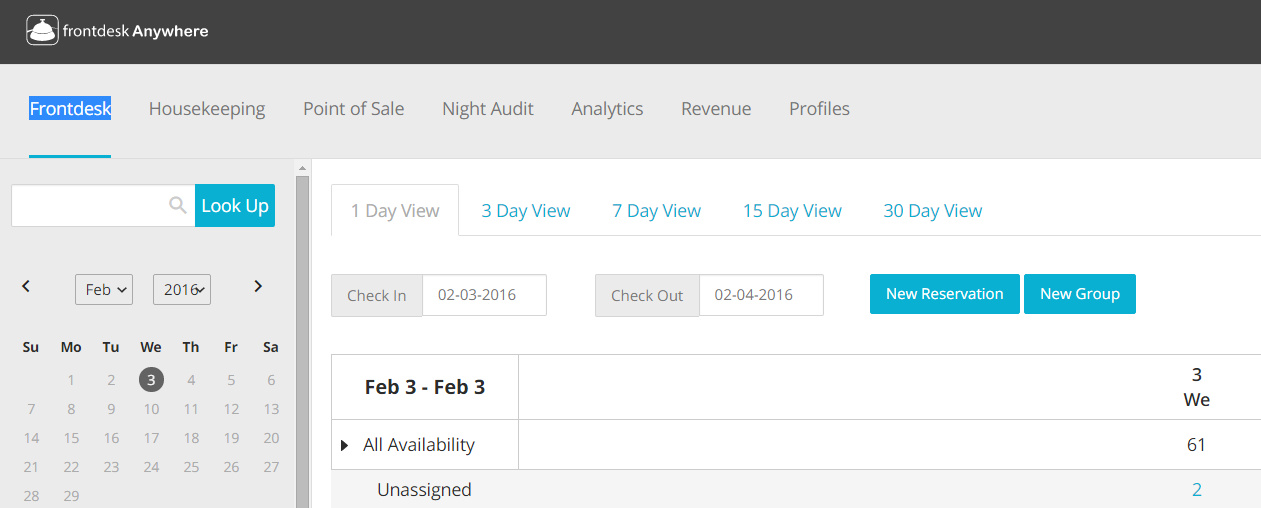
- Start by going to the Frontdesk tab, upon login:
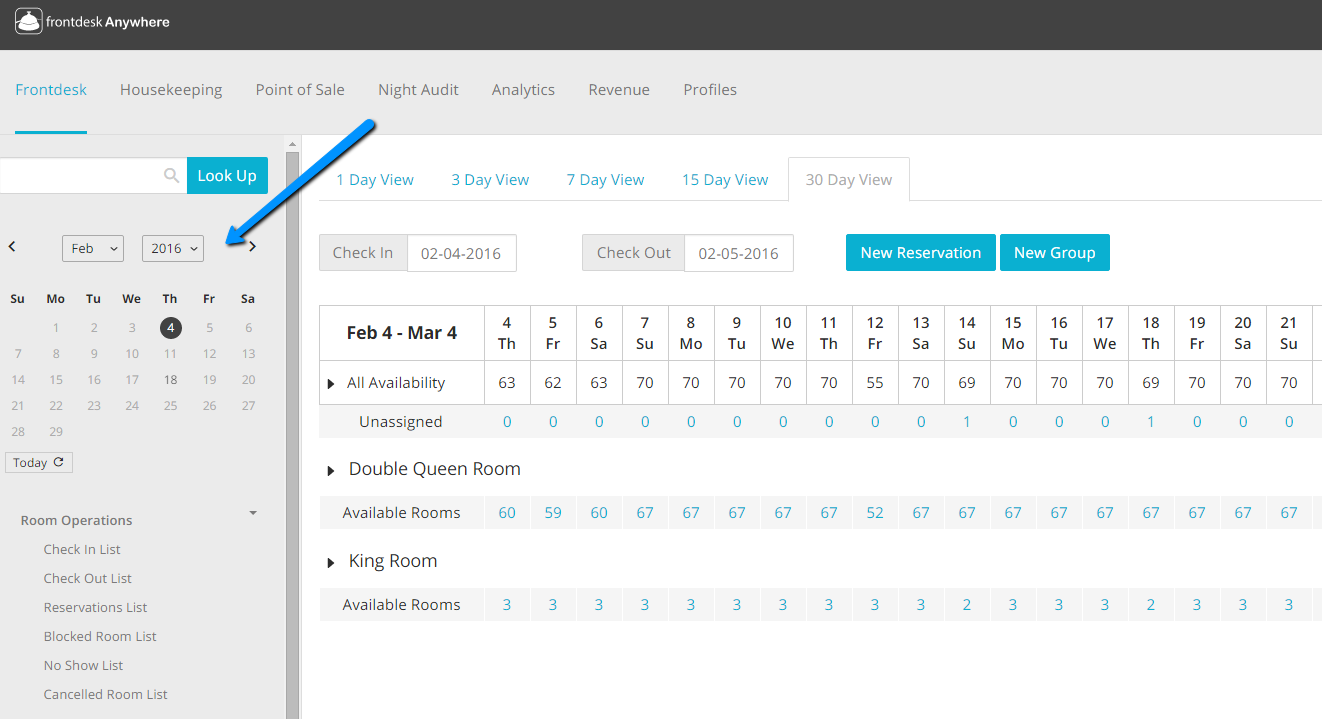
- If the day you want to make the reservation for is not displaying on the Tape Chart, make sure to update the calendar accordingly, so that you will be able to visualize all availability for the requested date range:
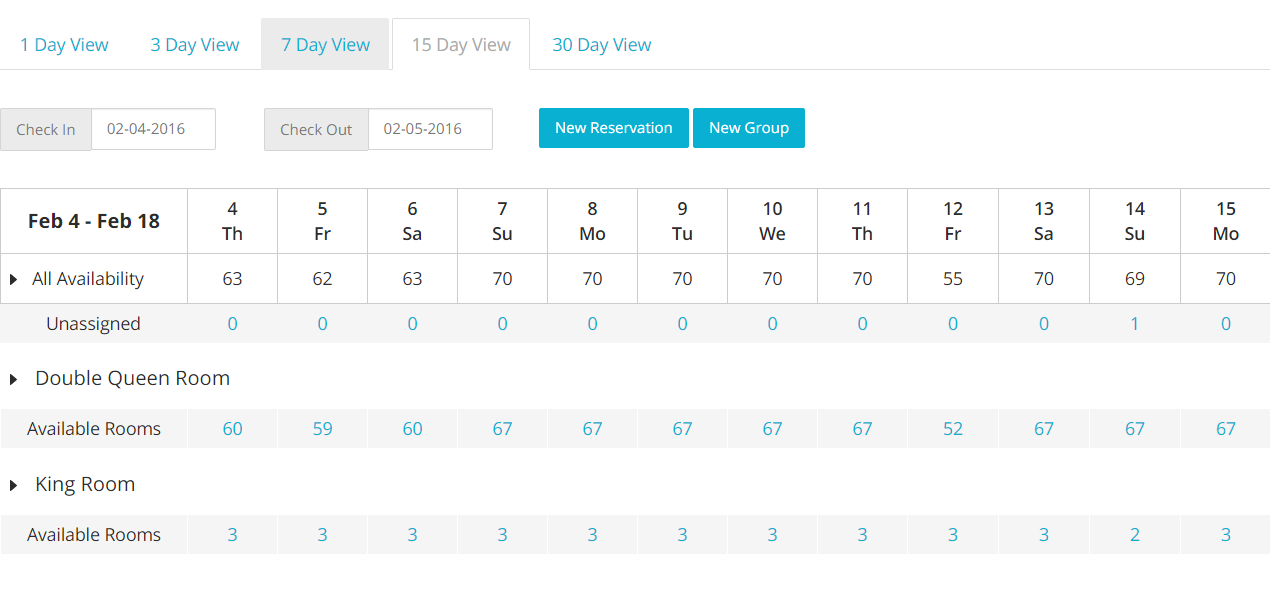
Note that you can also use the View tabs on the top of your Tape Chart to make sure you have a good understanding of what is and is not available for the selected date range:
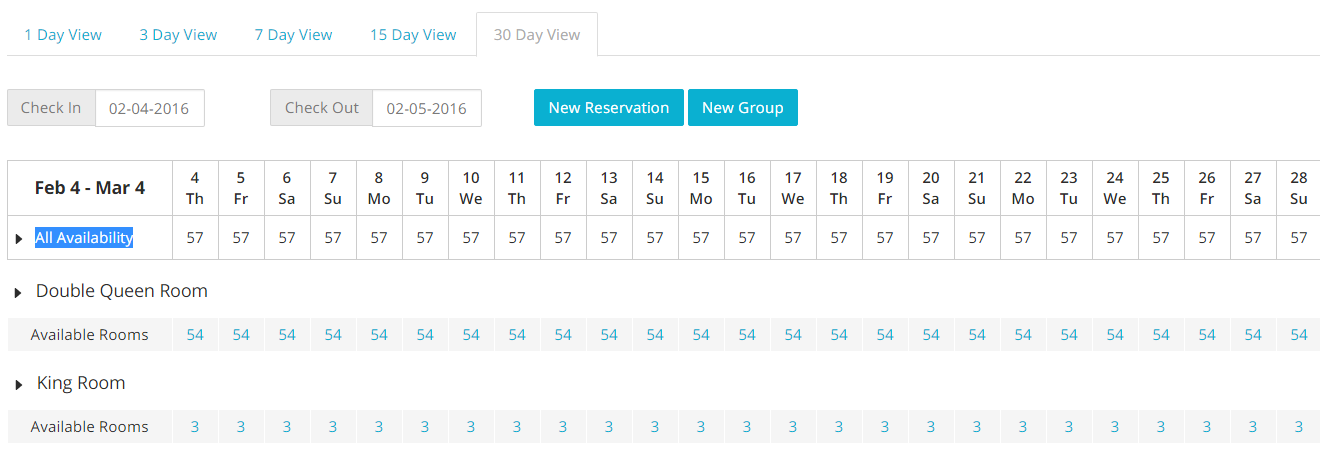
- Use the arrows on the top left corner of your Tape Chart, to see expand the Tape Chart and see what room is available for the selected period:
- Select the box corresponding to the room you want to book and the guest’s arrival date; another window will pop-up:
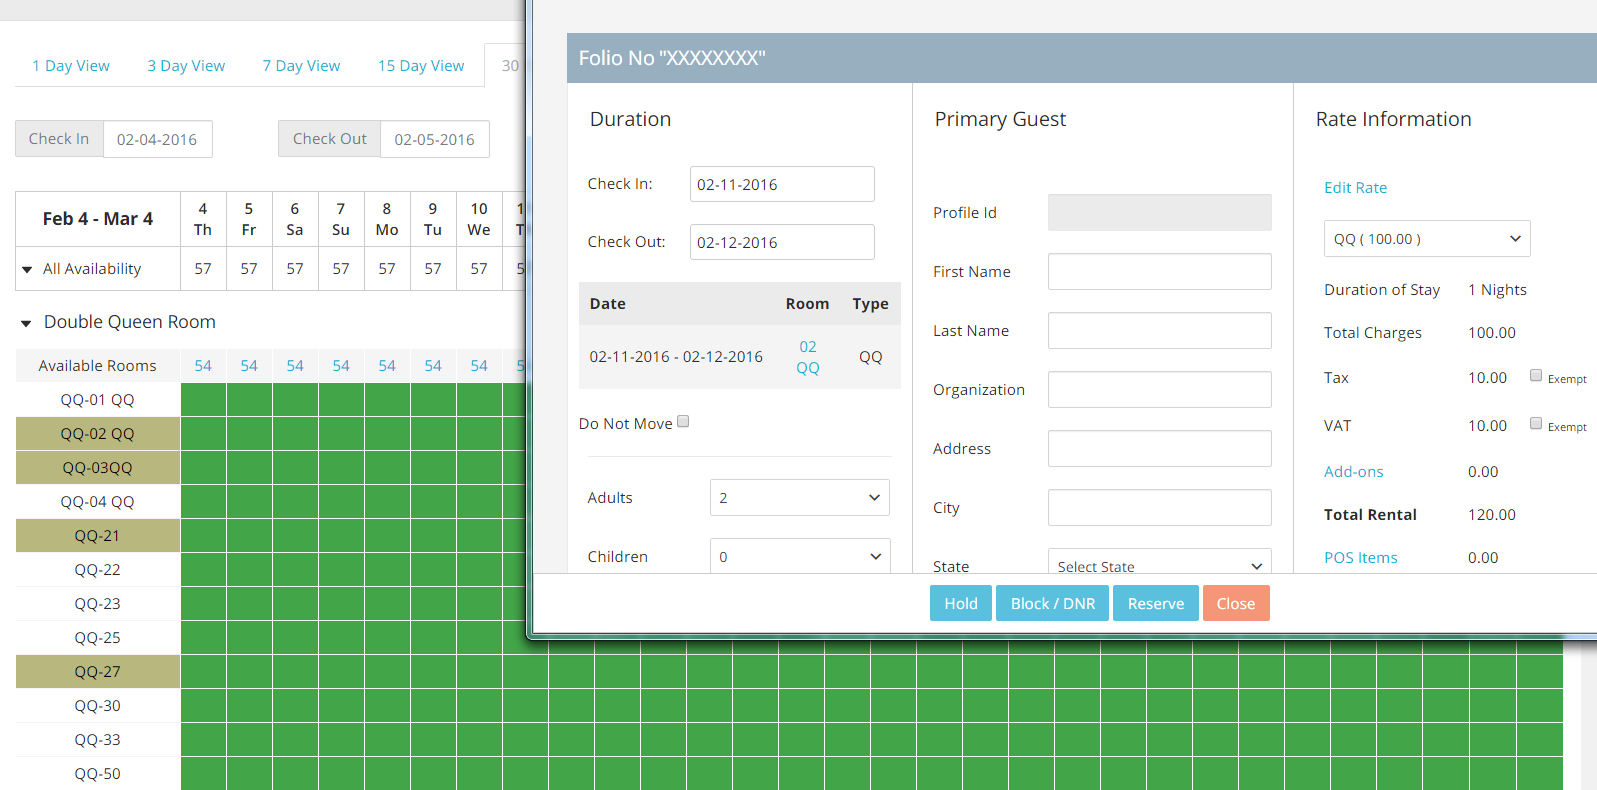
That window is called Reservation Folio.
- In each folio, the reservation details are organized into three different columns. The first column, called Duration bears general information about the reservation:
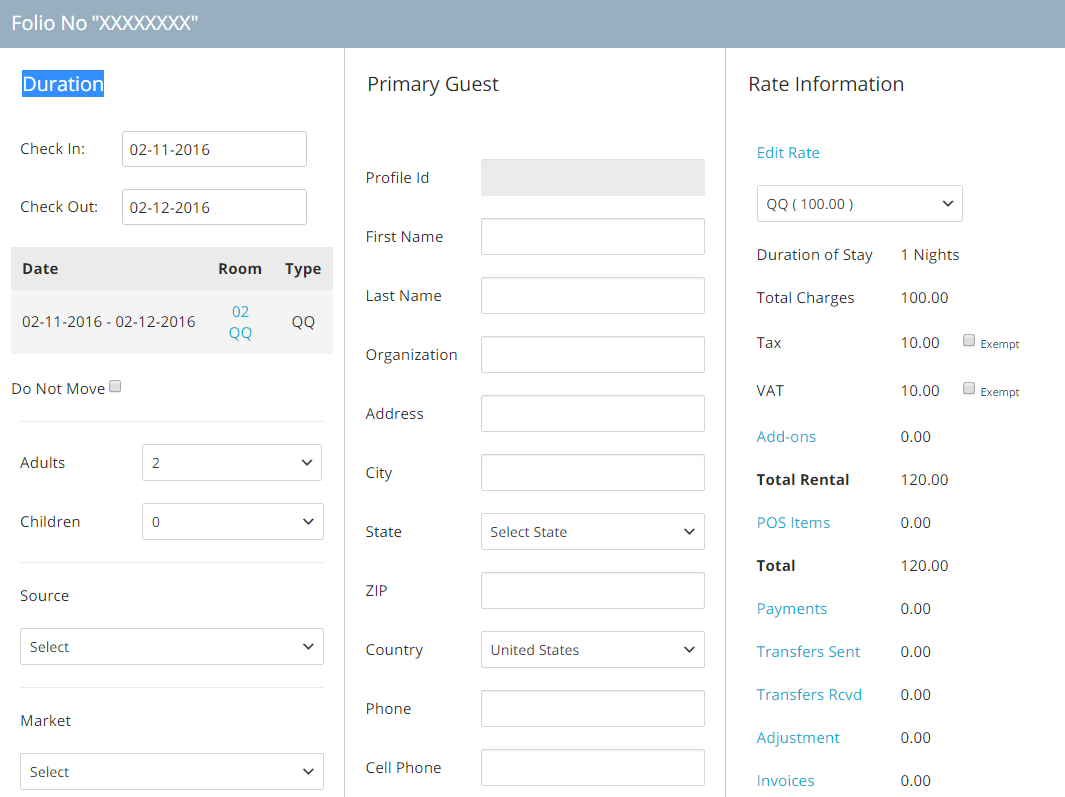
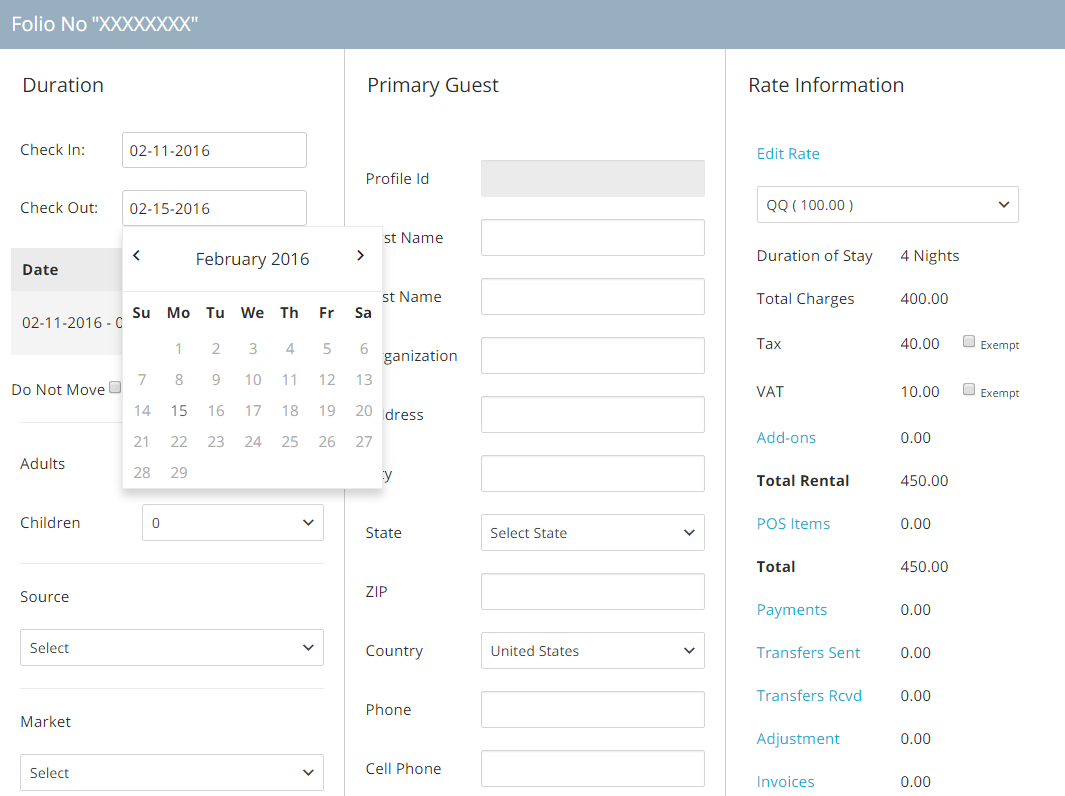
- There are two scroll down calendars where you can edit the reservation duration. In the example below, my guest is booking from 02/11 through 02/15:
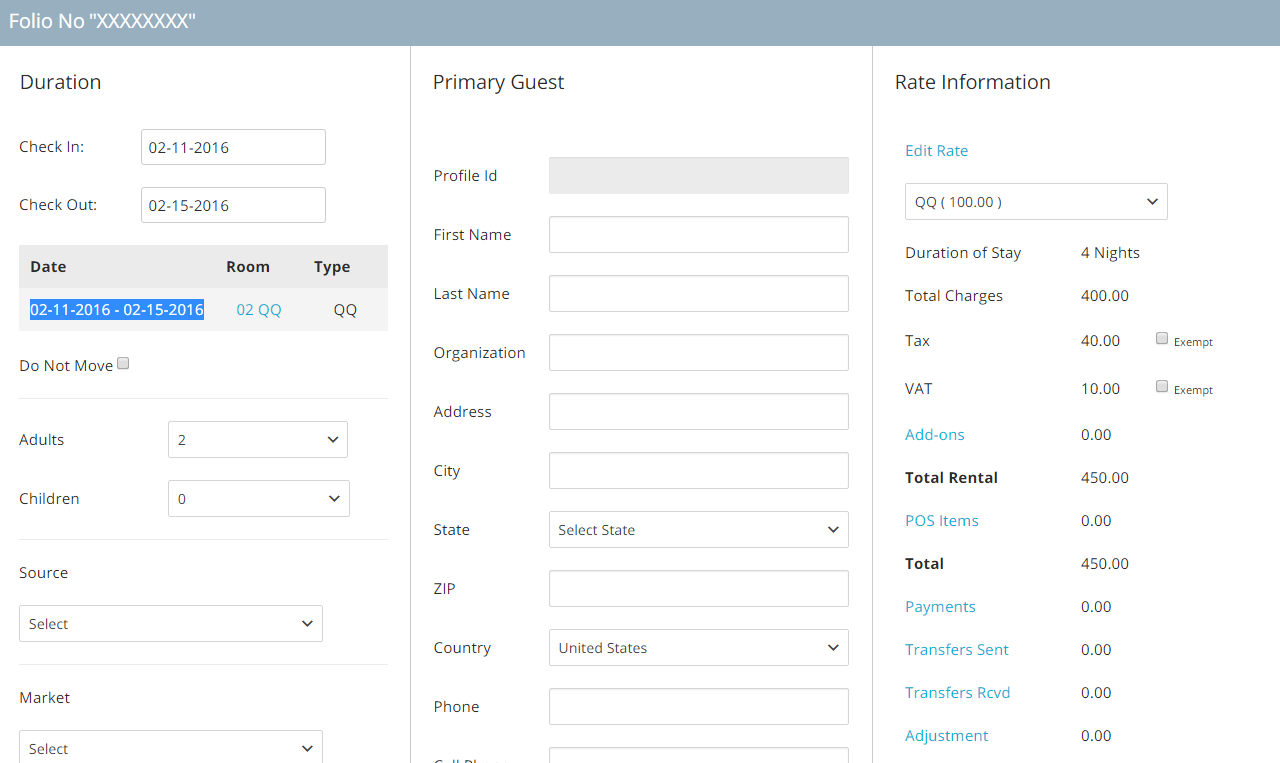
- The dates of your choice will be shown underneath the calendar, along with the room number the reservation has been assigned to, and the corresponding room type:
- You can select the number of people and children associated with this booking, by using the scroll down menus next to the tags Adults and Children:
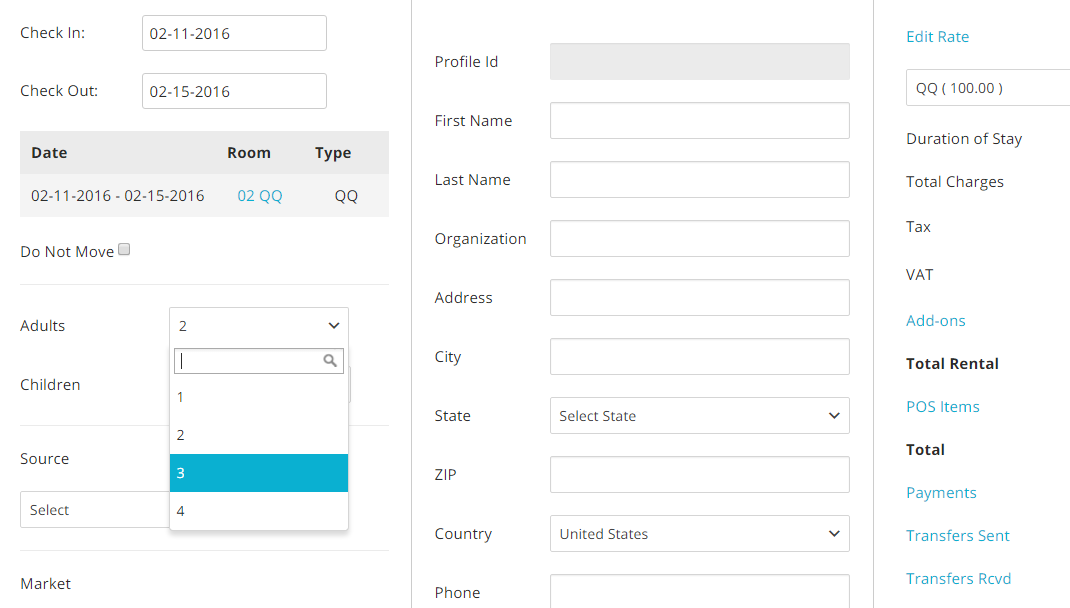
Note that the values appearing in these menus have been configured by the account administrator at your hotel, and the system won’t allow you to set up a higher occupancy than the one that has been configured.
- You can proceed to fill in all the information under the Duration column. Note that most fields are entirely customizable, so you will probably see a different set of information than the one appearing in the picture below:
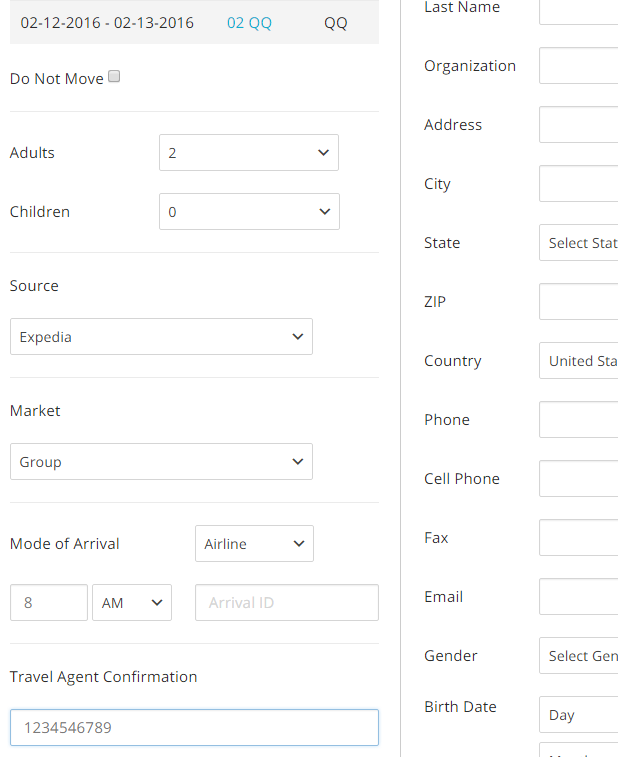
- The OTA# field is where you can record the confirmation number from Online Travel Agencies associated with the booking you are entering in your account. Note that in case your account is integrated with any of these sites, this field will be automatically fill in upon receipt of the reservation:
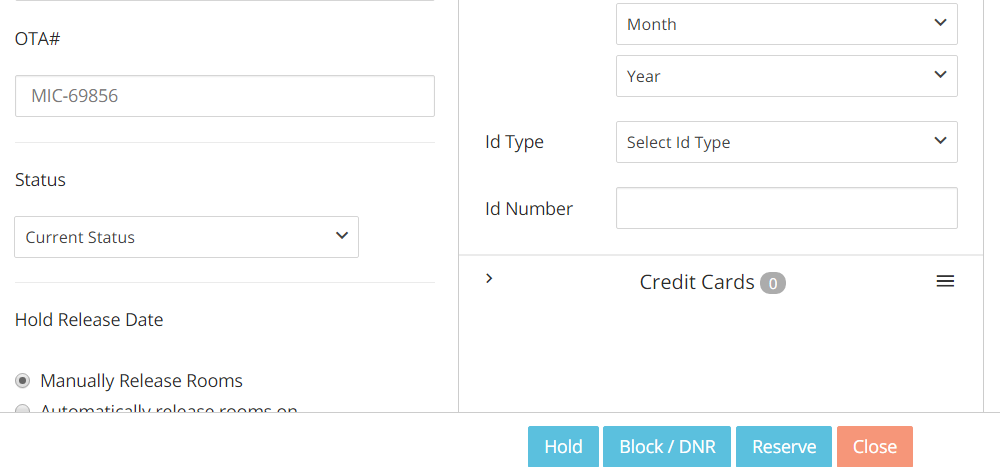
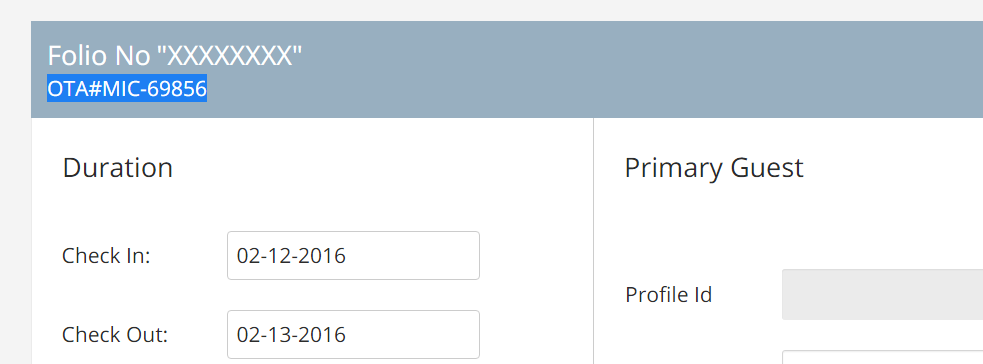
Note that once the OTA# field has been filled in, that value will also be appearing on the top left hand side of the reservation folio:
The middle column of the reservation folio bears information about the guest/s:
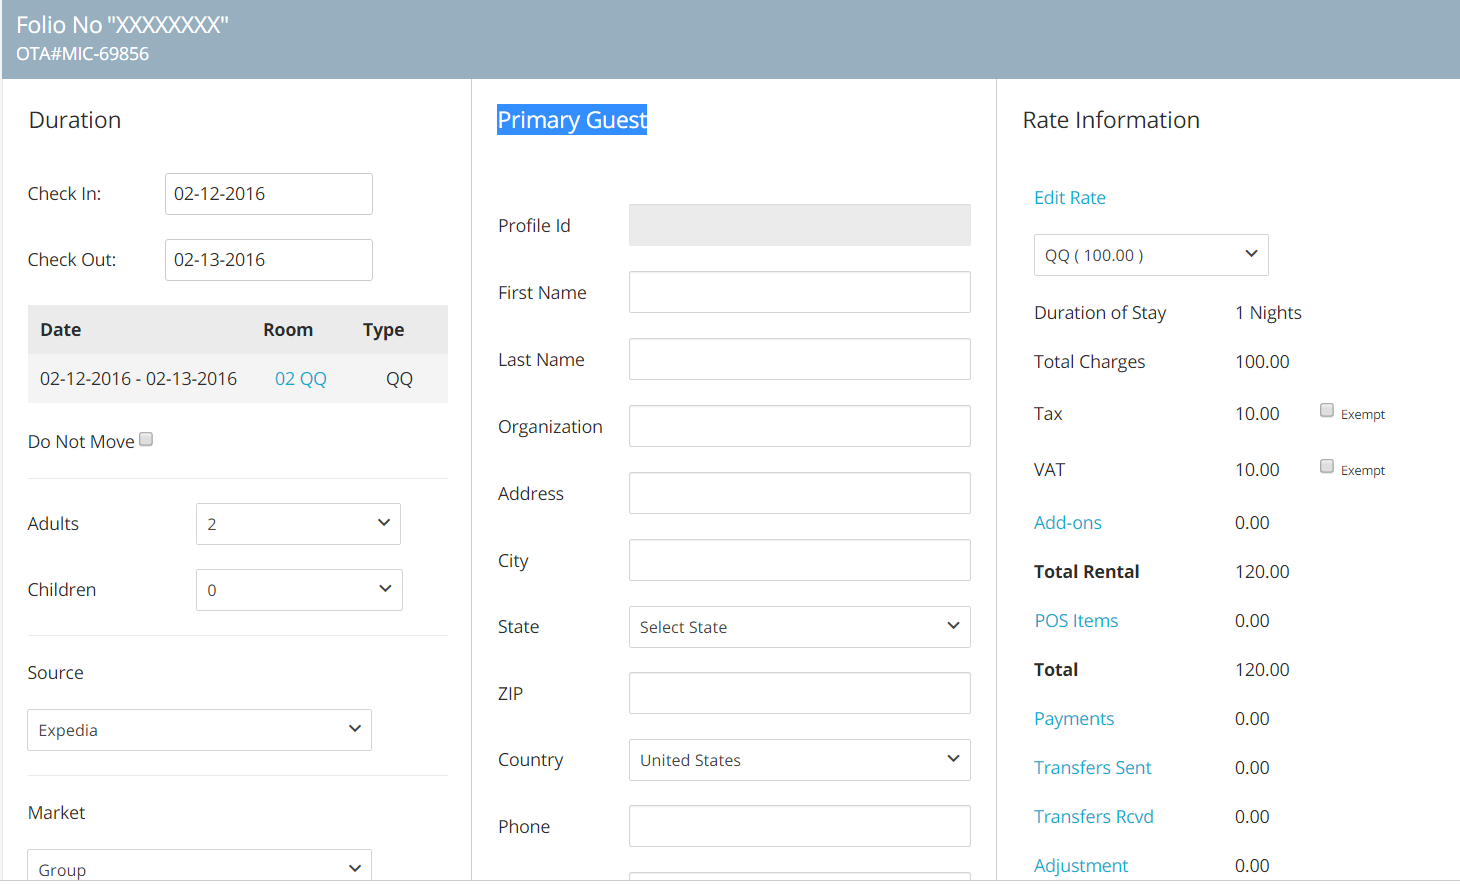
- The Profile ID field will be automatically filled in once the name and last name of the guest has been filled in:

Note that once you start typing the guest name, the system will automatically prompt you with suggestions that match what you have typed in. In the example below, you can see that when when I type in the name Test, the system will prompt me with any information matching the combination of first and last name. Note also that each of those suggestion is numbered: that is the Profile ID number associated with each of those guests.
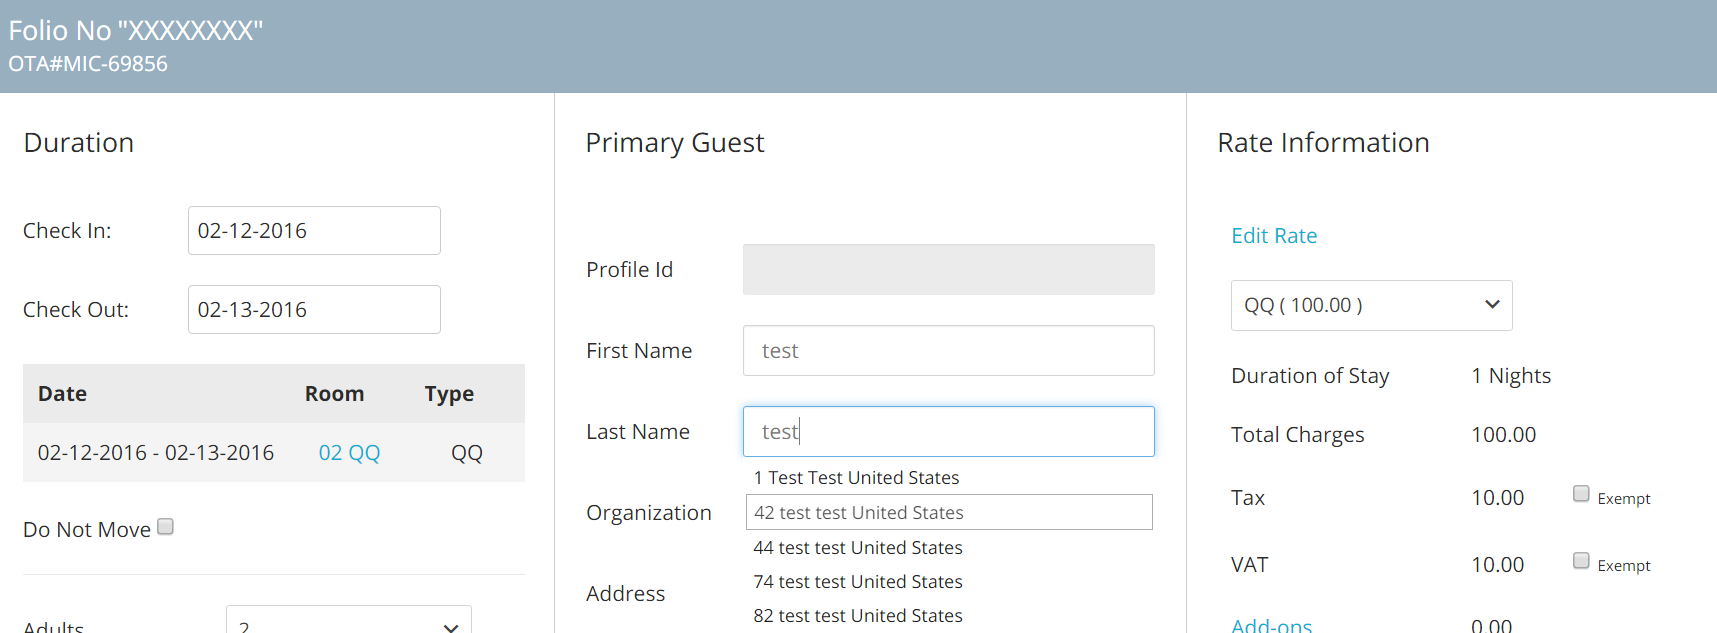
Selecting a prompted suggestion will make the Profile ID field default to the Profile ID number:

If you do not select any suggestion, a new unique Profile ID will be creating upon reserving the booking.
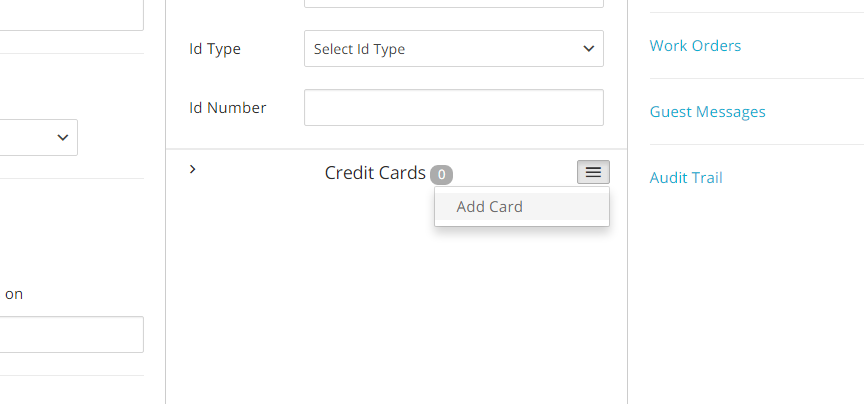
- Under the Guest Information column, at the bottom, you will find a place where to insert the guest’s credit card number. Click on the small box with the three horizontal lines, next to the written Credit Cards and then click on Add Card:
- A new panel will pop down with all the relevant fields you will need to record credit card details. Insert all information and click on the button Save Card:
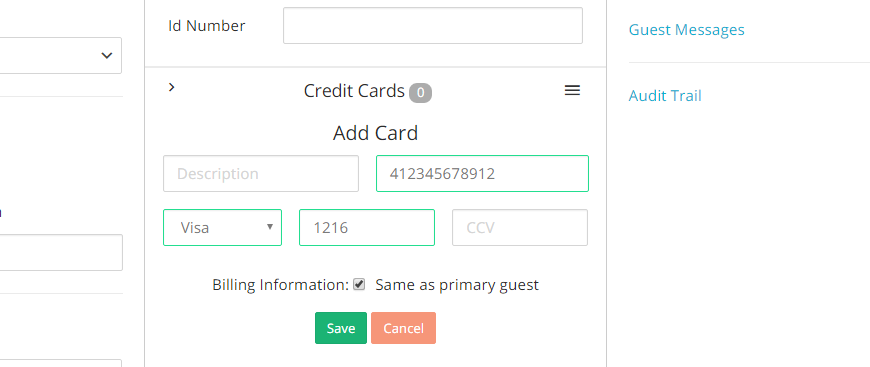
- If the guest’s billing address is different from the guest’s address, uncheck the box next to the tag Billing Information: new fields will appear below and you will be able to record a different billing address:
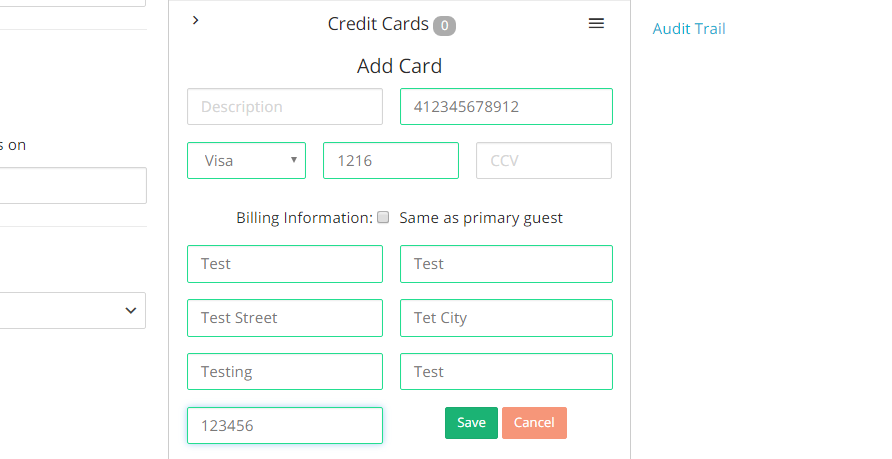
Note: credit card information entered into the reservation folio **will not** be saved under the Guest Profile. This means that unless you have saved the card directly in the guest's _profile_, under the _Prifile Tab_, the credit card information is not going to be saved. If you need instructions on how to record credit card information into Guest Profiles, please go to the **Profile** section of this manual!
The right column of the reservation folio bears information about rates, taxes and additional charges.
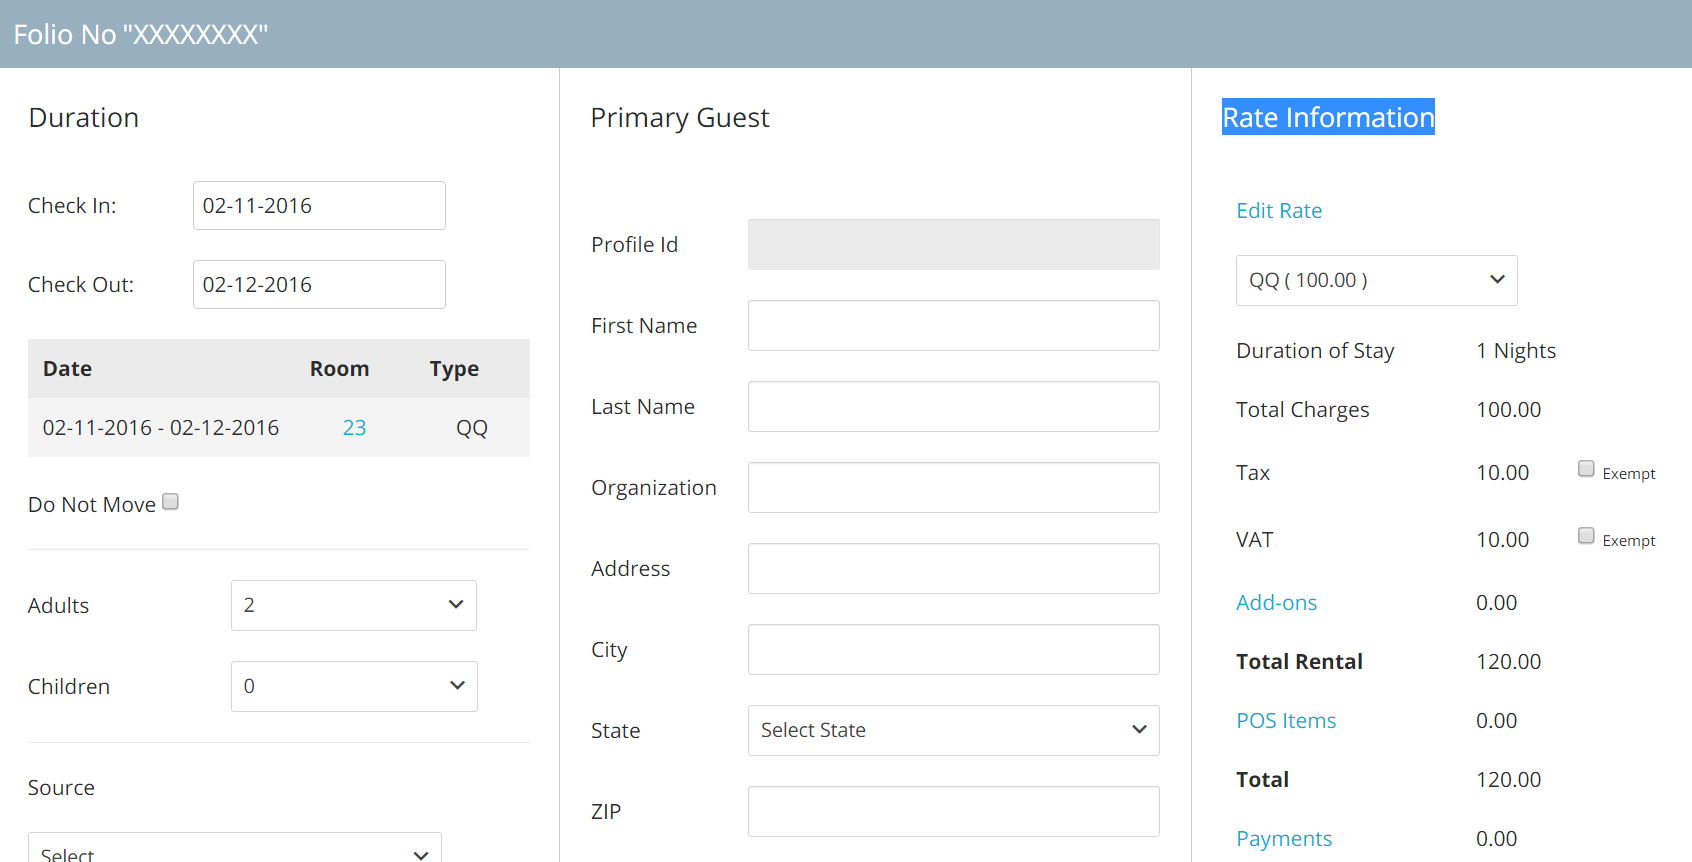
- The scroll down menu will contain information about all available rates the account administrator has set up for the selected date, for the selected room type. In the example below, we have two rates applied to this room type, for the chosen date:
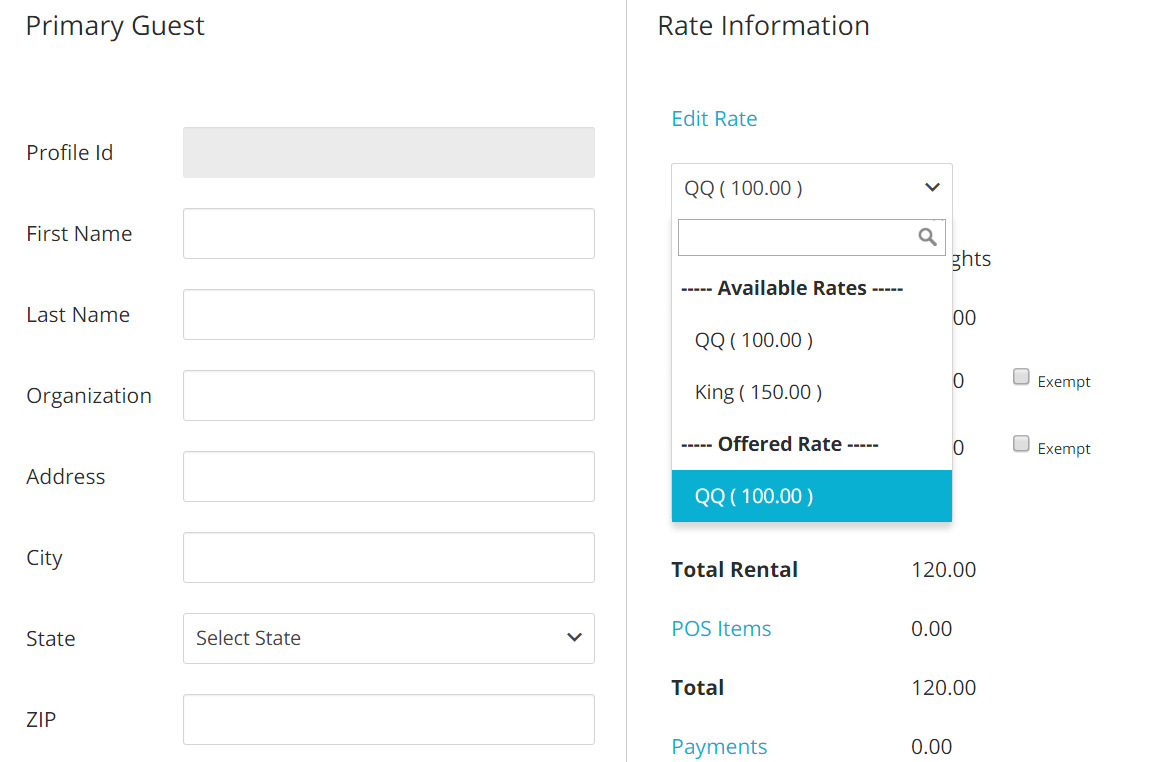
The Offered Rate is the one that the administrator has set up as default for the room type for the selected date range. If there are other availble rates for the date and room type specified, you will be able to see them in the drop down menu, under Available Rates.
- The Duration of the Stay field gives you the number of night the booking is for, and it is a dynamic field as it changes accordingly with the dates displayed by the scroll down calendars. The Total Charges will give you the total of the room charges:
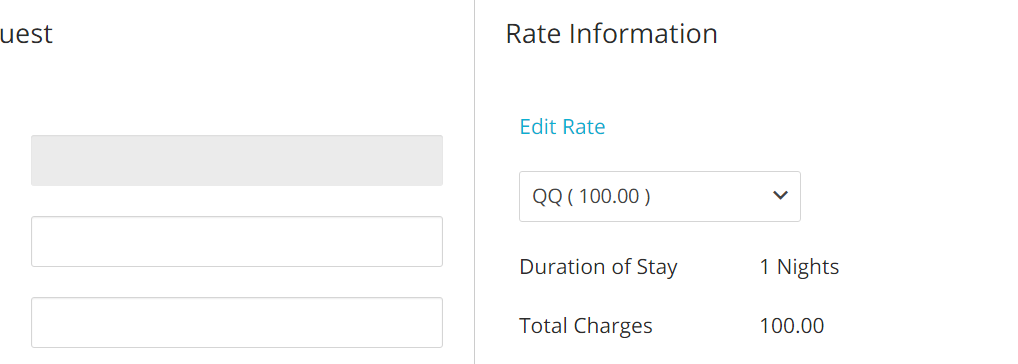
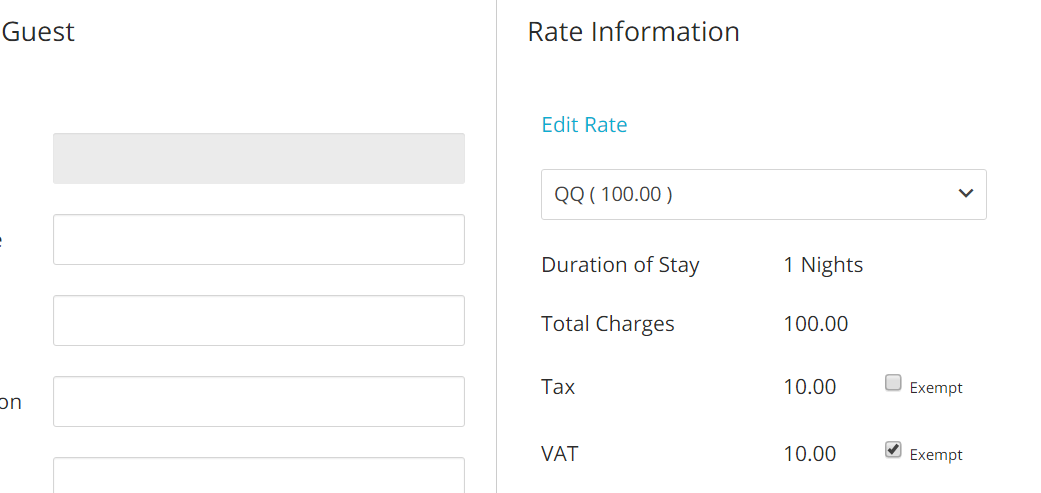
- The list of tax applicable to the selected rate will be listed right underneath the Total Charges field. Note that each tax is exemptable by click on the relevant check-box:
Reservation Operations
Once all information is in the reservation folio, there are several operations you can perform. Any available operation that can be performed will have its corresponding button at the bottom of any folio:
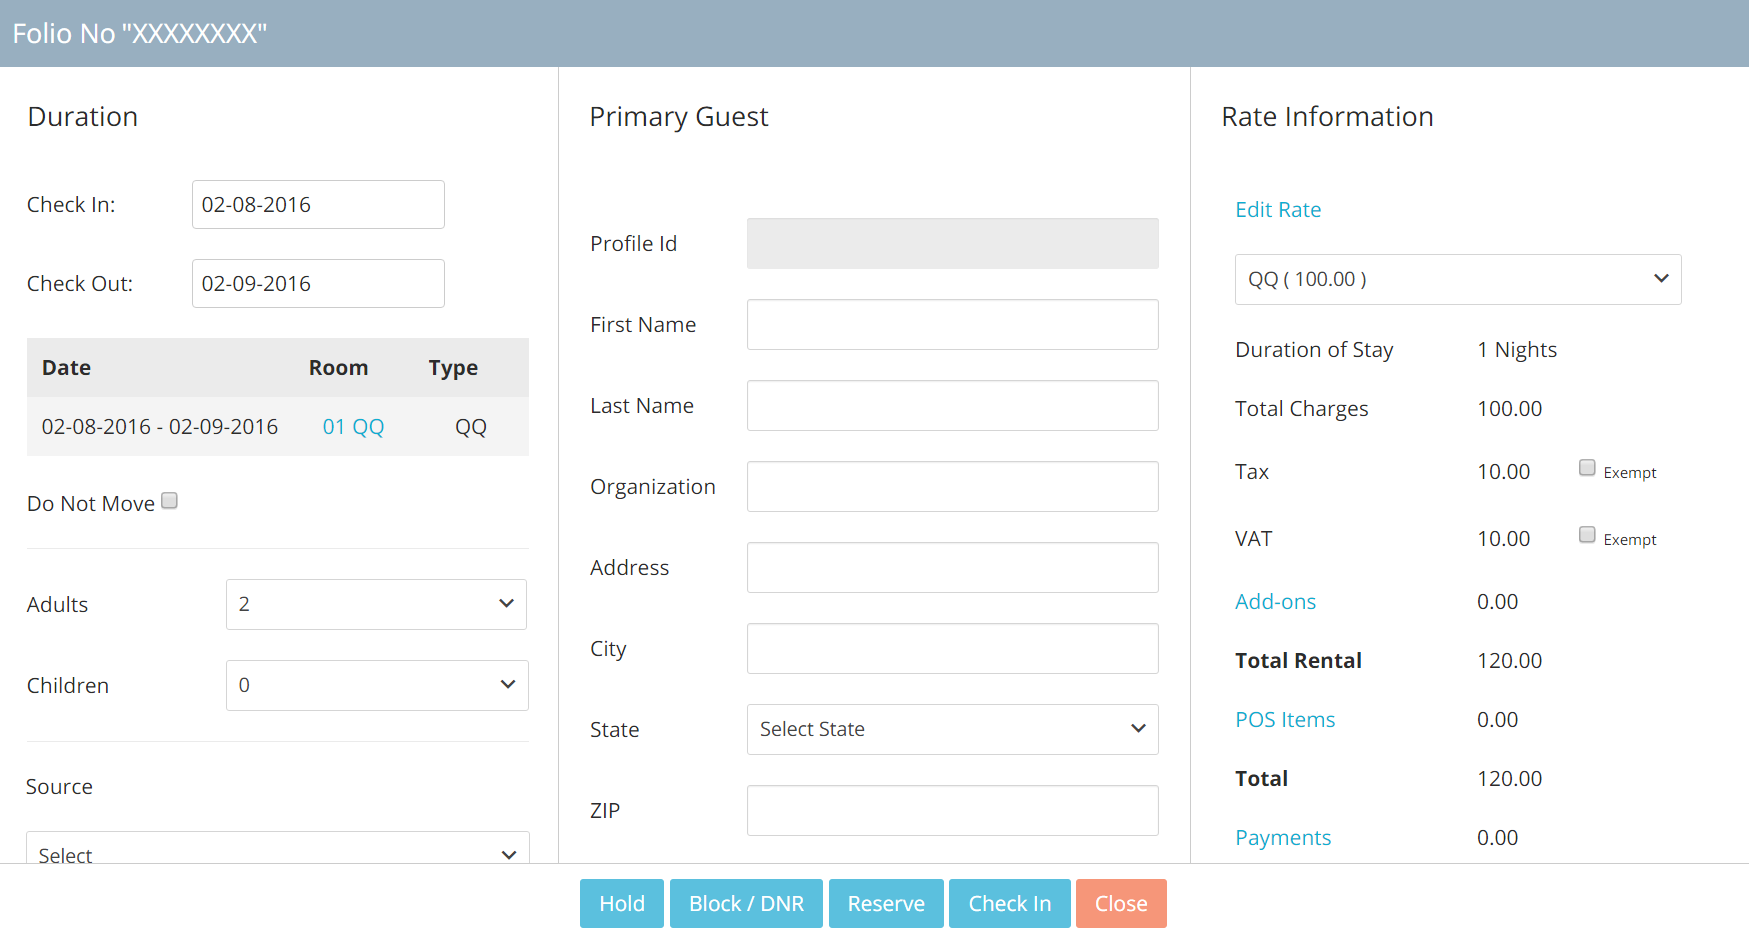
These buttons are dynamic, meaning that they will change according to the reservation folio status: for example, you will be able to Reserve, Hold or Block a new folio, but you will only be able to Unblock a folio that is in a Blocked status, and so on.
Hold
- If the booking is not finalized, you can choose to Hold the reservation: held reservations won’t be counted as part of the hotel occupancy, nor the rates will count as revenue. This is most useful when some required information is missing and the guest will have to get in contact with the hotel later to finalize the booking. To place a reservation in a Hold status, click on the bblue button Hold at the bottom of the reservation folio:
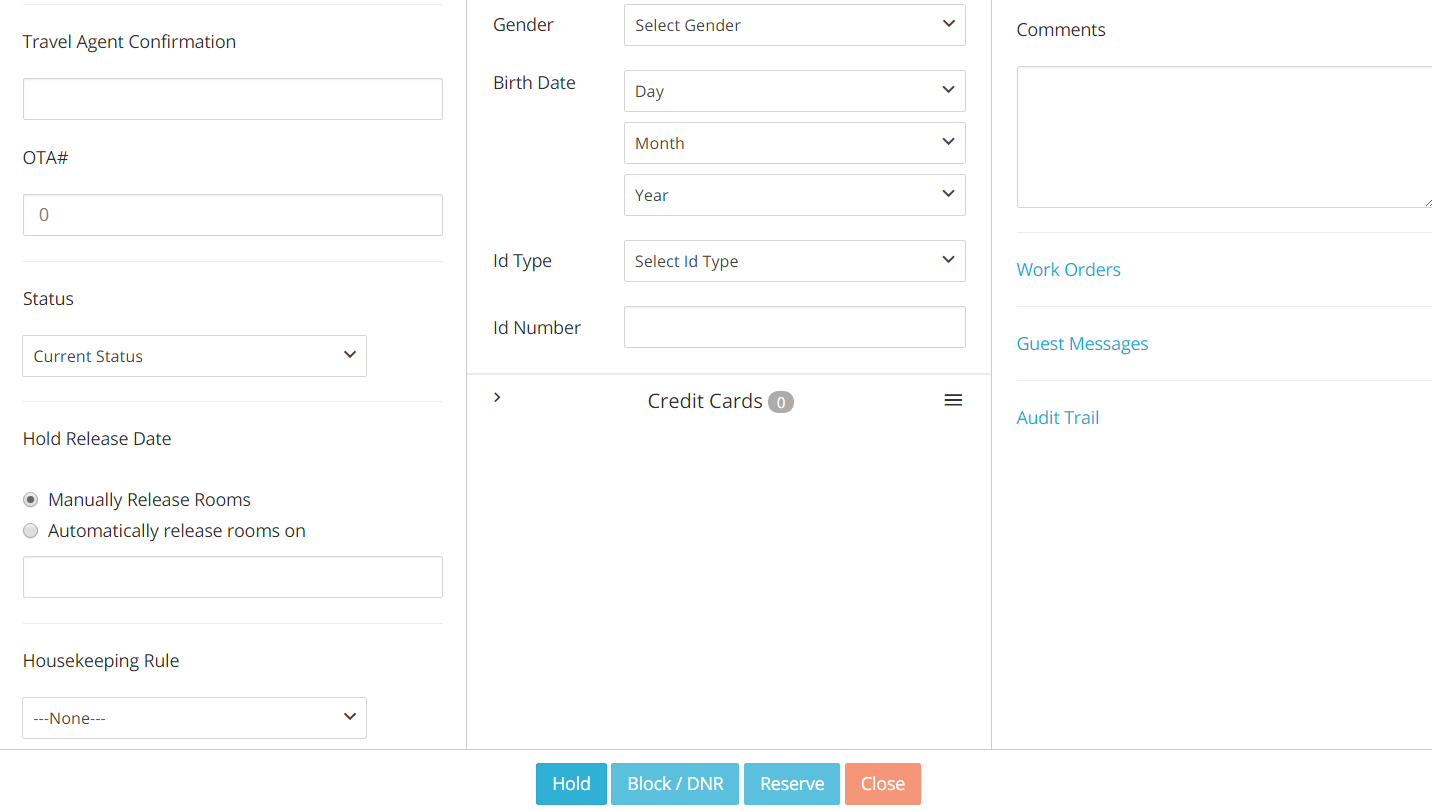
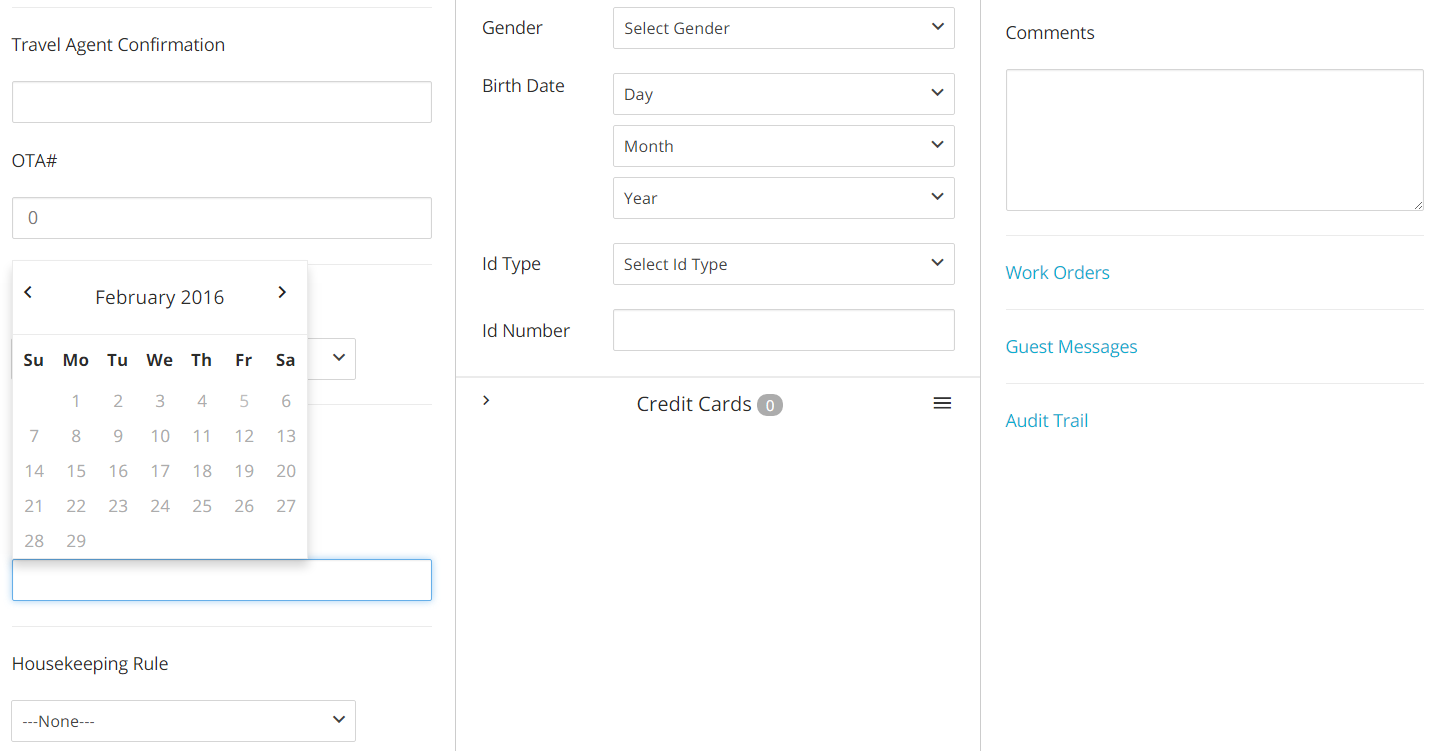
You can choose whether to manually remove the reservation from the Hold status, or whether set up a certain date on which the system will automatically release the reservation. Select your option on the left hand side of the folio, under the tag Hold Release Date:
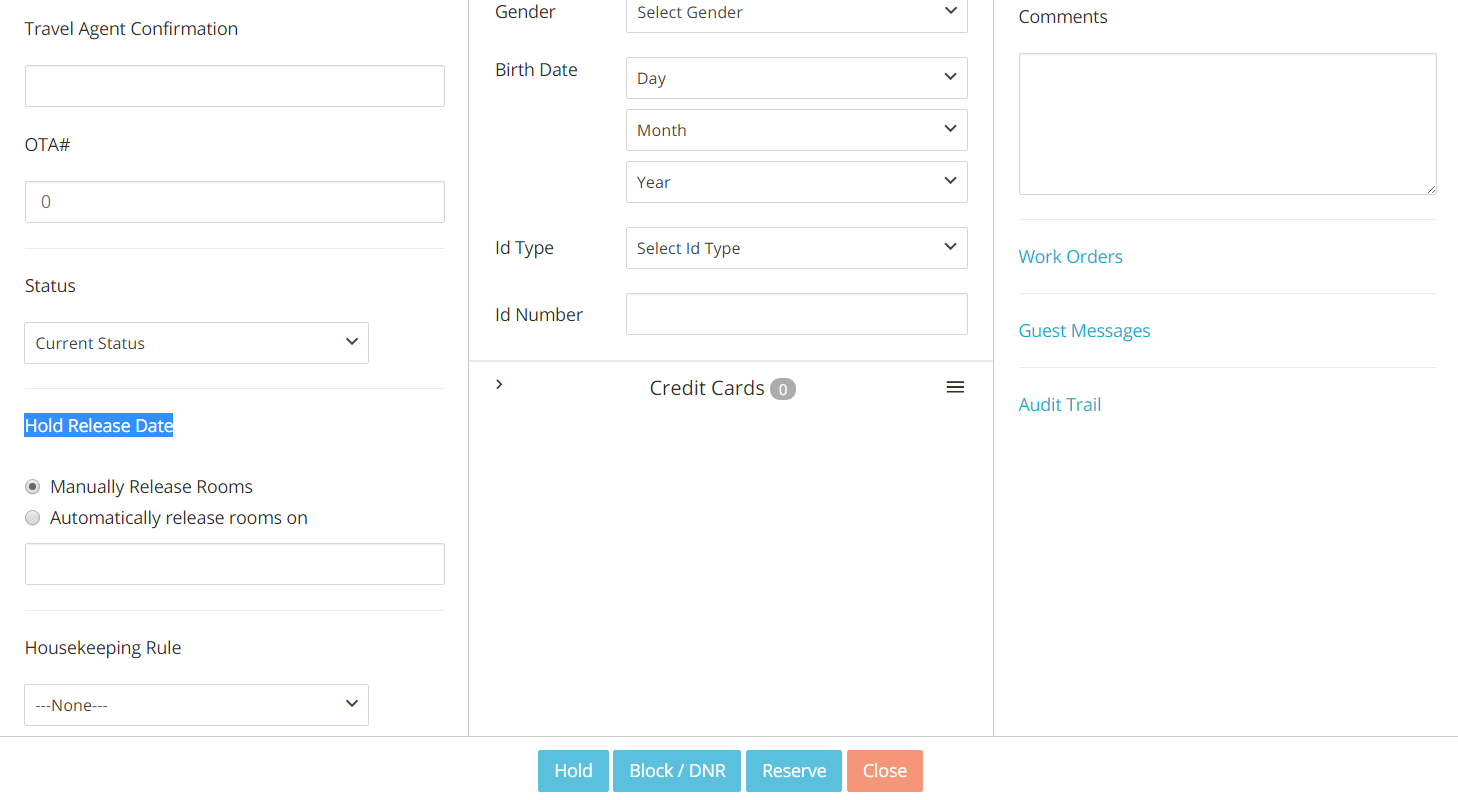
Clicking on the field under the tag Automatically Release Rooms On will enable you to select a date on a pop-up calendar.
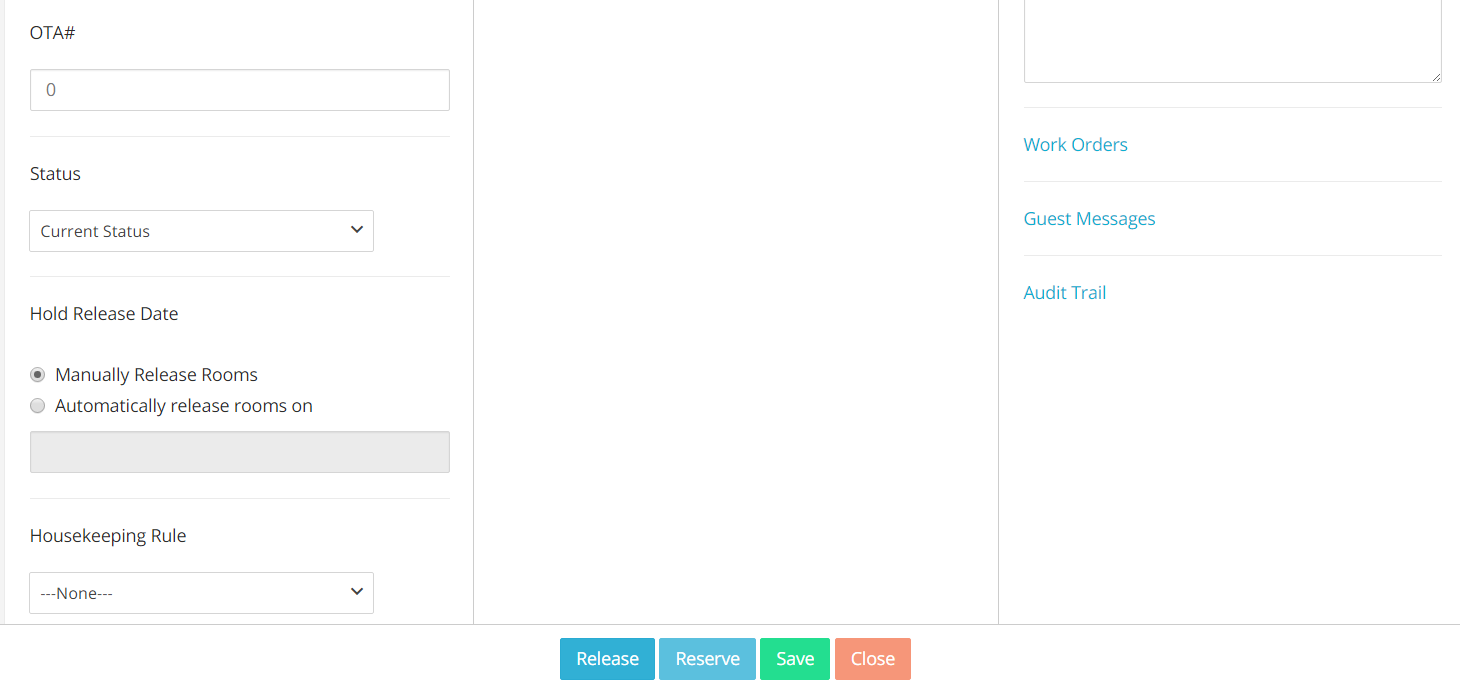
Once a room has been held, you can manually release it by clicking on the blue button Release at the bottom of any held folio:
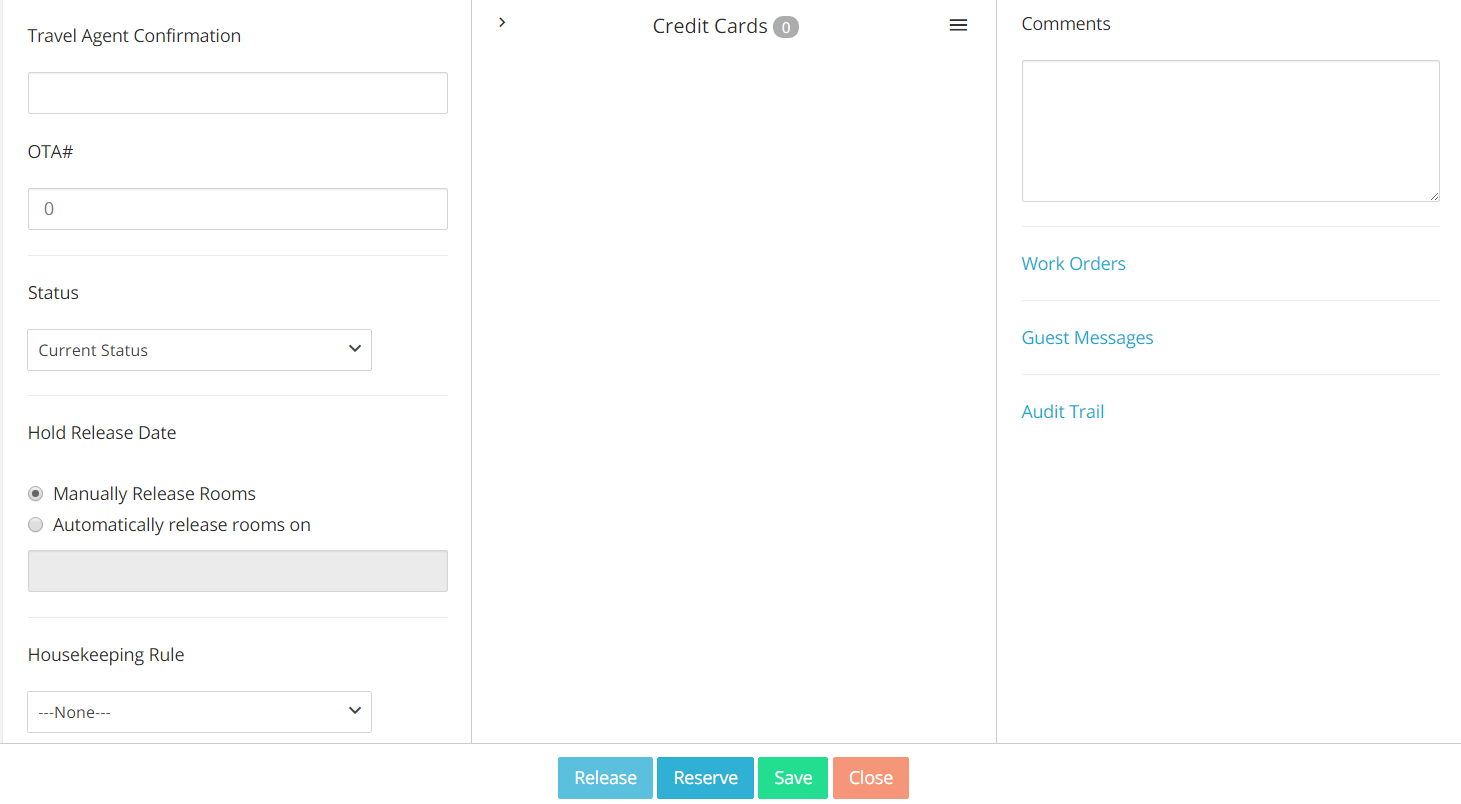
You will also have the option to reserve a held room, by clicking on the blue button Reserve at the bottom of the held folio:
Block/DNR
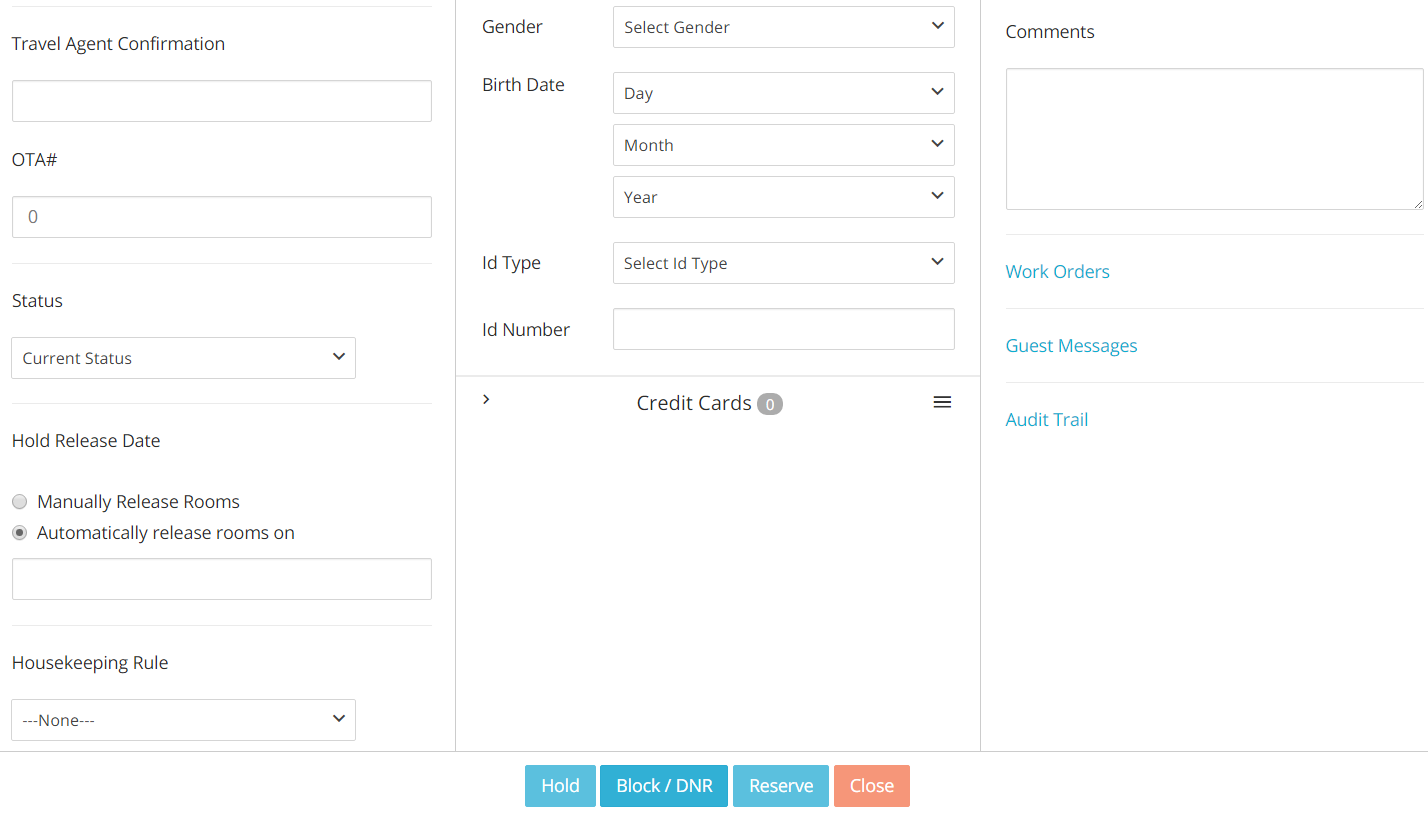
- If you need to momentarily hide a certain room from the displayed availability, you may decide to mark the room as Block/DNR (Do Not Rent): blocked rooms do not count towards revenue or occupancy values in reports. To place a block on a room, click on the blue button Block/DNR at the bottom of the folio:
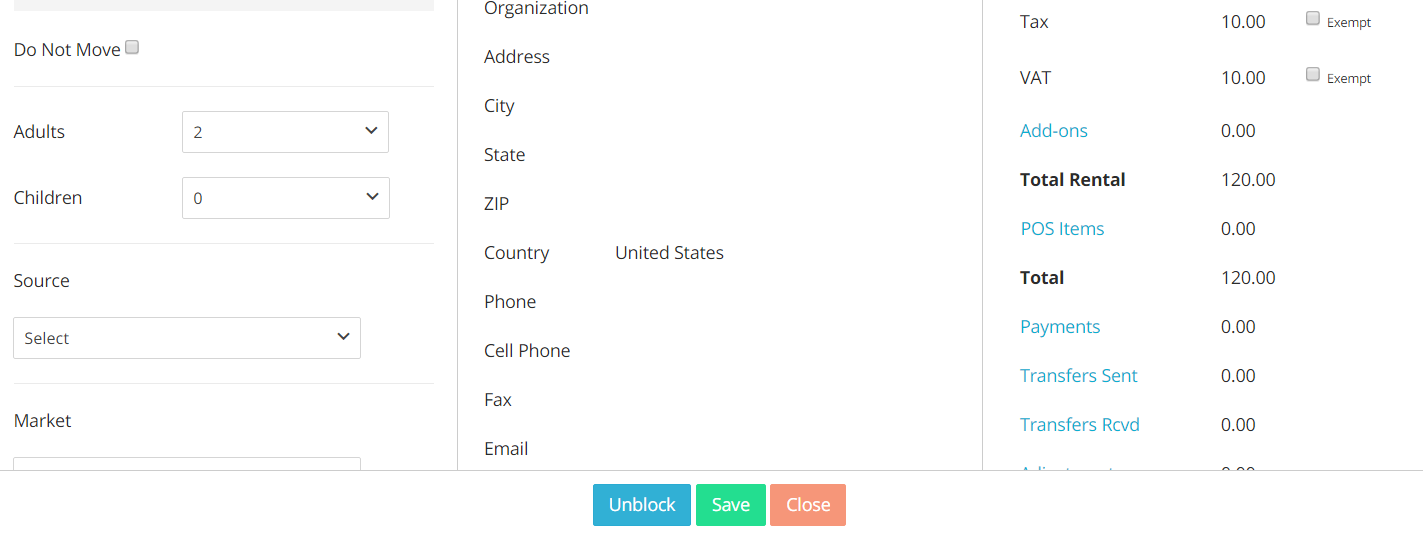
Important: A blocked room can **_only be unblocked_** and not reserved. Hence, make sure not to place any valuable information in a folio with a Block status, as the system won't allow you to move the status to a reserved one. To unblock a room, clcik on the button _Unblock_ on any blocked folio:
Reserve
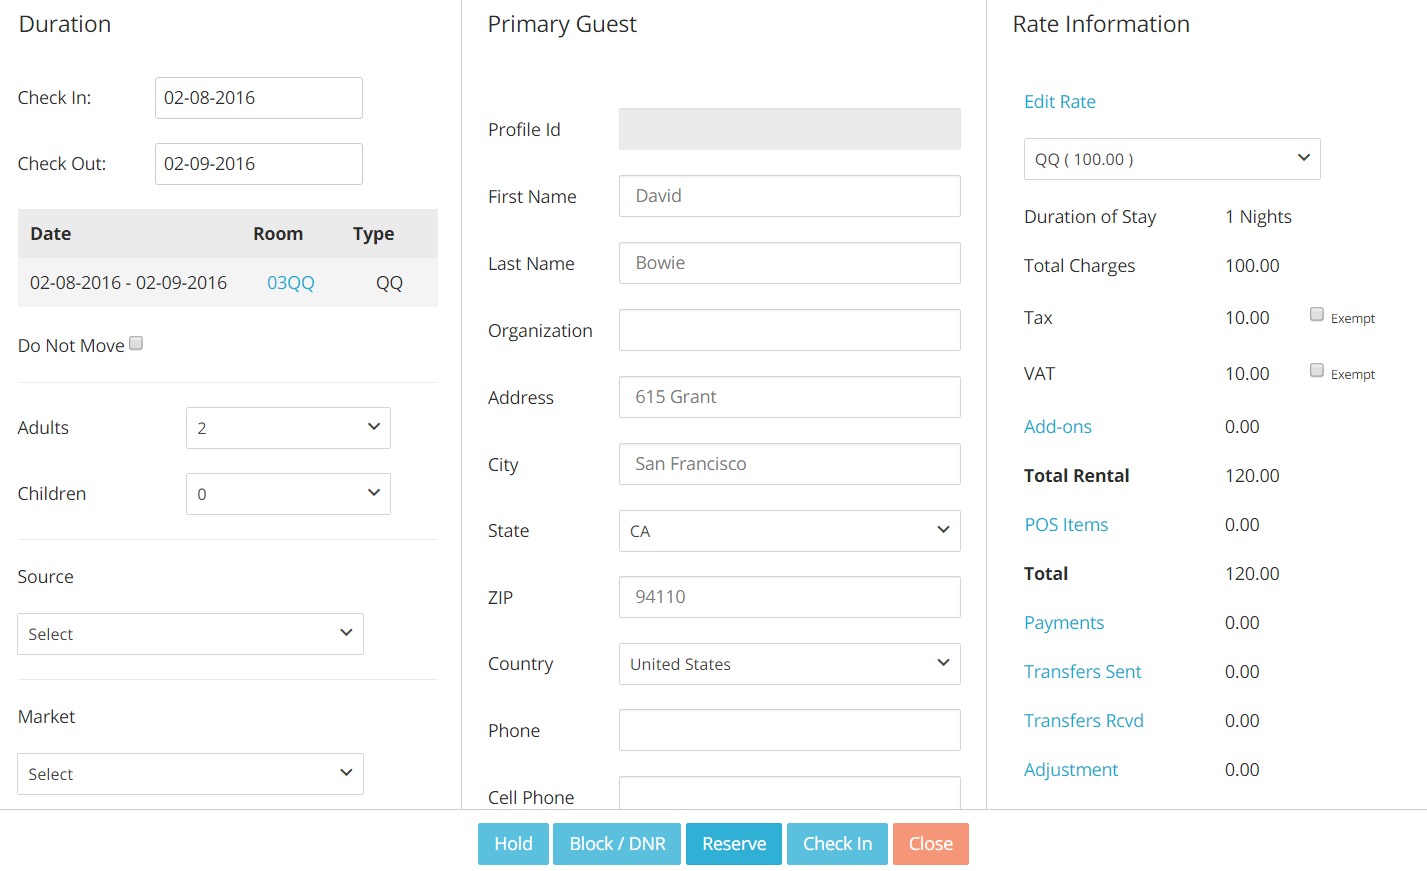
- If all required information has been collected, you can proceed to Reserve the folio by clicking on the blue button Reserve at the bottom of the folio:
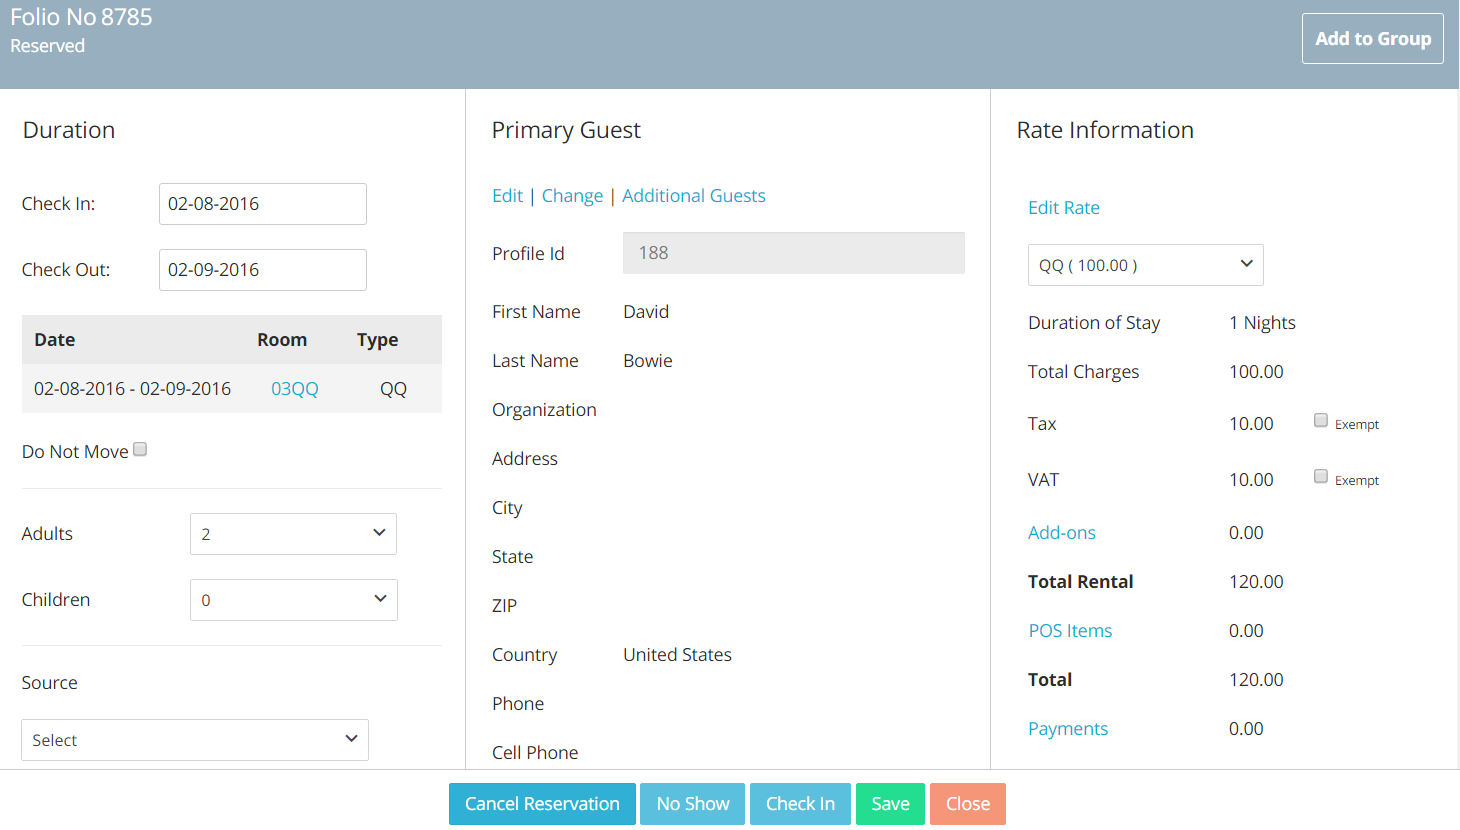
- Any reserved folio can be cancelled, by clicking on the blue button Cancel Reservation:
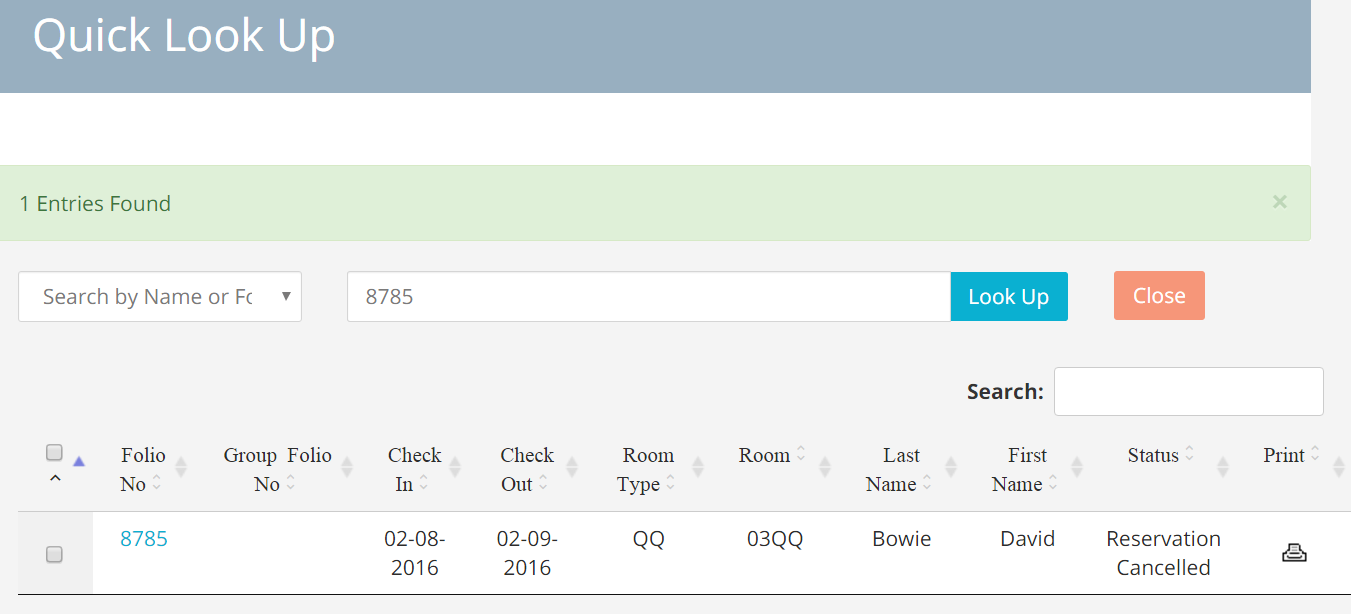
Note that the system will keep a record of any cancelled booking, and you can look all related information by looking up the reservation number:
- If you made a mistake, and you want to Reinstate a cancelled booking, just click on the button Reserve at the bottom of the cancelled folio:
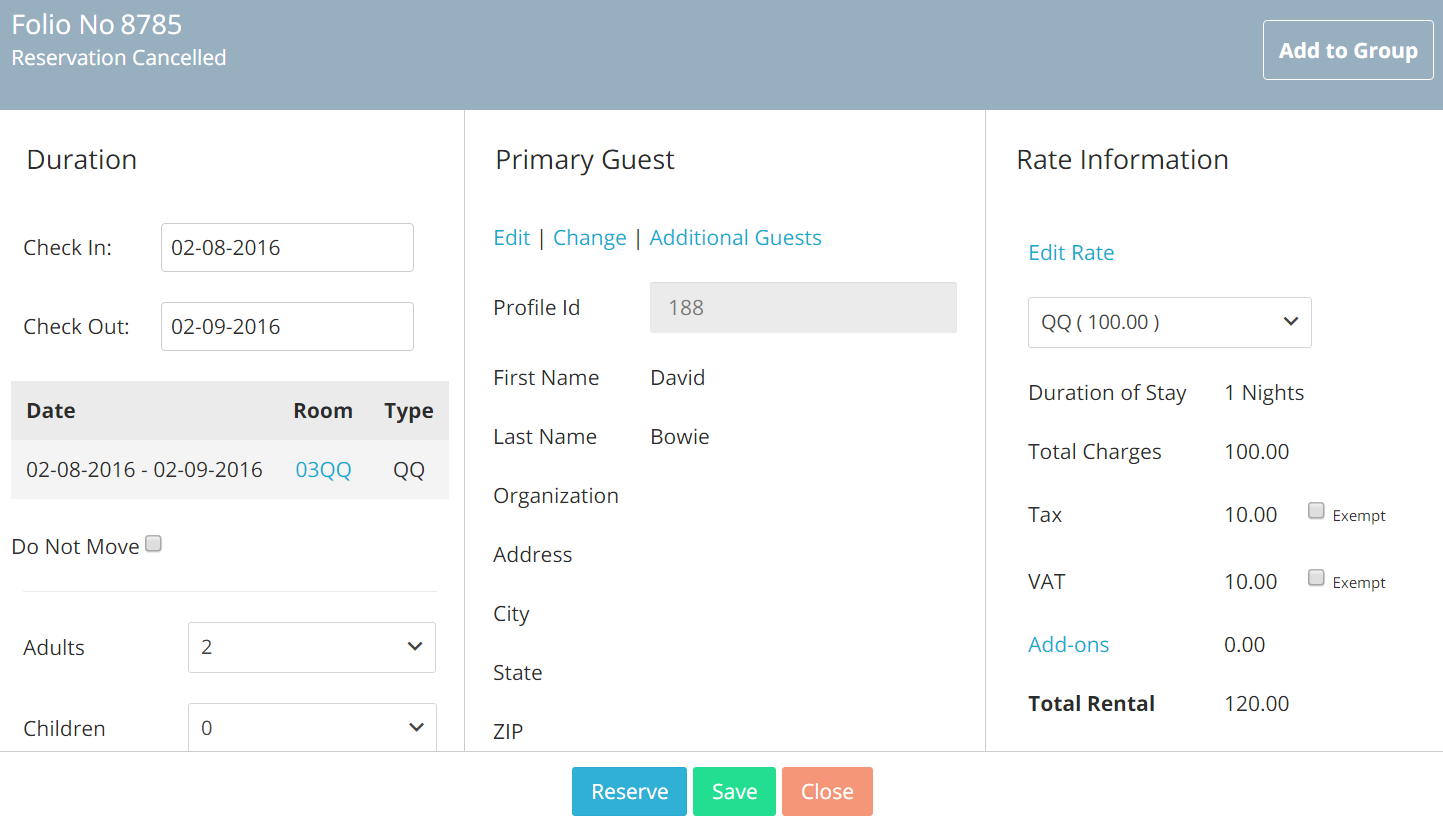
It is important to keep in mind that if you are trying to reinstate a cancelled booking, you will need to make sure that the specific room to which the booking was assigned is available for the selected date range; if the room is not available for the reservation dates, the system will throw an error:
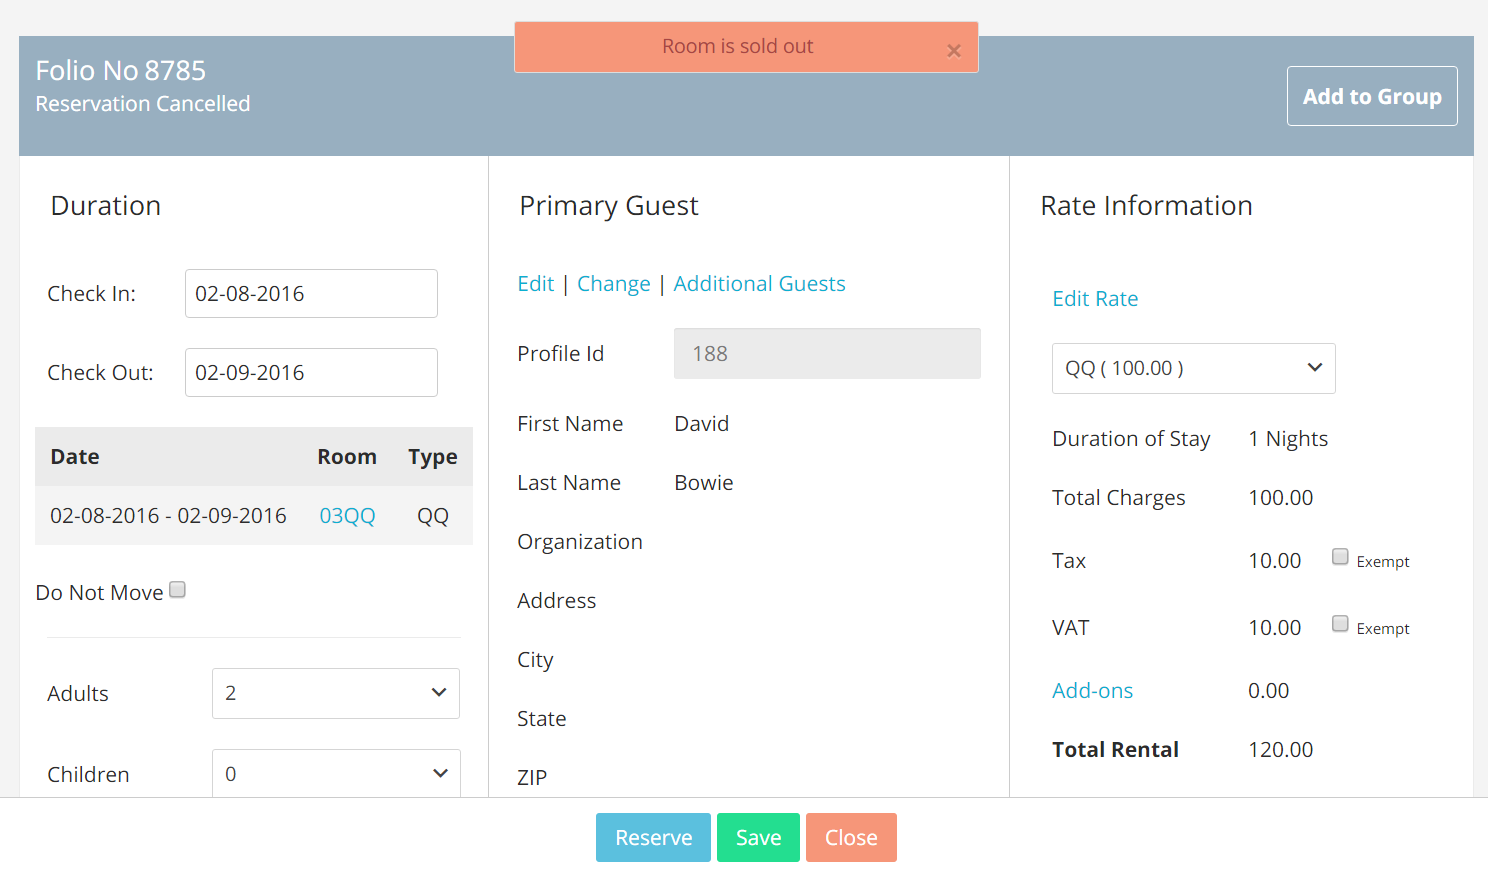
If this happens, you may either want to change the room assigned to the folio you are trying to reinstate, or move the reservation that is currently reserved in the system into another room.
- Once a folio has been reserved, you can proceed to Check it in, by clicking on the button Check-In at the bottom of the folio:
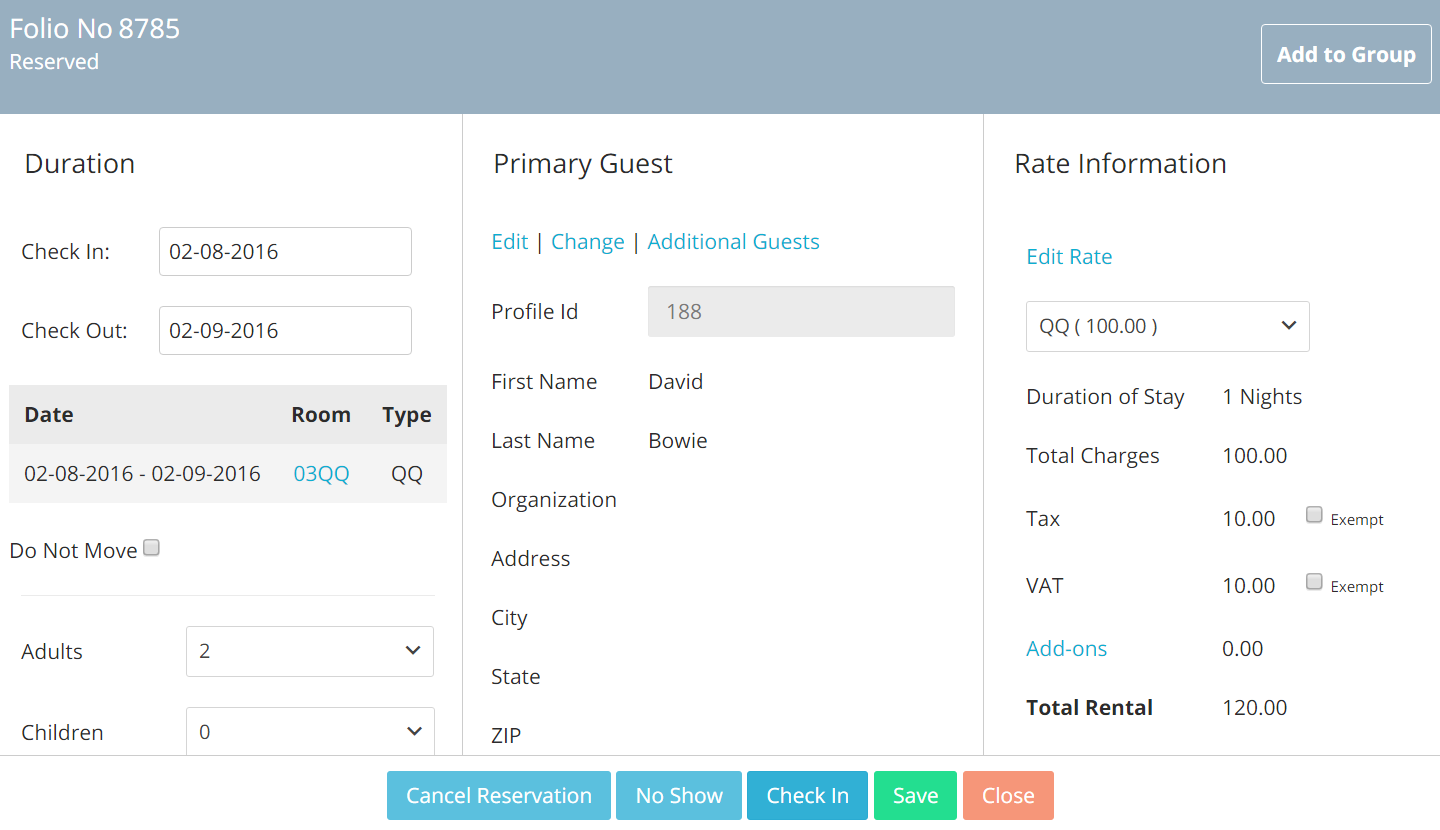
Keep in mind that the Check-In button will only appear when the folio’s arrival date is today’s date. The system won’t allow you to check-in future reservations.
- If you made a mistake and you want to undo the check-in, you can click on the blue button Reserve to re-place the booking in a Reserved status:
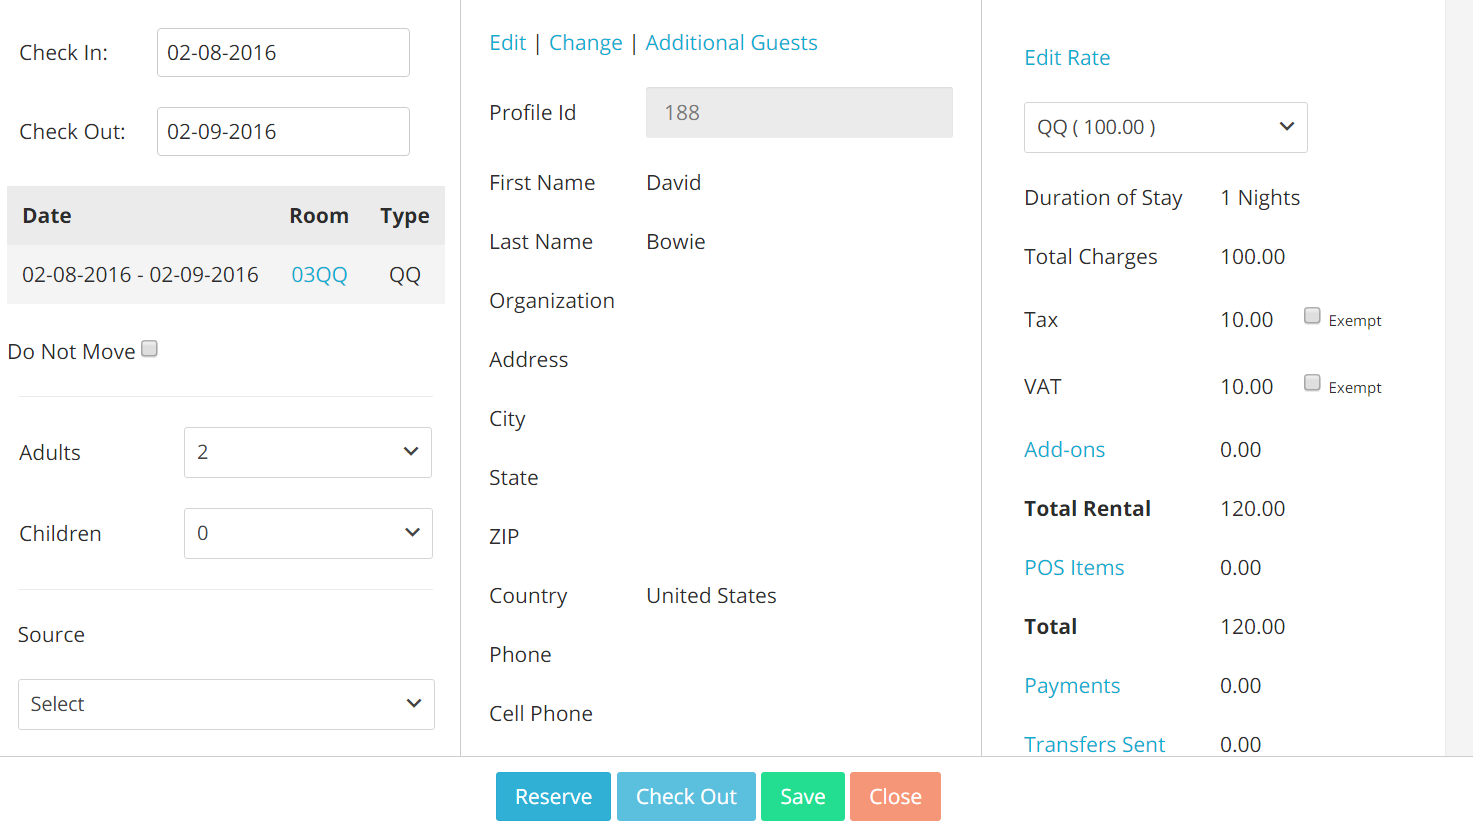
- When a folio is checked-in, you will be given the option to move it to a Check-Out status: just click on the button Check-Out at the bottom of the folio:
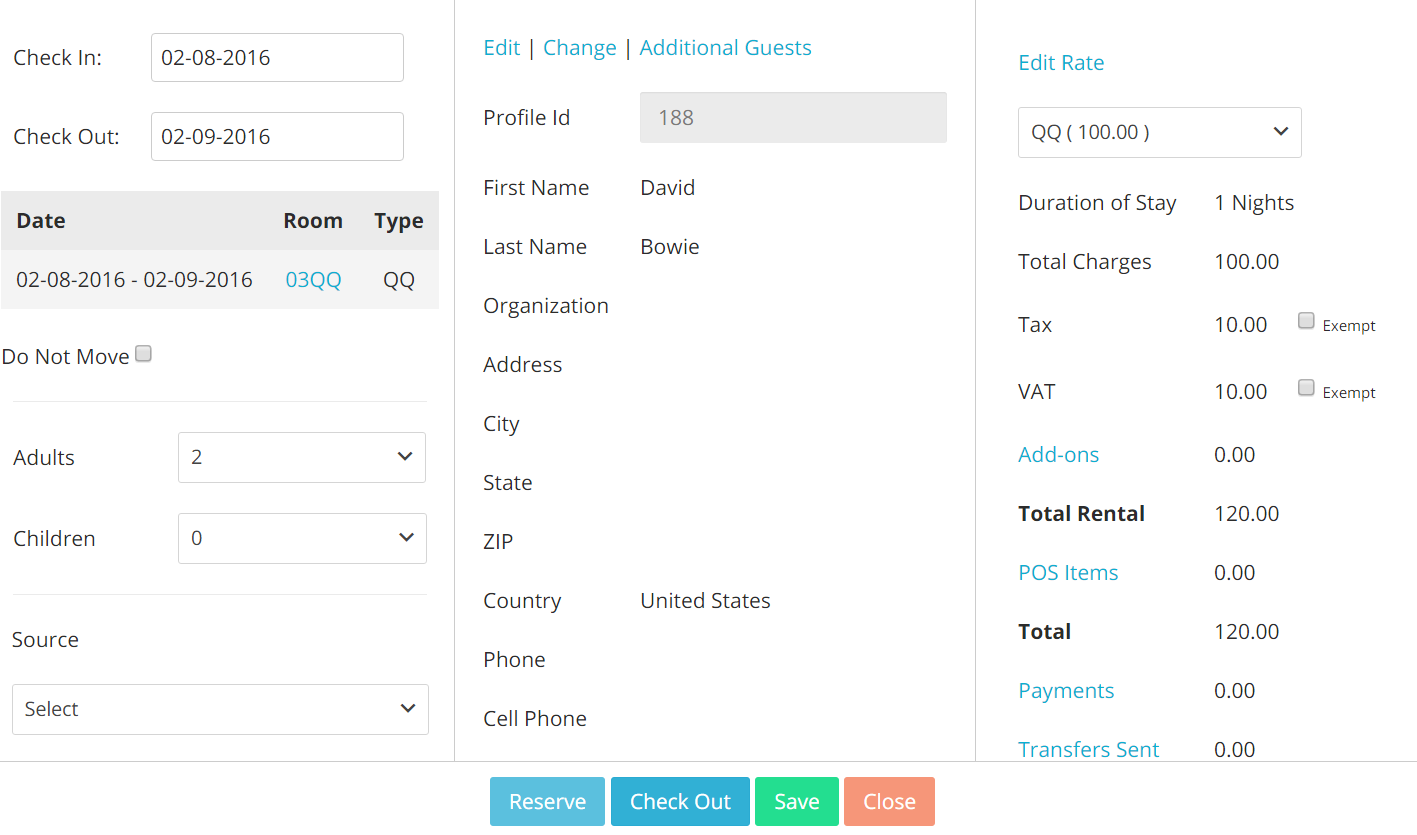
To undo the check-out, just click on the button Check-In:
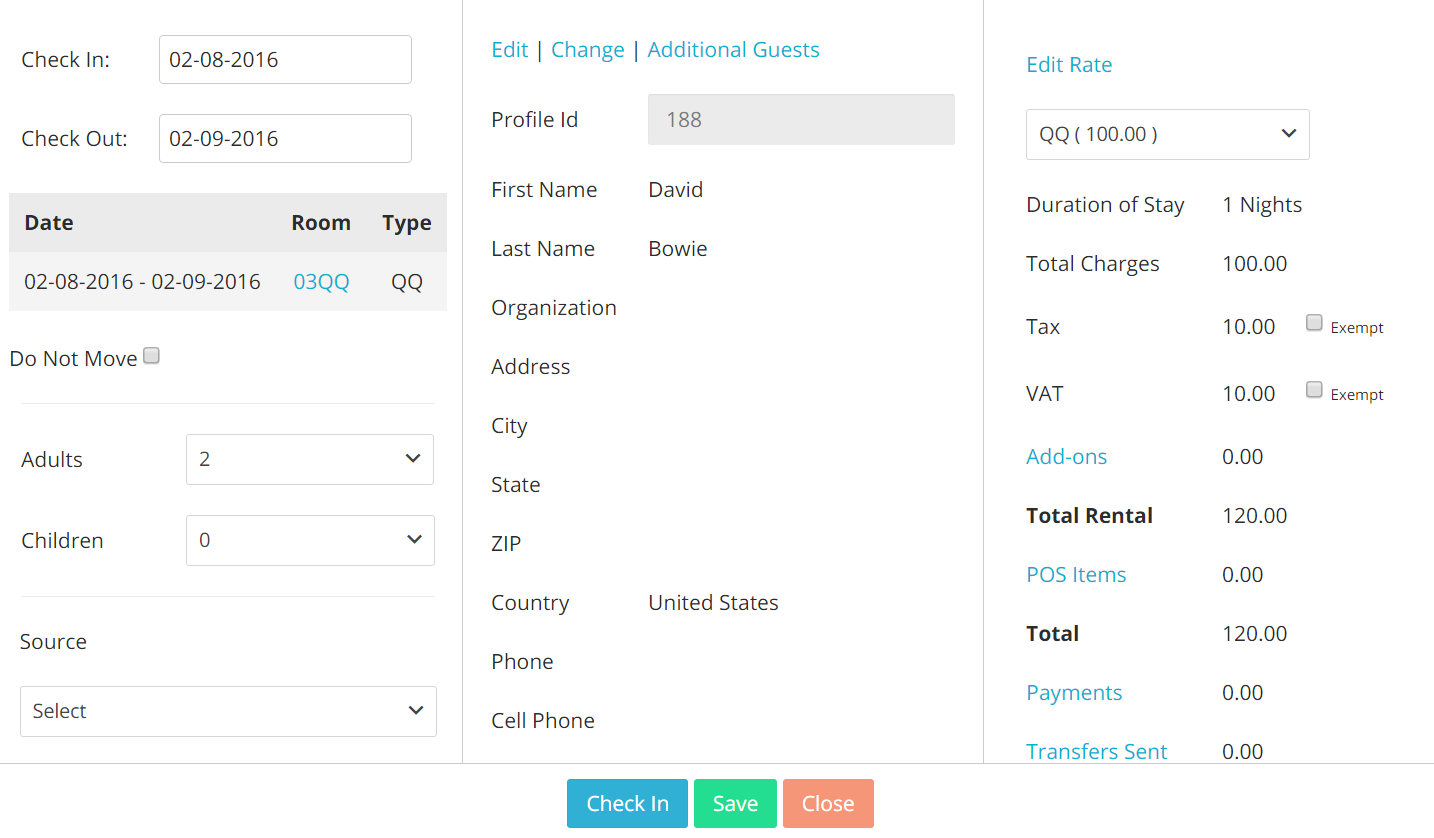
Important: the system won’t allow you to cancel a checked-in or checked-out reservation, so in order to cancel it you will need to undo all actions until the folio is back in a Reserved Status.
No Show
- Any folio in a reserved status can be marked as a No Show: simply click on the button No-Show:
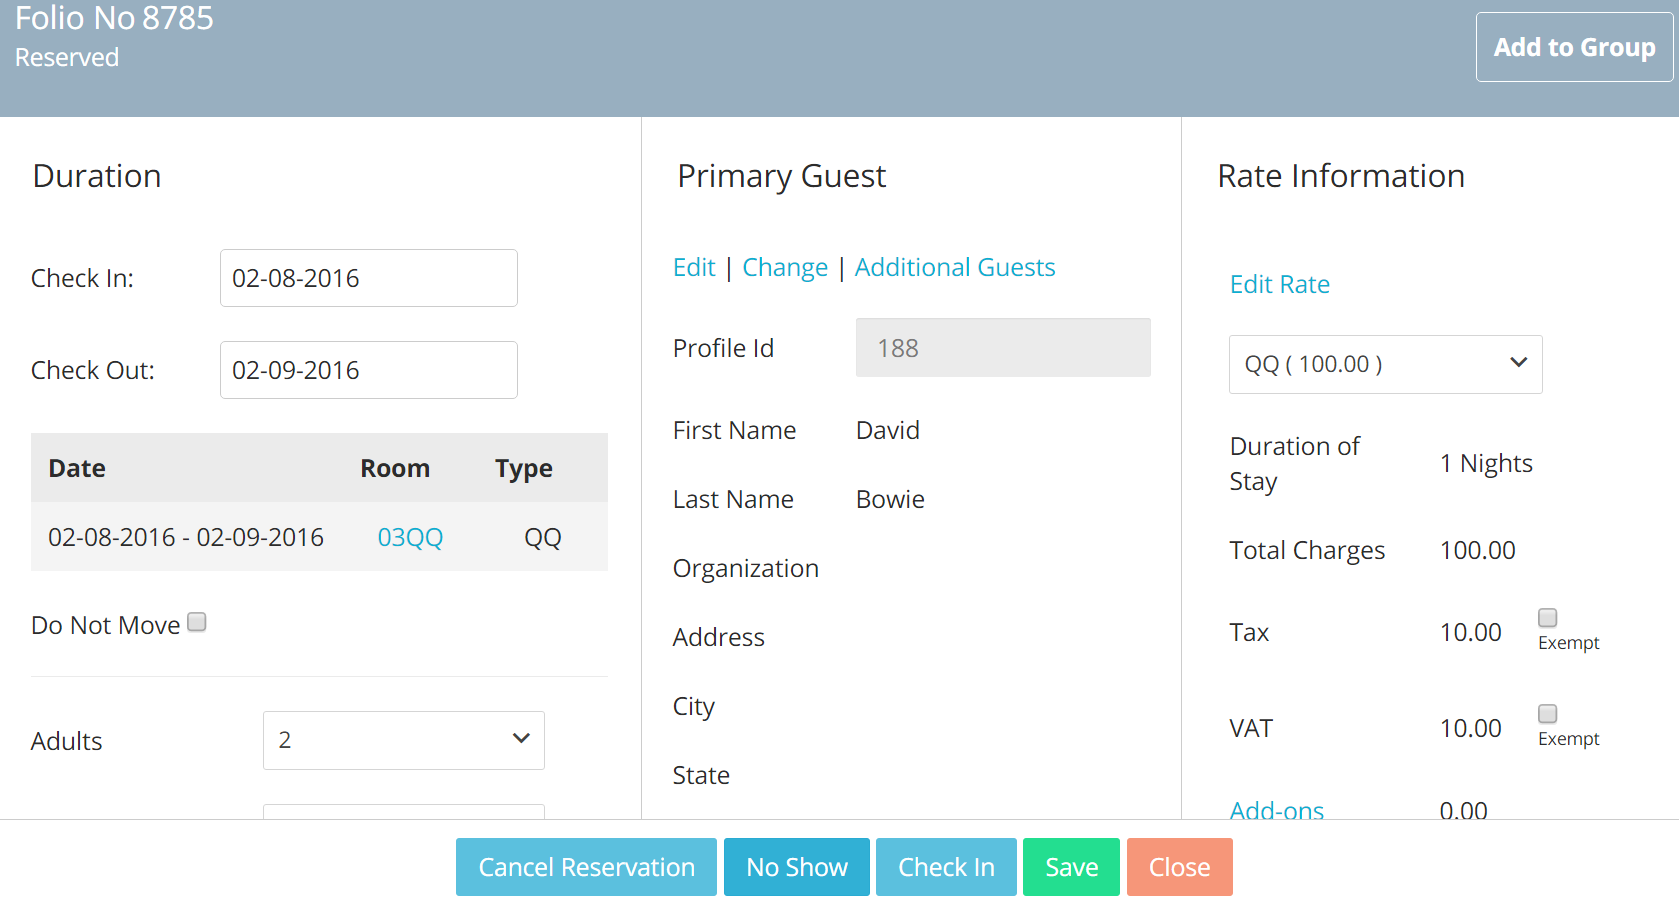
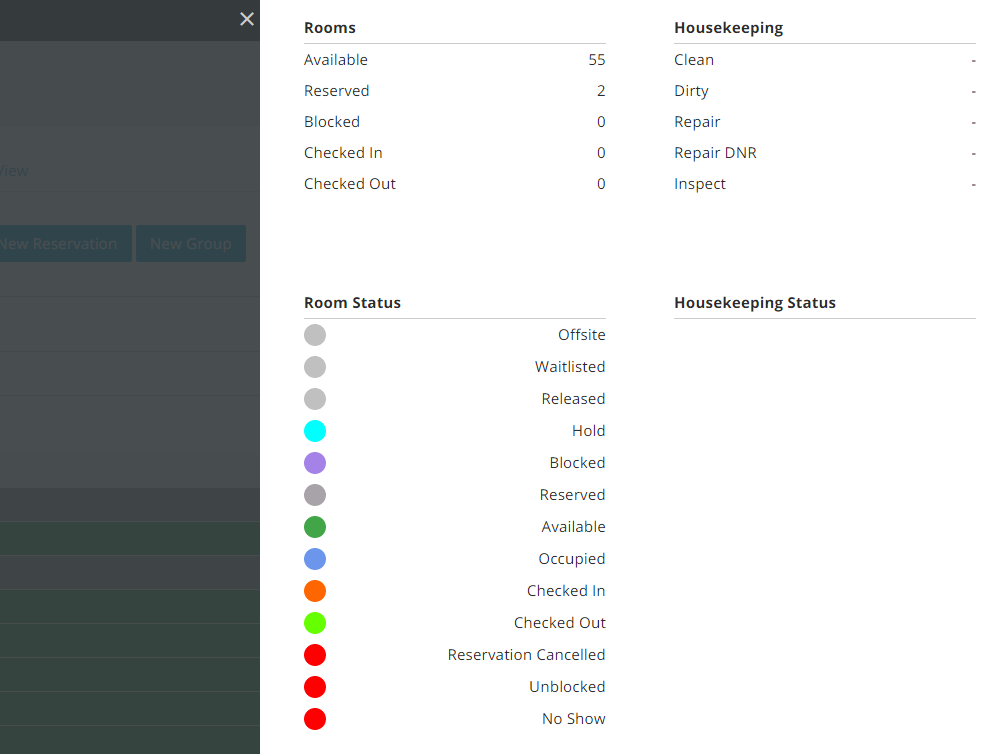
Important: When you change the status of a reservation folio, the color of that reservation will automatically change on the Tape Chart. You can see what each status means by using the drop down legend on the Tape Chart:
Editing the Rate of a Reservation
If your username has the right permissions, you will see a blue, clickable link under section Rate Information in any folio:
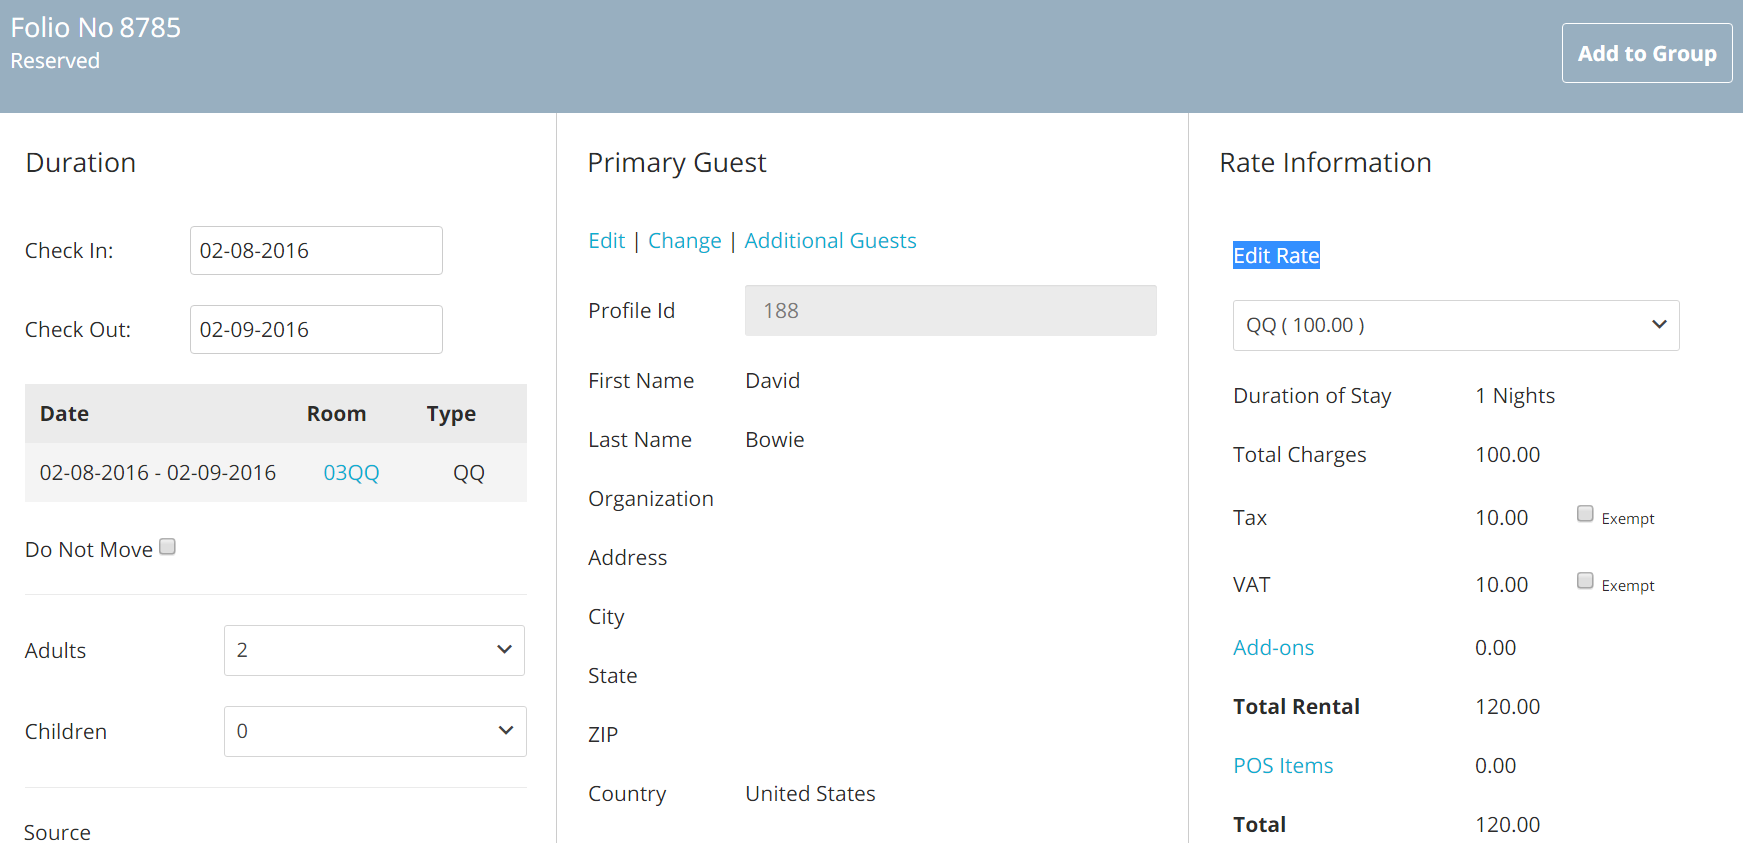
This link enables you to edit the rate on a per reservation basis. When clicking on the rate, another panel will pop-up: you will have two options to edit the rate:
- The first option is the Daily Price Edit, via which you can change the price for each night:
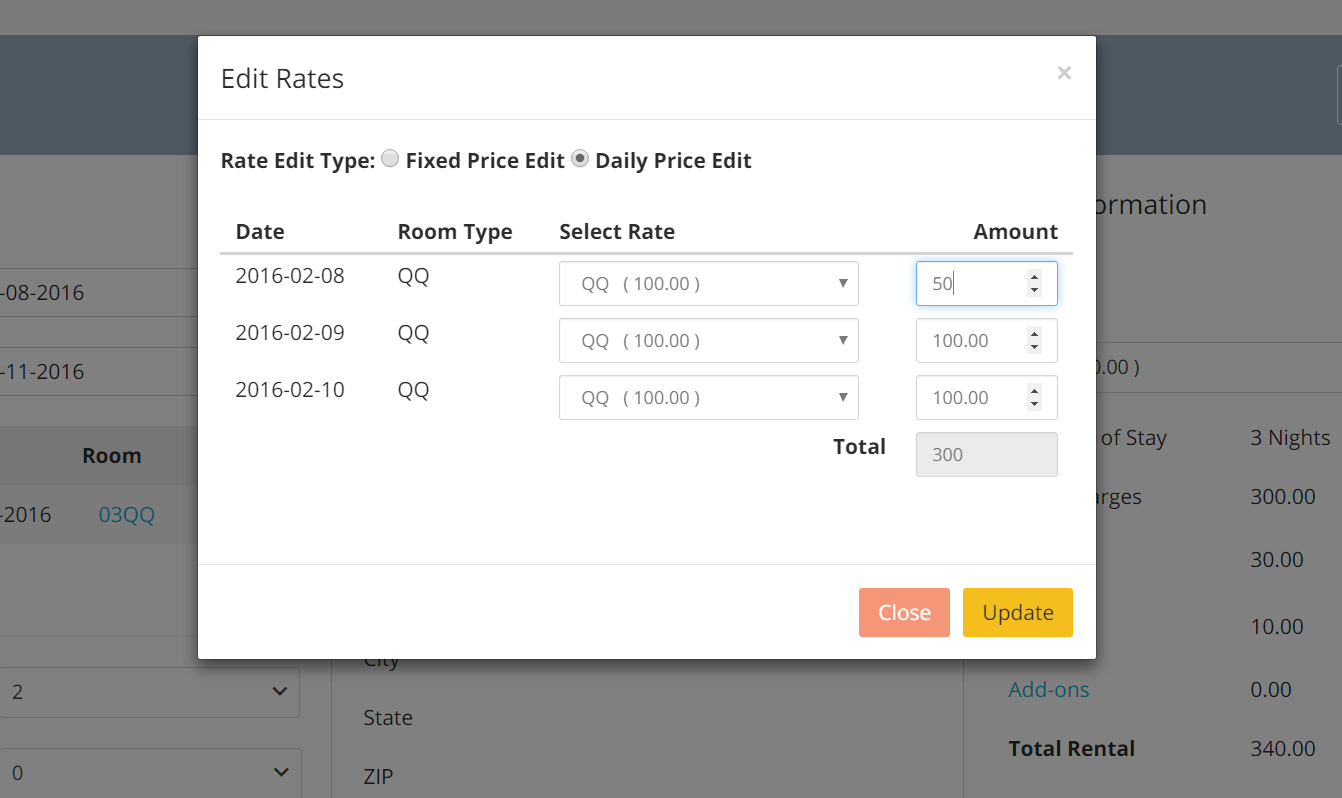
Once finished, click on the yellow button Update.
- The other option is the Fixed Price Edit, via which you can edit the overrall cost for the reservation:
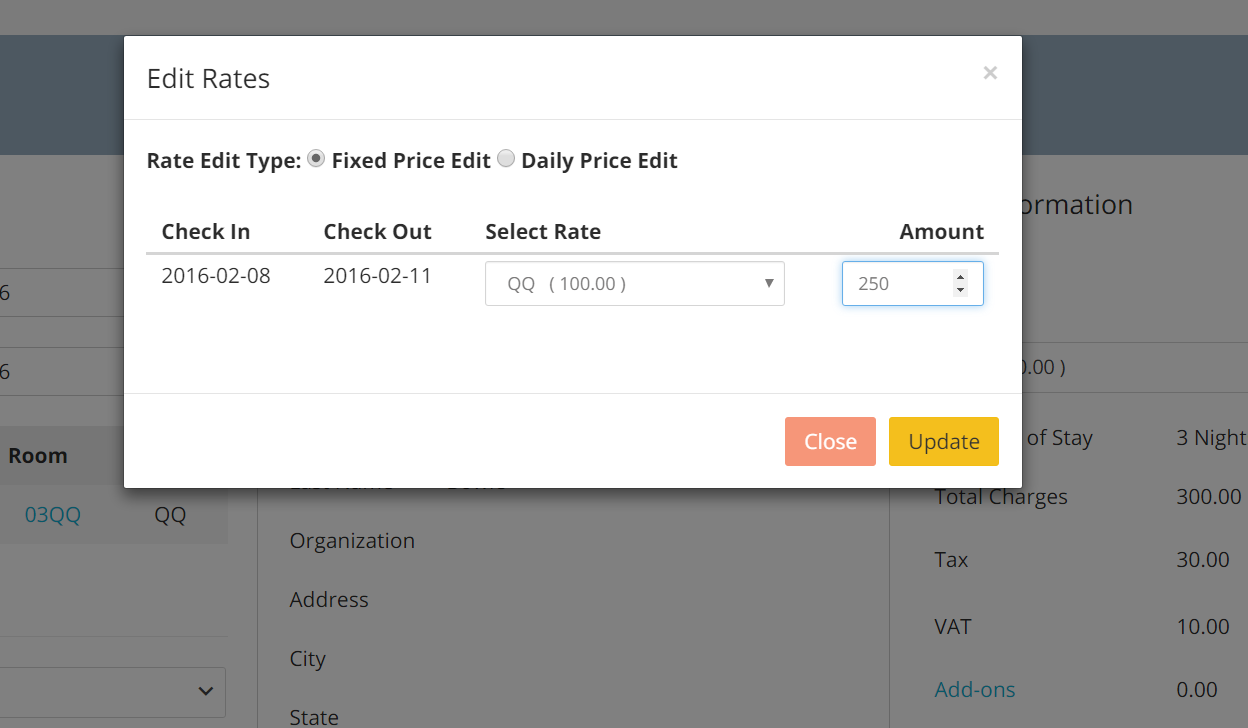
Once finished, click on the yellow button Update.
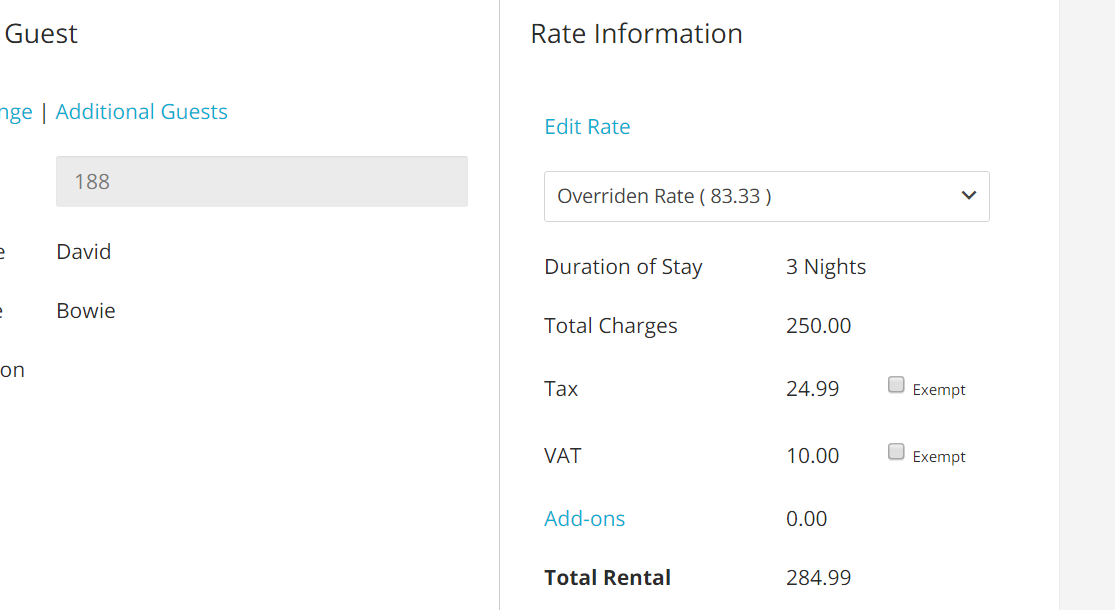
- You will notice that when the rate is changed, the Rate Drop Down menu will change to show the written Overridden Rate, sign that the original rate has been overridden; all taxes will also be re-calculated on the basis of the new rate:
Adding Add-Ons and POS Items to a Reservation
You can add an existing add-on directly from any folio.
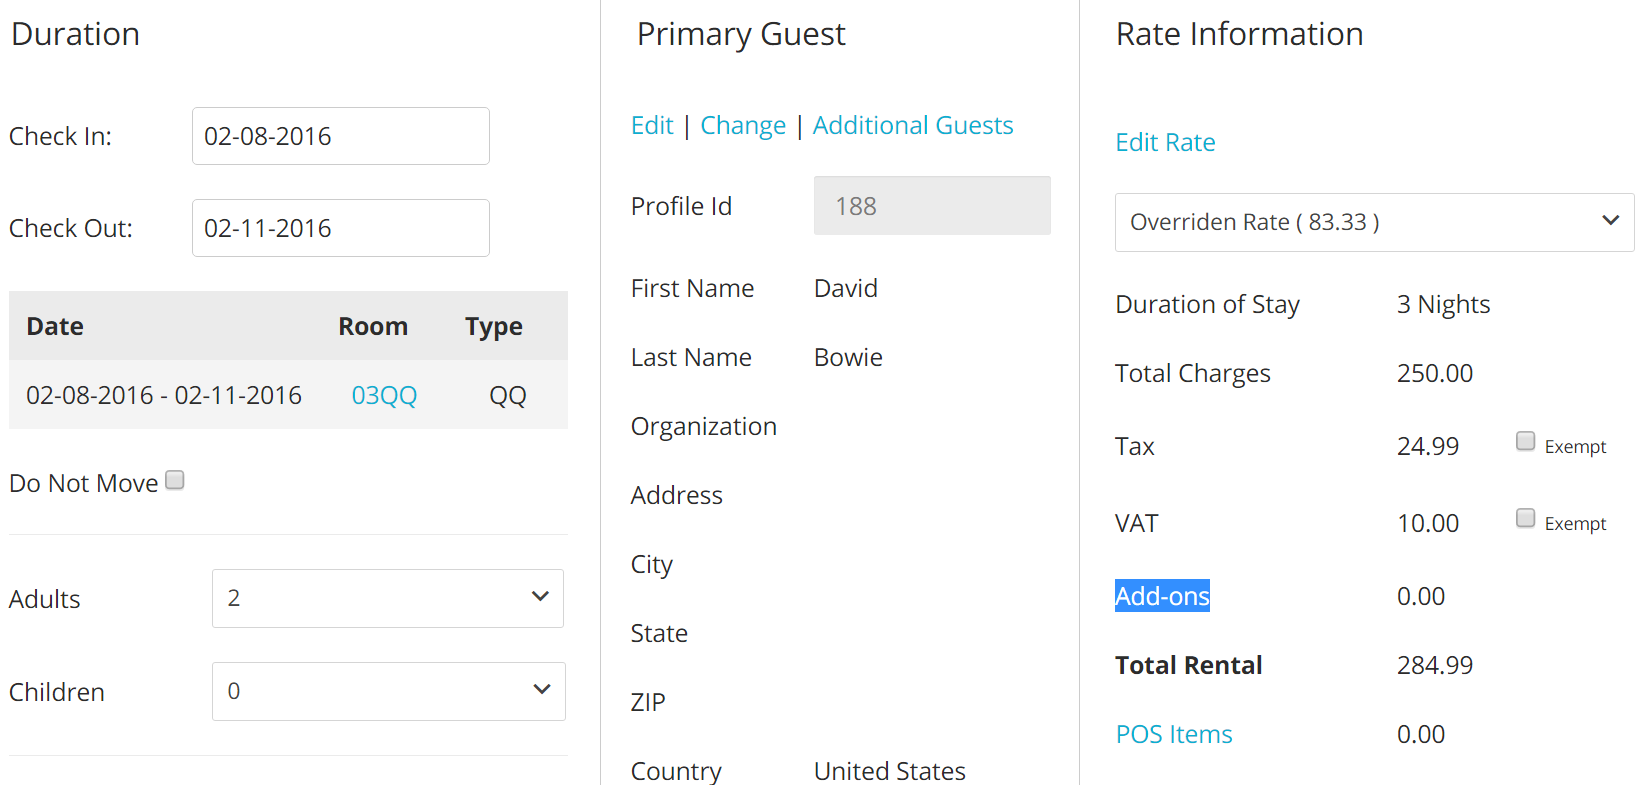
- Click on the blue link Add-Ons under the Rate Information folio section; if you want to add a POS, then click on the blue link POS Items right below it:
- Choose the available options from the drop down menu Charge:
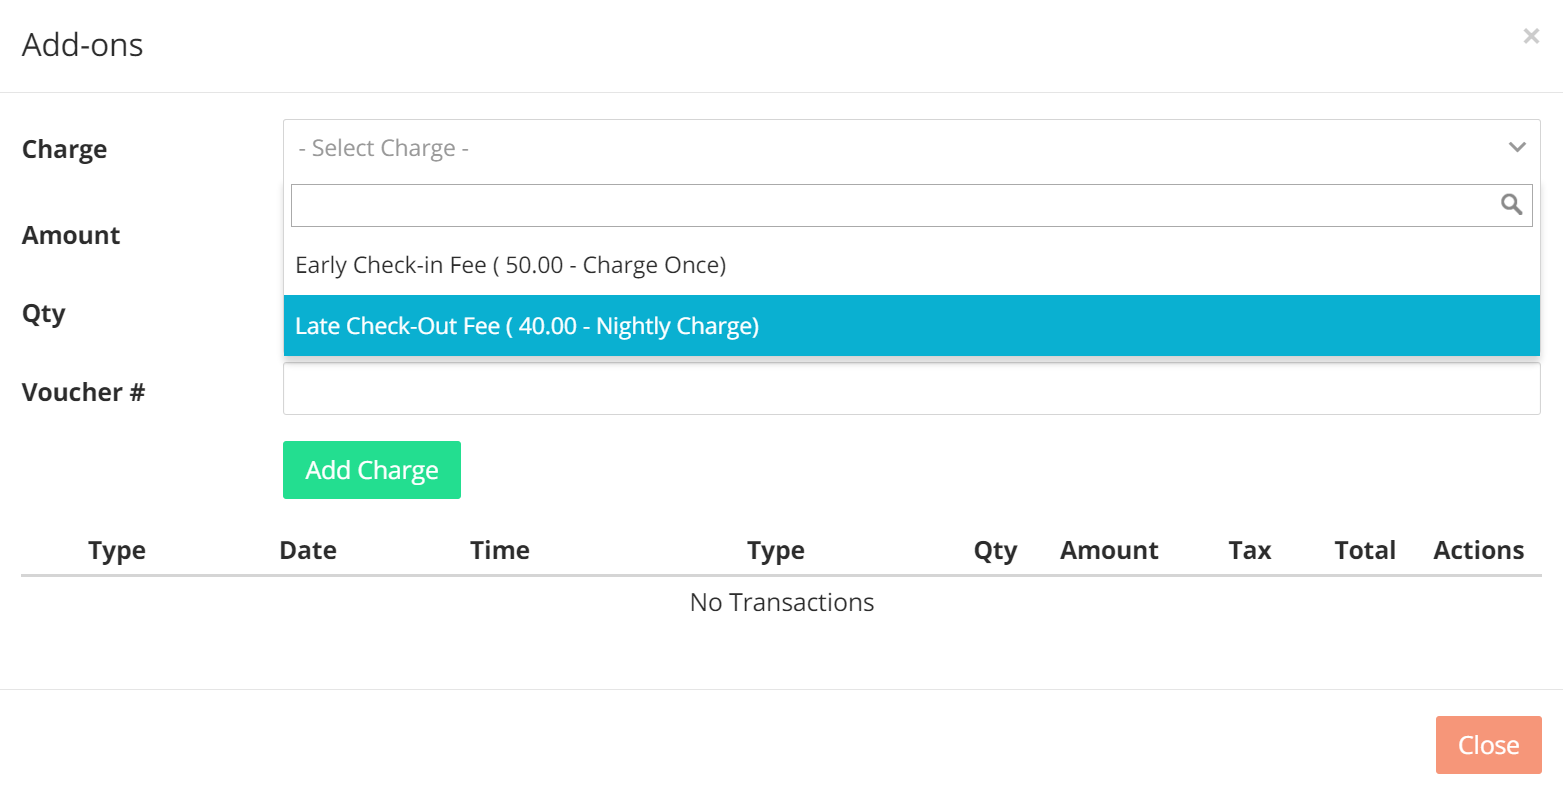
- The configured price for the chosen extra item will appear in the Amount box; you will be given the option to amend that price by either writing a new value in this box, or by clicking on the arrows on the left side:

- Insert the quantity of items you wish to add to the folio, by placing the correct numeric value in the Qty box:

- When finished, click on the green button Add Charge:

- The charge and all applicable taxes will be listed in the panel:
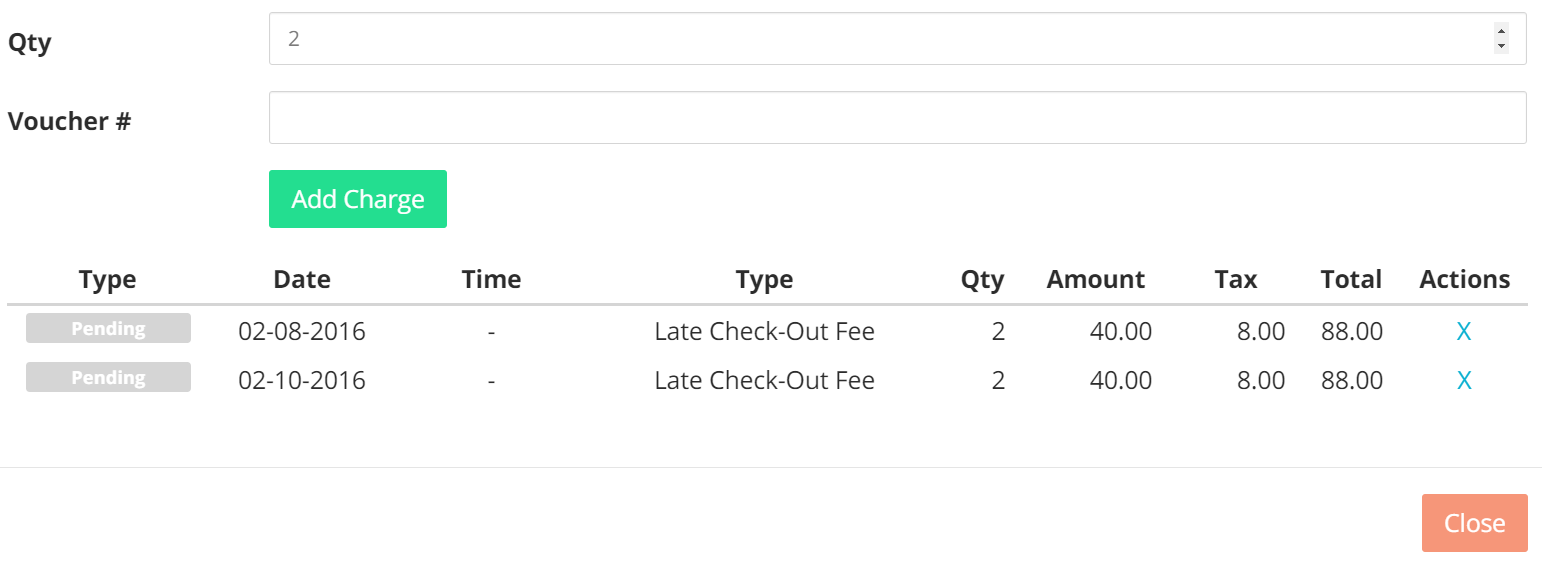
Note that all charges will appear to be Pending until you save the folio: once you save the folio, charges will appear as posted:

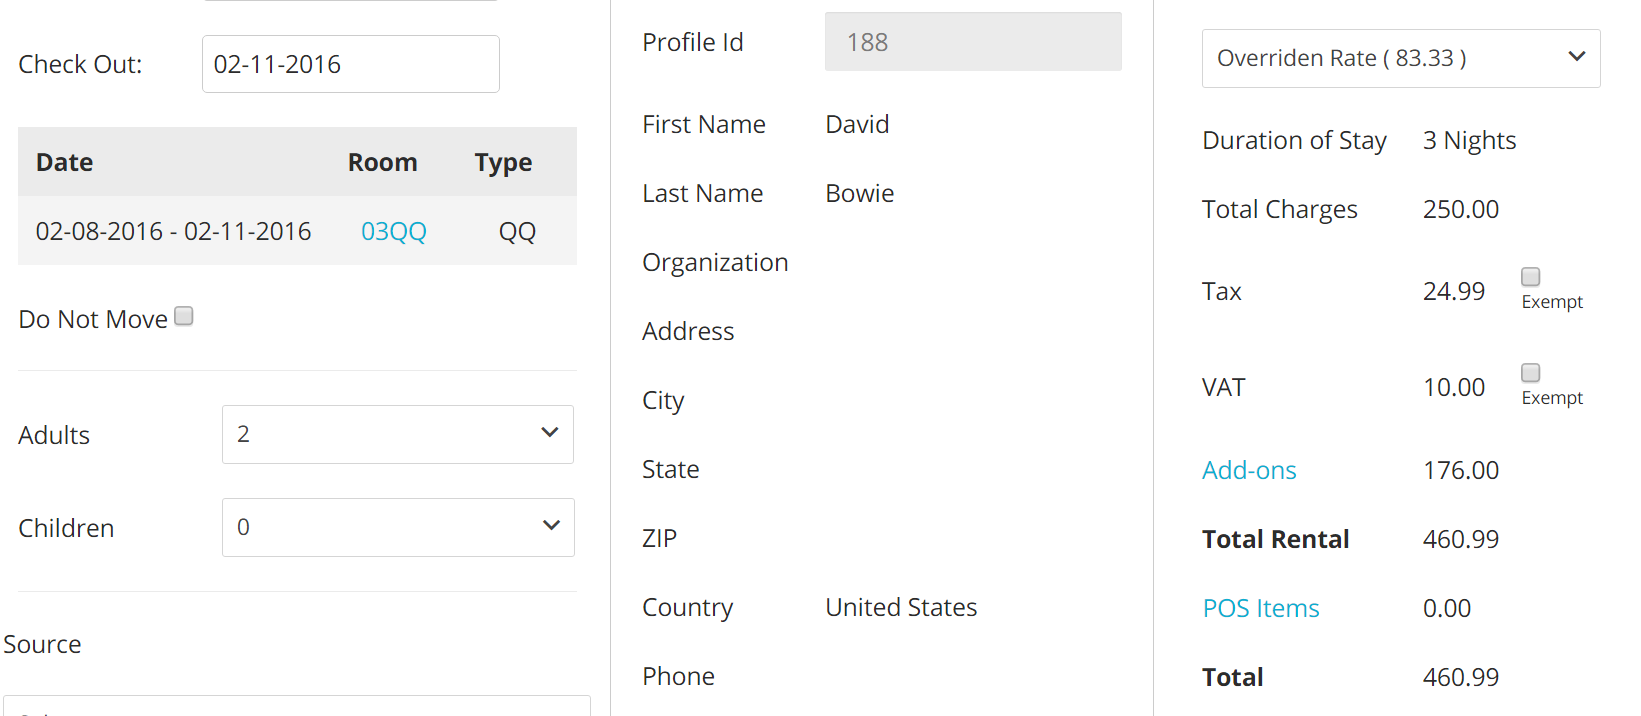
- You will see the amount for each added extra items next to the relevant tag, under Rate Information section on the folio:
Moving a Reservation into a Different Room
Any folio can be moved to a different room and room type, independently of the status of the reservation itself.
Important: If you wish to move the the reservation into a specific room, make sure that the latter is available for the selected dates: the system won't allow you to move a reservation into a room which is occupied or even partially occupied.
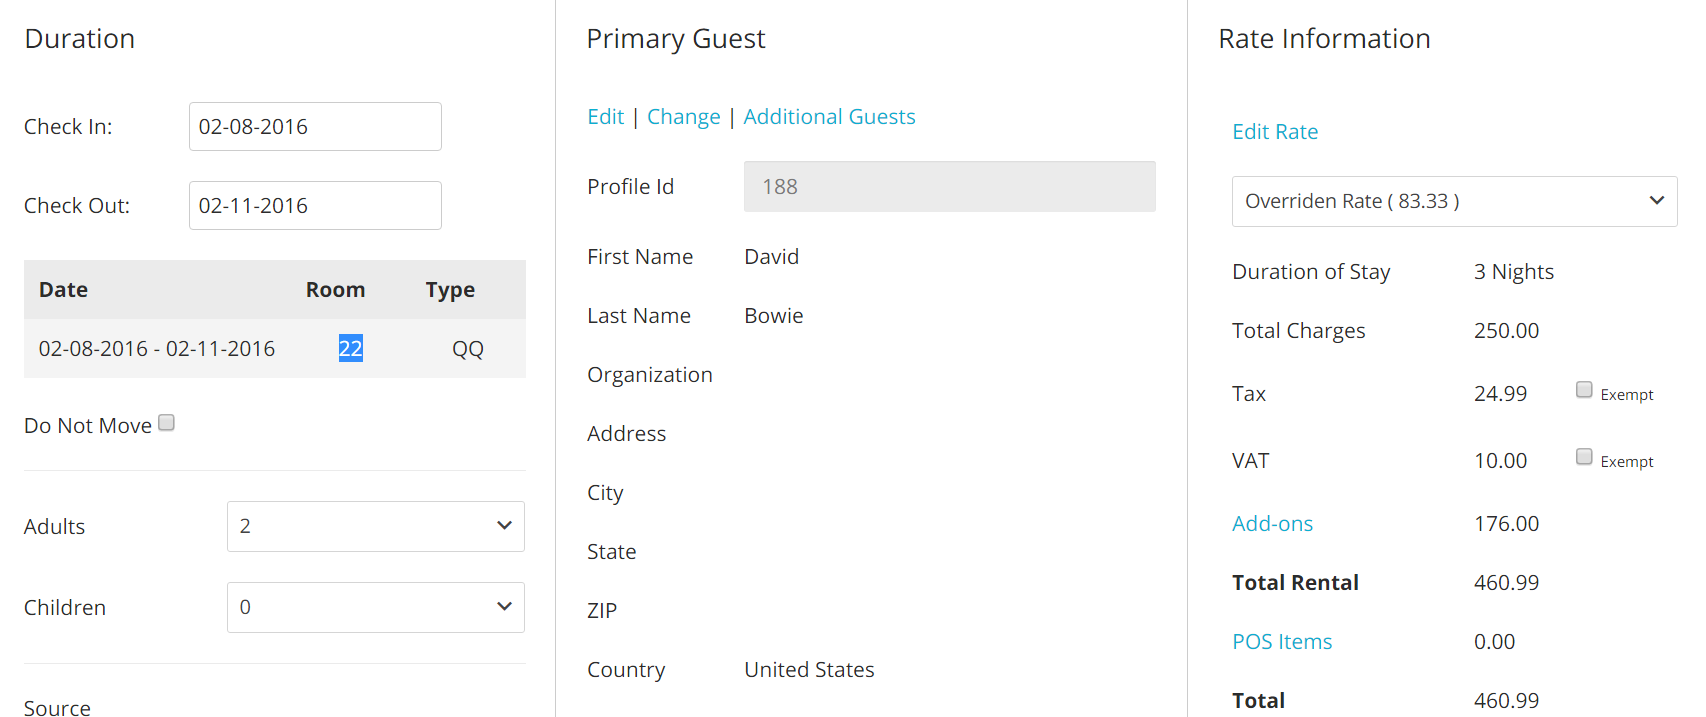
- Start by pulling up the reservation folio you want to move. You will notice that the room assigned to the folio will appear in a blue, clickable link:
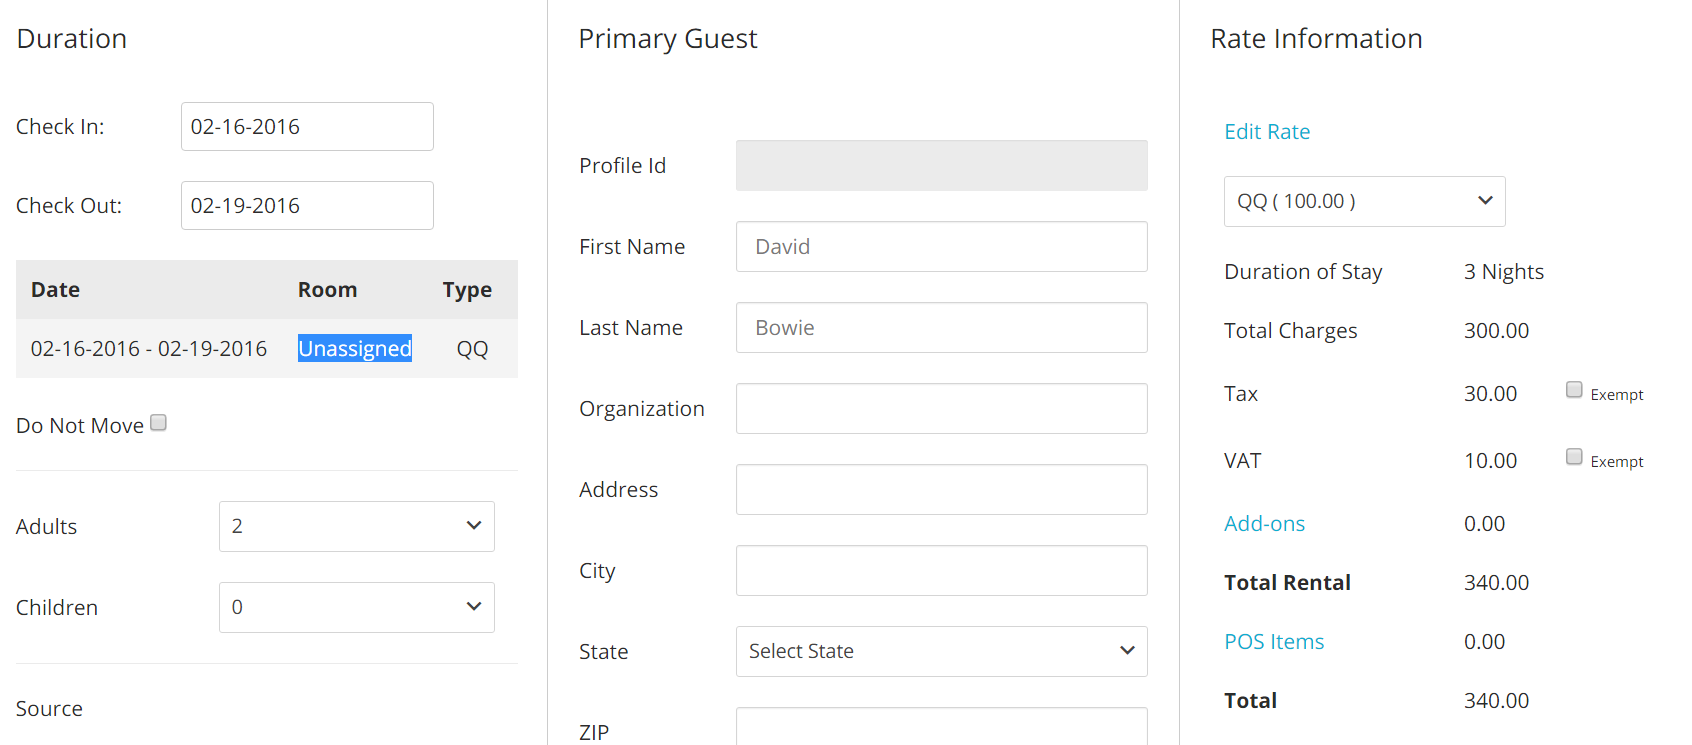
In case the folio you are trying to assign is not assigned to any room, the blue clickable link will read as unassigned:
- A new panel will pop: you will see two scroll down menu which default to the reservation dates; right below, there will be a list of all available rooms for the selected date range:
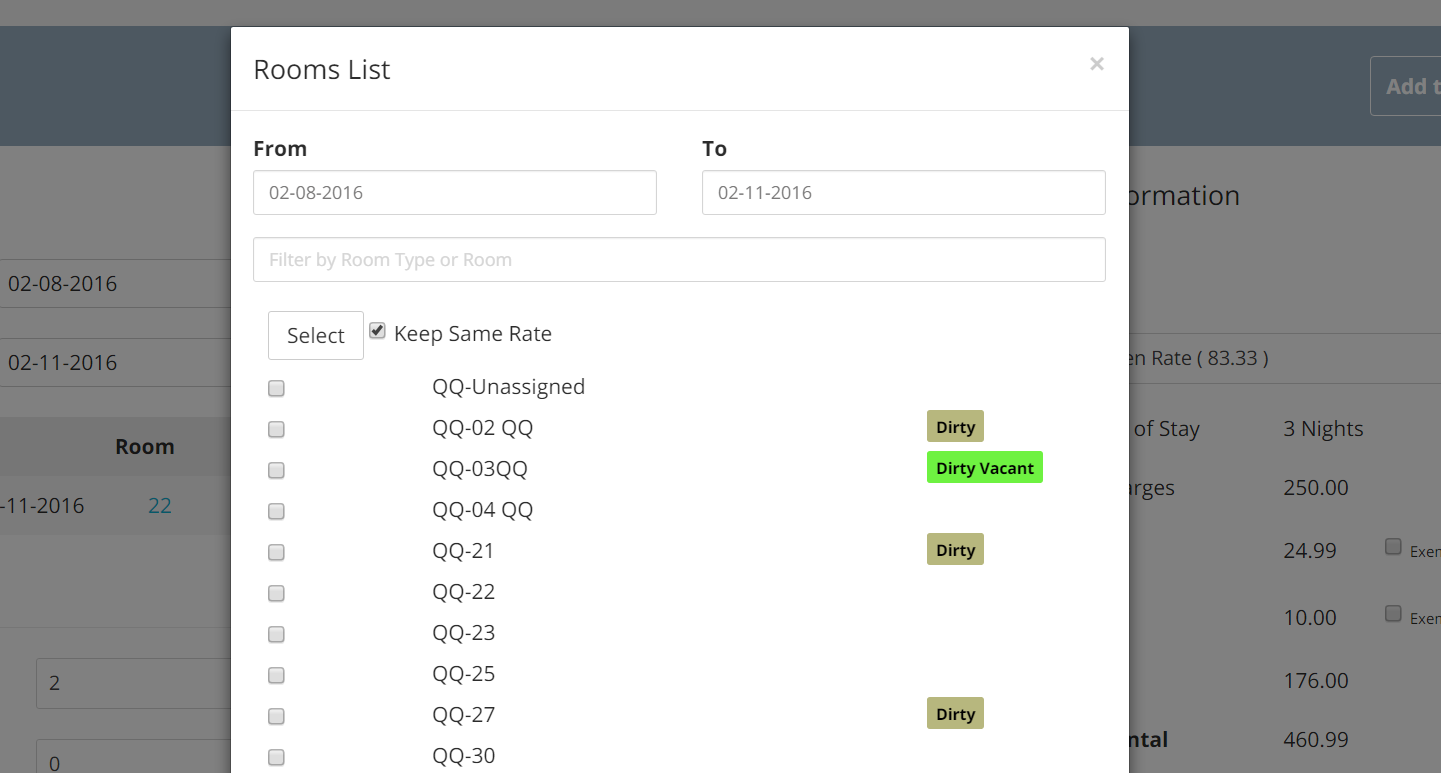
For each available room, the system will also notify you of the Housekeeping Status of each room, highlighting the ones that are not clean. In the screenshot above, for example, I know that rooms 2, 3, 21 and 27 are currently dirty. This comes particularly handy when you are moving reservations for the current date, as it reduces the risk of checking in guests inot rooms that are not ready to be sold.
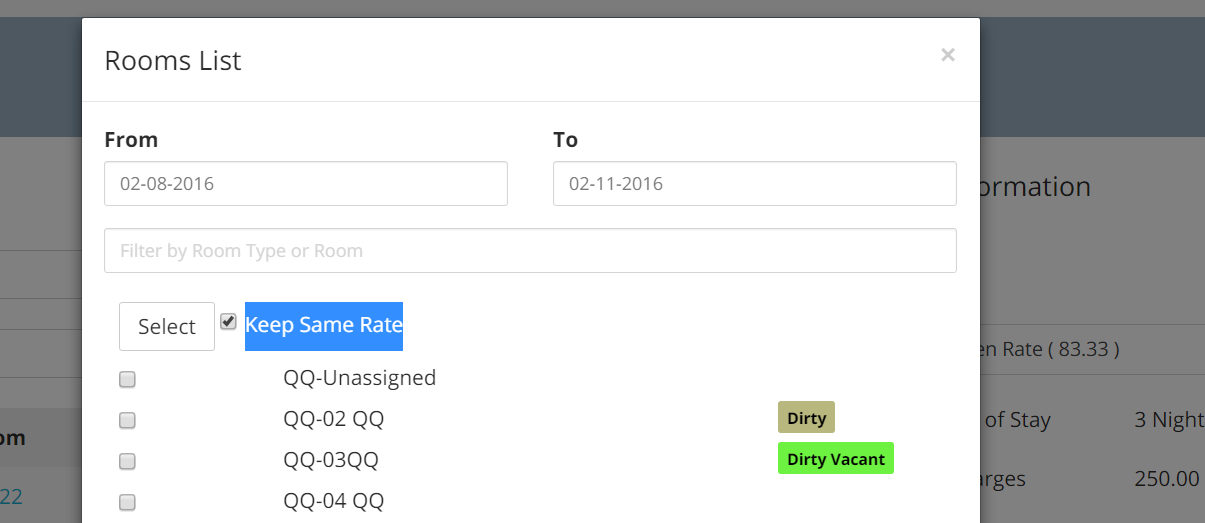
- Choose whether to move the room and keep the rate currently loaded in the folio, or have it update to the rate configured for the new room: check or un-check the box next to the tag Keep Same Rate accordingly:
- You will also have the option to place the reservation into an Unassigned Status: if available, that option will be marked with the tag Unassigned , along with the room type code:
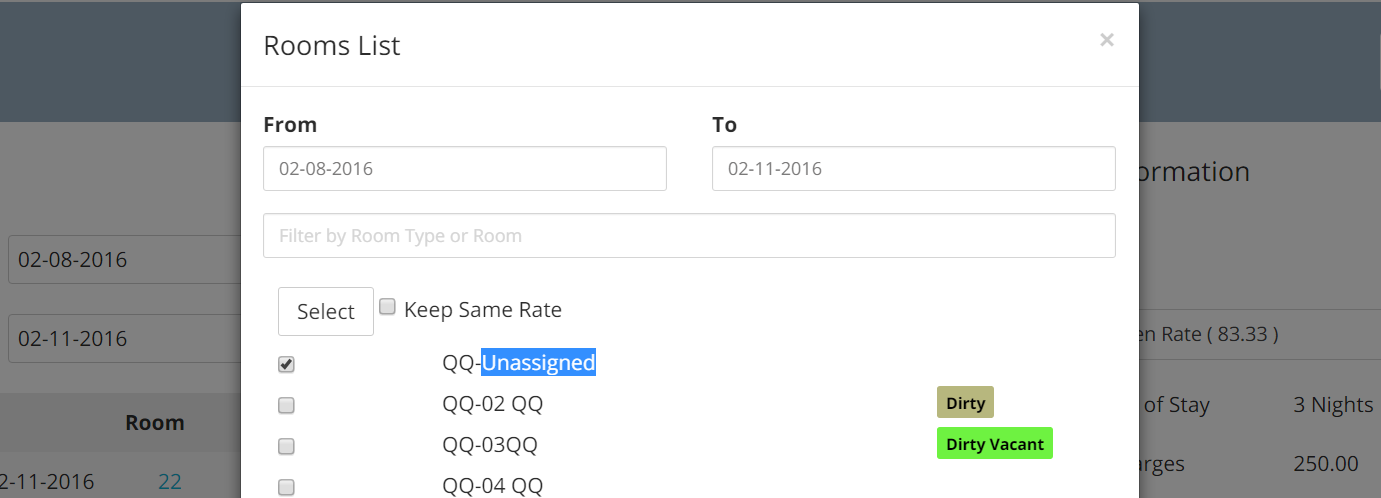
- Once you made your choice, click on the button Select:
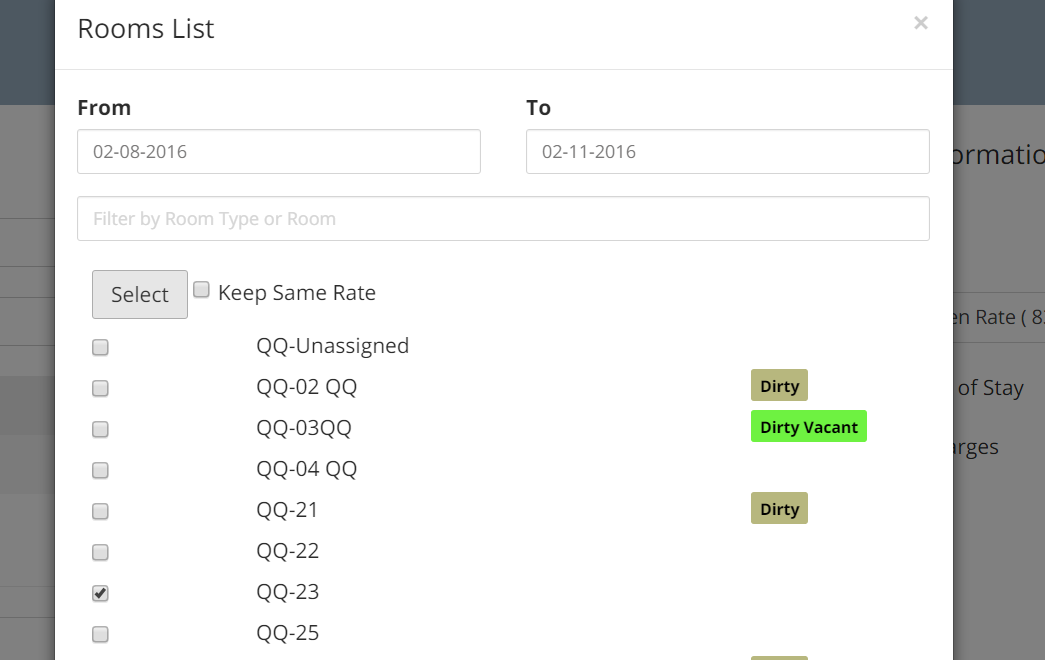
- Finally, save your changes:

Split Rooms
It may happen that your guests will change room during their stay: your account enables you to record their stay across multiple rooms without breaking the reservation. This function is called Split Room.
- Start by pulling up the reservation, and click on the room assignment link, on the left hand side of the folio:
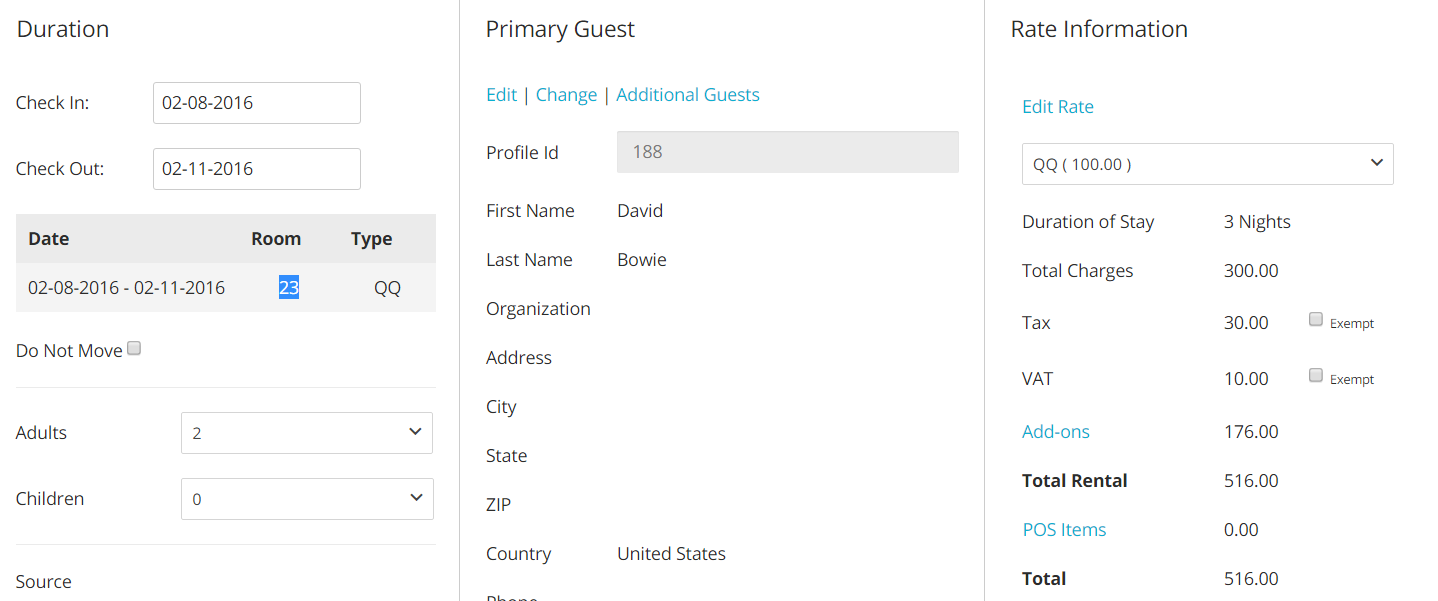
- Another panel will pop up, and there will be two scroll down calendars, From and Two. The dates showing there are defaulted to the the arrival and departure date of the guest:
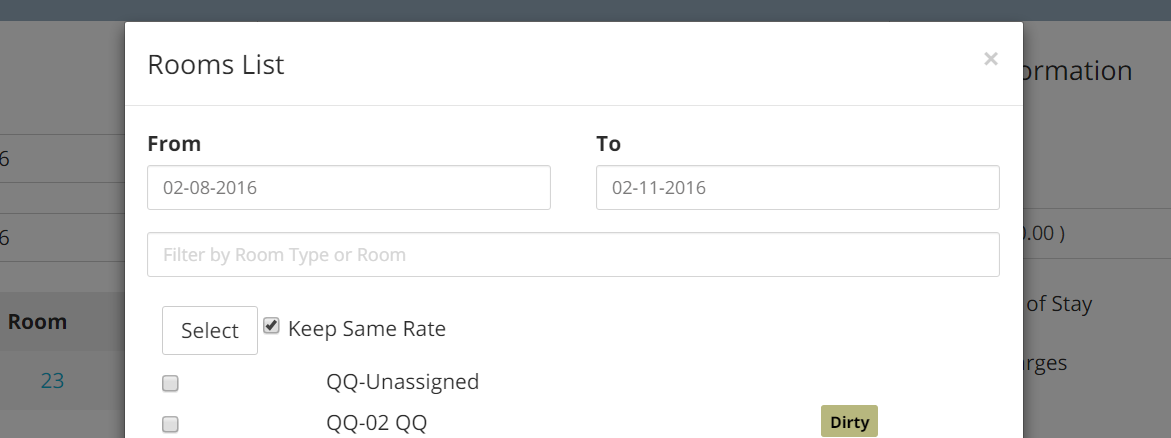
- Select the dates you want to have the guest move: in the example below, the guest is due to check-in on February 8th, but I want them to move on February 10th. So, I will select the 10th from the calendar.
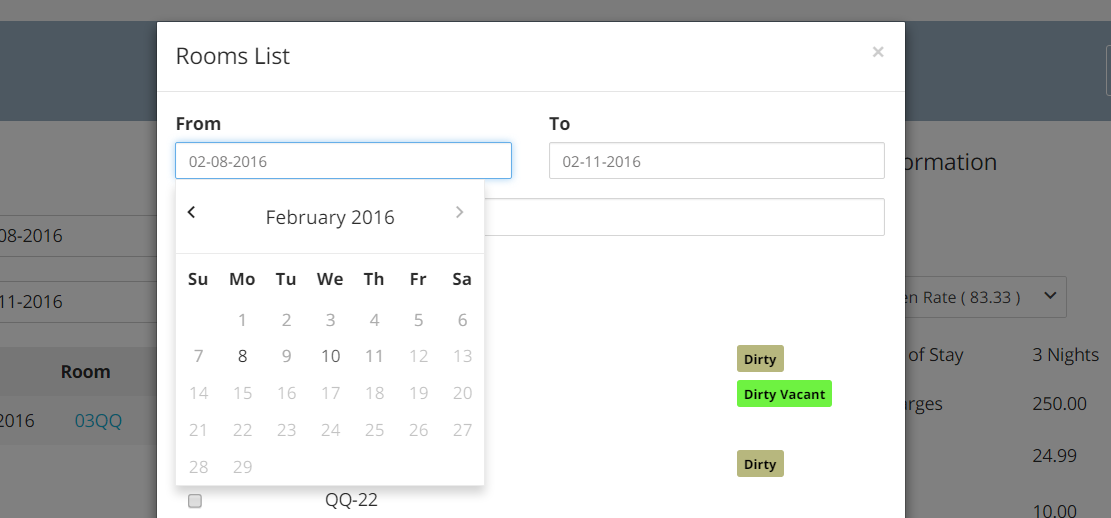
- The system will automatically give you a list of all rooms available for the selected dates:
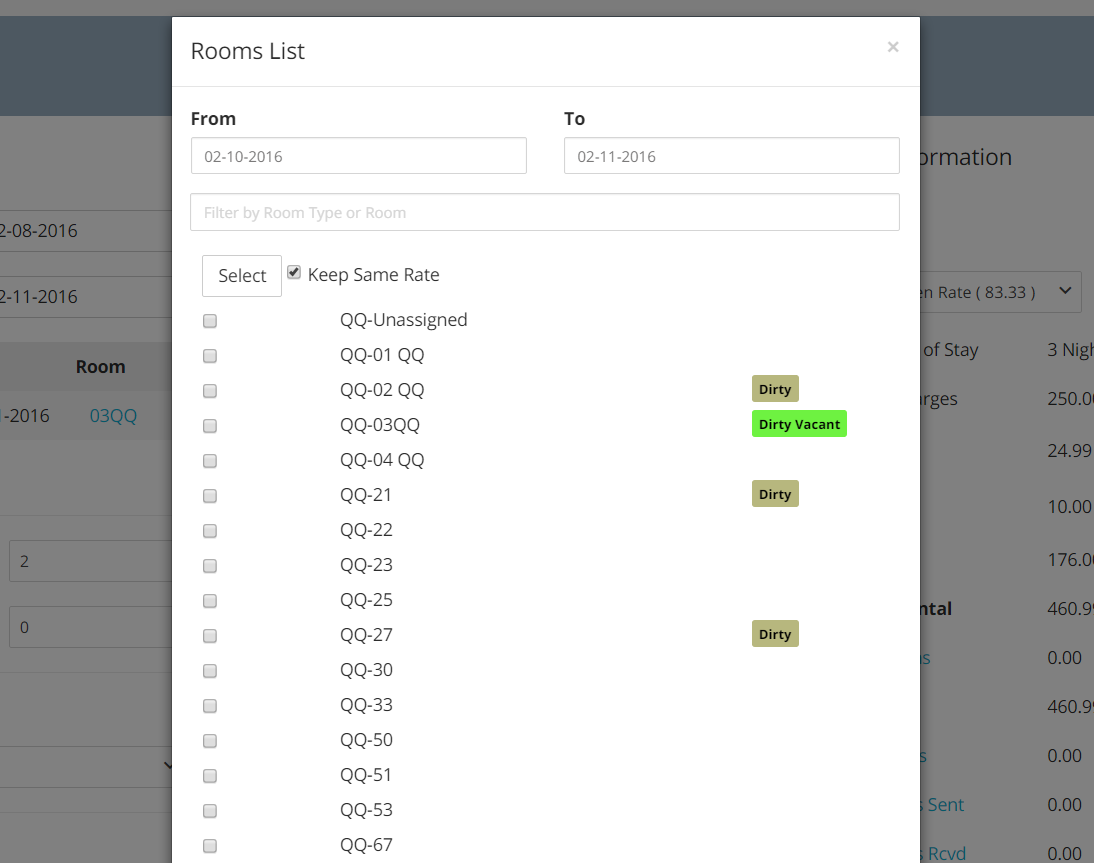
- Choose the room where you want the guest to move and click on the button Select. You can also choose whether to keep or not the same rate, by checking or un-checking the box next to the tag Keep Same Rate
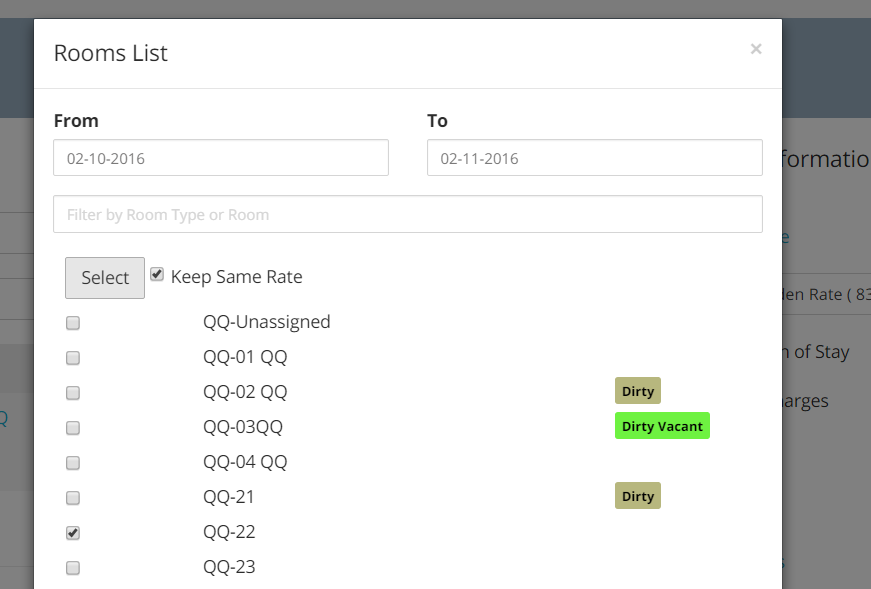
- The folio will now appear as follows:
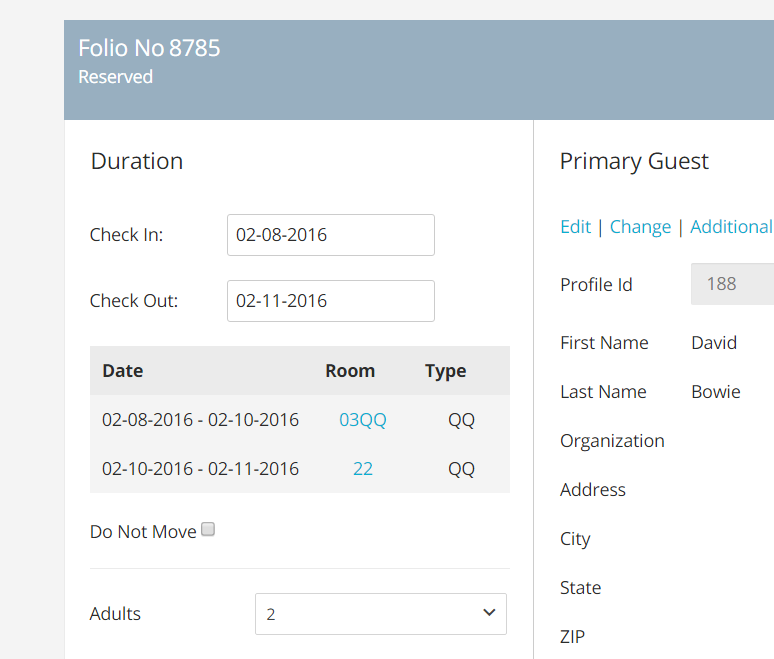
You will notice that under the tag Duration the two calendars bring information regarding the guest’s arrival and departure date, while right below there will be a date breakdown associated with the room change. In the example above we know that the guest is due to arrive on February 8th and leave on the 11th; we also know that from February 8th through the 10th they are assigned room QQ03, changing to room 22 on February 10th.
- A more common example of the split room is a guest extending their departure date and having to move to another room. Here is how to do to it: click on the room assignment link:
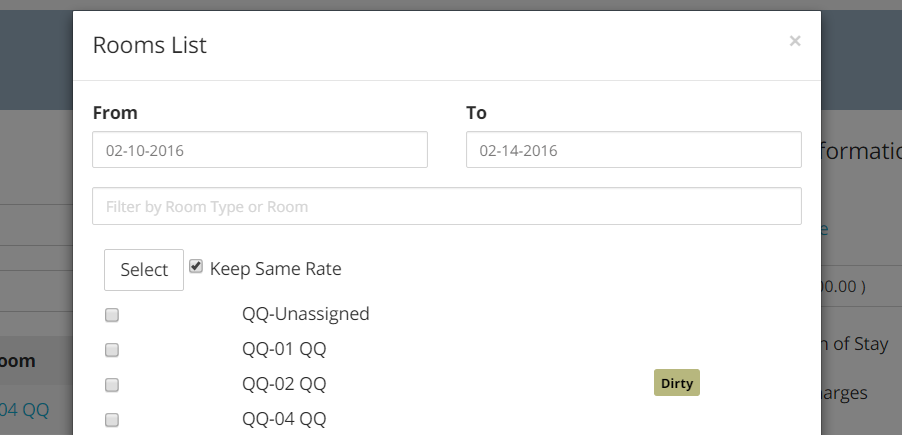
- As you can see above, my guest is due to depart on February 14th; as I want to place them in another room starting February 14th, I will set the From date to February 14th:
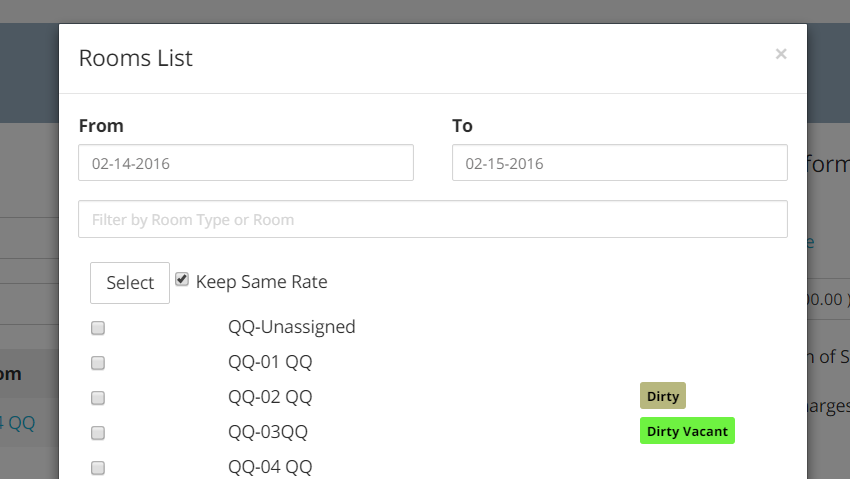
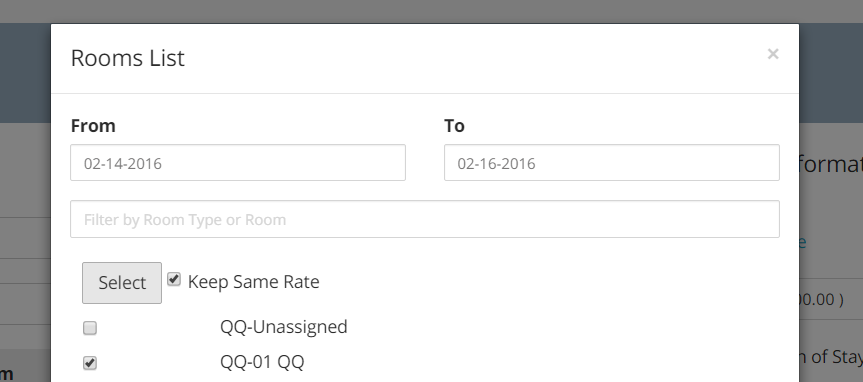
- Add the new daprture date for the guest and choose a room among the available ones:
- This is how the dates will appear on the folio:
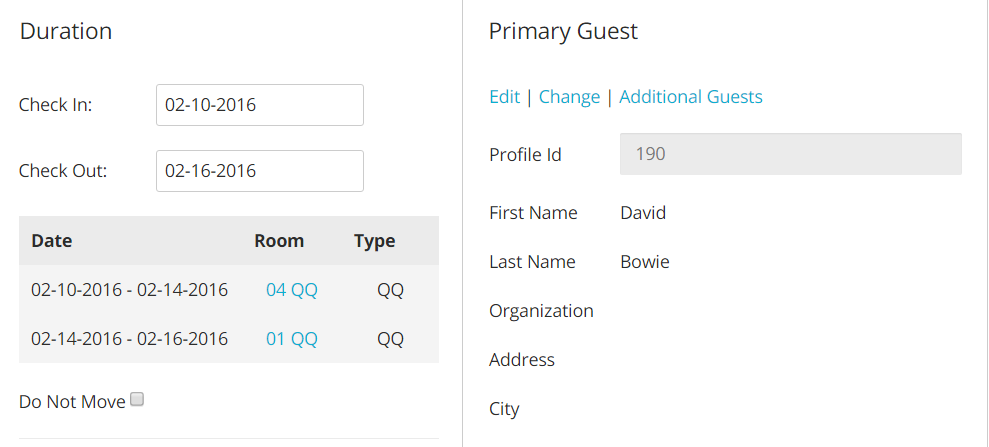
In the example above, the guest was initially due to depart on February 14th, but he is now extending two more nights in a different room.
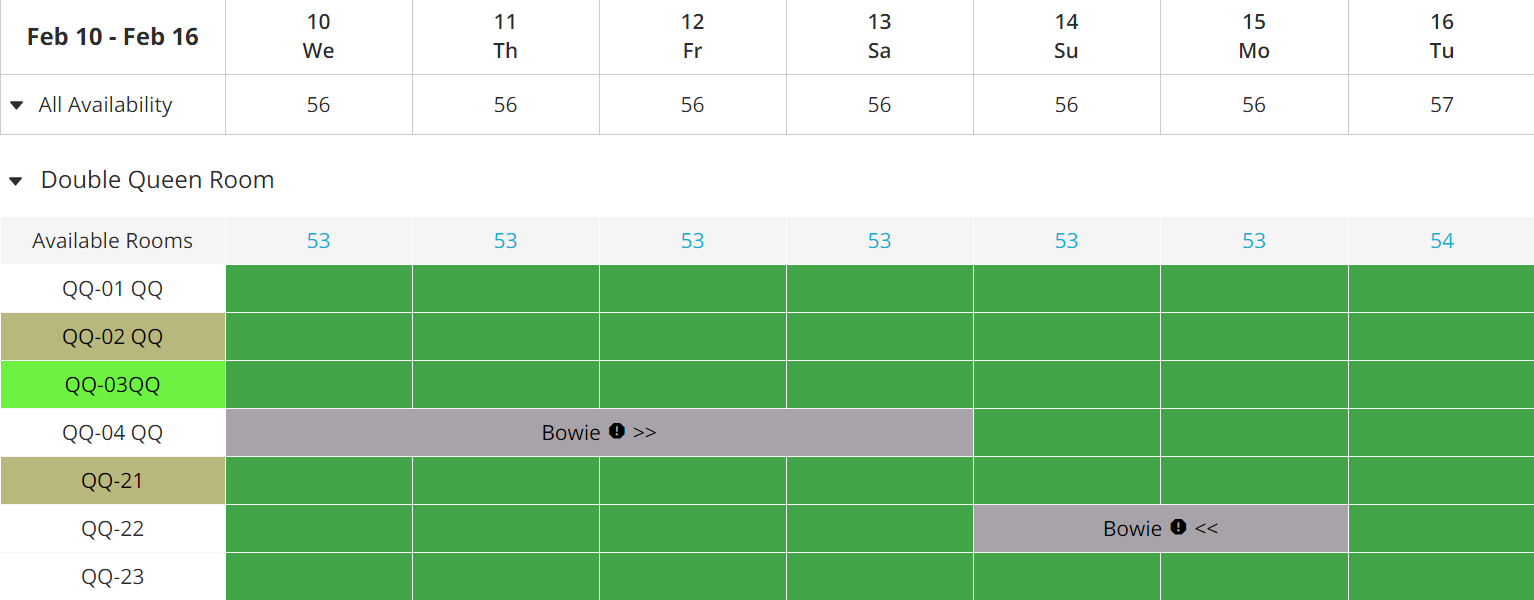
- This is how the reservation appear on the Tape Chart: small arrows will suggest whether and how the guest is moving rooms:
Guest Messages
Each reservation folio has its own Guest Messages section: from here you can send important information to your guests via email or print their reservation documents.
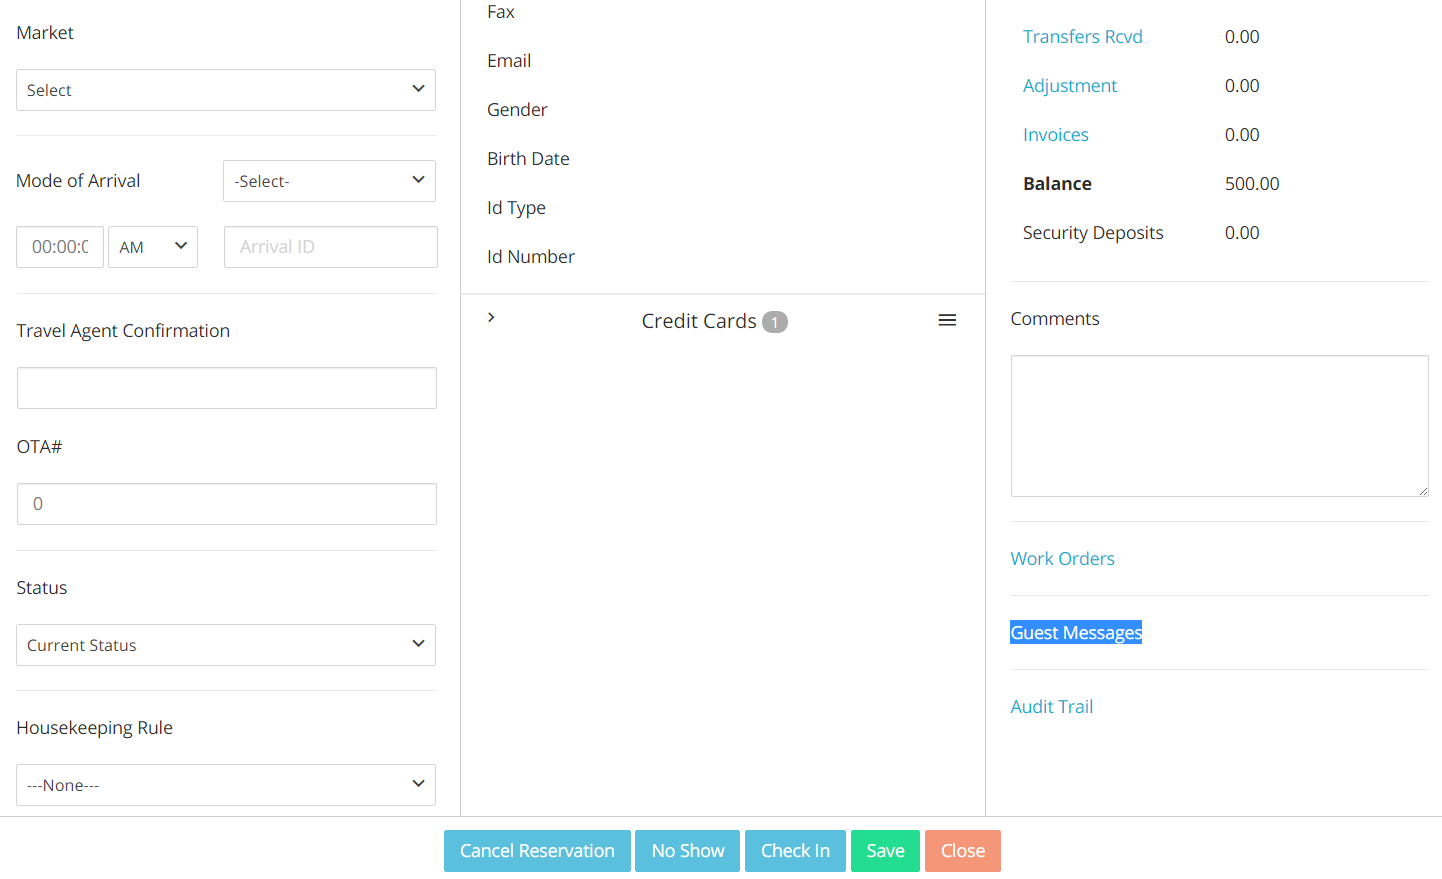
- Click on the blue link Guest Messages on the bottom right hand side of any folio:
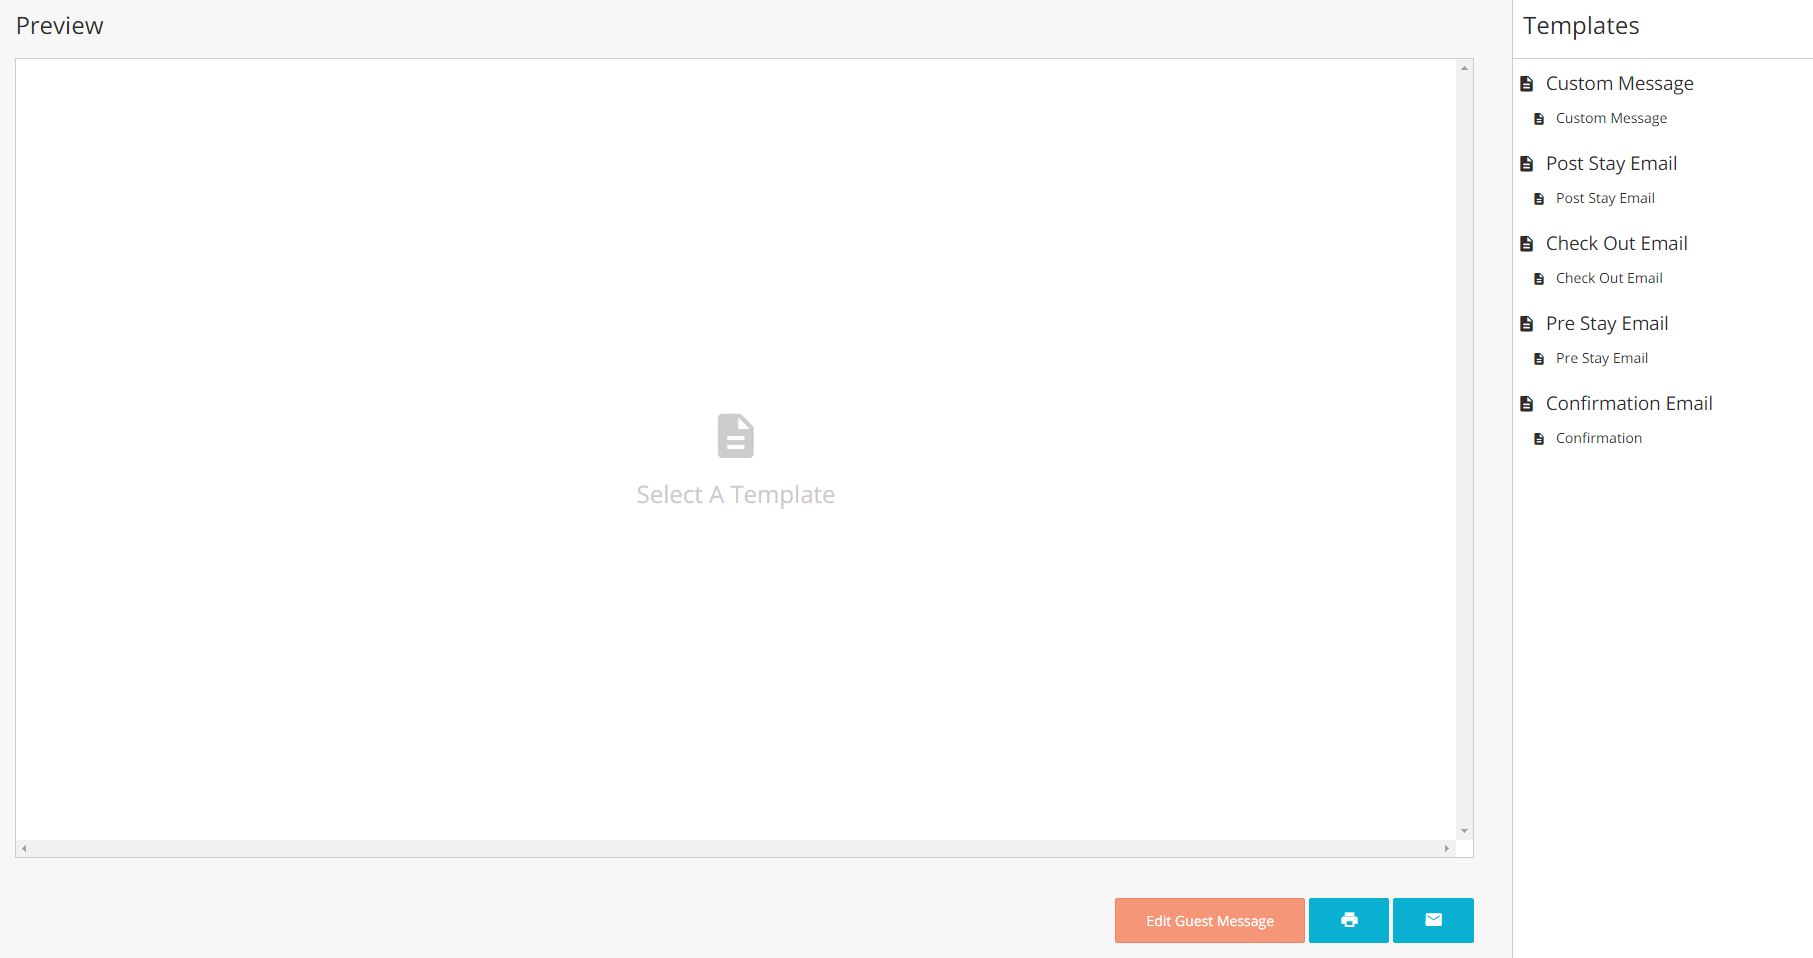
- A new panel will pop up: on the right hand side you will see all available documents:
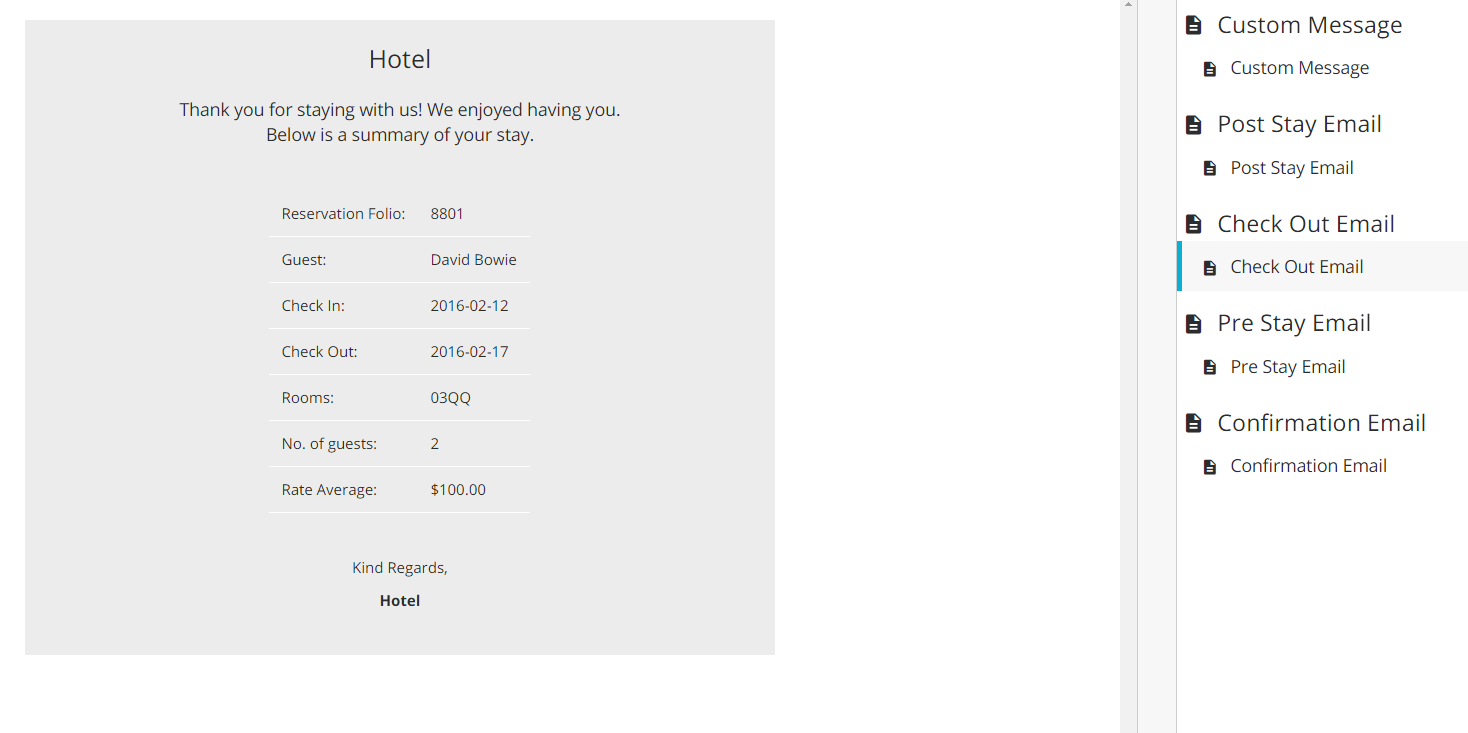
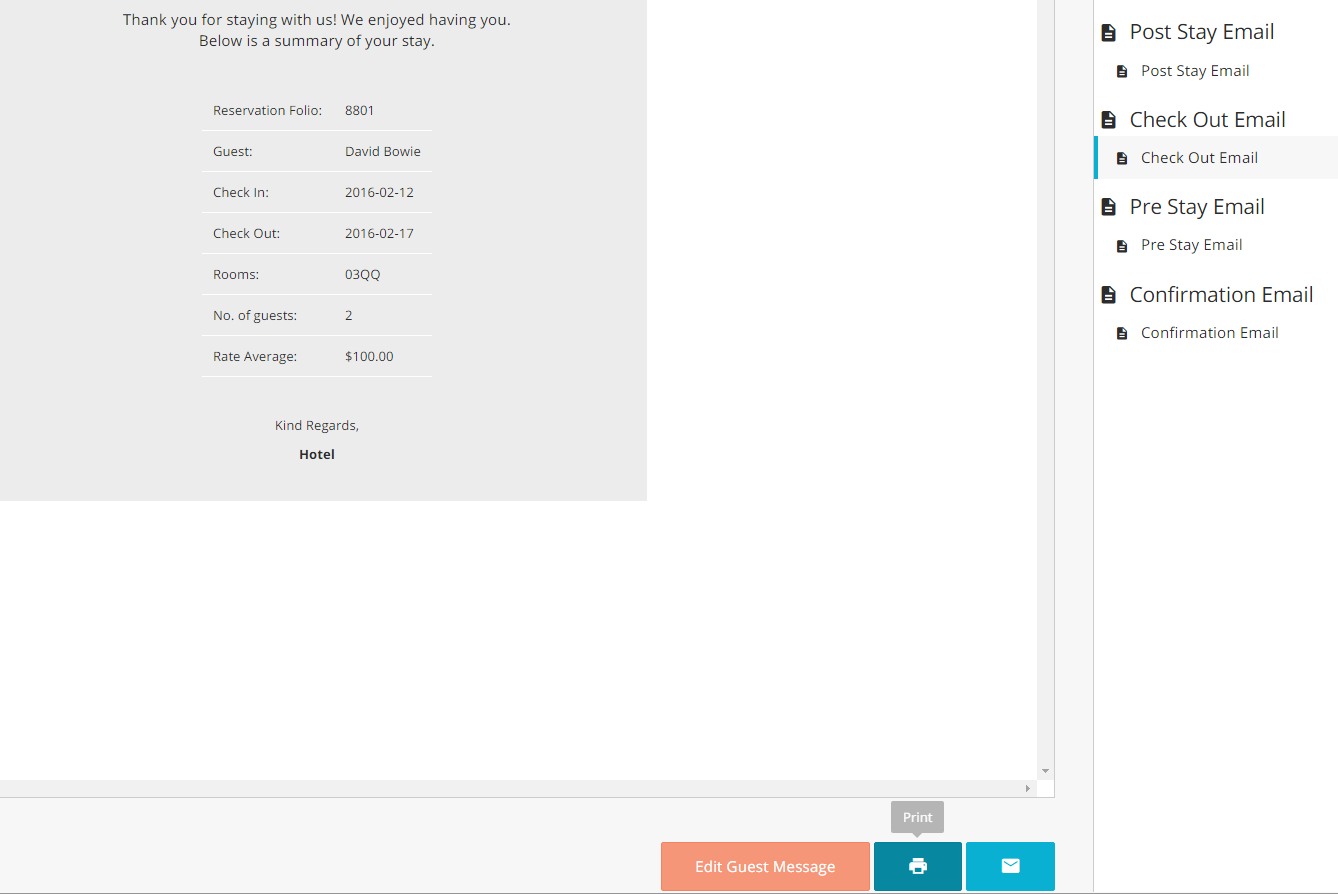
- Click on any template to visualize the relevant information:
- To print the message, scroll to the bottom and click on the blue button with the printer icon:
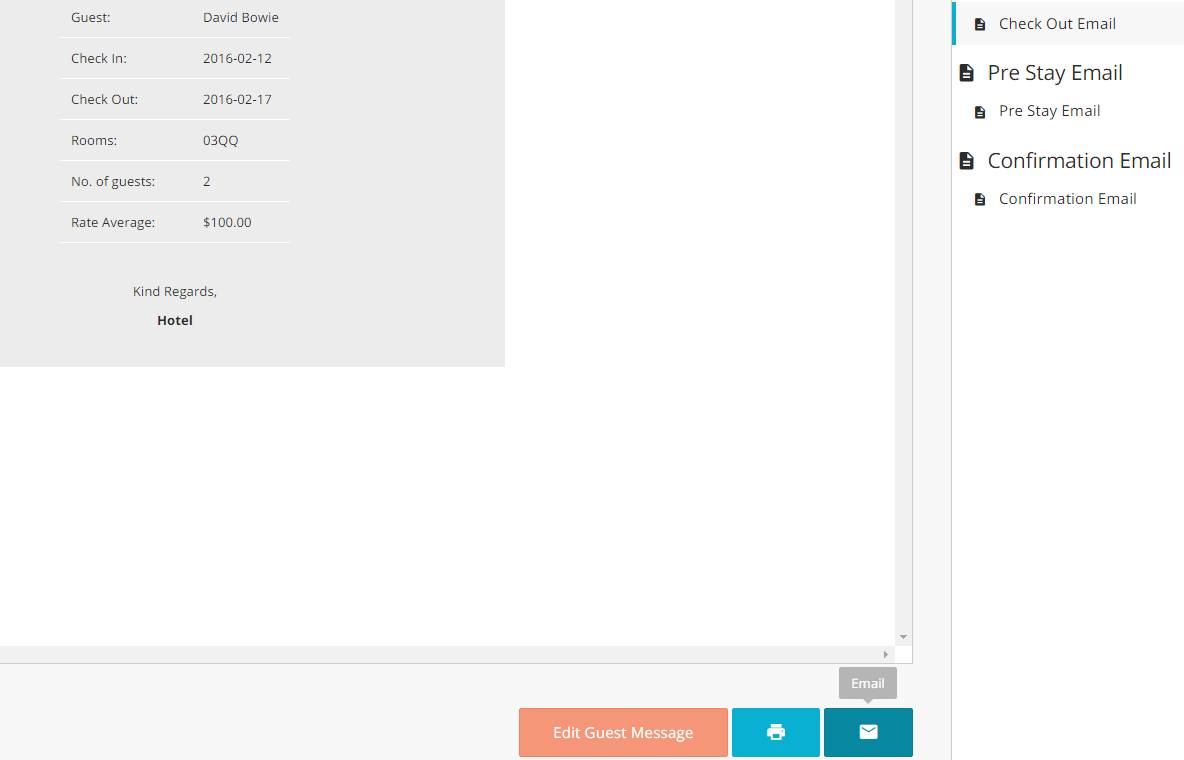
- To email the message, click on the blue button with the letter icon:
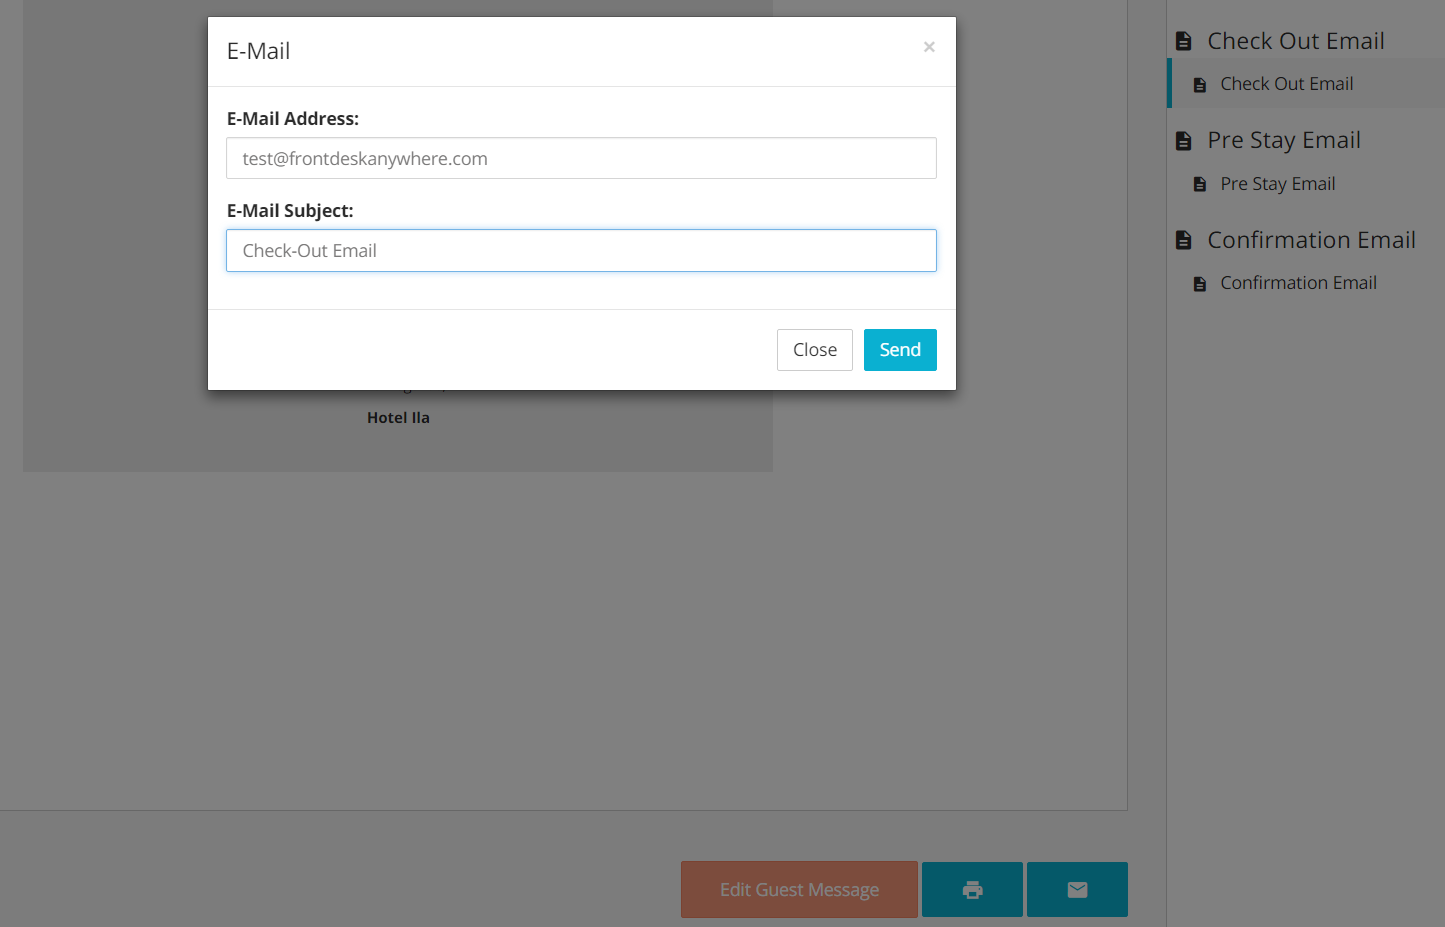
- A new panel will appear, and you will be prompted to fill in the receipient’s email address and the email subject; click on the button Send when ready.
- A confirmation message will appear on the top of the screen:

Tags: