Setting up your rooms in your Frontdesk Anywhere is a good way to start building your account and make it look like your hotel. This operation involves not only creating rooms, but also building amentities, define the levels you wish to have rooms organize, load pictures and much more. In the sections below you will learn the best ways to create your hotel room structure.
Room Configuration is probably one of the first steps you will take towards setting up your Frontesk Anywhere account. We recommend you to follow the order below when building your rooms, as some items are requirements for building other items.
Floors
Let’s start by set up floors at your property as this is a requirement for room configuration. Floors also serve to group together your rooms on the Tape Chart and on the Housekeeping tab.
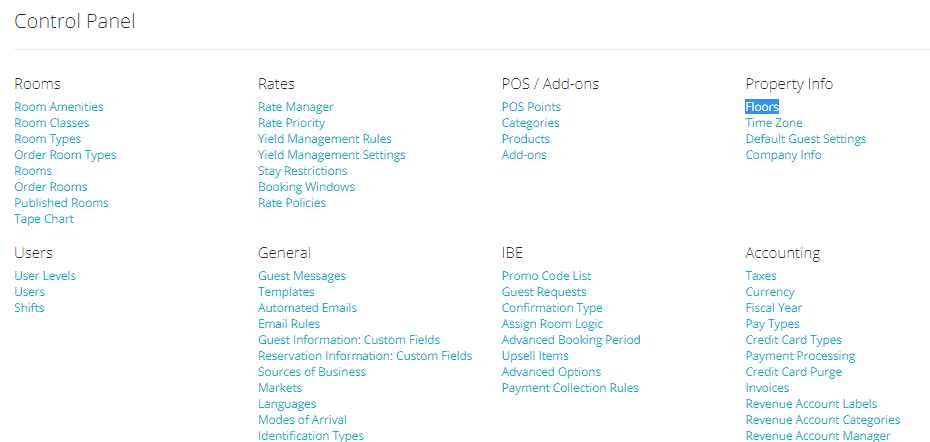
- In the Admin Settings, click on the link Floors under section Property Info:
- Click on the blue button Add a Floor to add floors; a small pop-up window will prompt you to place the name of the new floor:
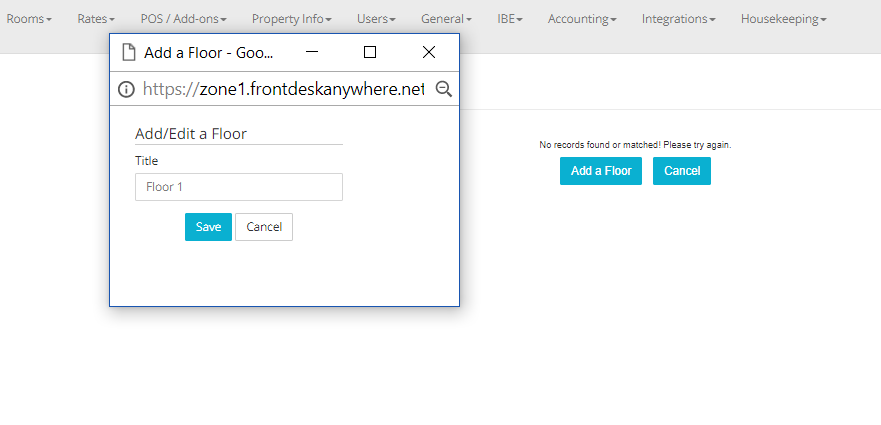
Click on the blue button Save when done.
Note: You can either number your floors (1,2,3, etc.) or name them (First, Second, etc).
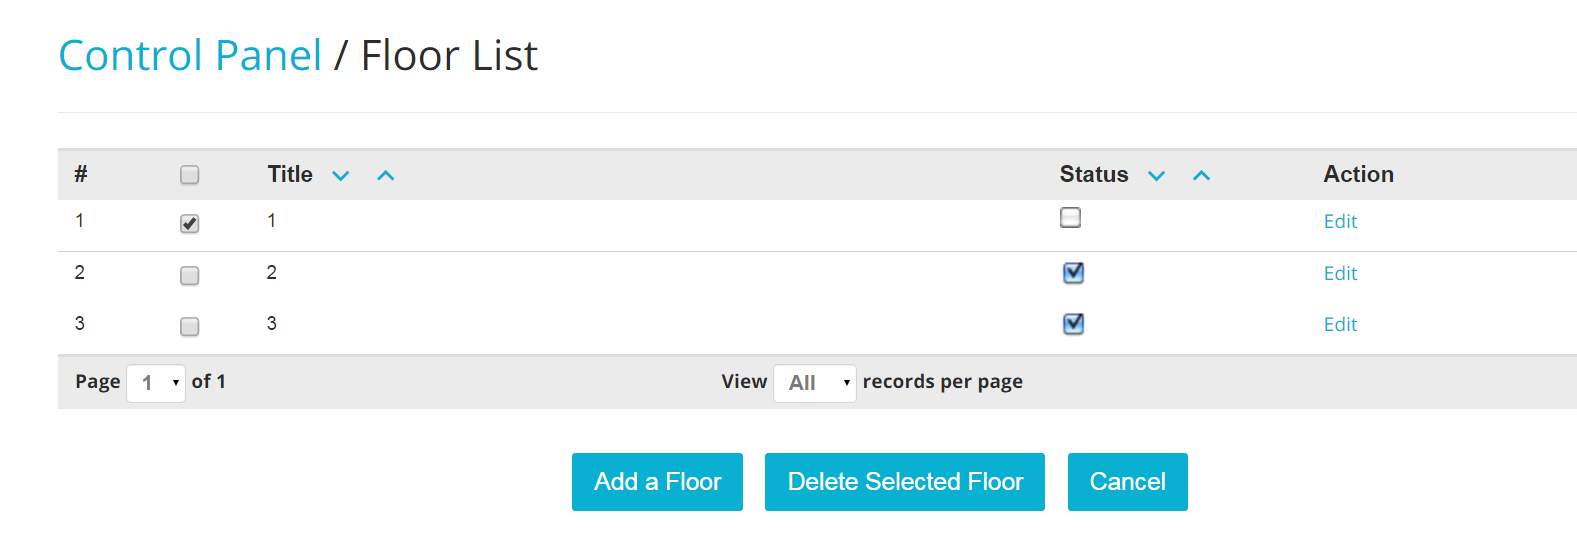
- To EDIT a floor, click on the blue link Edit on the relevant row:
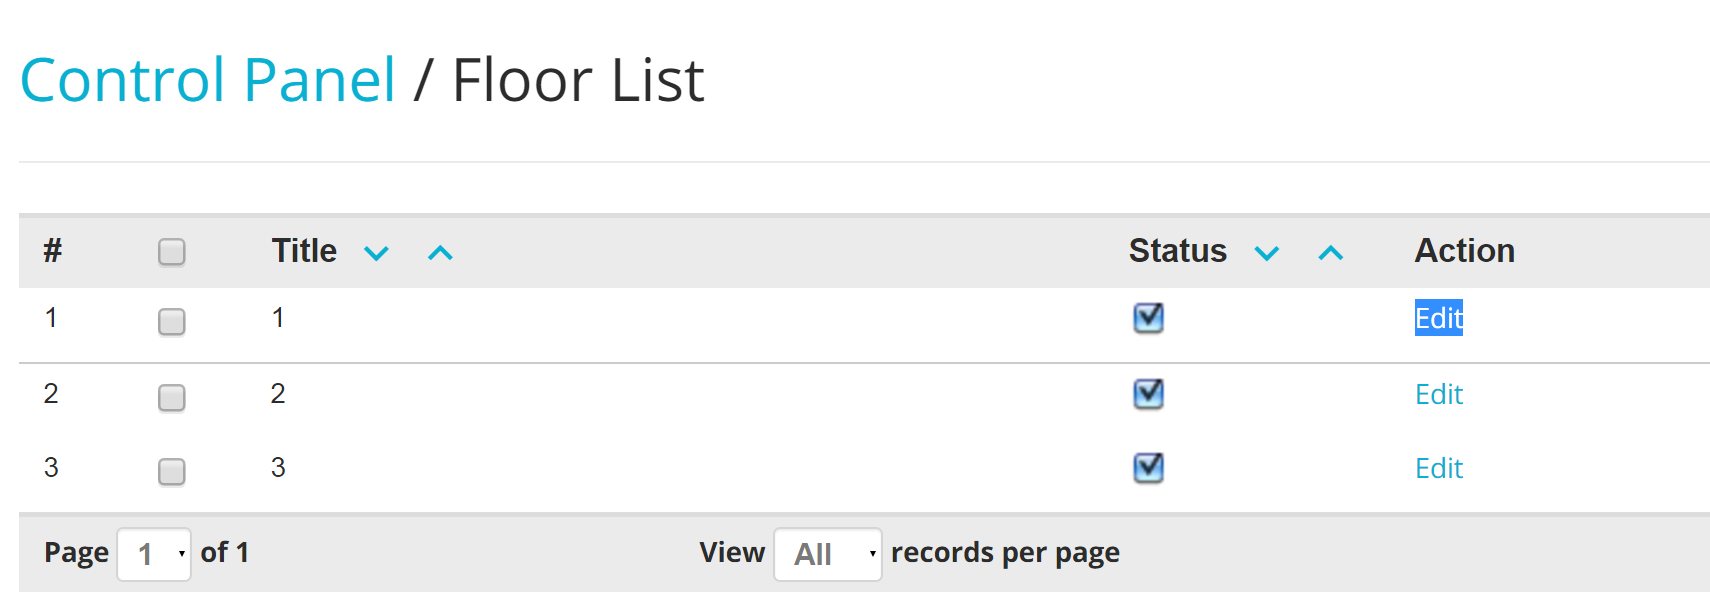
The same small window will pop-up: edit the name and click on the button Save when done.
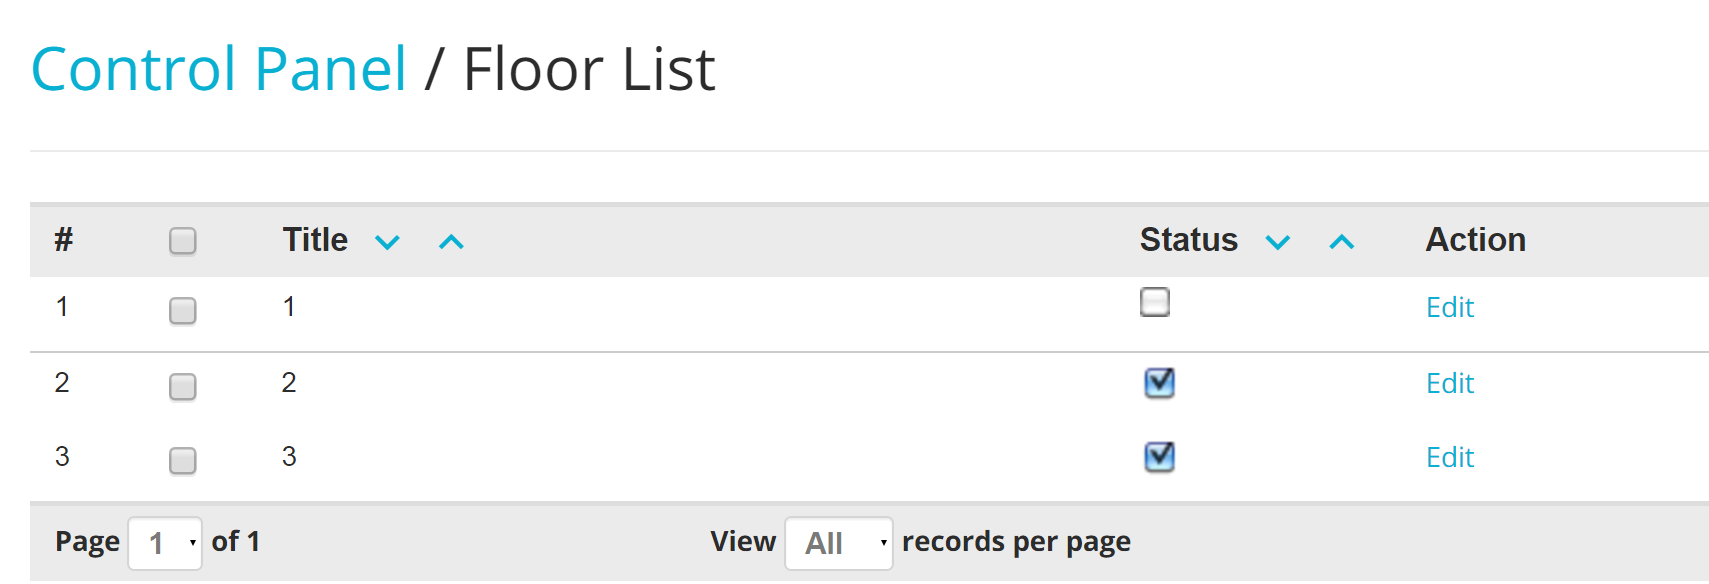
- To DEACTIVATE a floor, un-check the box under column Status for the relevant row:
- To DELETE a floor, select it by checking the check-box on the left hand side of the relevant row, and click Delete Selected Floor:
How To Use Floor
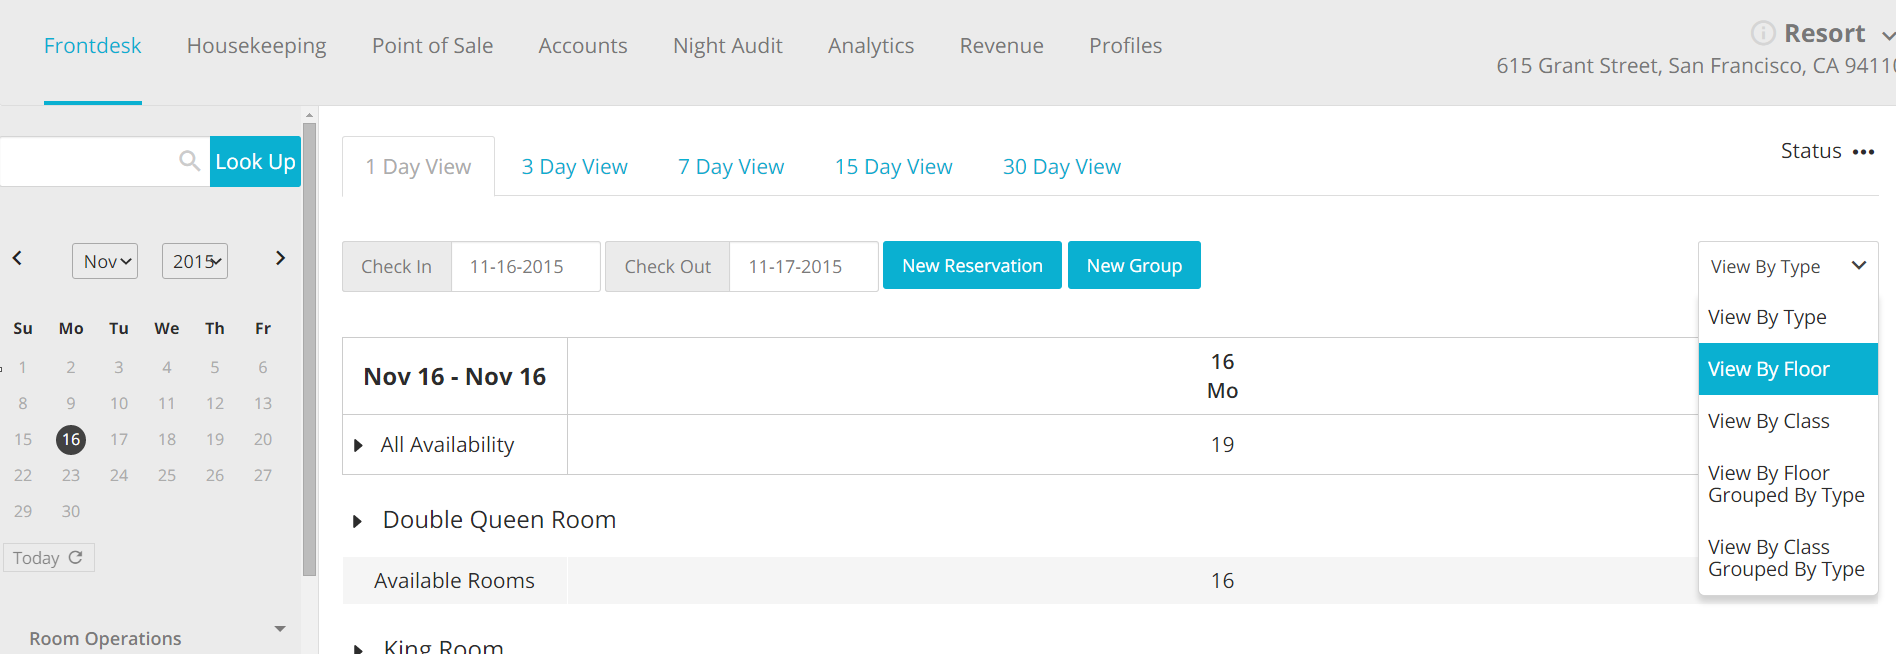
When you log in into your account, go to the Frontdesk Tab: on the right hand side there will be a scroll down menu with the tag View by Type. Click on the scroll down menu and select View by Floor to visualize your rooms grouped by floors.
Amenities
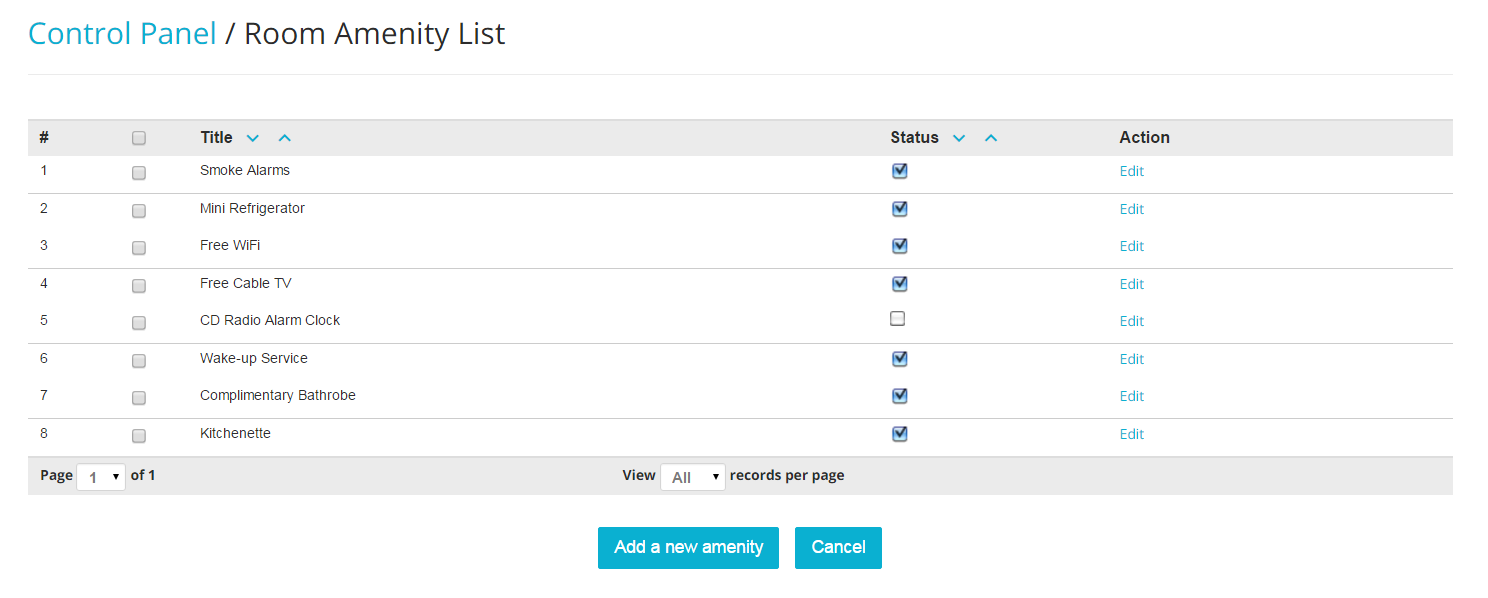
Before creating your rooms, you will need to configure the amenities that are available in your rooms. Make sure to create all of the amenities, independently of the type or room level in which they appear.
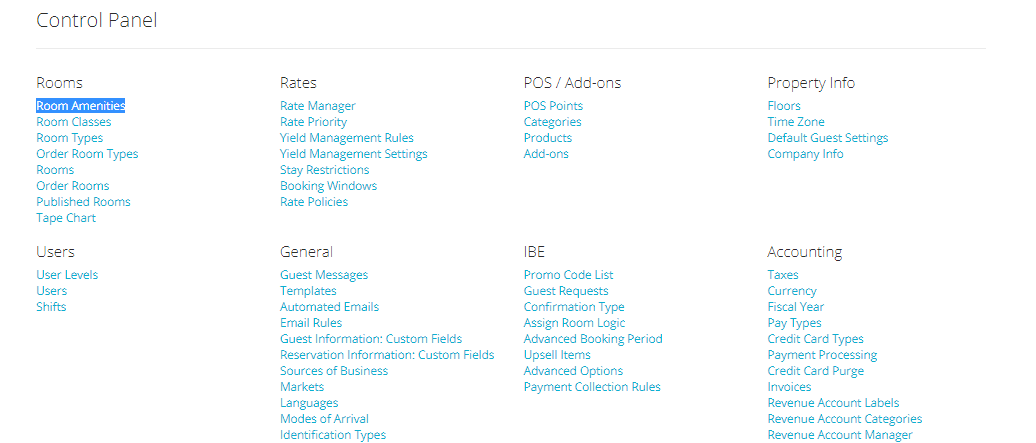
- In the Admin Settings, click on the link Room Amenities:
- Click on the button Add a New Amenity:

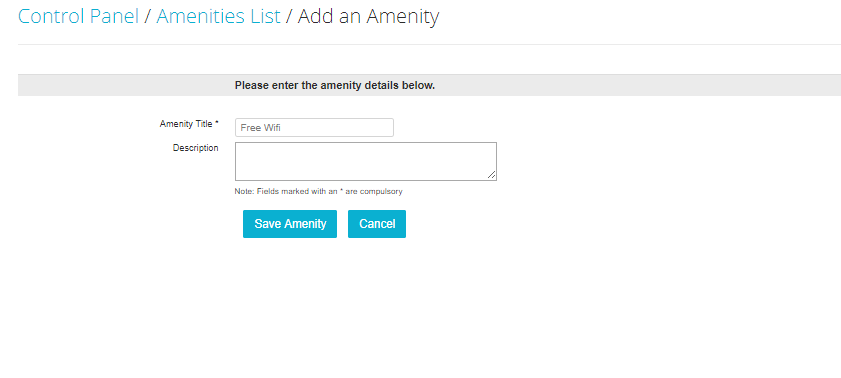
- Type in the amenity name in the first field. You may leave empty the Descriptio box, as it is only used on this screen. Click Save Amenity when done:
- To EDIT an amenity, click on the link Edit on the left side of the panel:
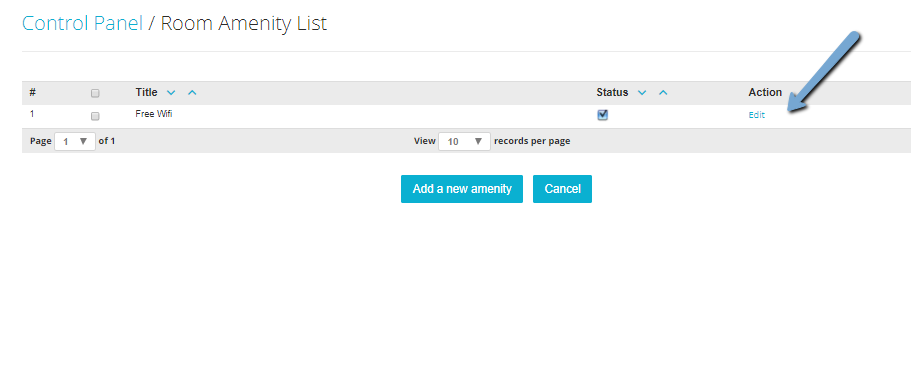
- To DEACTIVATE an amenity, uncheck the box under the column Status, corresponding to the relevant row:
Room Classes
A room class is a general concept referring to any extra organizational level you wish to have for your rooms. For example, if your hotel offers bed dorms, you can create a ‘dorm’ class to group your beds; or if you have different buildings, you can treat classes as ‘buildings’, and easily check for availability. Room Classes represent a grouping level for rooms but only for internal purposes: your guests won’t be able to see nor to book a rom listed under a specific class.
Important: Room Classes is a requirement for room configuration: if you think you may not need it, we recommend you build at least one class called All Availability.
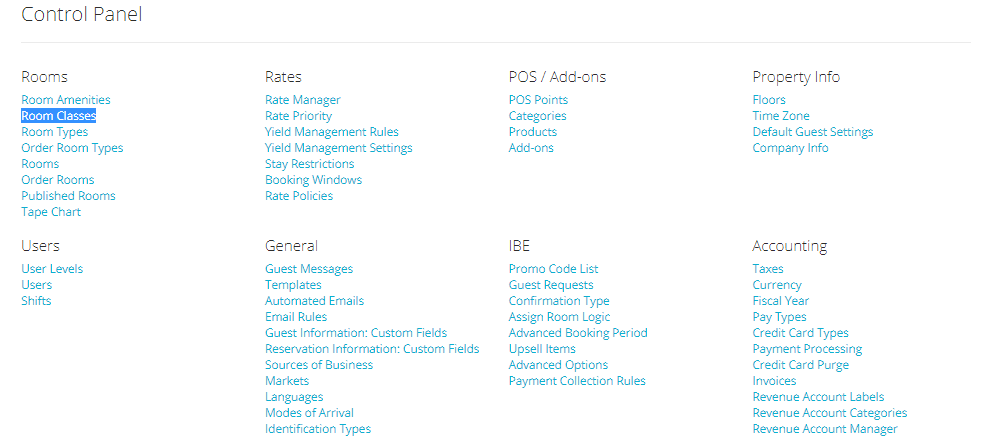
- Start by clicking on the link Room Classes in the Admin Settings:
- You can create a new class by clicking on the blue button Add a Class and a small window will pop up: type in the name of the class you wish to create and click on the blue button Save
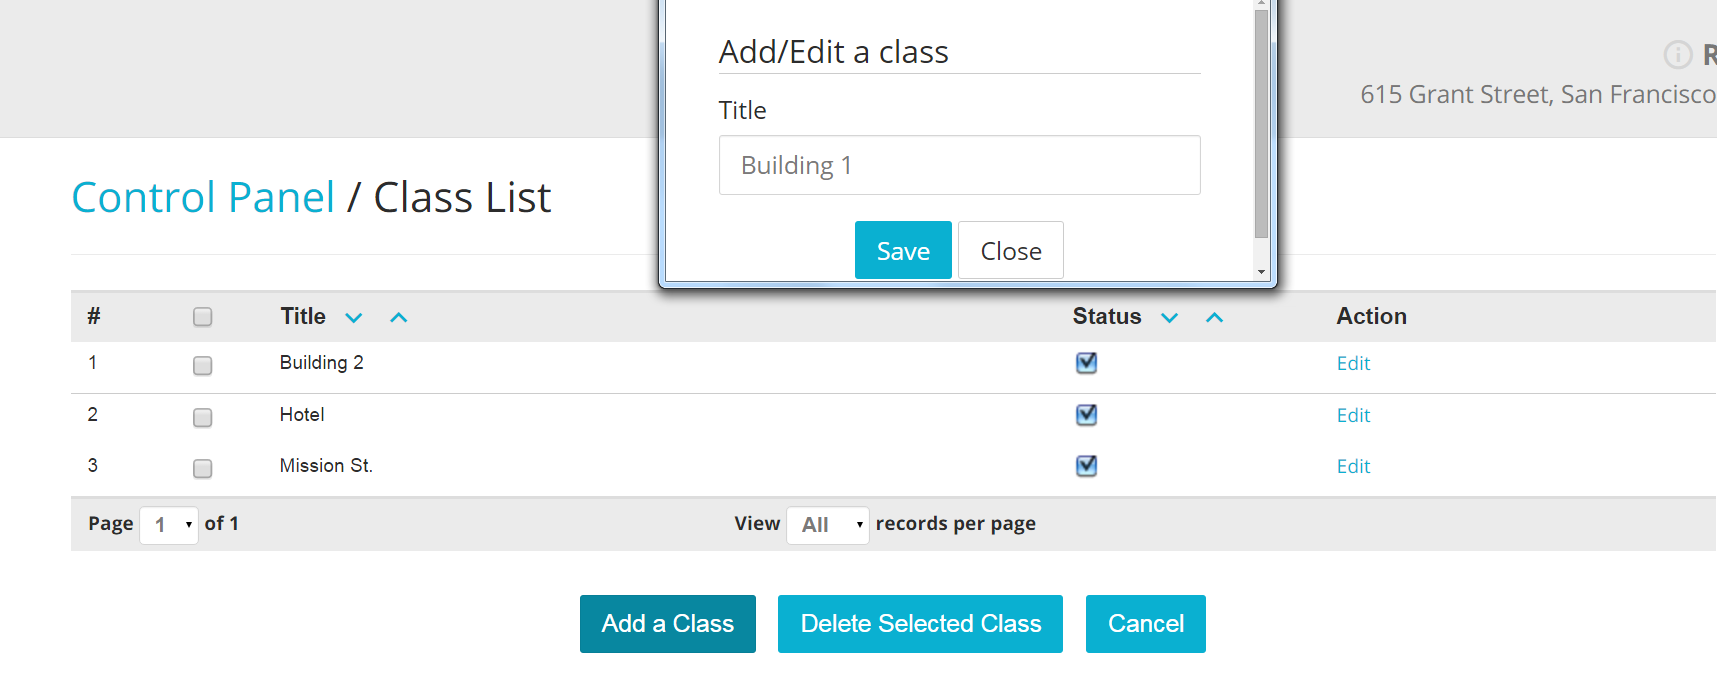
- To EDIT a class, click on the blue button Edit on the right hand side of the class you wish to amend:
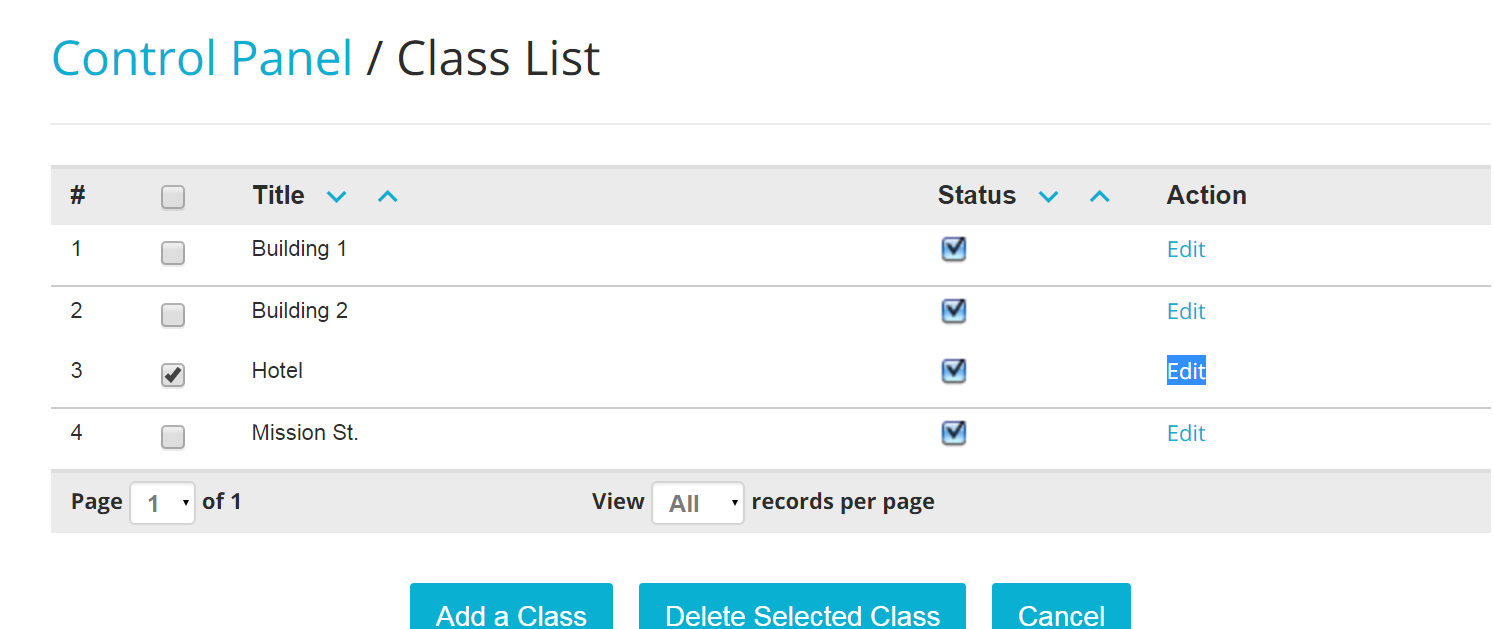
Insert the updated name and click on the button Save
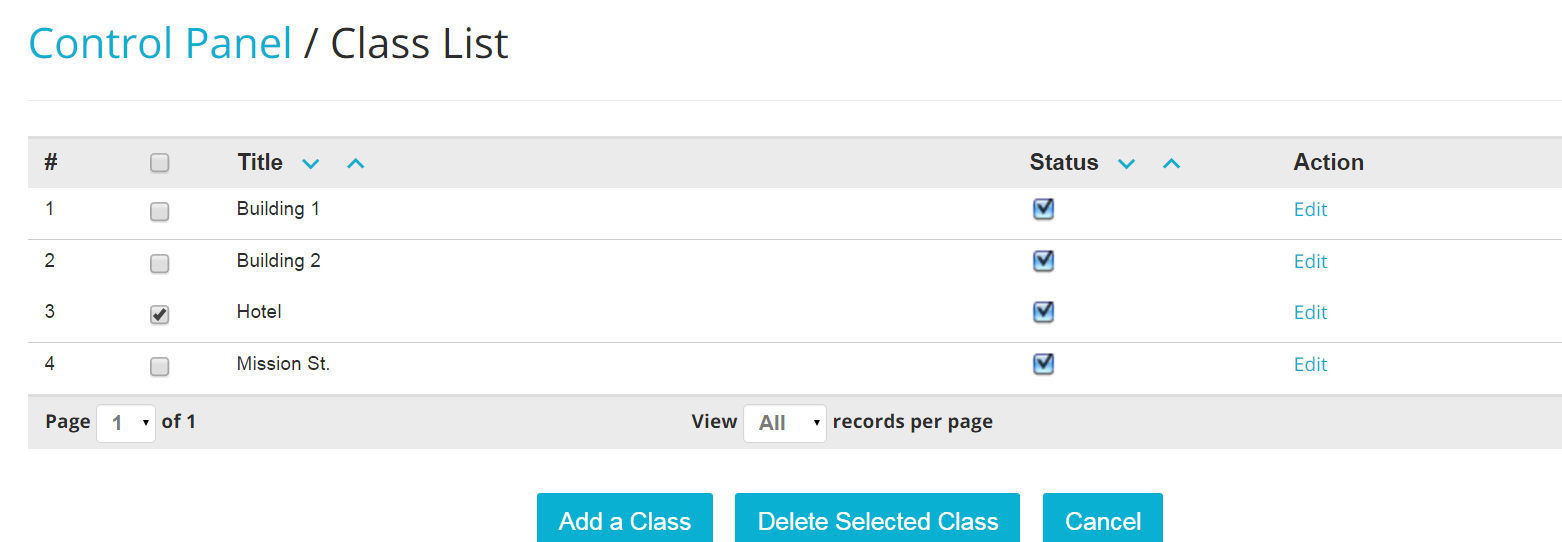
- To DELETE a class, check the box on the left side of the class you wish to erase, and click on the blue button Delete Selected Class:
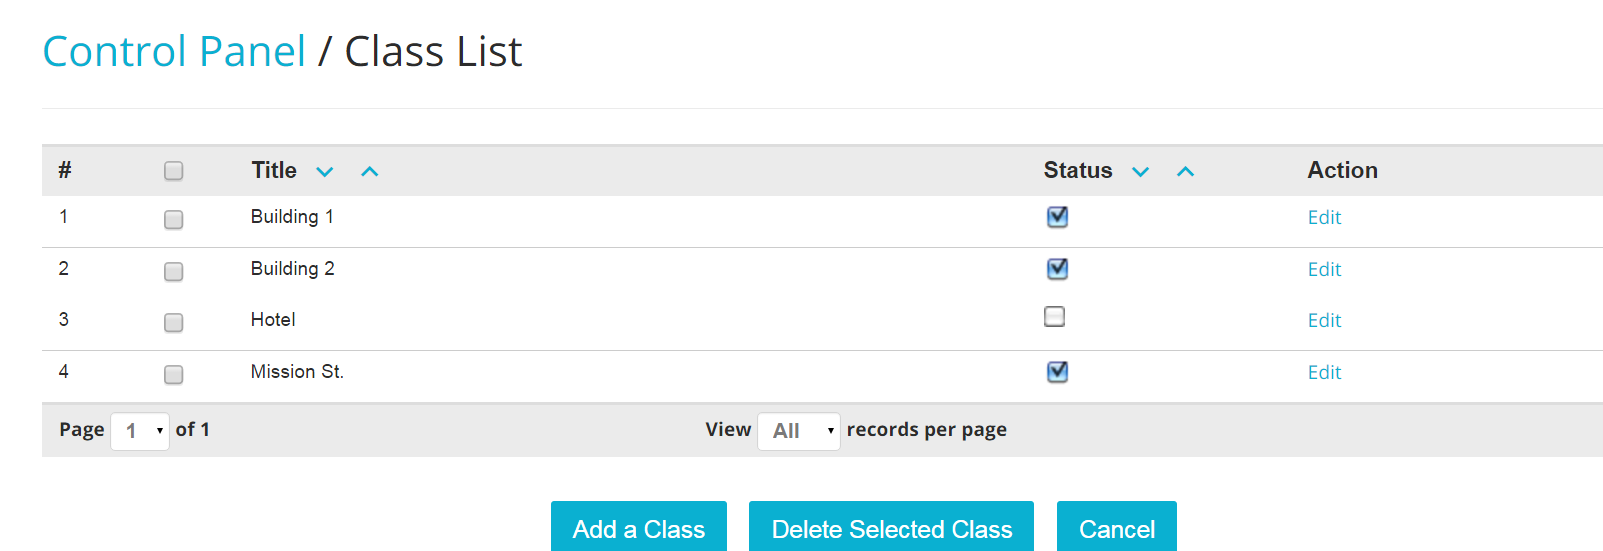
- To DEACTIVATE a class, un-check the box under column Status relevant to the class you wish to make inactive:
How to Use Classes
When you log in into your account, go to the Frontdesk tab: on the right hand side there will be a scroll down menu with the tag View by Type. Click on the scroll down menu and select View by Class in order to have your rooms grouped by classes:

Room Types
We have now come to the point where you need to build your hotel’s room types: as we understand it, a room ‘type’ is defined by the occupancy level, its position in the bulding and the type of amenities it offers. For example, common room types are ‘King’, ‘Queen’, ‘Twin’, and so on.
- Start by clicking on the link Room Types under section Rooms in the Admin Settings:
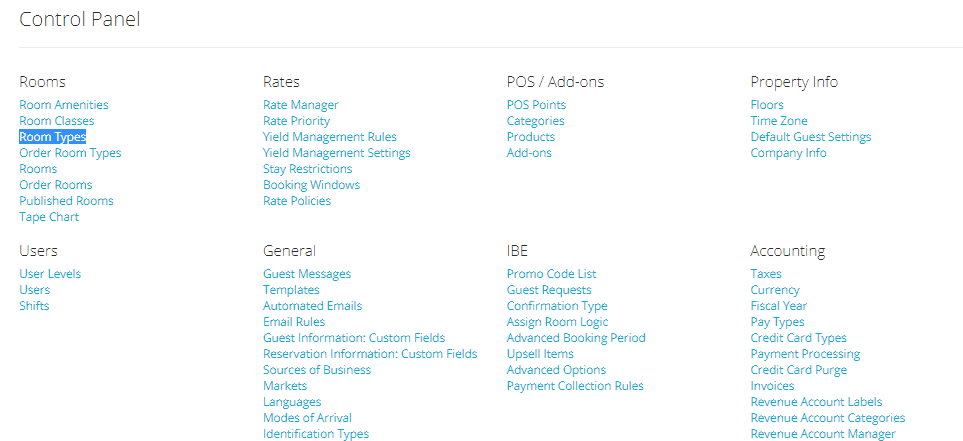
- To create a new room type, click on the blue button Add a Room Type:
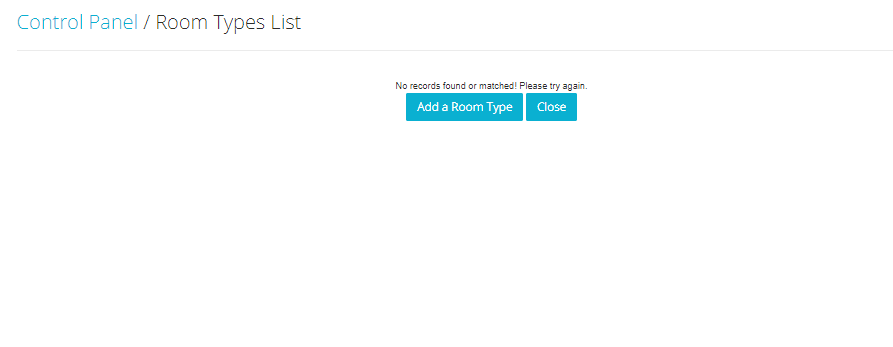
- Fill up the fields with the requested information: place the name of the room type in the field Title and the accronym you want to use: the latter will show up before the actual room number for all those rooms listed under this type. Place a small description of your type, too:
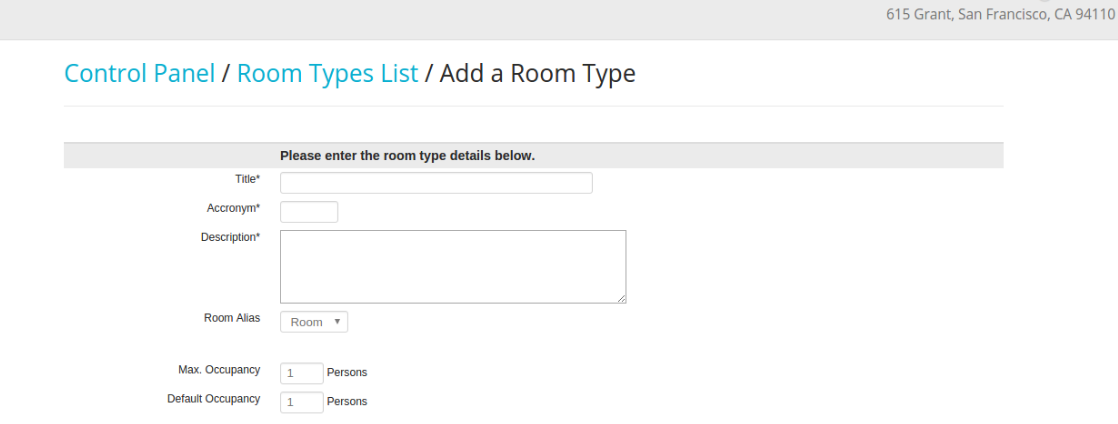
- From the Room Alias drop down menu select whether the room type should be considered as different from a ‘room’: if you are a hostel, for example, you would probably choose ‘bed’ and if you are a campground, you will choose ‘site’:
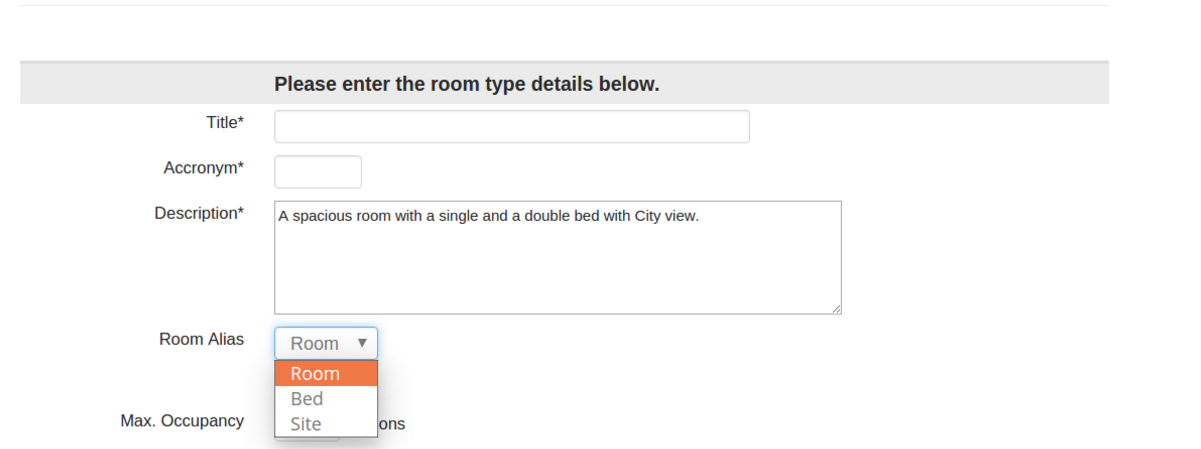
- Select the maximum and default occupancy by inserting the desired value in the apposite boxes. If you need to limit the number of children allowed, click on the check-box Limit Children. Place the maximum number of children allowed in the box:
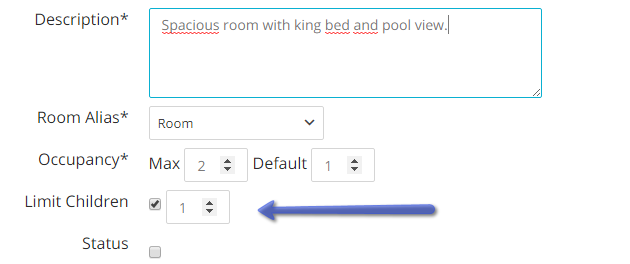
- Click on the Status box to make the room type active upon saving. Finally, click on all applicable amenities for the room type:
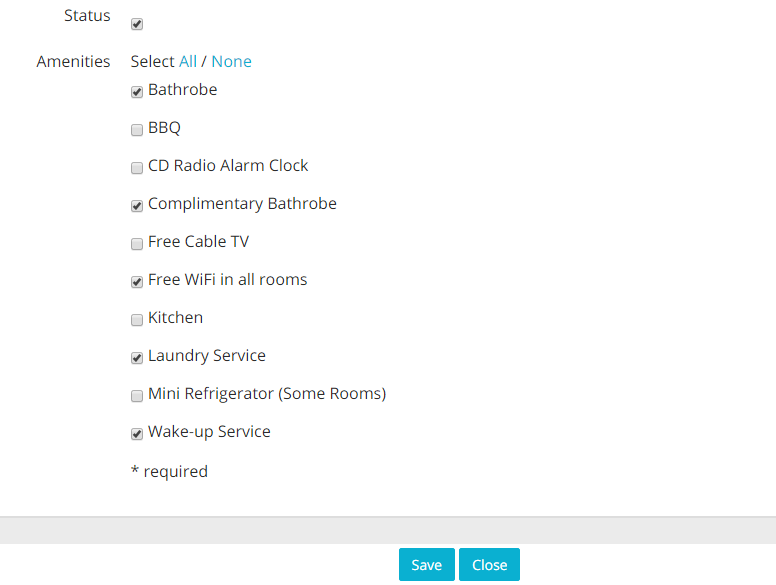
- Click Save when finished.
Load Room Type Pictures
- Go back to the Room Types List (Admin Settings - Room Types) and click on the blue link Images on the right hand side of the relevant room type:
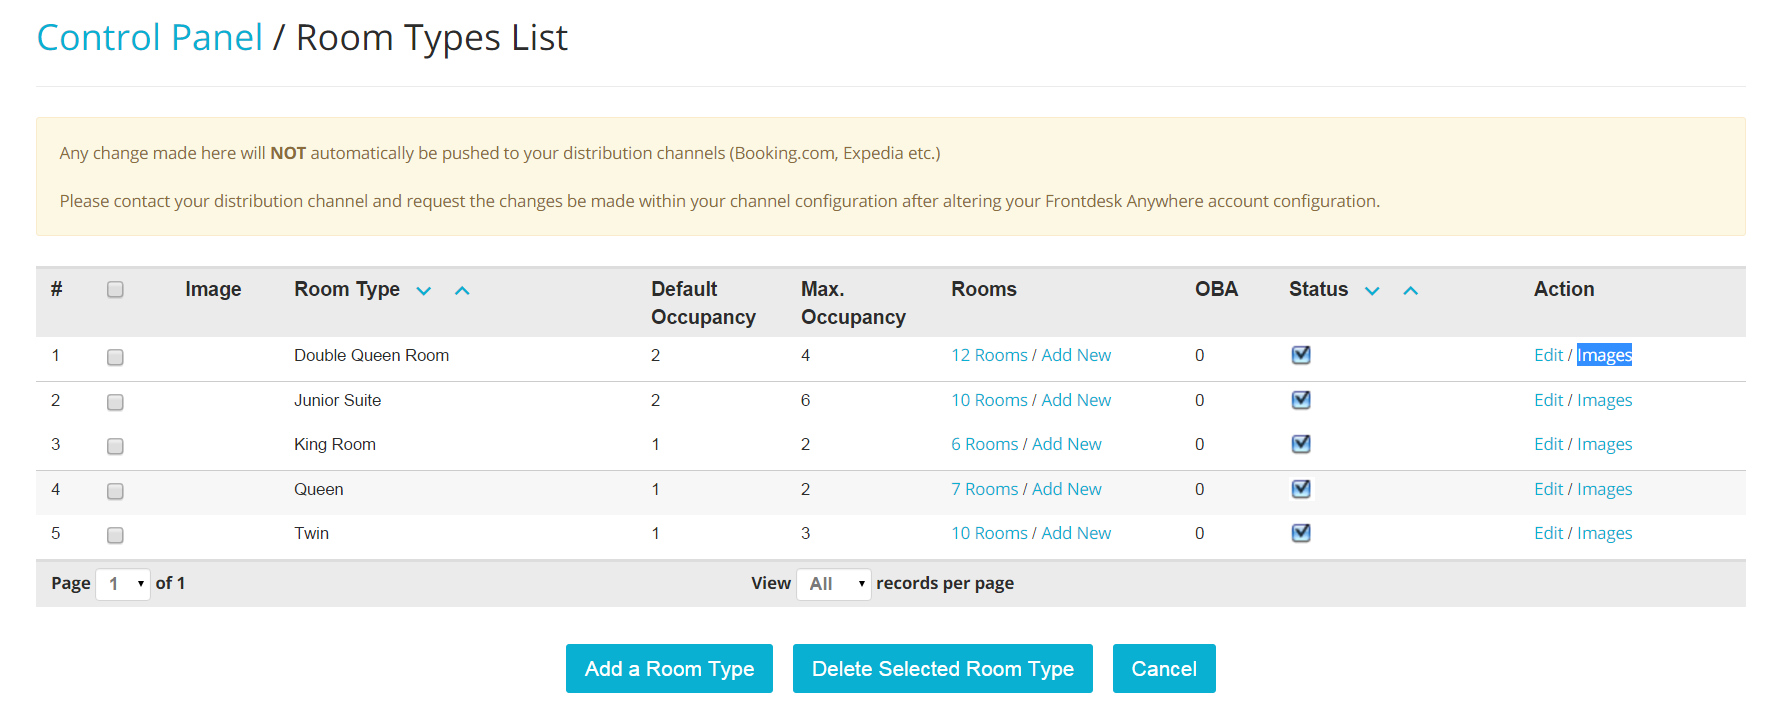
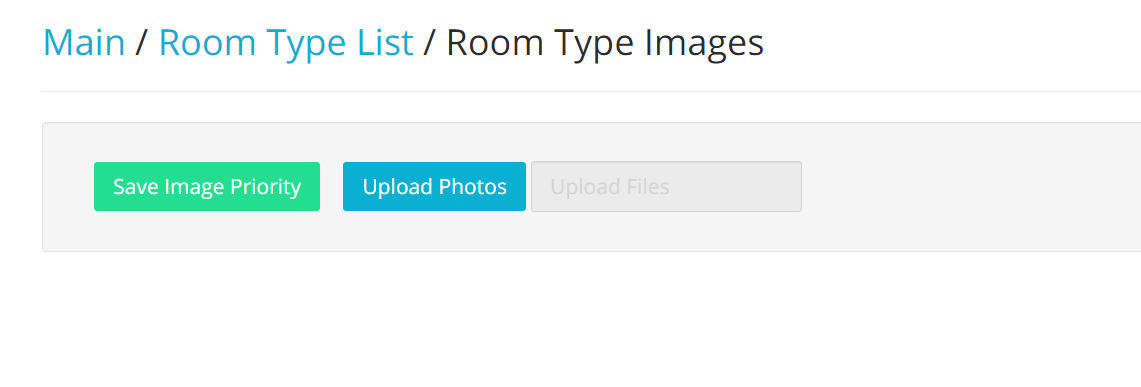
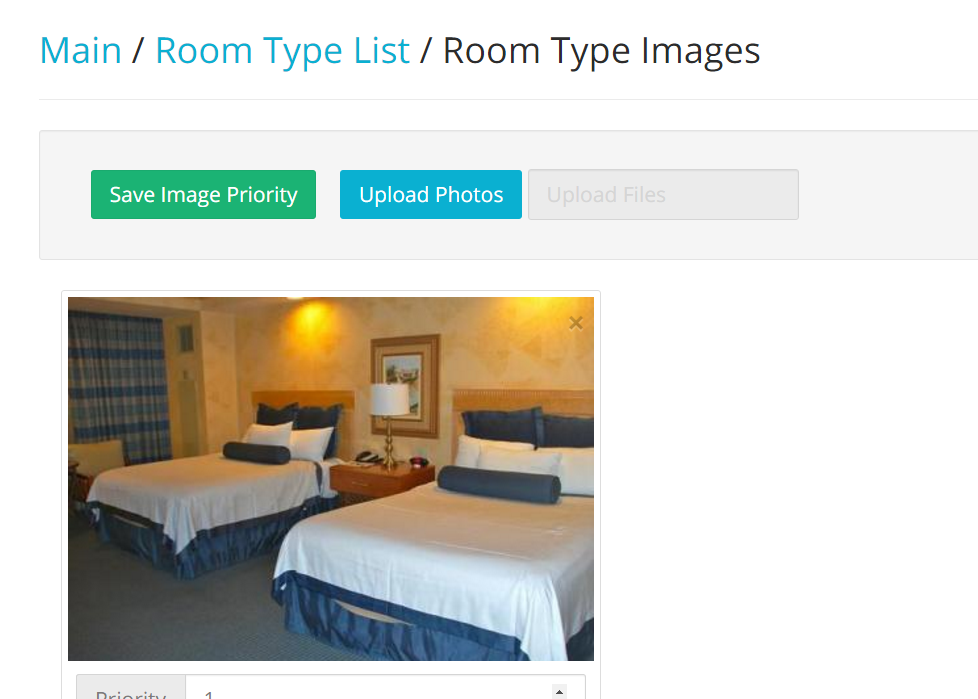
- To upload a picture, click on the blue button Upload Photos:
- You can upload more than one picture, and decide the order in which they are going to appear by setting the right priority at the bottom of any uploaded picture:
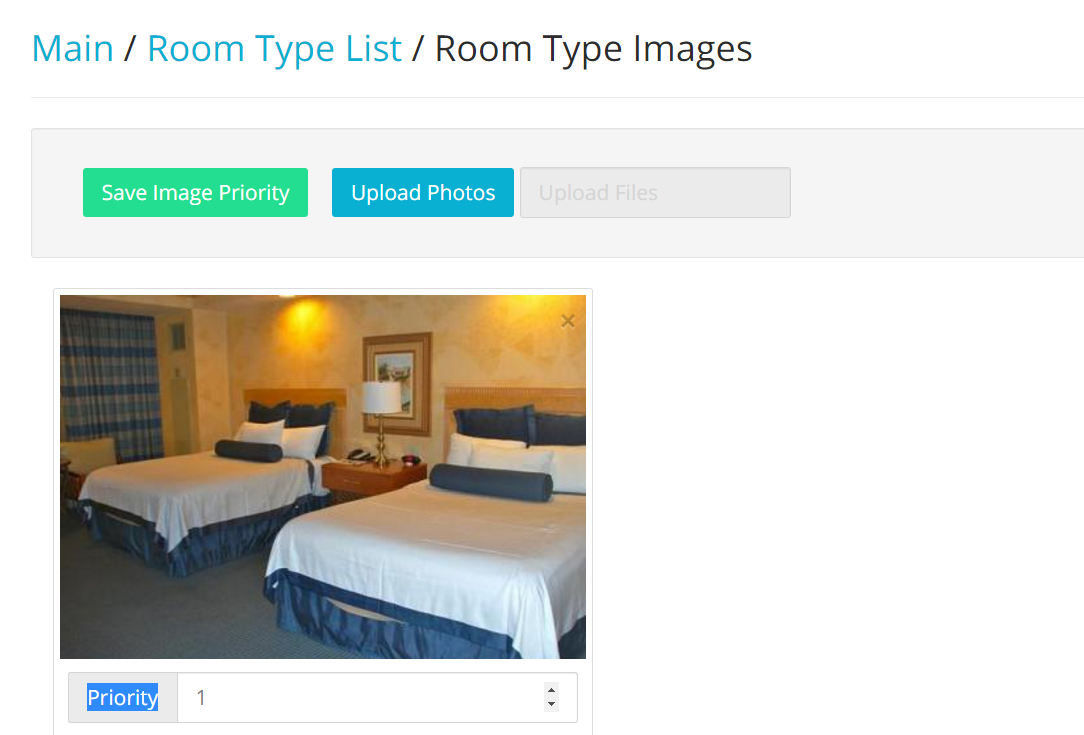
- Once you have set up the priority, click on the green button Save Image Priority:
Room Availability Period
Before configuring the rooms that will be listed under each room type, you will need to configure a Room Availability Period: it defines the time period when each room is available. If you are running a seasonal buisness, for example, you will be able to pre-configure when your rooms are available in the system. This feature also comes handy if rooms need to be taken off the availability chart for a limited period of time. We remind you that configuring a room availability period is a requirement for room creation: if your hotel runs all year long, you will simply need to create one availability period.
- In the Admin Settings, click on the link Room Availability Periods under section Rooms:


- In the Title field, type in the name for the availability period. Then, select the availability starting date by clicking one the Availability Start field:

- Choose when the availability period should end. If your hotel runs all year long, simply check the Ongoing circlebox. Otherwise, click on the circlebox Set End Date: then click on the field below to choose an end date:

-Activate the availability period by checking the Status box, and click on the blue Save button:

Rooms
You can now load in the system all of the rooms at your property, and organize them around the room types, classes and floors you have created.
- In the Admin Settings, click on the blue link Rooms under section Rooms:
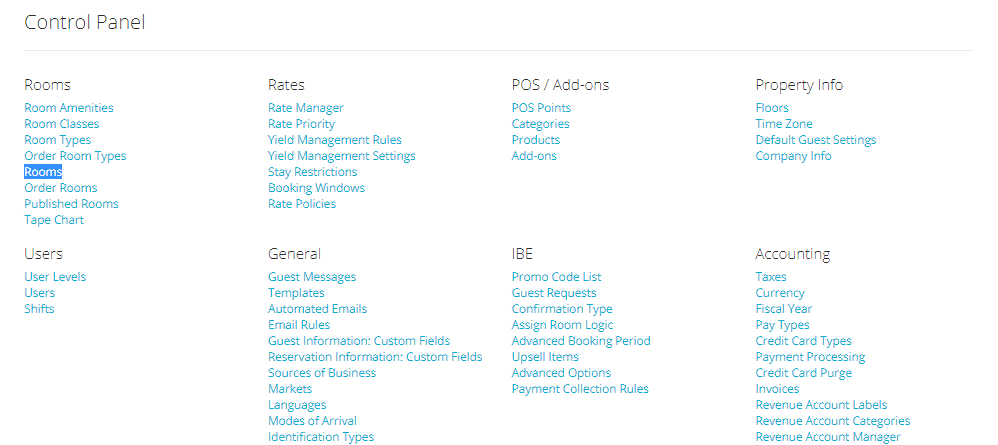
- To add a new room, click on the button Add:

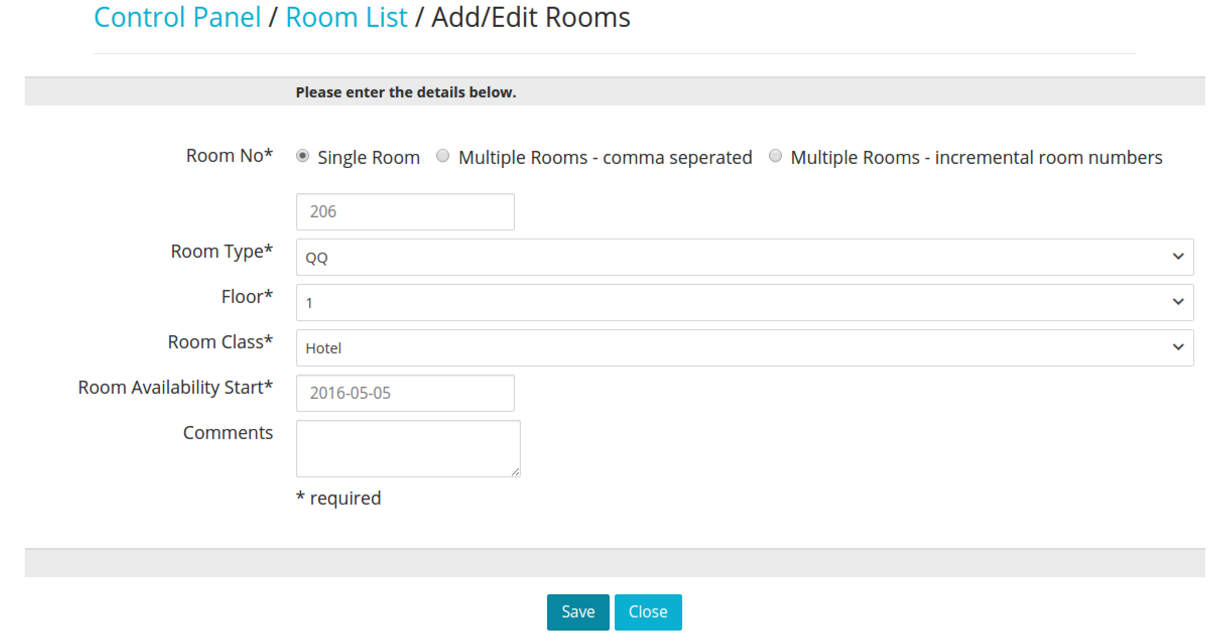
- To create one room at a time, select the option Single Room, and fill in all the information: insert the room name/number in the Title field. The Description box is only used on this screen and can be ignored. Assign the room the right Room Type, Floor, and Room Class by choosing an option from the drop down menus:

- Activate the room by checking the Status box, and select an Availability Period. When done, click ont he blue Save button:

. Click Save when finished:
Creating Multiple Rooms
You will have two options to create multiple rooms.
- To create rooms that are under the same type, but have different names or numbers, select the option Multiple Rooms - Comma Separated:
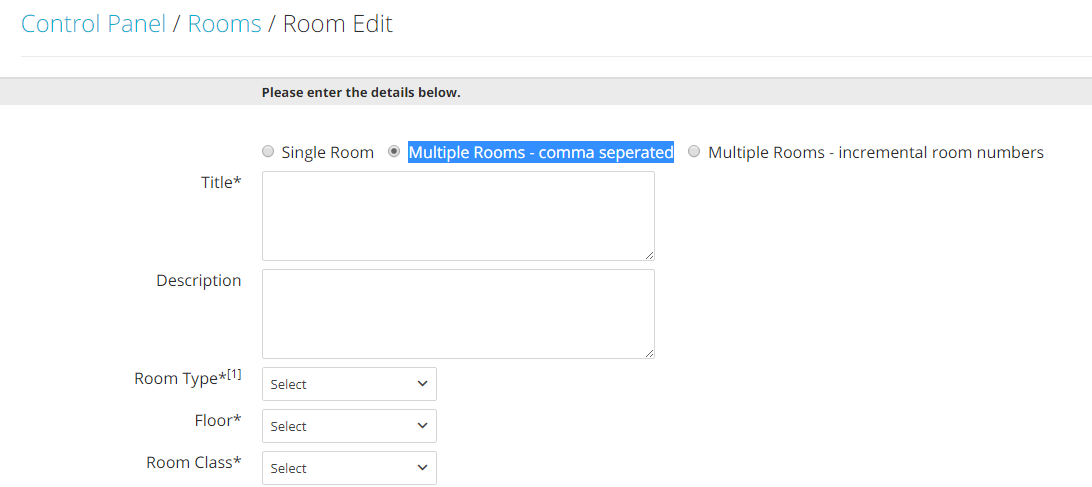
- Enter all room names/numbers in the editable box, separating each name/number with a comma and no space. The Description box is only used on this screen, and it may be ignored. Fill in all other information and when finished, click on the button Save:

- If your rooms are numbered in a progressive order, you may want to use the option to create Multiple Rooms - Incremental Room Numbers. Select this option by clicking on the circle box on the top of the room creation panel:

- Fill in the Prefix, and insert the first and last number of the progressive room order. In the example below, all rooms between 101 and 110 are going to be automatically built:

Important: The Prefix will be added to the room accronym. If you do not need both accronym and prefix before the room number, you may leave the Prefix field empty.
Fill in all other information and click on the button Save.
Order Room Types
You can decide the order in which your room types are displayed on your Tape Chart with just one click.
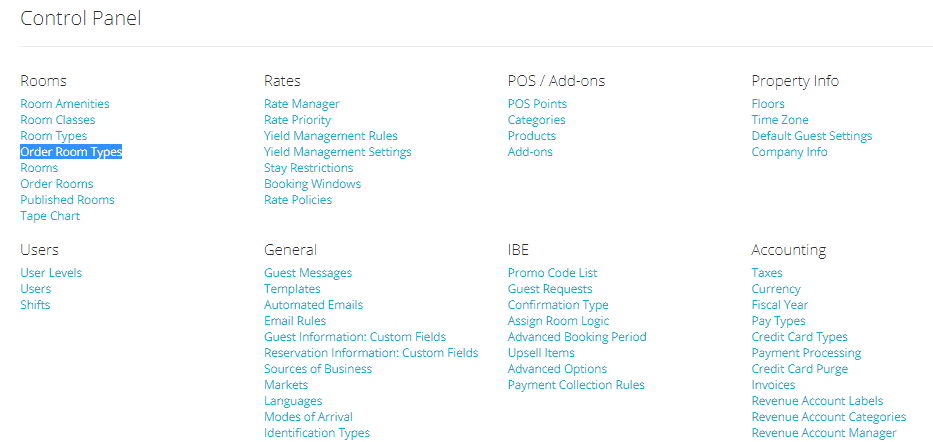
- In the Admin Settings, click on the blue link Order Room Types under section Rooms:
- You will see a list of all your newly created room types, each one with an editable box on the right hand side. Insert a numeric value in each box, according to the progressive order you want your room types to show up on the Tape Chart and click on the blue button Save:
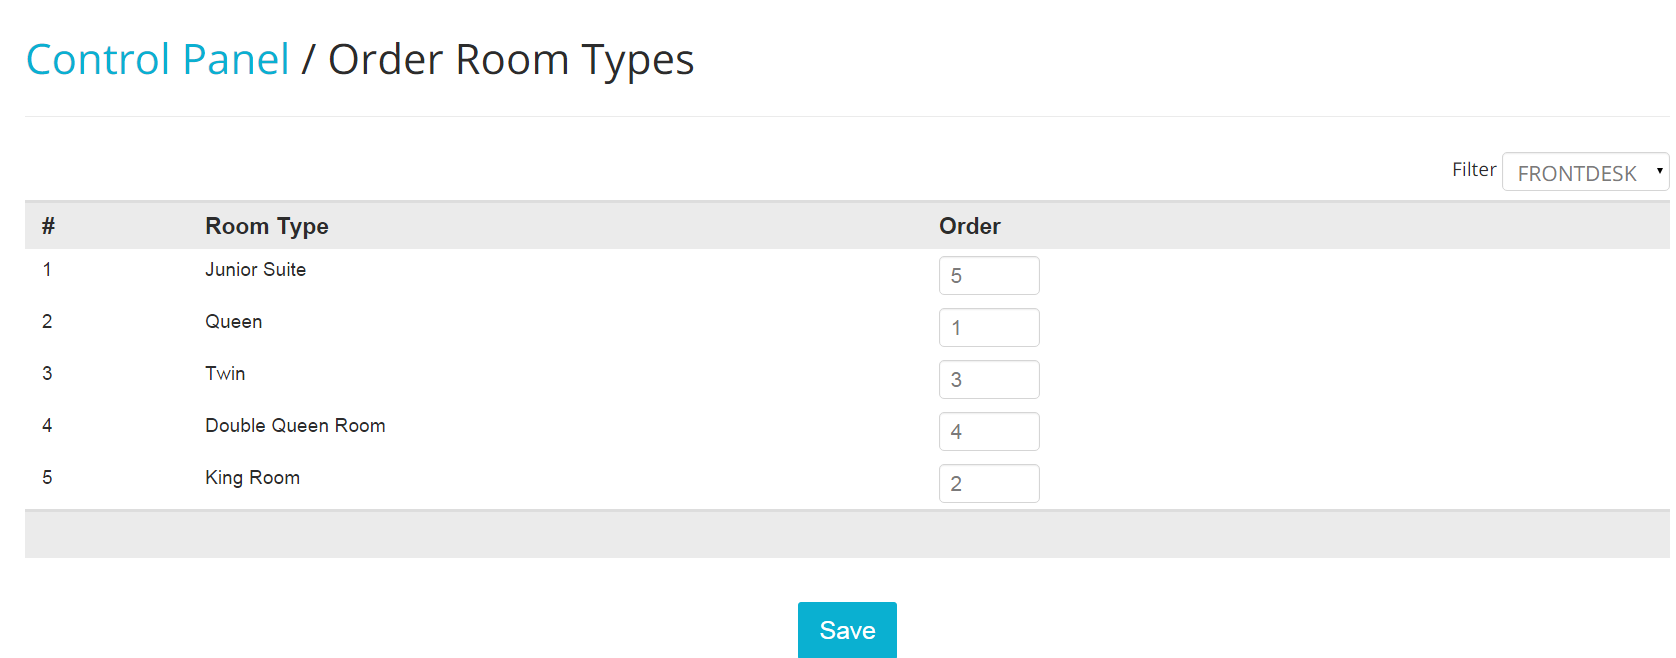
Note: In order to see changes being effective on your Tape Chart, do not forget to log out and log back in into the system. This will ensure a proper refresh of the room order.
Order Rooms
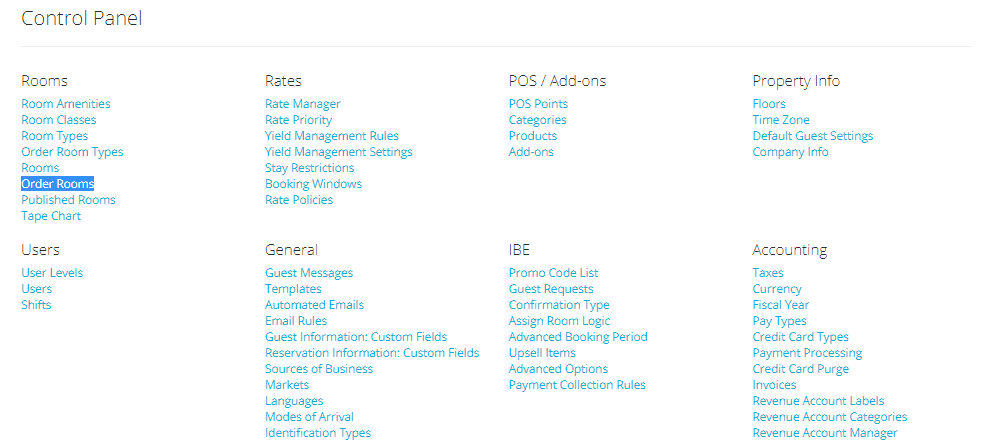
To order with which your rooms are listed under each type, click on the blue link Order Rooms, under section Rooms: a list of all your rooms will appear, along with an editable box on the right side: order your rooms by placing them in progressive order. When finished, click on the blue button Save:
Published Rooms
Frontdesk Anywhere allows you to take some rooms off all channels or to increase the availability value. You will have both the ability to select how many rooms you wish to protect and decide by how many reservations you wish to overbook.
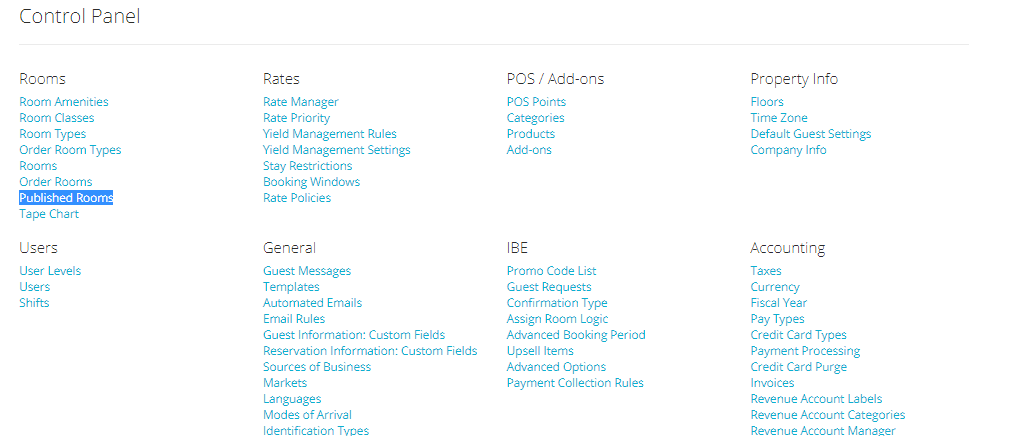
- In the Admin Settings, click on the blue link Published Rooms under section Rooms:
- You will see a list of all your room types, and four columns: the Real column shows the real availability for each type, meaning the number of rooms actually created and listed under a type; it is uneditable. The OBA column stands for Overbooking Allowance: you can edit this field and add the number of reservations by which you want to overbook. In the Protect column you will need to place the number of rooms you want to hide or protect from all channels. The Total column will show the final availability value; the latter is calculated in the following simple formula:
Real Availability + Overbooking Allowance - Protected Rooms = Total Availability
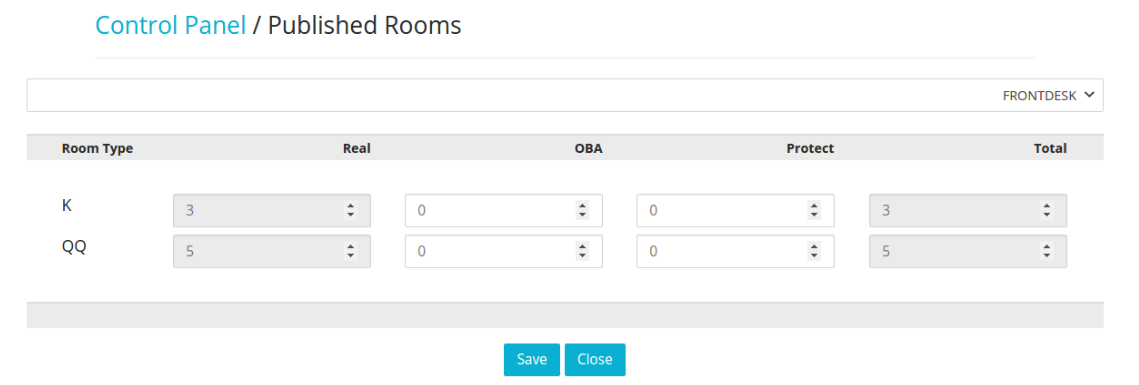
- For each room type, insert the number of rooms you want to protect and the number by which you want to enable overbookings for any external channel:
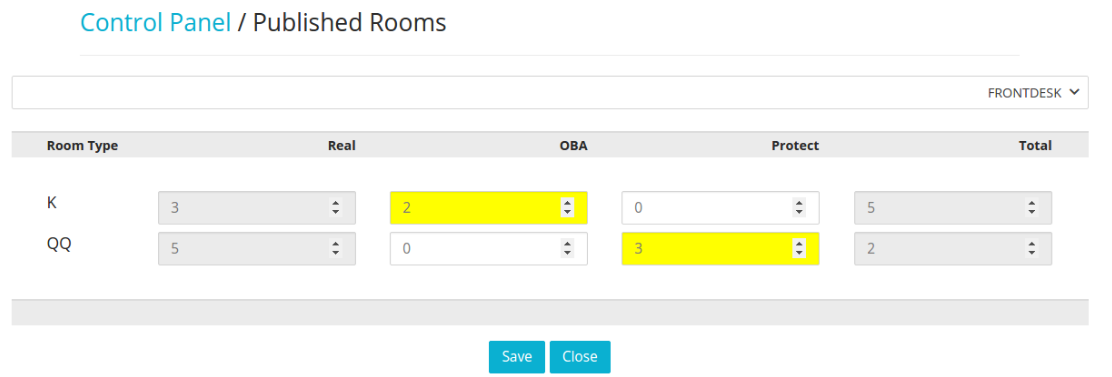
- Notice that there is a drop-down menu, defaulted to option Frontdesk: make sure to choose the right channel, before placing the OBA, or to protect rooms. You can configure different values for different channels:

Tape Chart/Refresh Your Availability
Running the Tape Chart ensures that all amendments made to rooms or room types are effective on the Tape Chart. It is also useful to refresh inventory on all integrated channels!
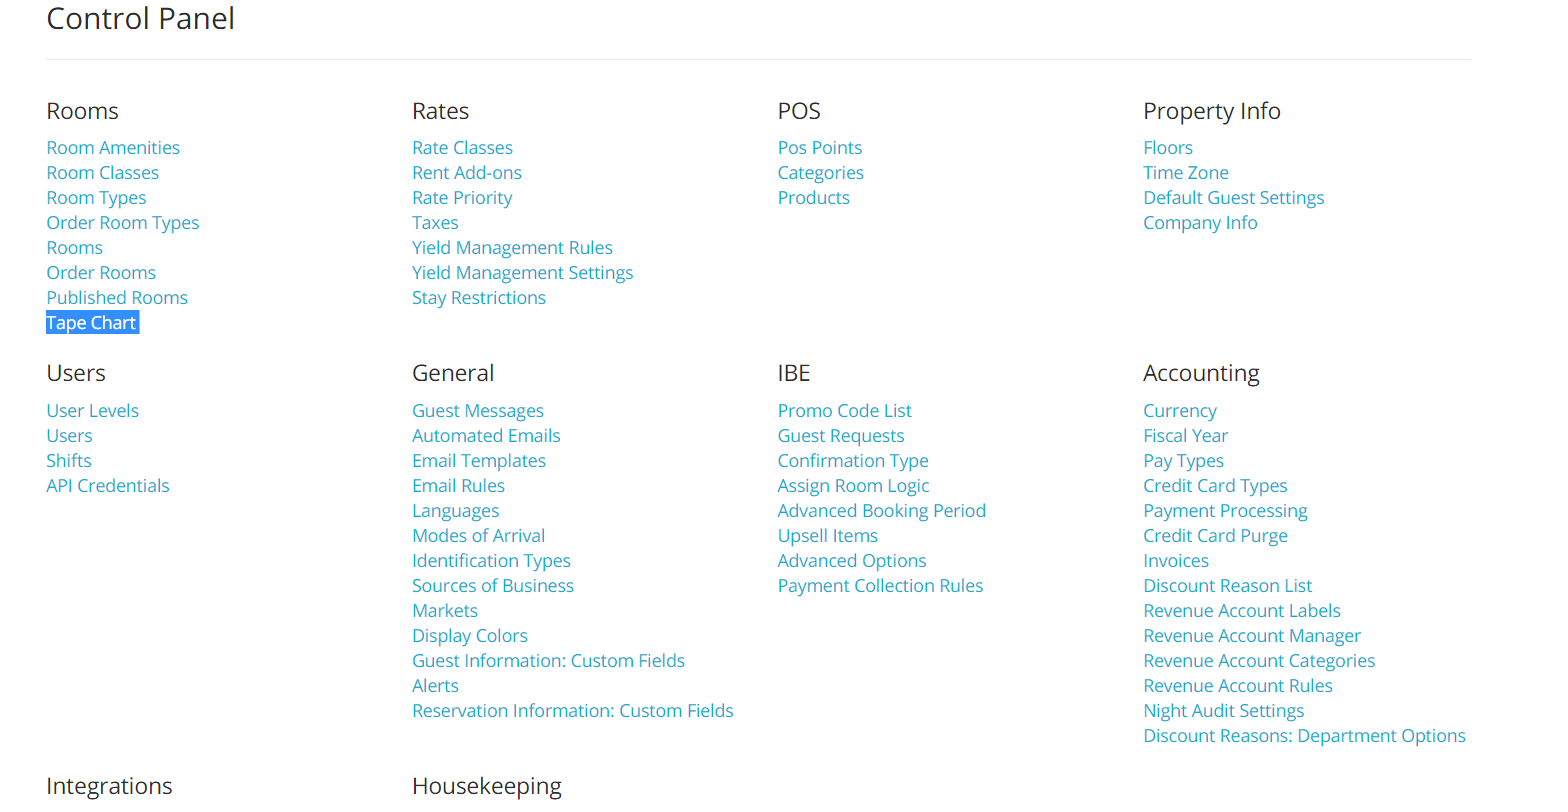
- To run the Tape Chart, click on the link Tape Chart under section Rooms:
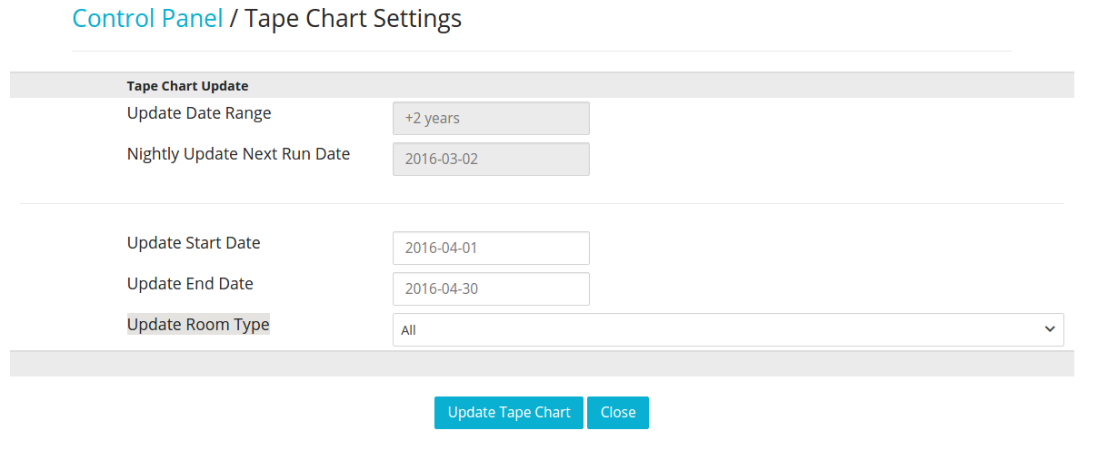
- You will see a panel, called Tape Chart Update:

The Update Date Range is uneditable, and it is fixed to 2 Years. This means that all integrated channels will receive from Frontdesk Anywhere up to two years worth of availability values. The Nightly Update Next Run Date will tell you when the Tape Chart is due to automatically refresh.
- If you want to manually refresh your availability, or if you have made changes in the room type/rooms configuration, you can use the scroll down calendars to select the date range you want to send the refresh for:
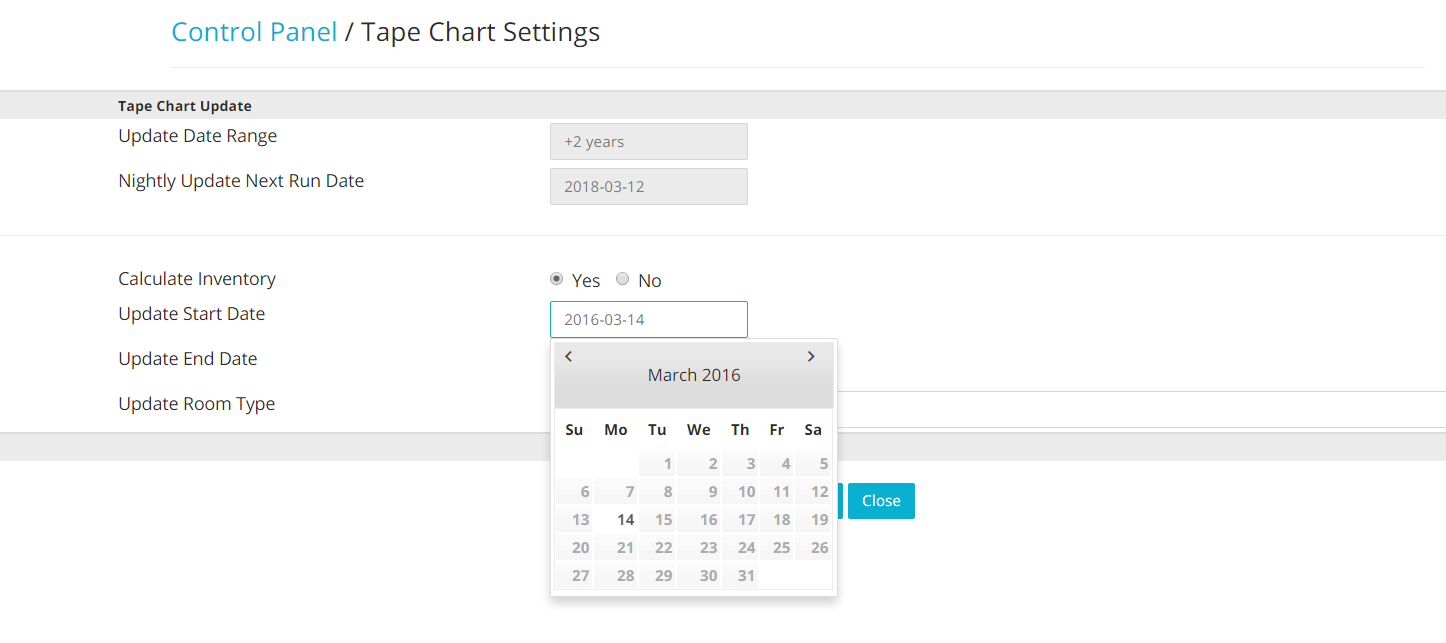
- You can also choose to update only a selected room type, and not all room types. Choose the relevant option from the drop down menu Update Room Type:
Calculate Inventory
Having the system Calculating Inventory depends on whether you want to send a hard refresh of inventory to the channels, rather than a simple push of inventory. Choosing to re-calculating your inventory means to re-build all of the information loaded in your Tape Chart and then send it to the channels. A simple push of inventory, on the other hand, means to send whatever information are already displayed on the Tape Chart to the channels.
Calculating Inventory might take a lot of time, especially if you have a big properties or a lot of information there. We do recommend to calculate your inventory from time to time, however try to do this during the night or when the need to access your system is low.
Choosing Room Priority for Incoming Reservations
Frontdesk Anywhere allows you to establish a priority for where newly created reservation interfacing with the software will be placed. This comes handy if you want your best rooms to always have reservations assigned, and by the same token, if you want certain rooms always to be filled up at last.
- In the Room Order panel, you will notice that there is a drop down menu on top of the panel:

The drop down menu lists all channels where reservations can interface with the software.
- For any channel you currently use, insert a numerical, progressive order in the apposite field, just like you were ordering your types and your rooms on the Tape Chart. When done, click on Save: reservations interfacing with the system will first go to the rooms that have the highest priority.
