Frontdesk Anywhere allows you to create as many users as you want, and as many access levels as you need. Although the login page will be the same for all users, you can limit what each can do and tailor-made what is displayed for each of them upon login.
Creating User Levels
Creating different access levels for the system may be necessary to protect certain sensitive information and to enable higher management to have an overrall access to the system. Levels are also used to limit what is displayed to a certain user when they log in into the account. Our first step will be to create those User Levels; once that is done we will need to assign each user to their respective level.
- In the Admin Settings, click on the blue link User Levels under section Users:
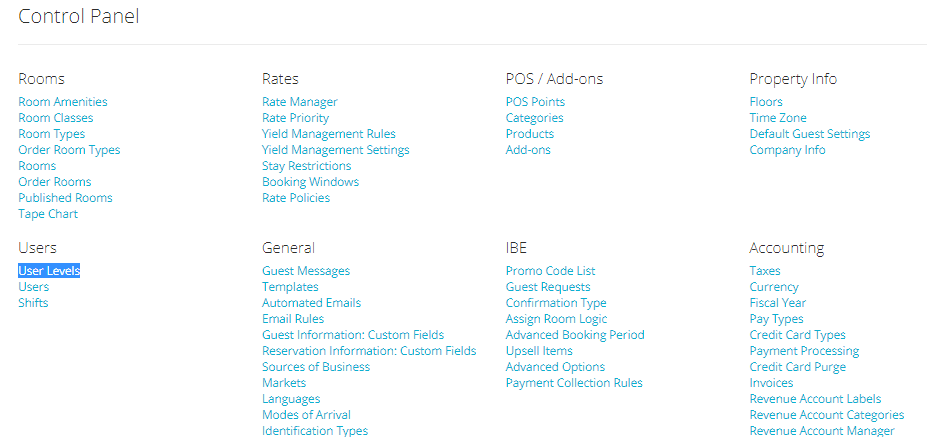
- Your system comes with two defaulted common access levels, Frontdesk and All Access that reflect concierges access and managers type of access :

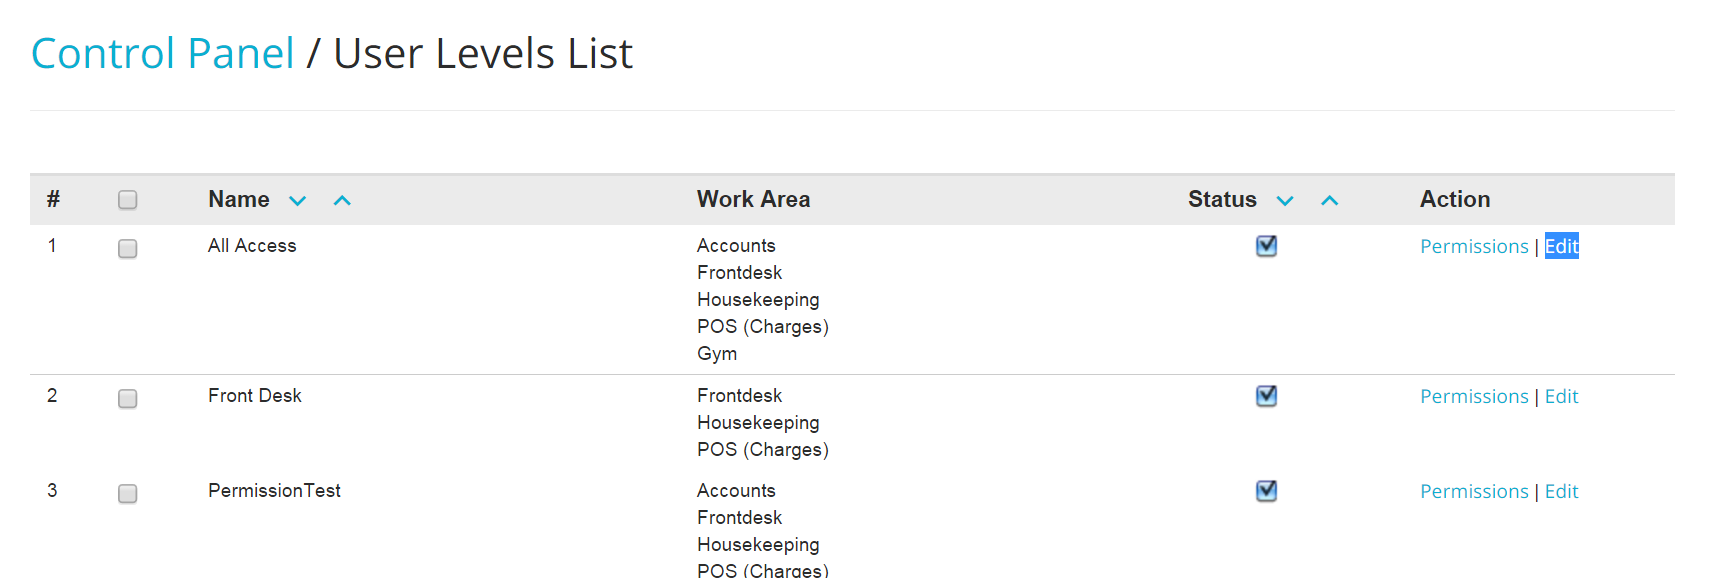
- Start by defining your managers access by clicking on the blue link Edit on the right side of the panel:
- Select all of the areas that you want accessible for the User Level you are editing:
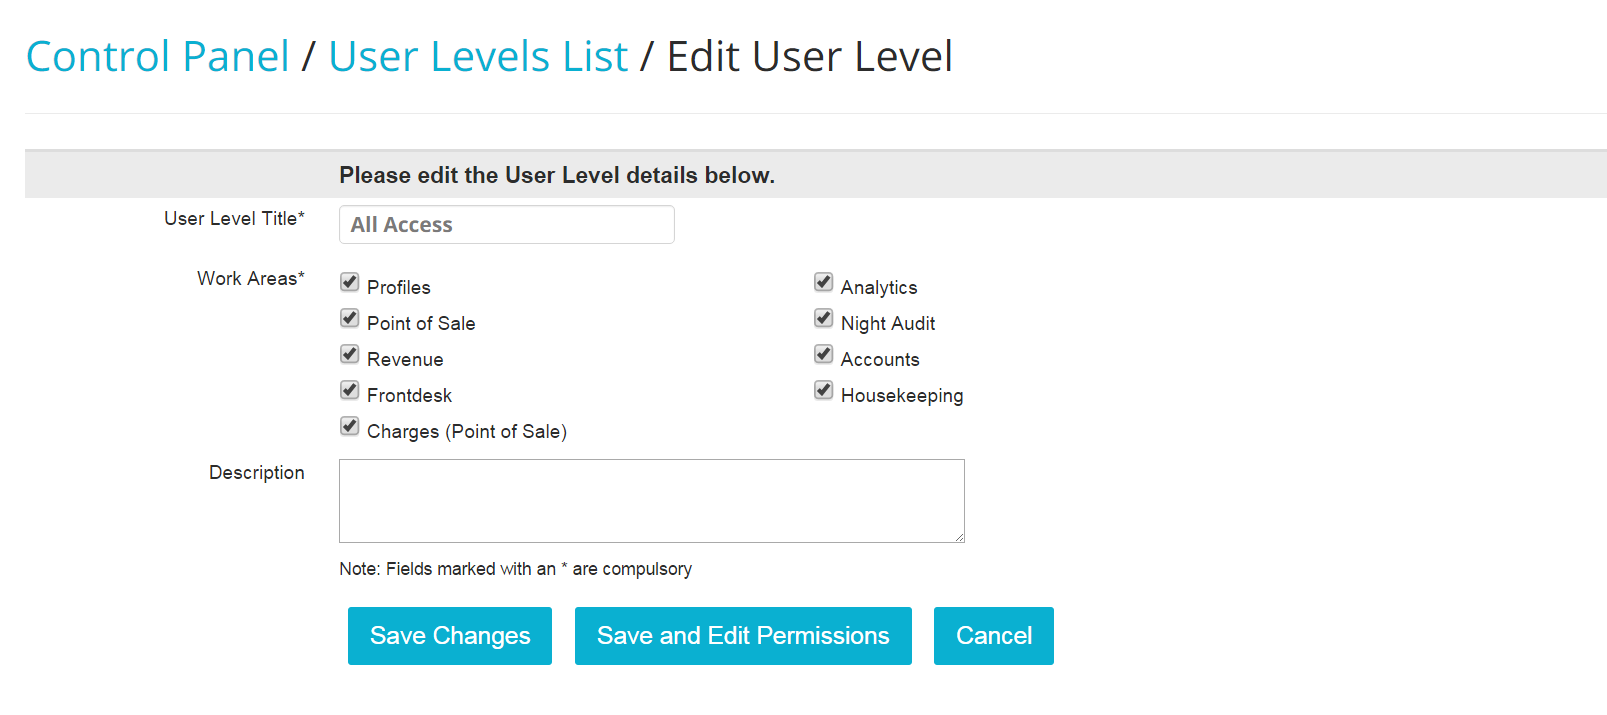
The tags next to the check boxes refer to the tabs that appear on the top of your Tape Chart:

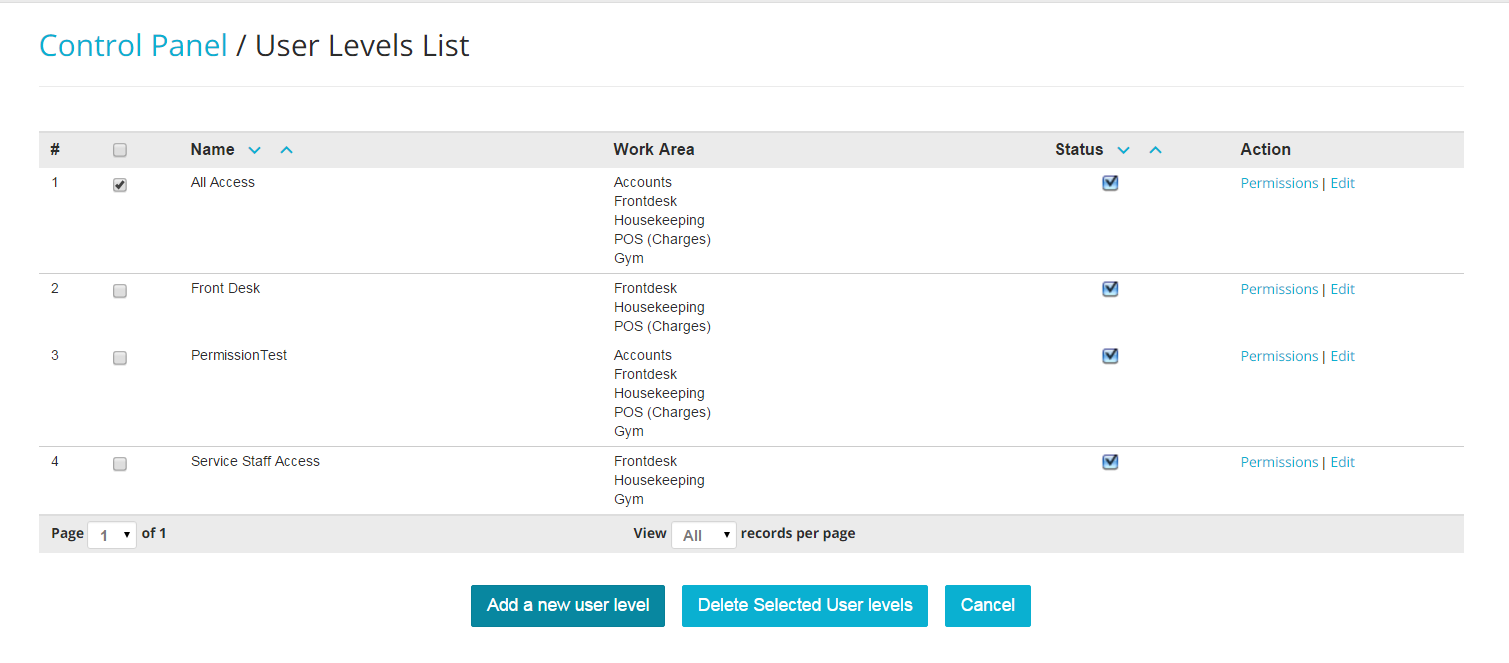
- To ADD a User Level, click on the blue button Add a New User Level:
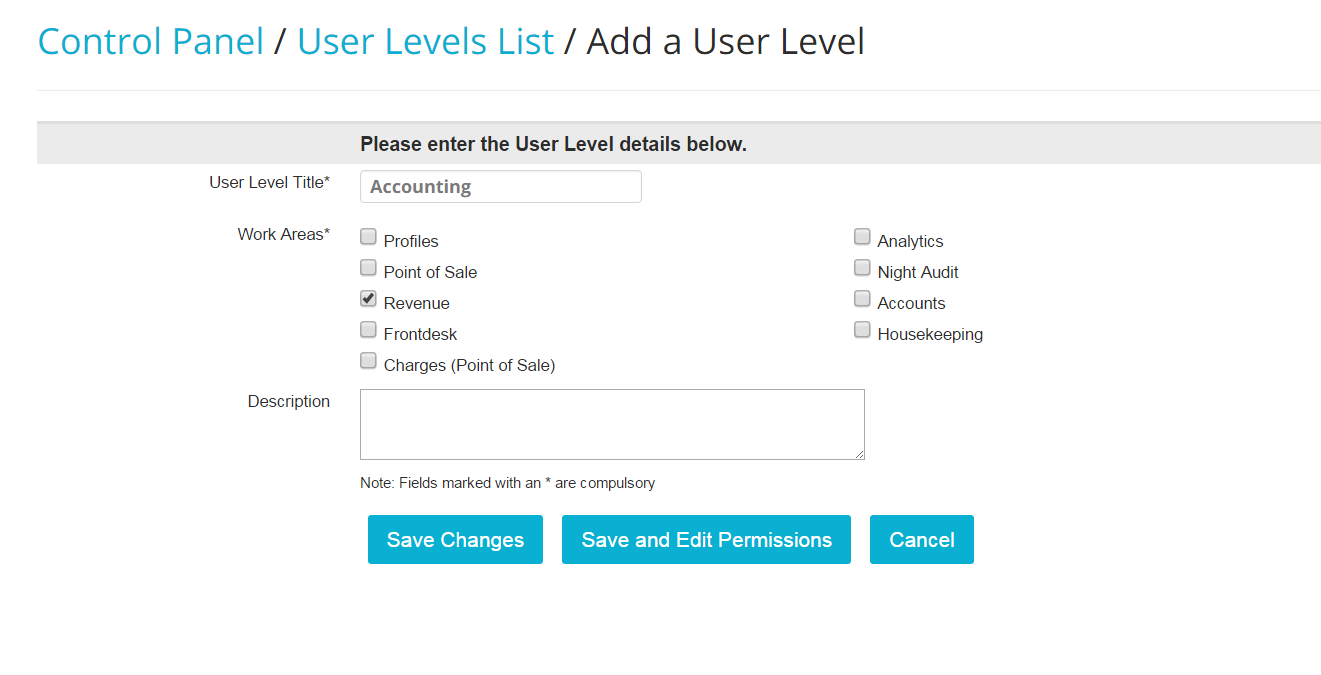
- Give a name for the new User Level and check all the applicable boxes. When done, click on the blue button Save Changes:
Edit Permissions for a User Level
Now that you have created your User Levels, you can go more in depth and edit access permissions.
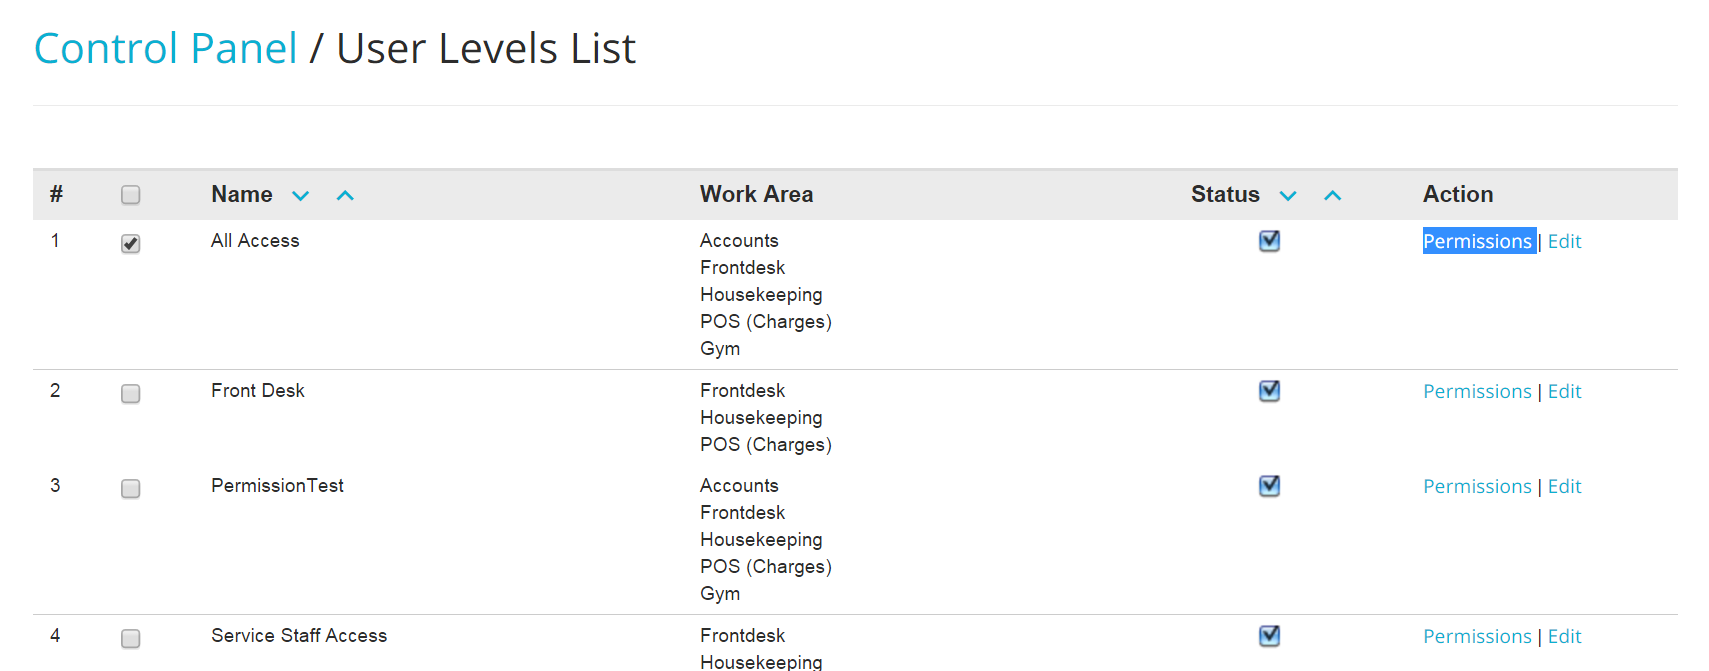
- In the User Level List, click on the blue link Permissions:
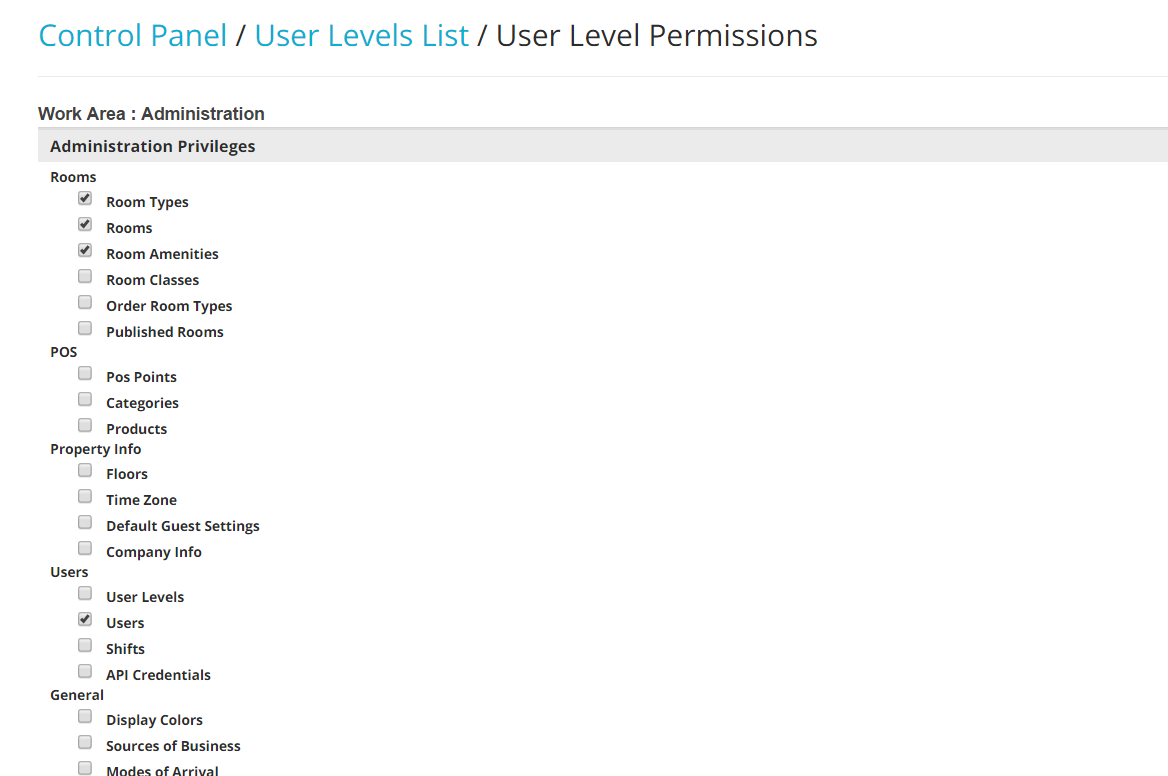
- Select all the actions you want to enable for users in that level, by checking the boxes next to each tag. The latter describes the kind of action you can enable/disable:
- Once done, click on the blue button Save Changes at the bottom of the page:
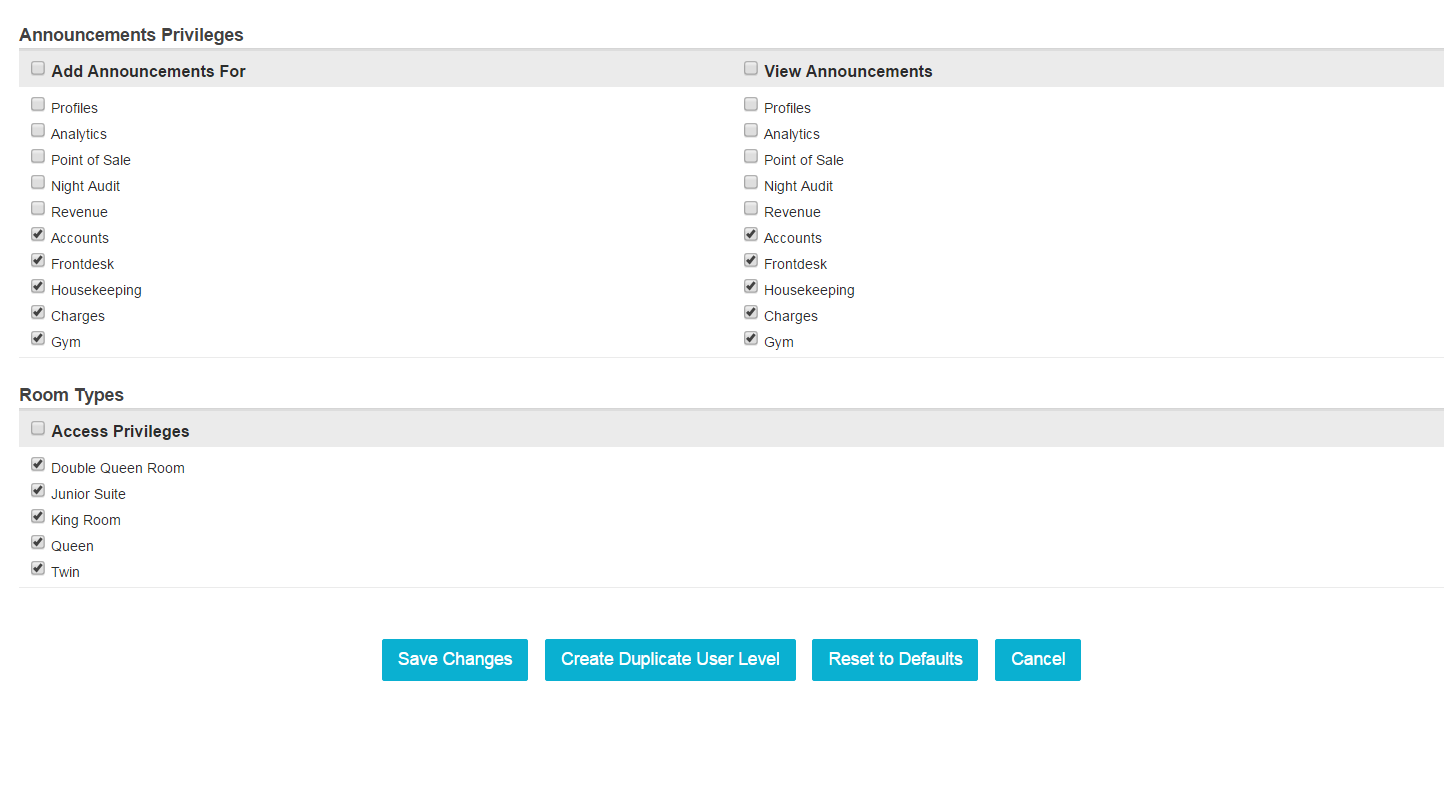
You can also duplicate a User Level, if you need to create a similar one to the level you just edited: simply click on the blue button Save and Duplicate User Level.
- To DELETE User Levels, select the box on the left hand side of any level you wish to erase, and click on the blue button Delete Selected User Levels:
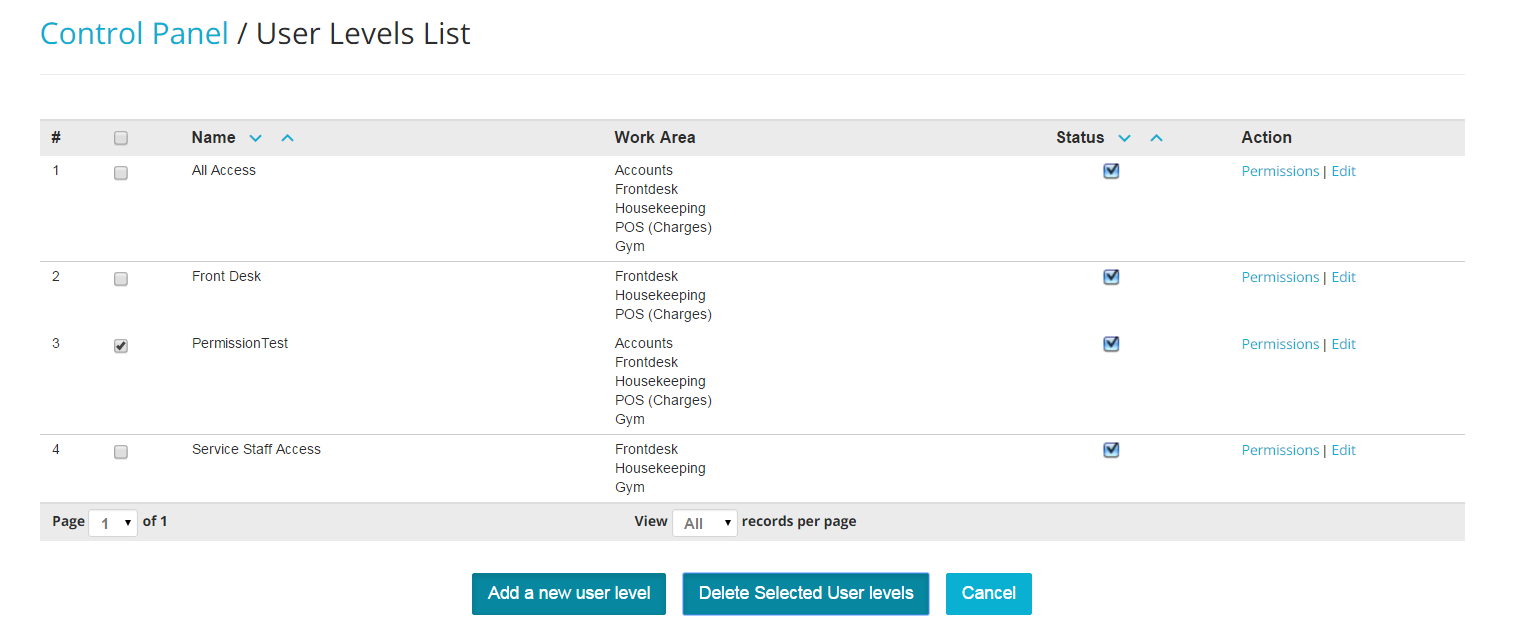
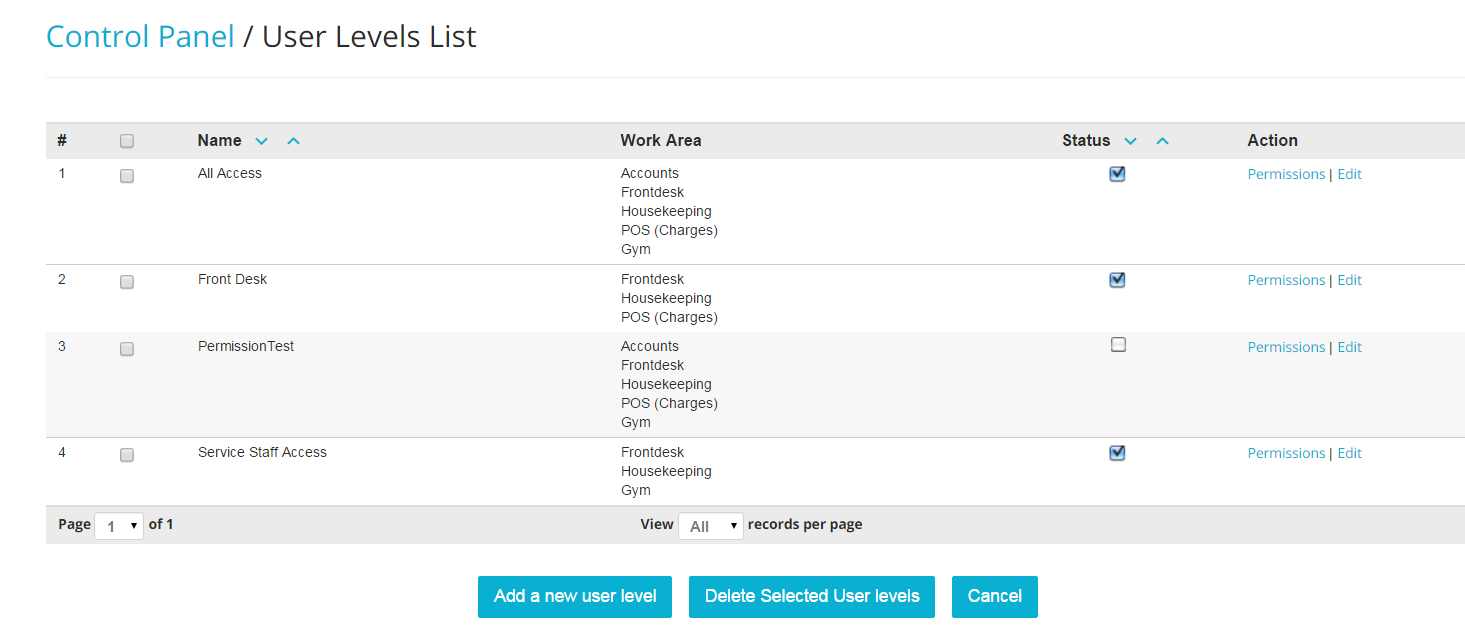
- To DEACTIVATE a User Level, simply un-check the box on the right hand side of the User Levels List, under column Status:
User Creation
It is currently not possible to create users directly within your account: if you wish to create a new user, please contact our Support Team at help@frontdeskanywhere.com
Apply User Levels
- All of your system users appear in the Users list. In the Admin Settings, click on the blue link Users under section Users:

- You will see a list of all the currently created users: click on blue link Edit on the right hand side of any user:
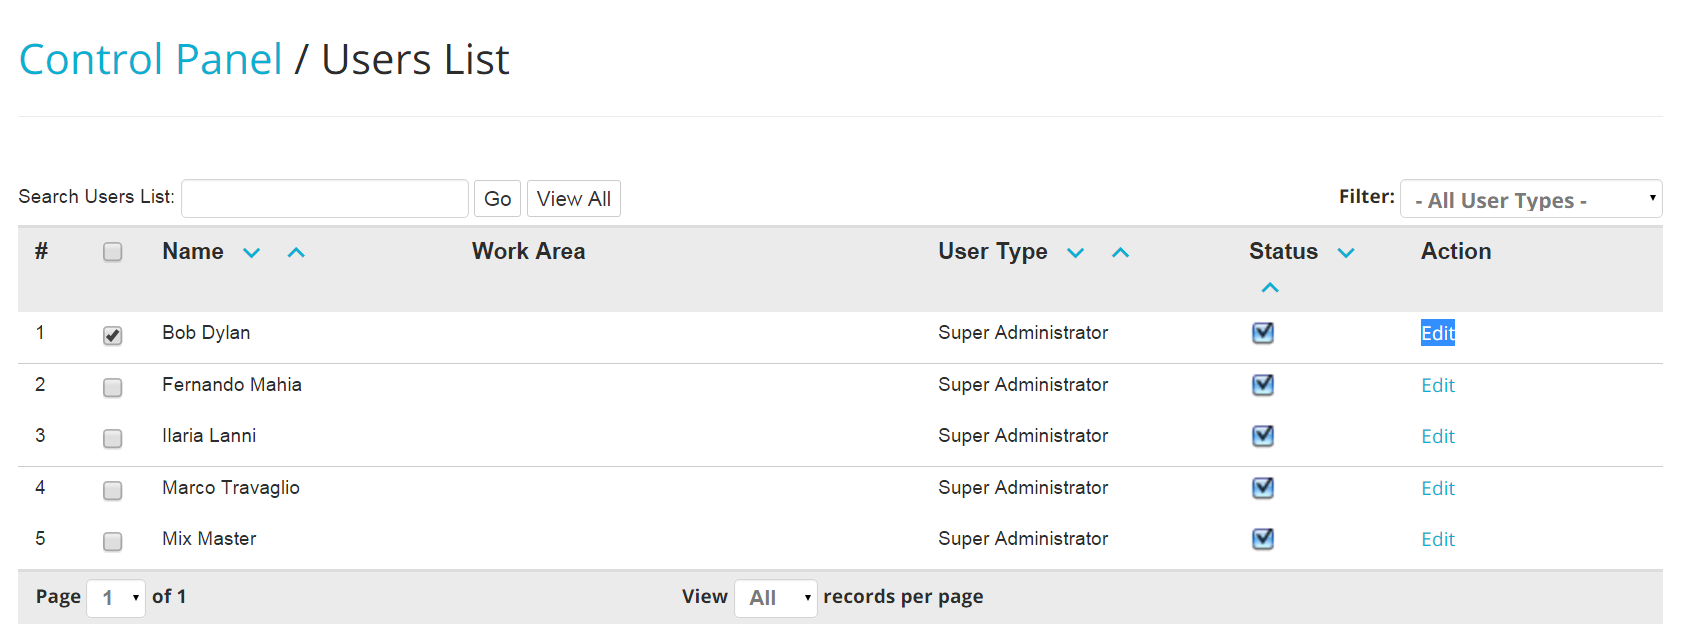
- As mentioned above, it is currently not possible to create a user directly from your account, and for this reason the name, last name and username of each user is not editable; if you need to make any amendments to those fields, please contact our Support Team at help@frontdeskanywhere.com.
Select the right access level by using the scroll down menu next to the tag User Type:
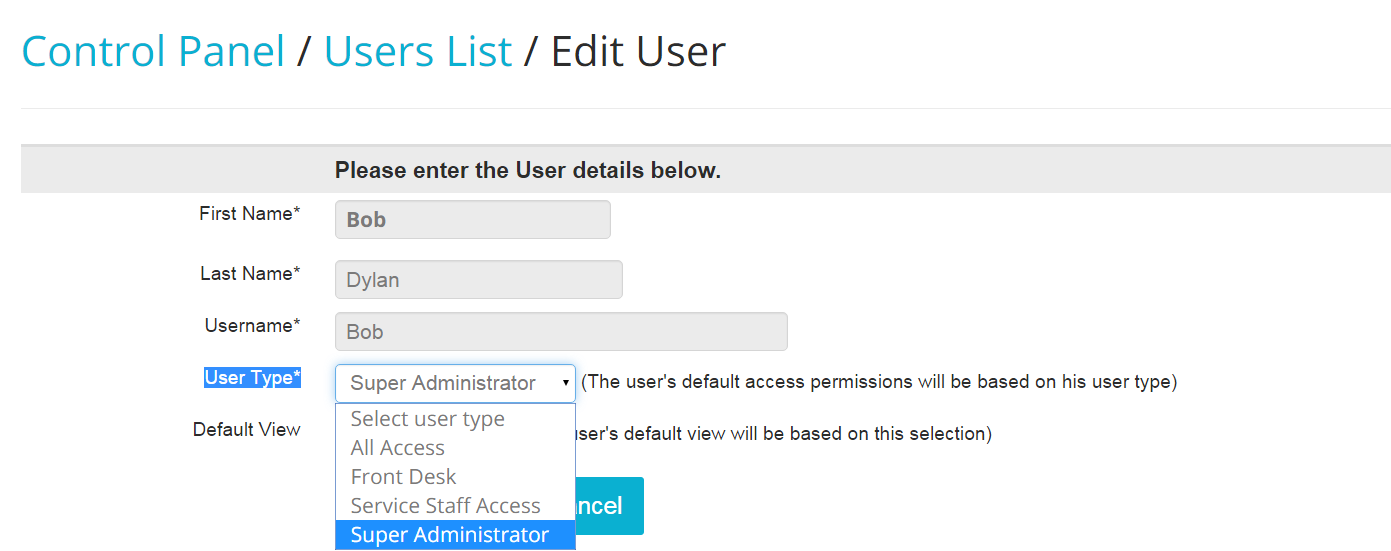
- Choose the default view for the user, by selecting a choice from the drop down menu next to the tag Default View:
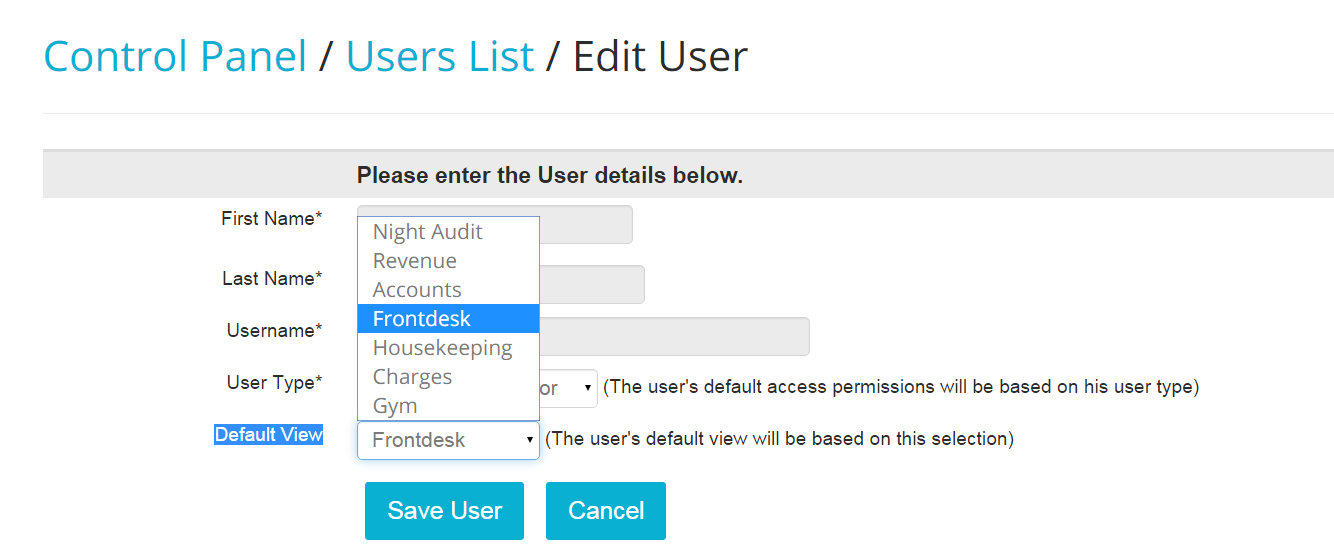
- Click on the blue link Save User at the bottom of the screen, when finished:
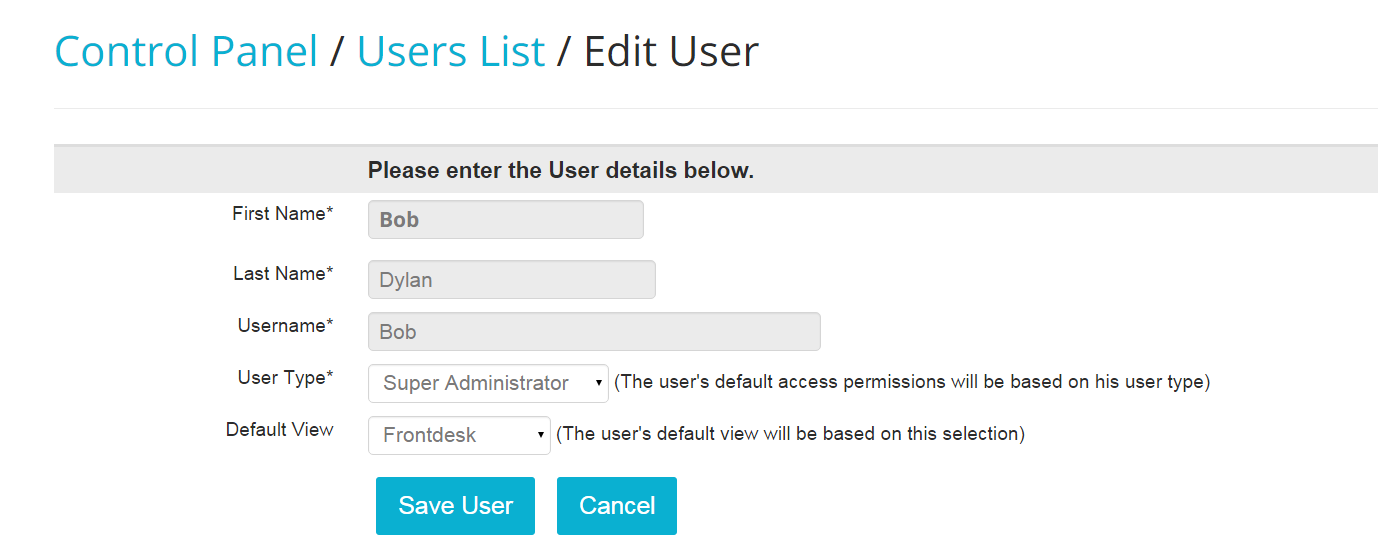
- To DEACTIVATE a user, un-check the box under column Status on the right hand side of any user:

Warning: It is currently not possible to delete a user. However, if a user has been made inactive there will be no chance of them accessing the system.
- If you have a lot of users, you might find it useful to filter them by level. You can do that by using the scroll down menu on the top right hand side of the screen:

Shifts
Setting up shifts is a useful tool for auditing and for checking operations that have been processed on a particular shift. You can also run reports for a particular shift to track back user activity!
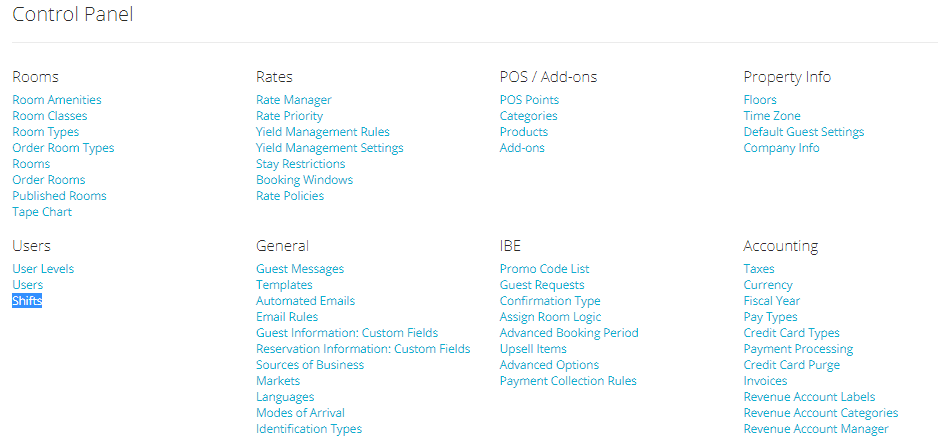
- In the Admin Settings, click on the link Shifts under section Users:
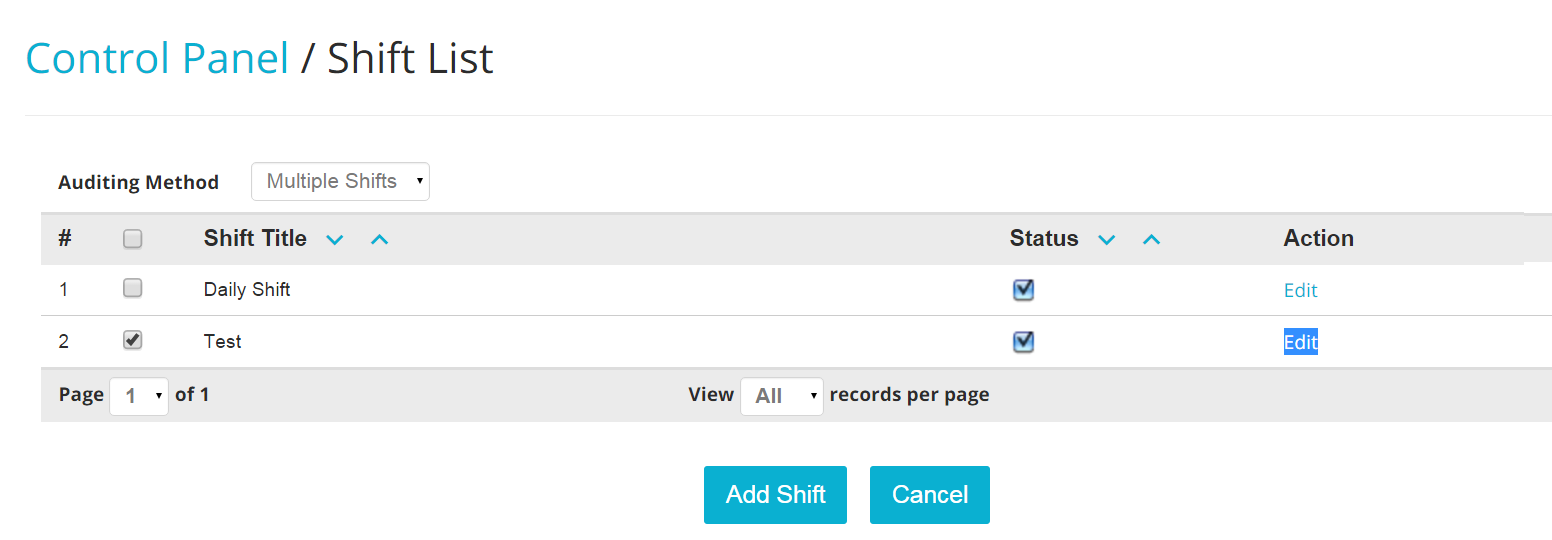
- To start using shifts, you will need to change the Auditing Method from Single Shift to Multiple Shifts, by using the scroll down menu:

- A list of all default shifts will appear: before creating new ones, you can edit the existing ones. Click on the blue link Edit on the right hand side of the screen:
- Edit the name in the Shift Title text box and when finished, click on the blue button Save Shift:
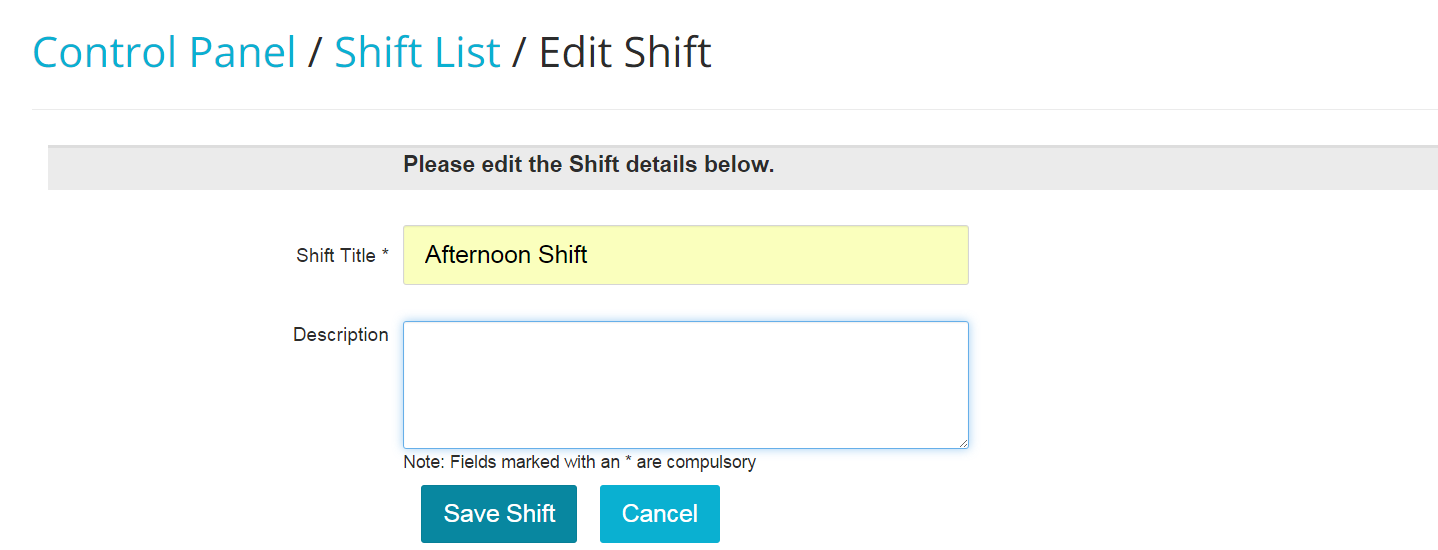
- To add a new shift, click on the button Add Shift:
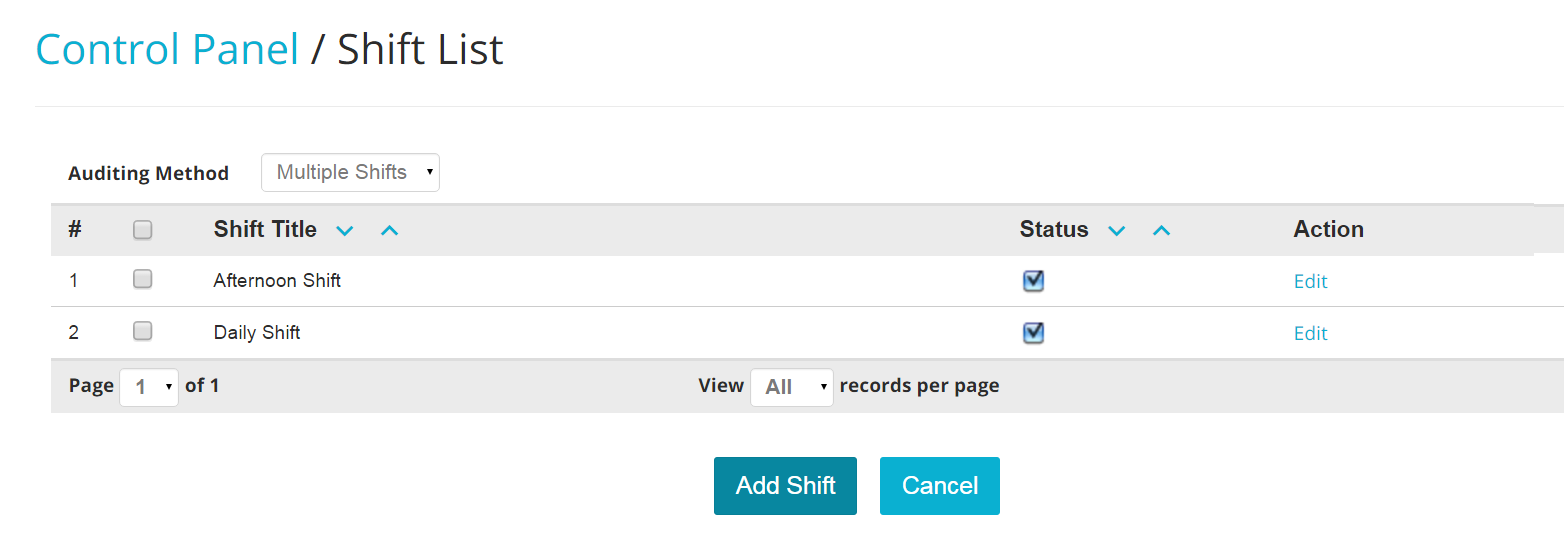
The process is the same as editing one!
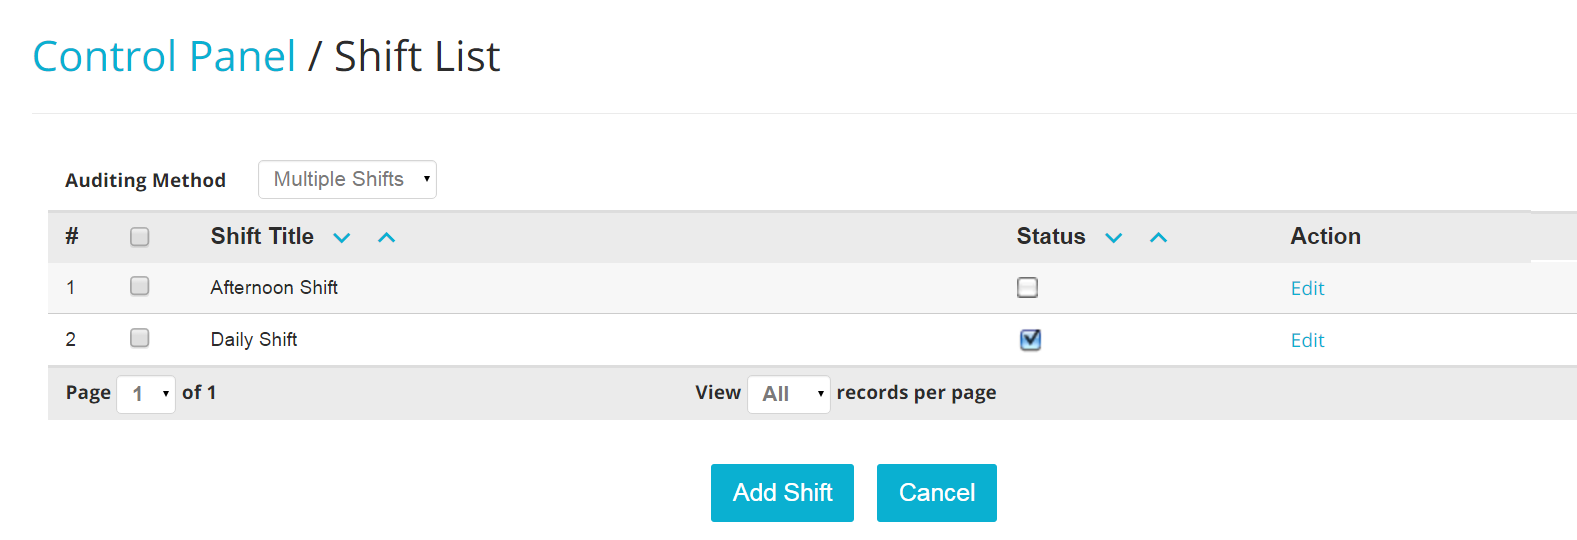
- To DEACTIVATE a shift, simply un-check the box under the column Status on the right hand side of the screen:
Once shifts are created, users will be prompted to select a shift at the time when they log in in Frontdesk Anywhere:
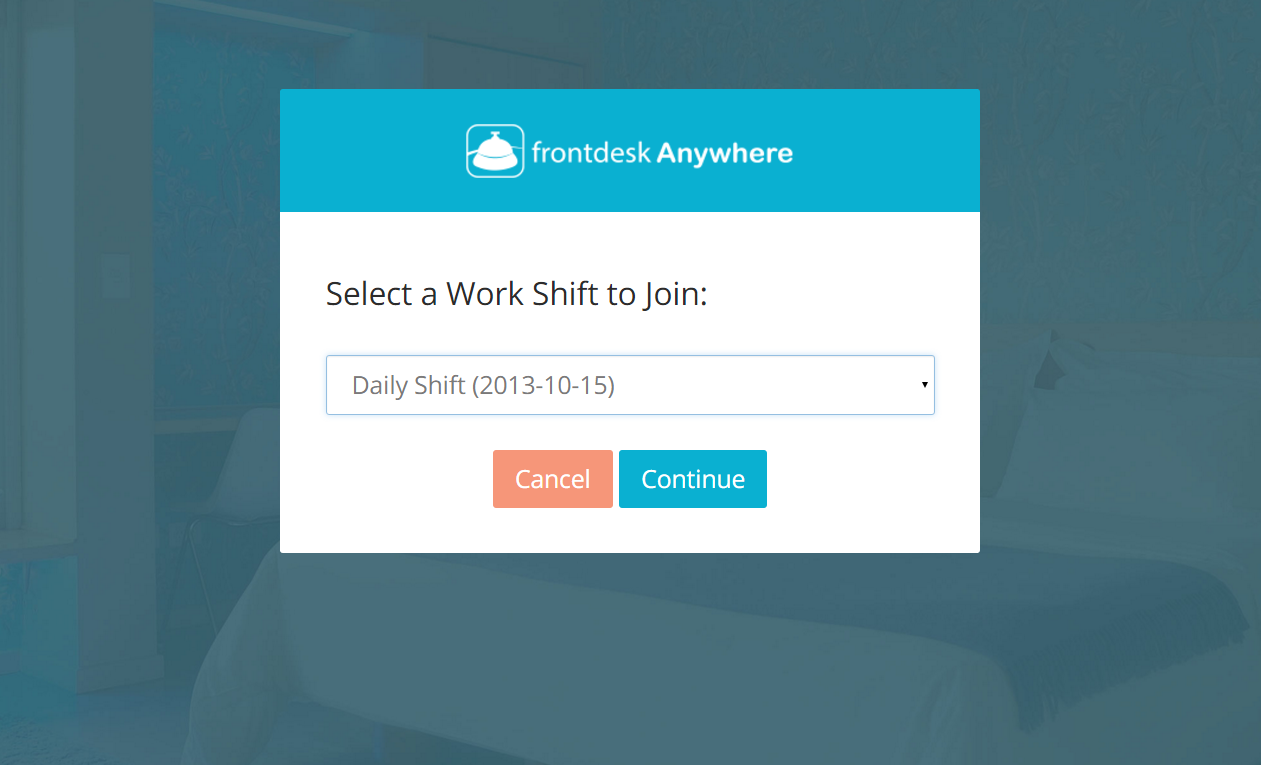
Different users will be able to join the same shift upon log in. However, for auditing purposes it is important that shifts are not left open when they are supposed to be closed.
To close a shift, click on the drop down menu next to the user’s name on the top right of the Frontdesk Screen:
