This section will guide you through how to perform basic and advanced payment operations: you will learn about how our payment screen is organized, how to record payments, how to transfer charges and, if applicable, how to capture credit card details. If you are integrated with a payment gateway and/or a credit card swiper, this will also be the place where you can learn how to process your guests' credit cards directly from your Frontdesk Anywhere account.
The Payment Panel
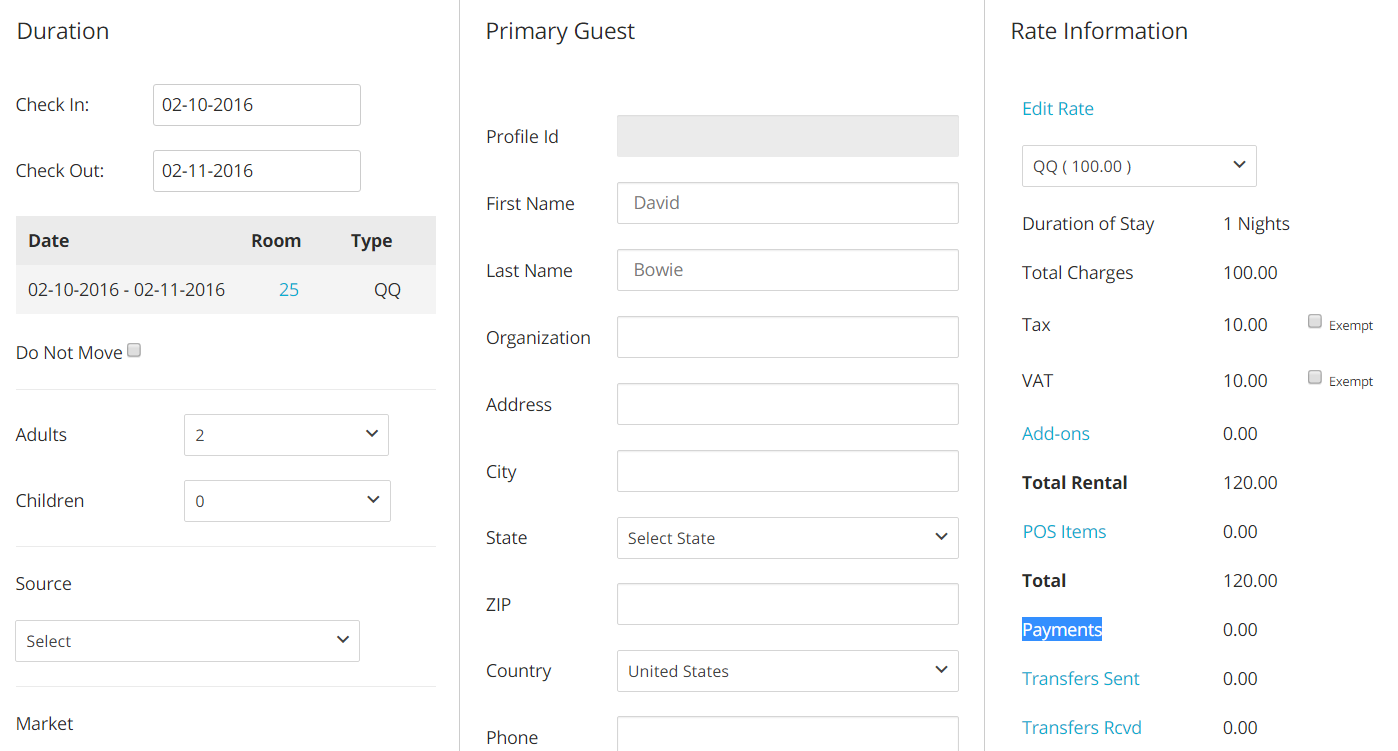
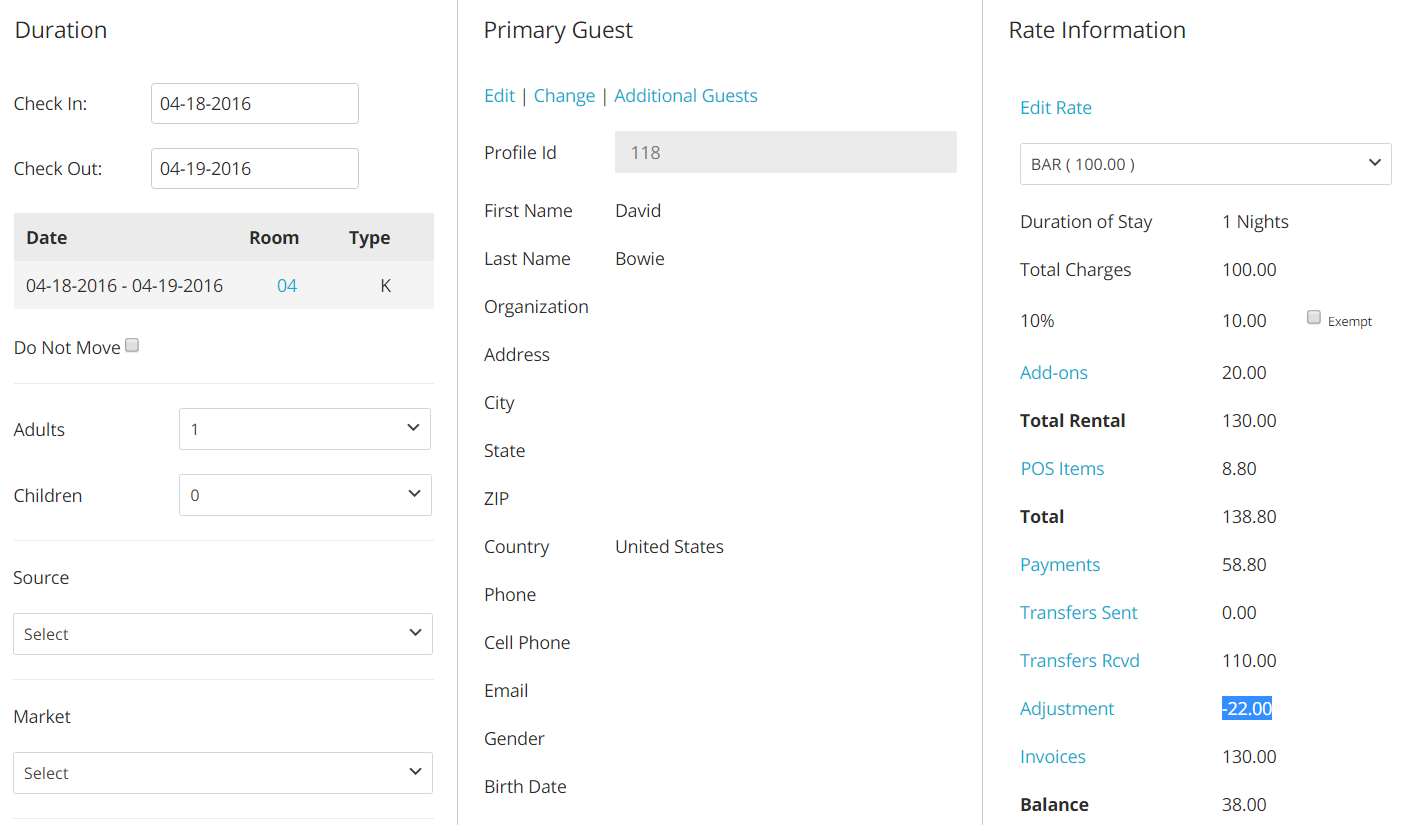
- The payment section is located on the right column of the folio, right under the summary of all charges, and it is accessible by clicking on the blue Payment link:
- Clicking on the link will bring up a pop up panel from where you can perform all operations related to payments:
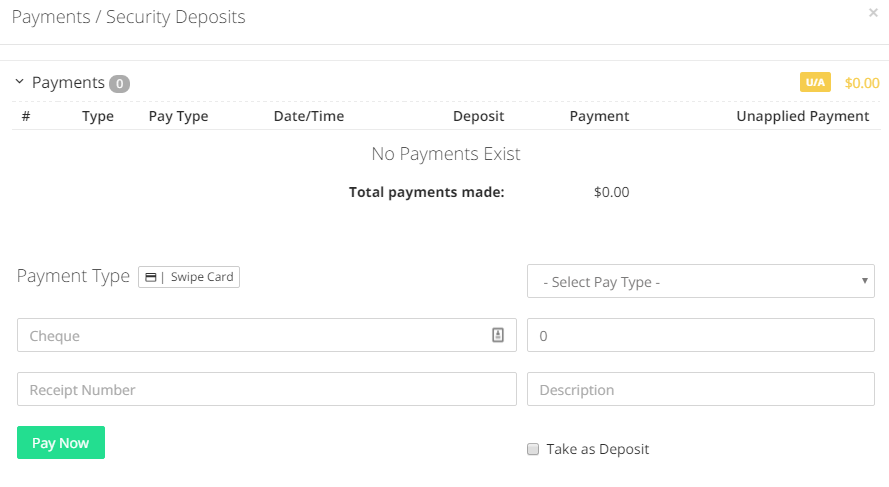
The Payment panel can be separated into two main sections:
- The Payments drop down menu lists all payment details and operations recorded for the folio. It also brings information about what payments have been applied to certain charges, and what not: indeed, the U/A tag means Unapplied (Payments) and reminds to the amount of payments that have not or not yet been applied to charges.

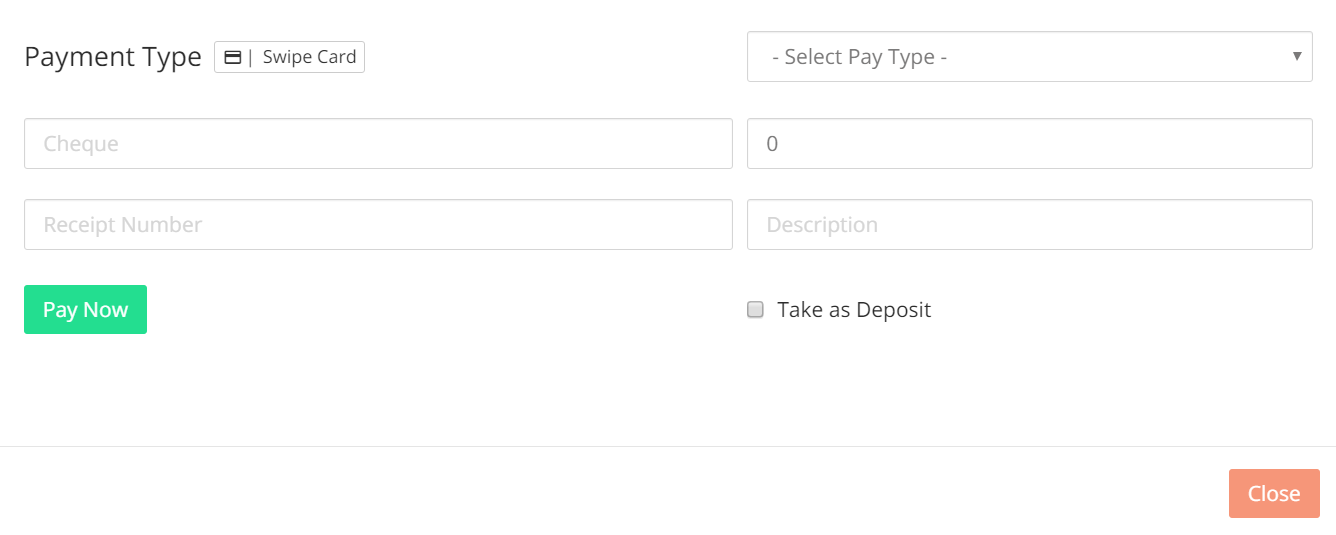
- The Payment Type section is where you actually submit the payments:
Recording a Payment
Recording a Payment Without Applying it to a Charge
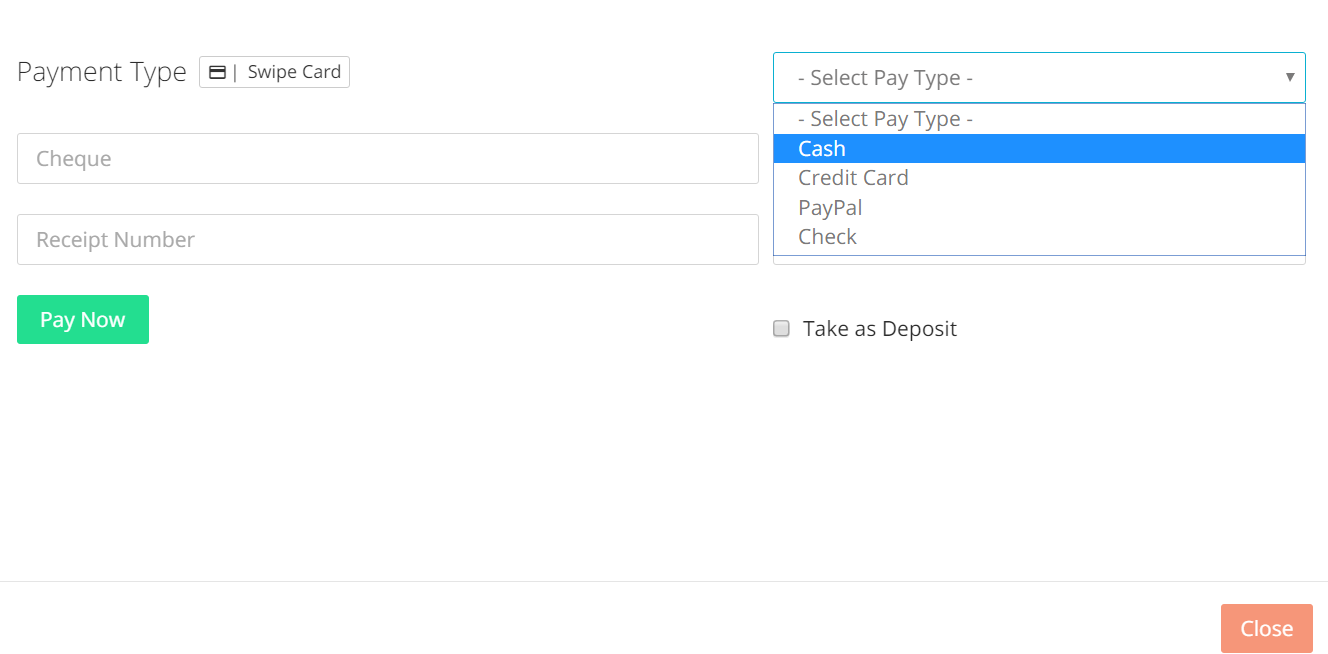
- To record a payment, first select the Payment Type by choosing the appropriate choice from the ones available in the drop down menu:
- Place the amount the guest is paying in the box on the left:

- If applicable, write down the receipt number in the Receipt Number box and a description in the box with the tag Description:

- To record the transaction, click on the green button Pay Now:

- You will see the message Payment Successful once the action has been finalized:
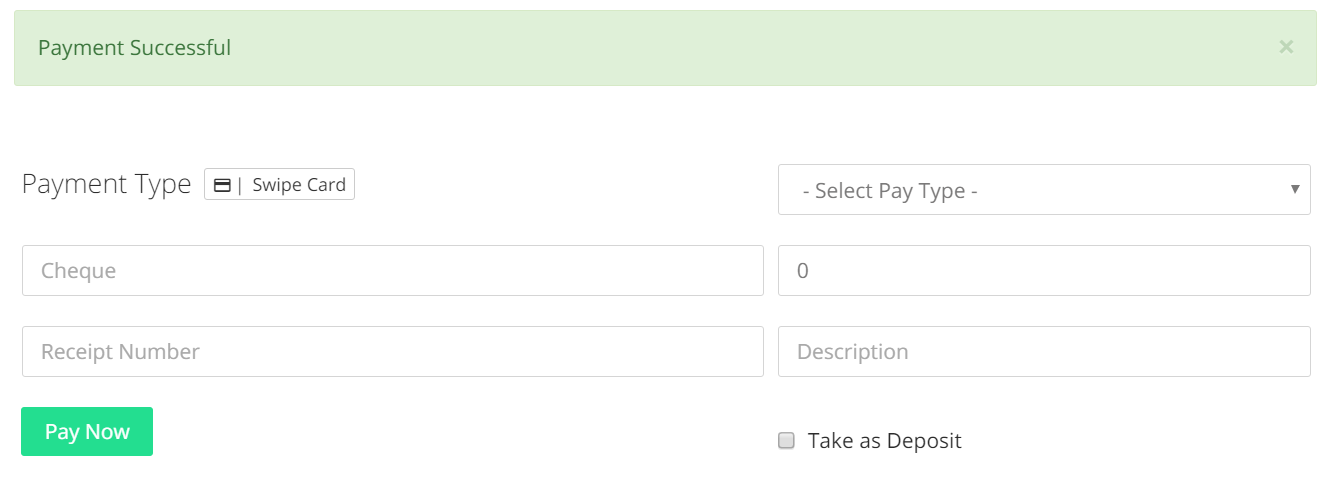
- You will be able to see the payment details by clicking on the Payments drop down menu. From this panel you can see the type of operation performed, the type of payment used and the date and time when the operation was successfully recorded in the system:

Note that if the recorded payment has not been or not yet been applied to a specific charge, the amount the guest paid will also appear under column Unapplied Payment:

Invoices
Each folio has a dedicated section called Invoices : this is the place where you can isolate existent folio charges into different invoices. This feature is used when having to split bills for your guests, along with printing the associated receipts.
If you do need to isolate any of the charges and associated payments, just follow these simple instructions!
BEFORE STARTING: Invoices have some unique statuses that are key to understand as they impact what actions can be done to them.
- Draft: A newly created Invoice will appear in Draft status until it is issued. Draft invoices can be Deleted, Issued or have Transfers Reversed.
- Delete: Remove all references to a draft invoice.
- Issued: Confirm a draft invoice and generate a unique number.
- Cancel: Voids an issued invoice. The invoice name and number will remain for record keeping purposes.
Create a New Invoice
In order to transfer charges/applied payments, you will first need to create a new invoice.
- In the folio, click on the link Invoice:
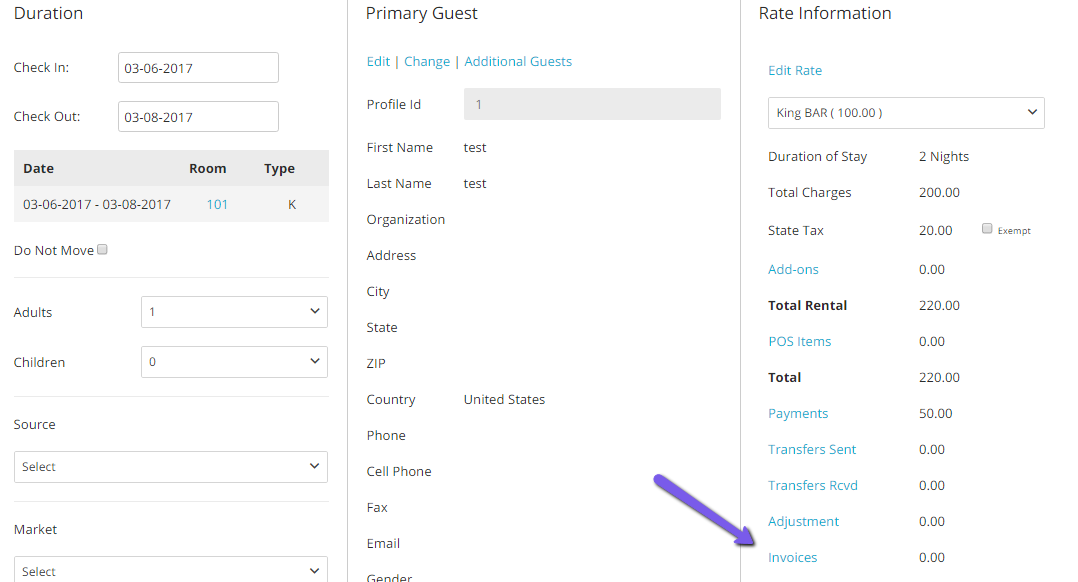
- A pop-up panel will come up. You will see a transaction drop down menu which, if expanded, will list all charges contained in the folio. You will also see a transfer transactions button which enable you to move any of those listed charges:
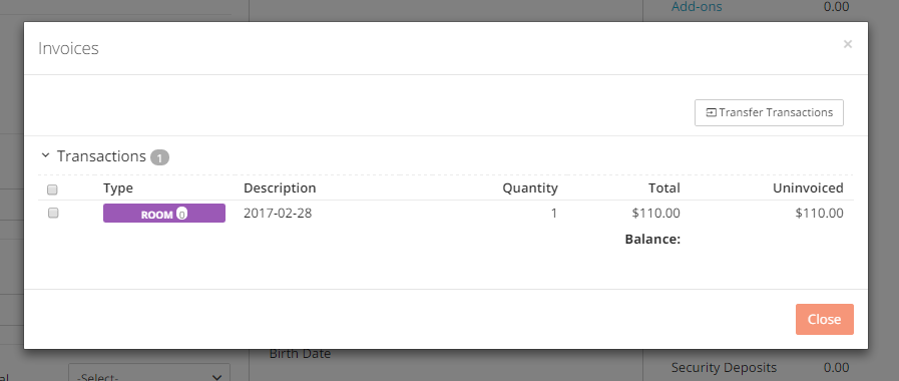
- The first step to split charges into an invoice is to actually create the invoice. You can only transfer charges, if there is an invoice where to transfer charges to.
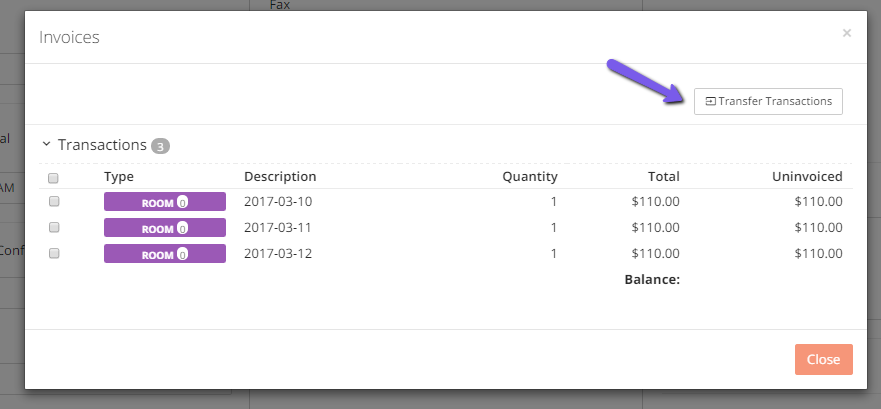
To create a new invoice, click on the button Transfer Transactions:
- Expand section Transfer to Invoice by clicking on the three dots on the right hand side and then click on the button Create Invoice:
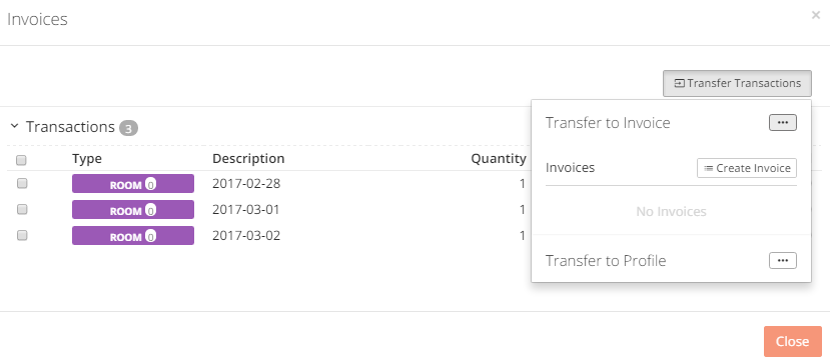
- After clicking on the button create invoice, a new invoice will drop down menu will appear on the screen. If you want to rename the invoice, click on the red written New Invoice to make the field editable and type in a new name:
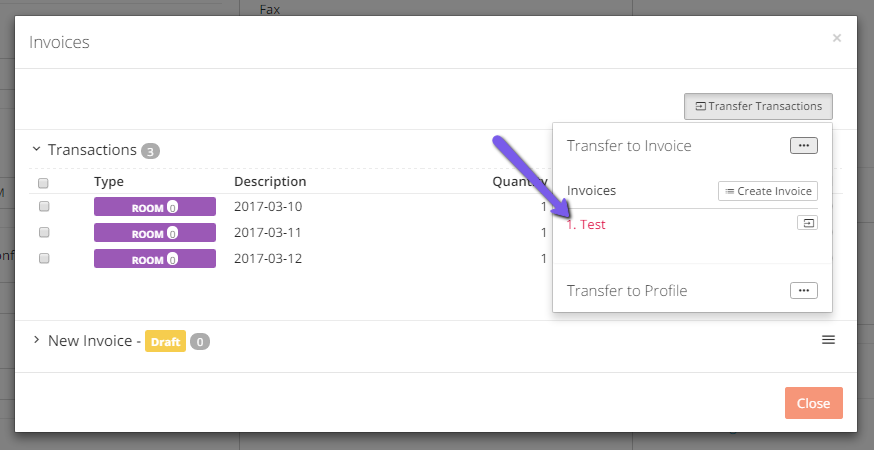
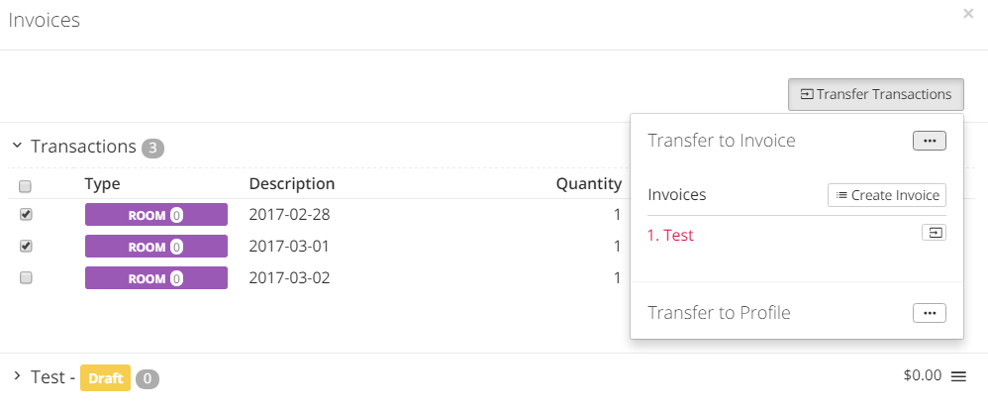
- Select the charges to transfer to the newly created invoice by checking the boxes on any charges listed under menu transactions. To transfer those selected charges, click on the small arrow icon on section Transfer to Invoice:
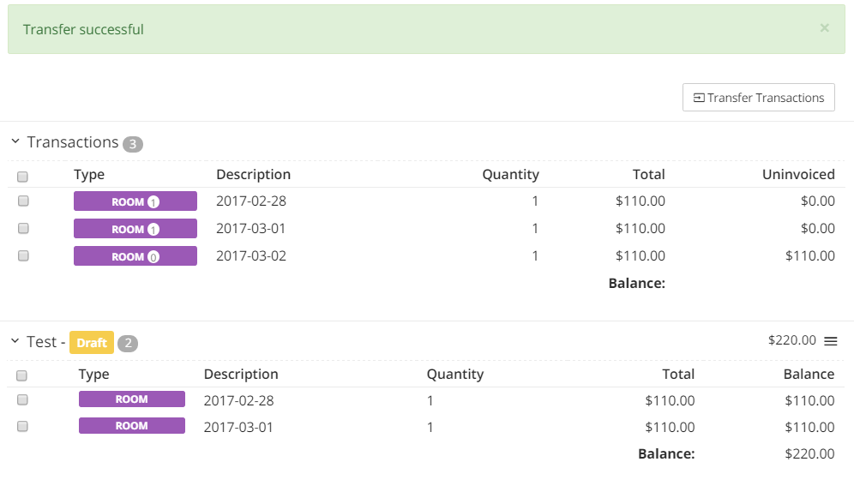
- Transferred charges will appear under the Newly Created Invoice. Note that they also remain listed under Transactions, although with a $0 balance as they have now been placed under the invoice:
- The invoice will be in a Draft status until it is issued, meaning it is finalized or confirmed. You can change the status of the invoice by clicking on the three bars action button on the right hand side of the screen. A draft invoice can be deleted, issued or have the transfer undone:

- When an invoice is issued, it will be tagged with a unique number:

- Note that once an invoice has been issued, it can only be cancelled. When this happens, all charges that were originally transferred to the invoice will be re-listed under section transfers:
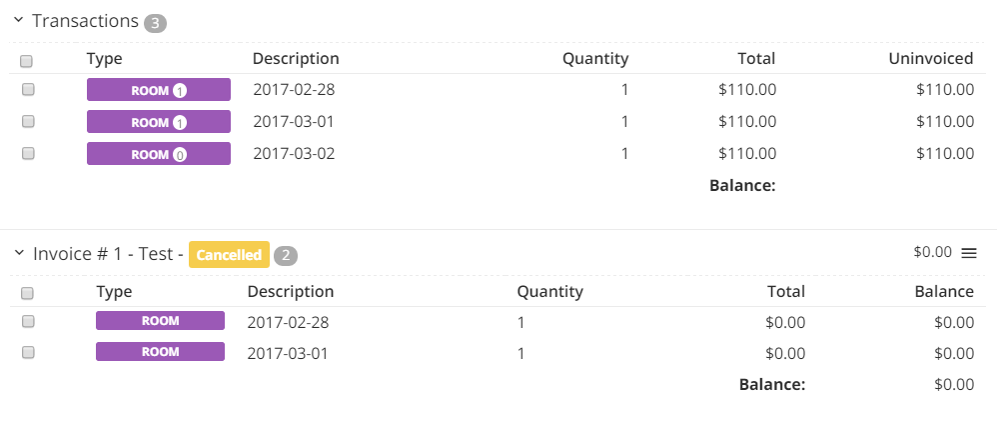
Applying Payments to Charges
When you split charges into different invoices, you will need to reflect payments in the folio that are relative to those charges, so that the invoice will show a balance of $0.
We call this feature Apply Payments: it is the ability to associated payments to certain charges.
Note: payments can only be applied to those charges that are listed under an Issued invoice.
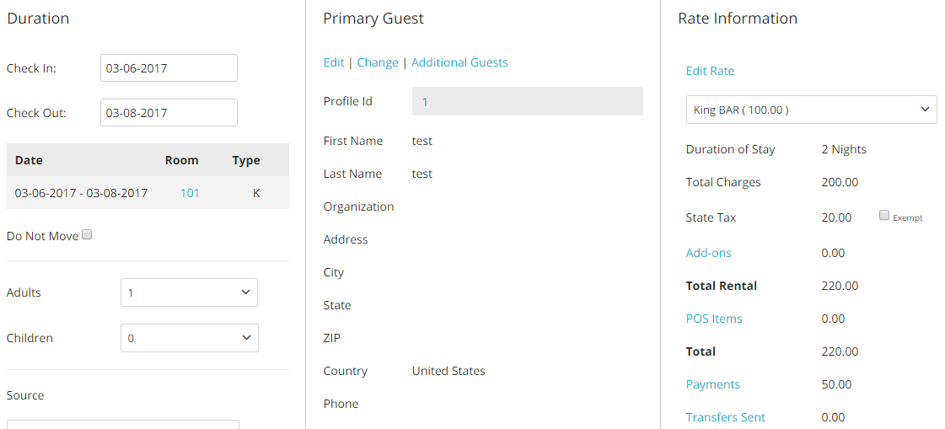
- To apply payments to charges, click on the link Payments on the right hand side of the folio:
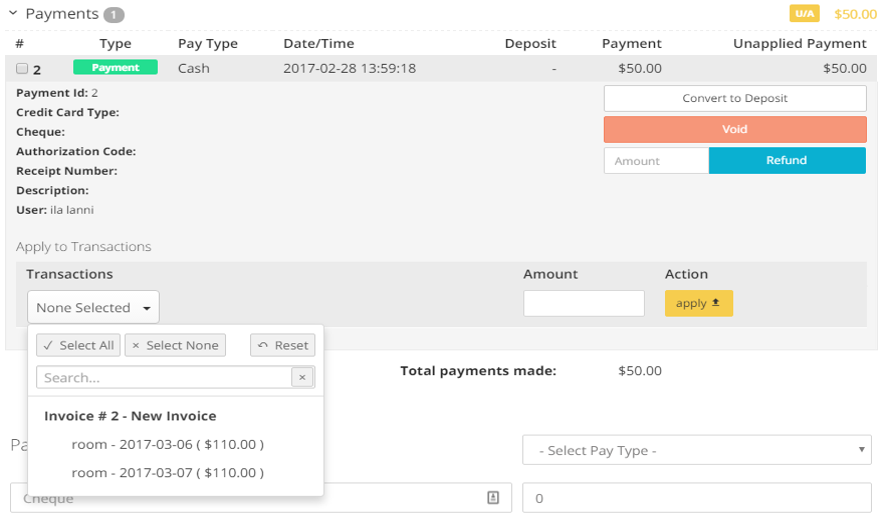
- Expand the payments list and expand the payment details relative to the credit that needs to be applied to the invoice. At the bottom you will see a Transactions drop down menu which will show you all invoices created on the folio with all the relative listed charges:
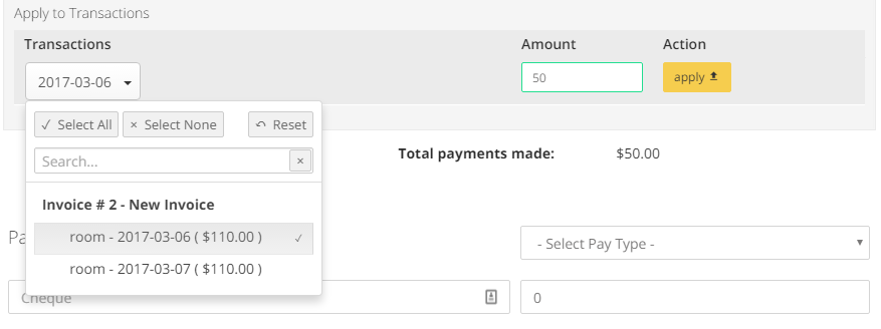
- Select those charges you want to have linked to the payments and type in the amount you want to apply. In the example below I am applying the full $50 payment to one $110 charge.
When done, click on the yellow button Apply to Payments:
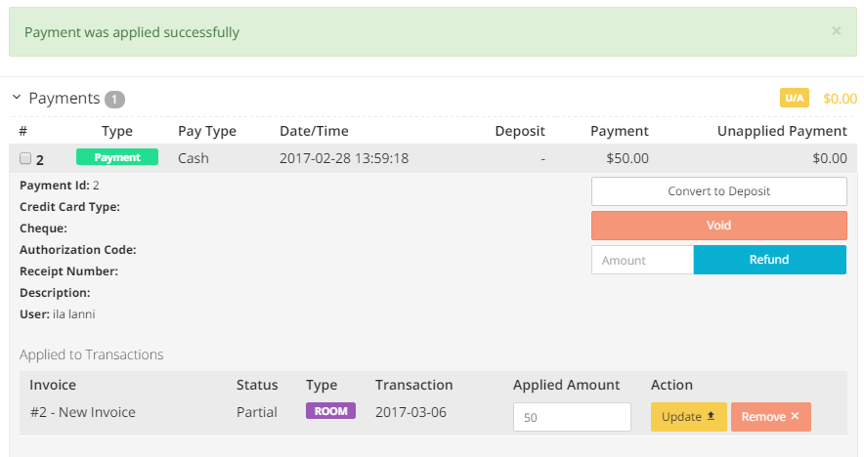
- A Successful message will appear at the top in green. A summary of applied charges will also appear at the bottom of the payments list:
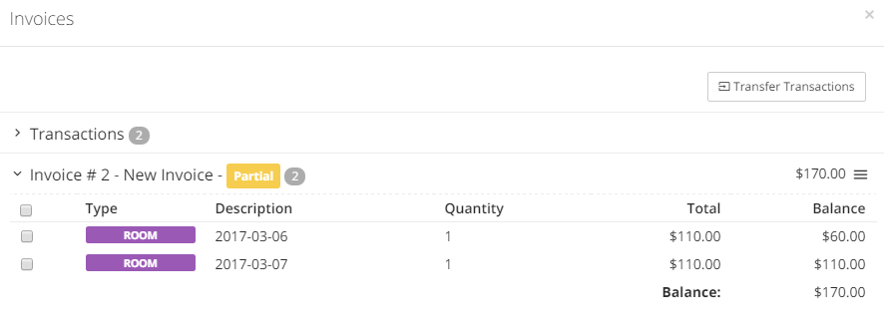
- If you now open the Invoice blue link back in the folio, you will notice that the balance of the invoice will go down by the amount of the applied payments.
Printing an Invoice
Each invoice has its own balance, corresponding to the charges it contains and the payment that have been applied to those charges. From time to time you might need to separate the bills and print receipts that will only show certain charges/payments.
- To print a receipt, simply click on the three horizontal bars, next to the right invoice:
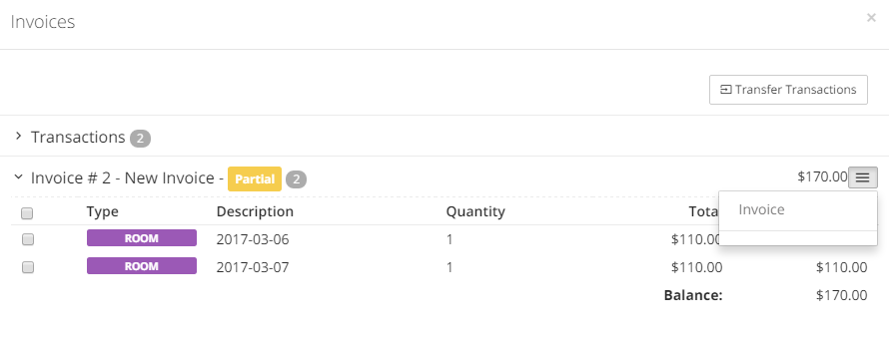
- Click on the option Invoice to bring up the printable receipt:

Note: If you do not see any template in the pop-up panel, contact your manager and make sure that the right template has been enabled for the Profile Documents.
You can click here to get more information!
Payment Operations
- To perform operations on submitted payments, click on the Payments drop down menu, and then on the green box Payment for the payment on which you wish to perform your operations:
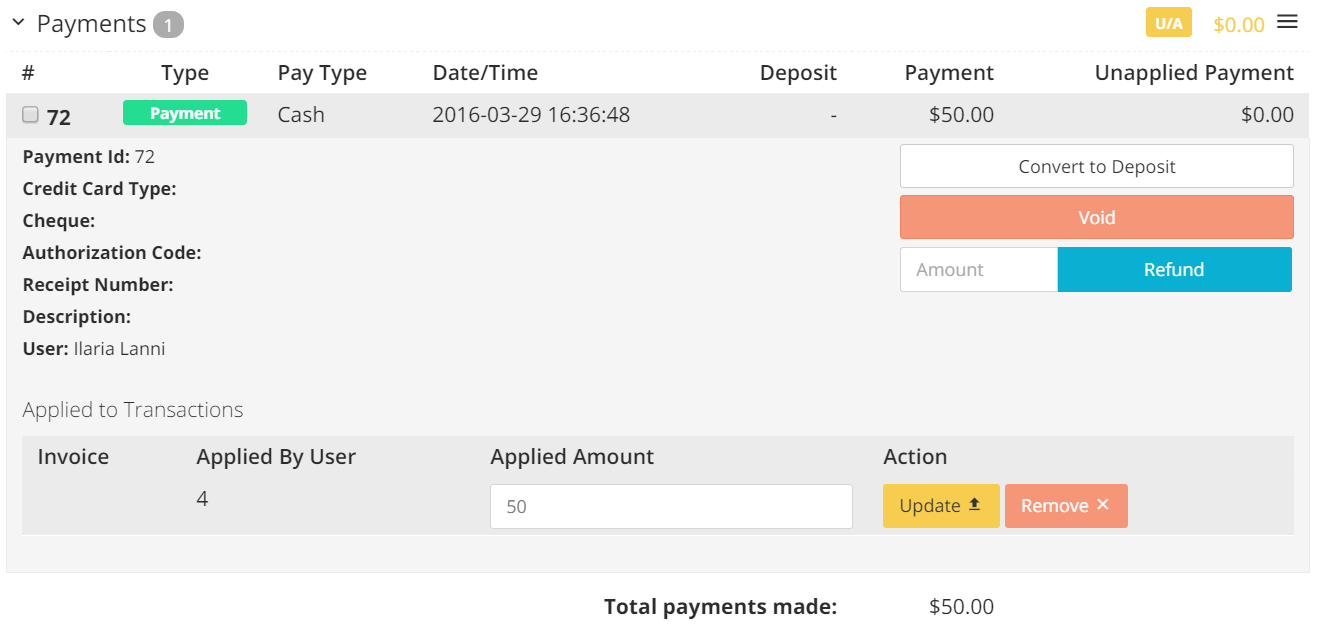
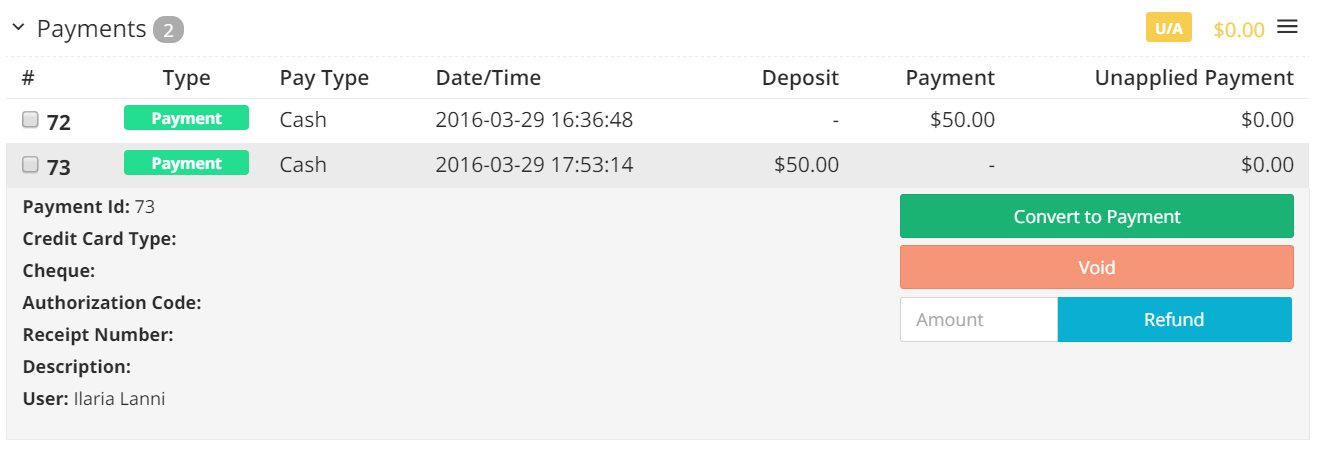
Convert to Deposit will change the payment from being recorded as a payment proper into a Security Deposit.
Void will annul the payment.
Refund will enable you to refund part or the whole of the payment. If you wish to partially refund your guests, fill in the box with the amount you wish to refund and click on the box Refund.
Recording a Security Deposit
- You can record security deposits directly from the same Payment screen. Choose the Pay Type and insert the amount you want to have recorded as a deposit:

- Check the box with the tag Take as Deposit and click on the button Pay Now:

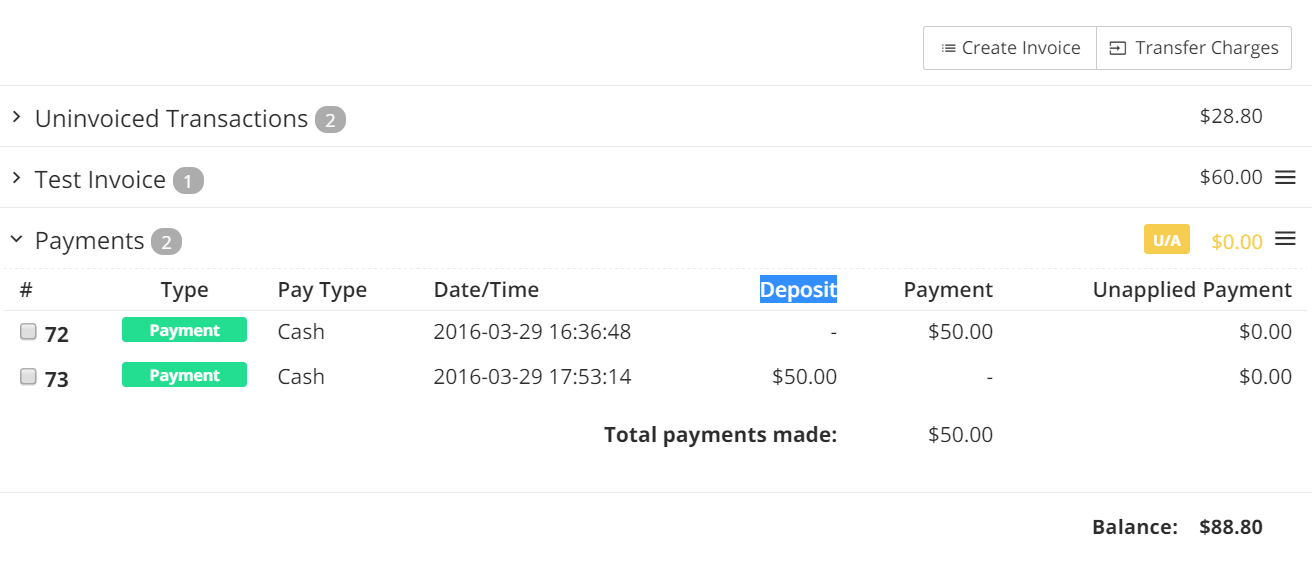
- If you open the Payments drop down menu, you will see that the sum is recorded in the system as a Deposit, and not under Amount:
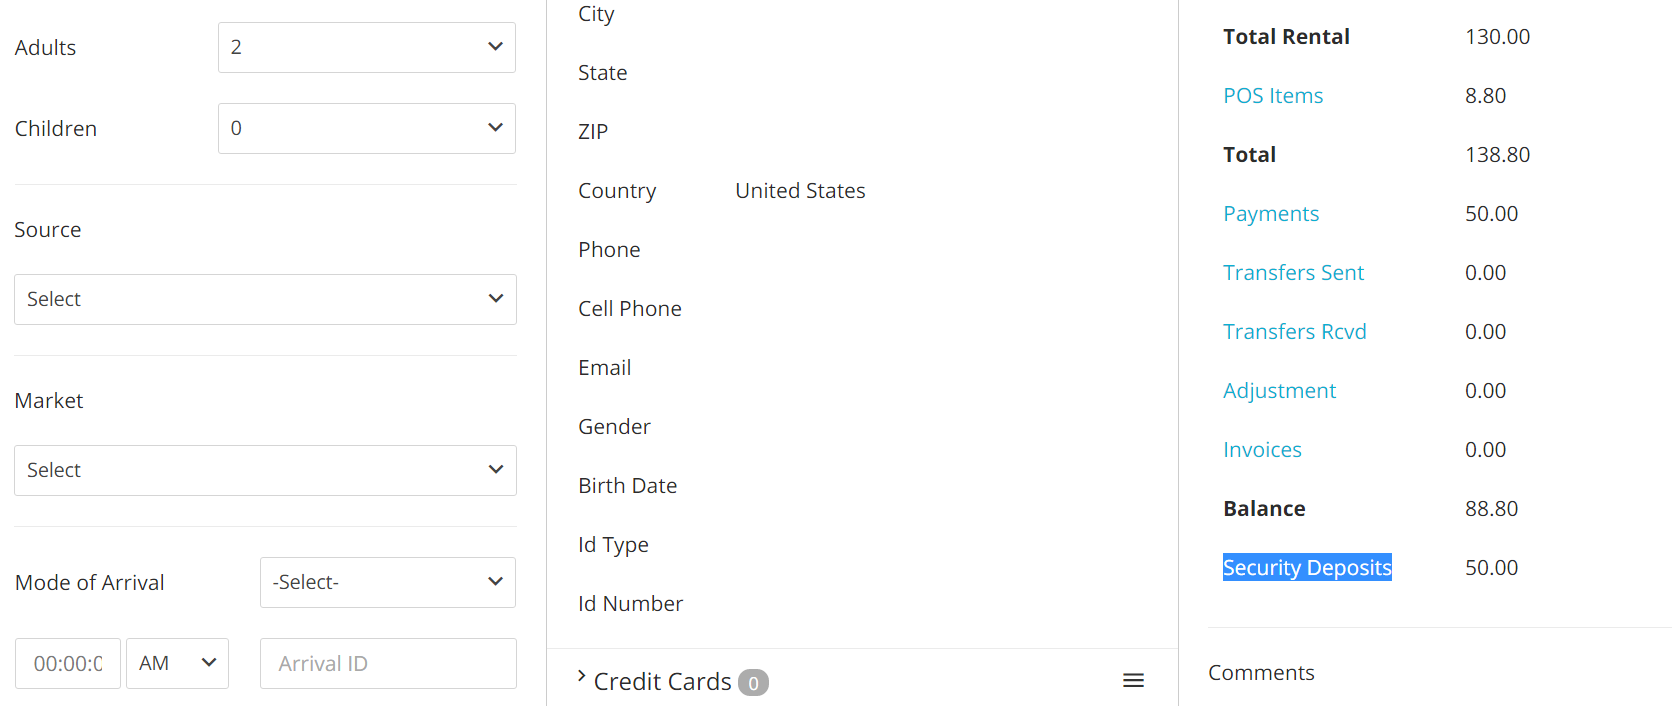
- In the folio screen, the amount submitted as deposit will appear in the field Security Deposits:
###Turning a Security Deposit into a Payment
- It might often happen that your guests will want to turn their security deposits into payments to set their bills. This is easily done: expand the Payment tab to individuate the deposit:

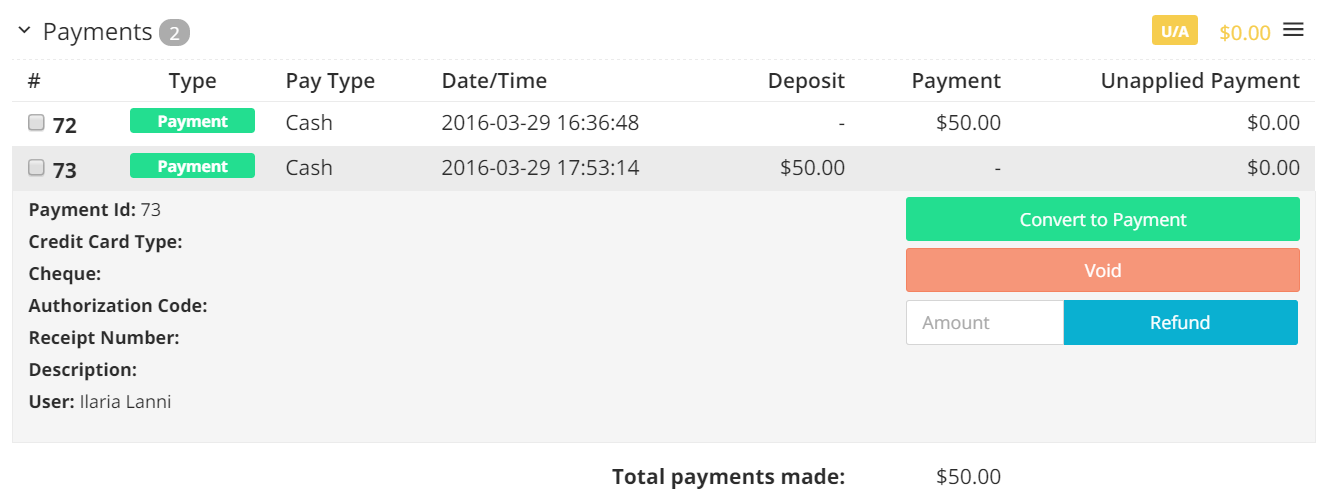
- Expand the payment to visualize the details and operations available by clicking on the green button associated with the deposit:
- Click on the green button Convert To Payment:
Capturing Credit Card Details With Credit Card Swiper
Your Frontdesk Anywhere account can be integrated with any Credit Card Swiper that uses Keyboard Emulation tool. A credit card Swiper will enable you to capture your guests’ credit card numbers and expiration date in an automatic fashion, thus making the reservation process much quicker and reducing the possiblity of human error.
- To start using the credit card Swiper, click on the folio you want to record the card details:
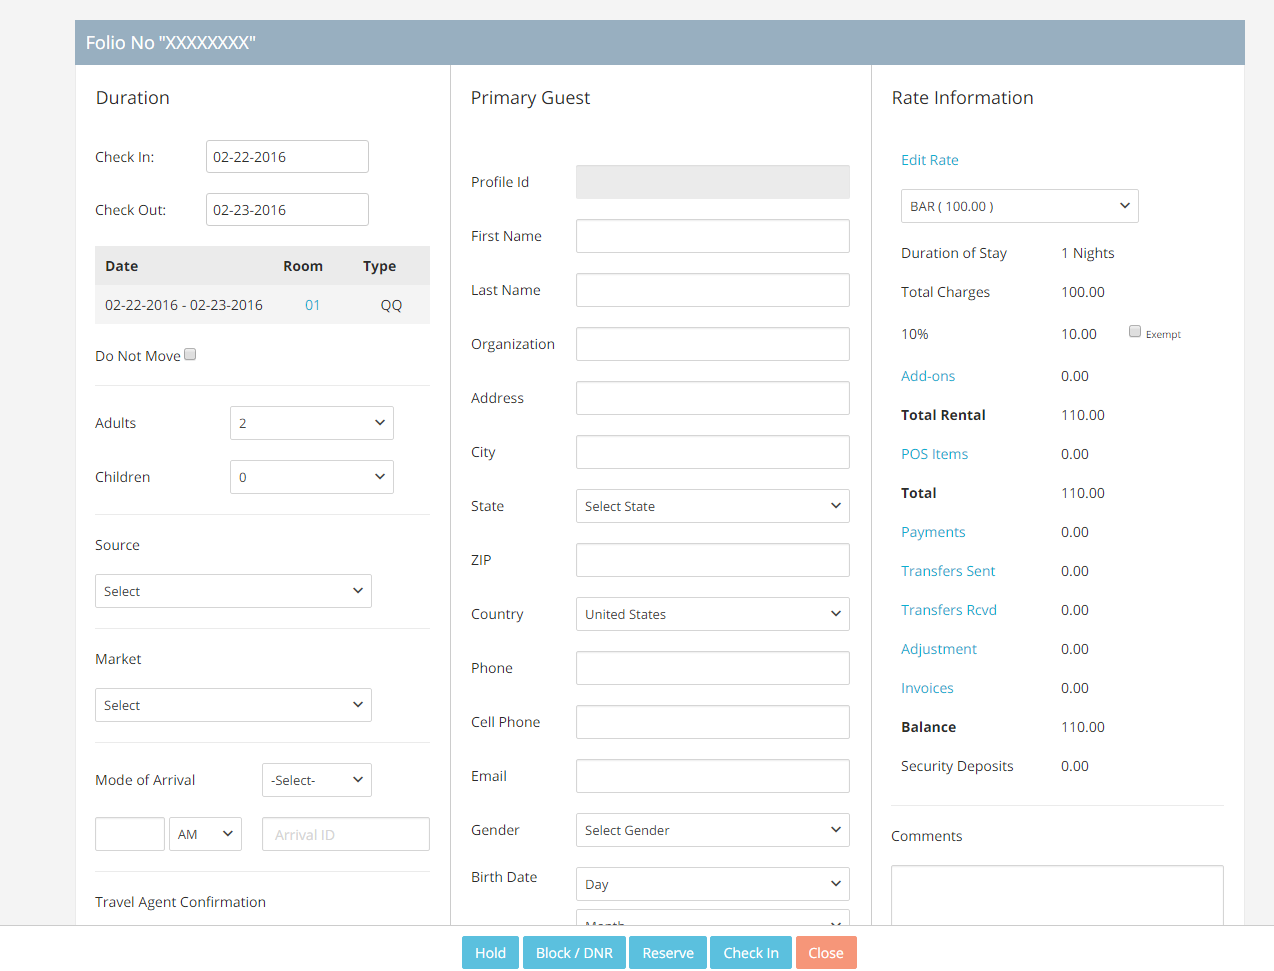
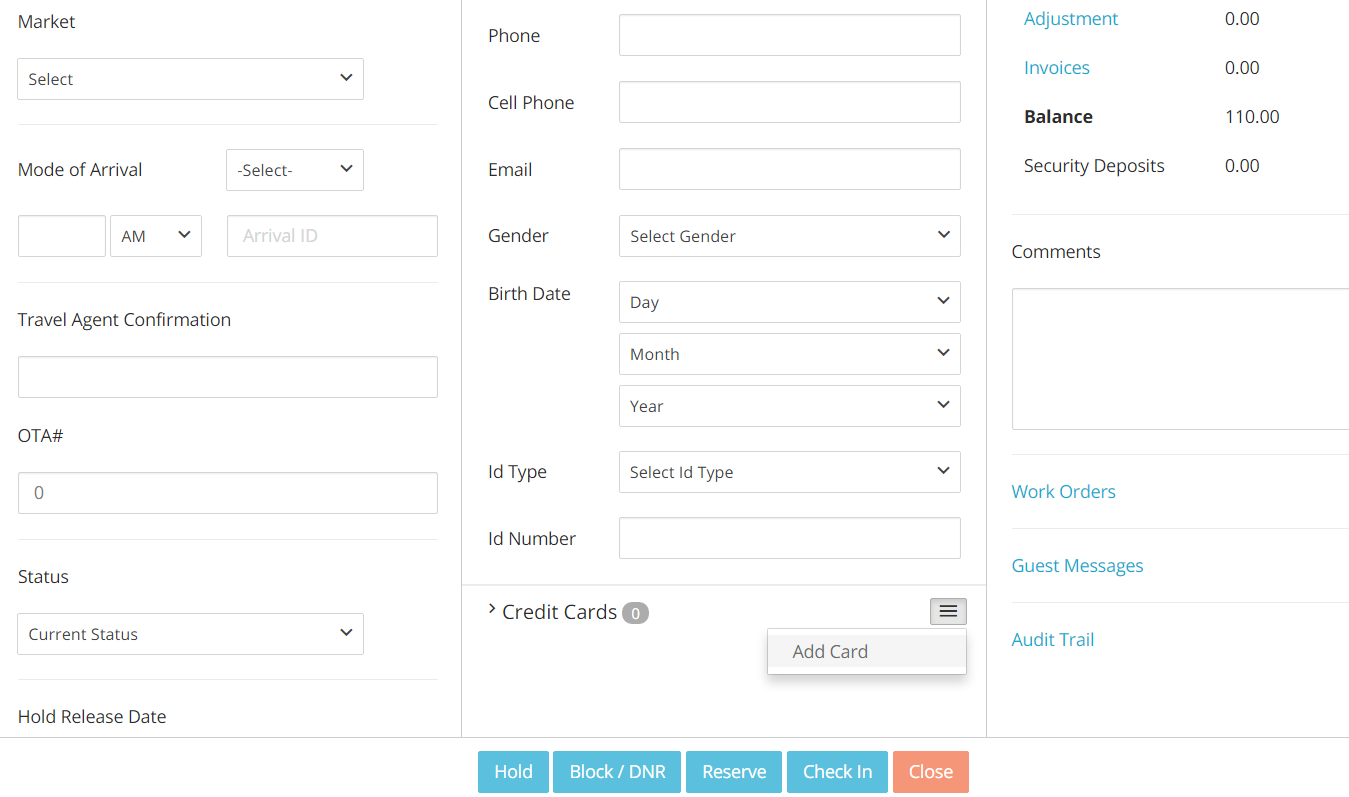
- Scroll down to the Credit Card panel at the center of the folio, and clik on the link Add Card:
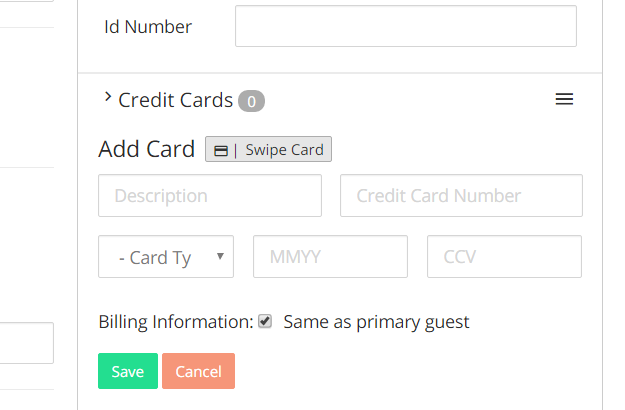
- You will see the button Swipe Credit Card: click on it:
- Once you click the button, the written Swipe Card will start flashing: swipe the credit card using the card Swiper:
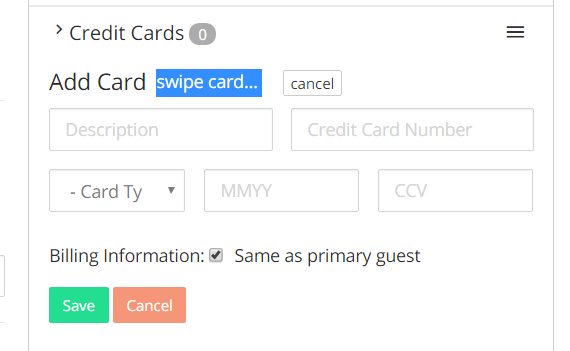
- You should hear a beeping sound when the card details get captured, and you will be able to see those details in the relevant fields:
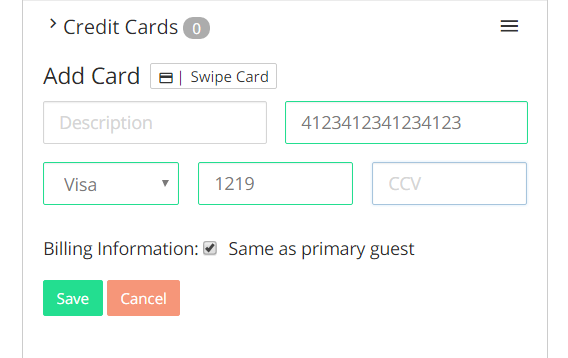
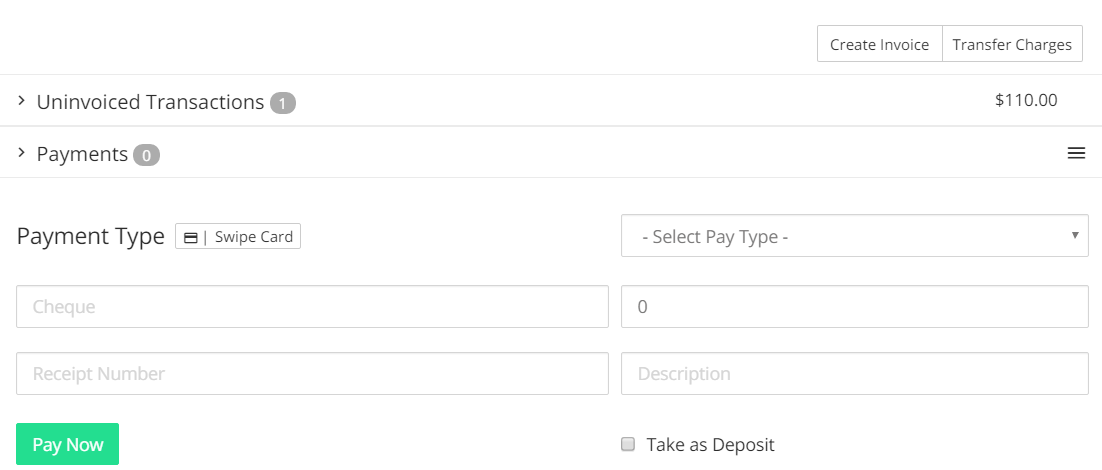
- You will be able to find the Swipe Card function that enables you to capture the card details in the Payment Screen:
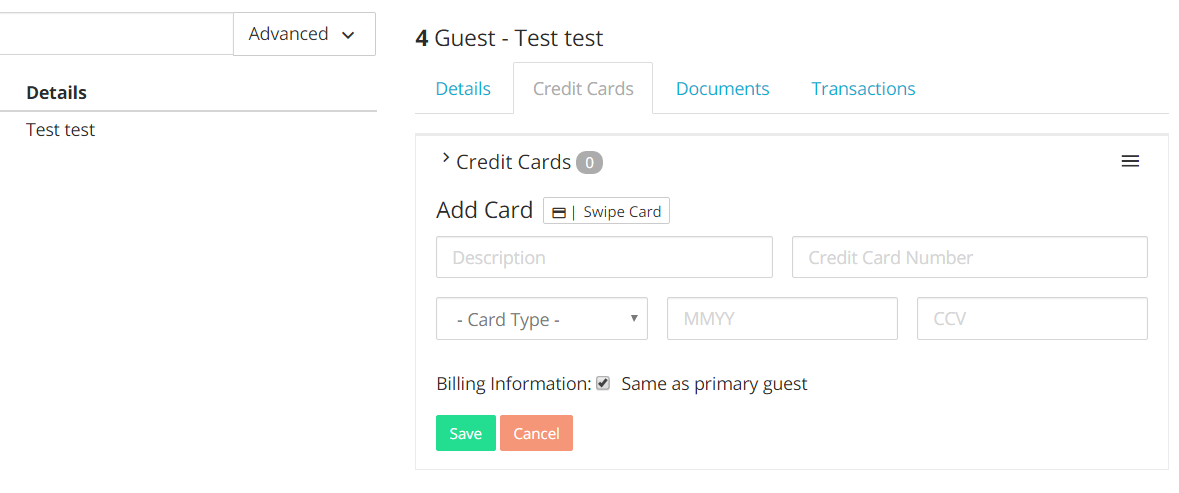
You can use the Swiper in the Profile tab, in the relevant Payment section:
Processing Payments with Payment Processing
If your account is integrated with a Payment Gateway, you will be able to process payments for credit cards directly into the Payment screen.
- To process a payment, select Credit card from the Payment Type drop down menu:
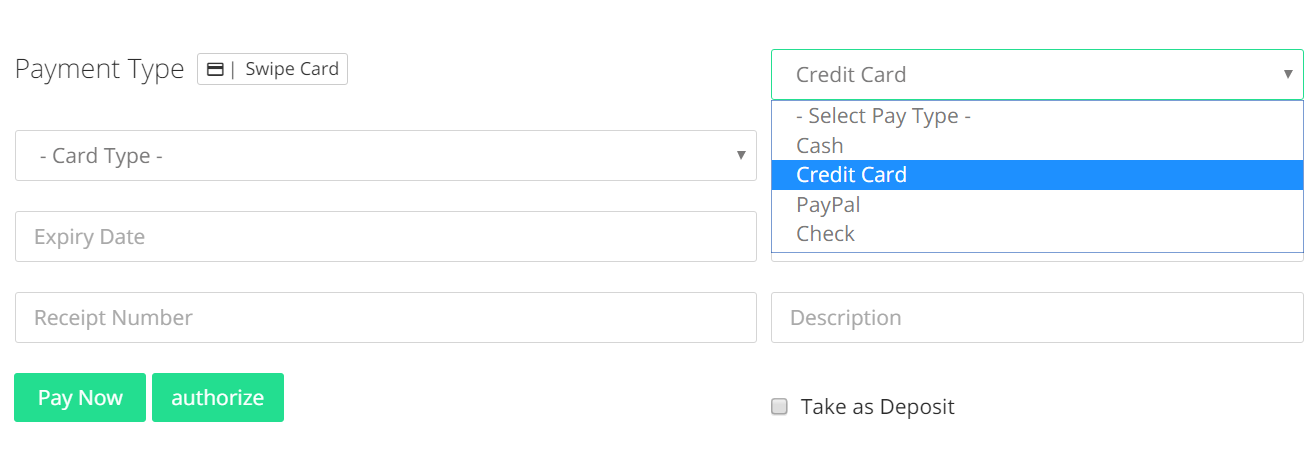
- Enter the credit card type from the Card Type drop down menu. Note that if the guest has a credit card loaded in the folio, there will be an option to select that card:
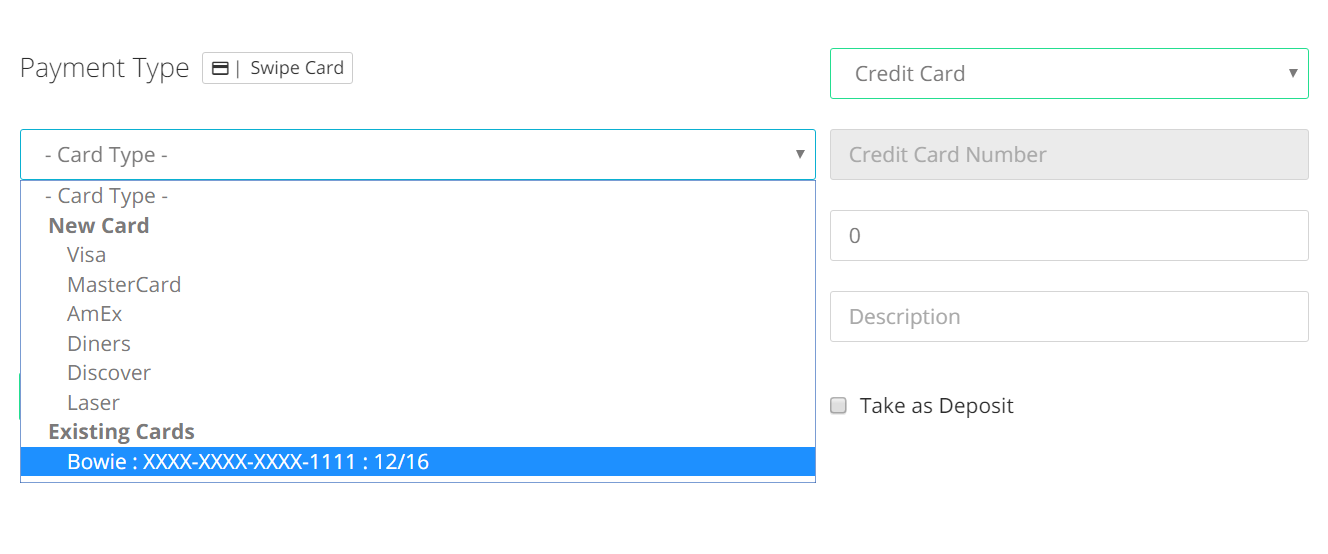
In the case you select the existent card, all relevant fields will be automatically filled in; otherwise, you can select the card type and insert the card number and the expiration dates.
- Place the amount you want to charge the guest:
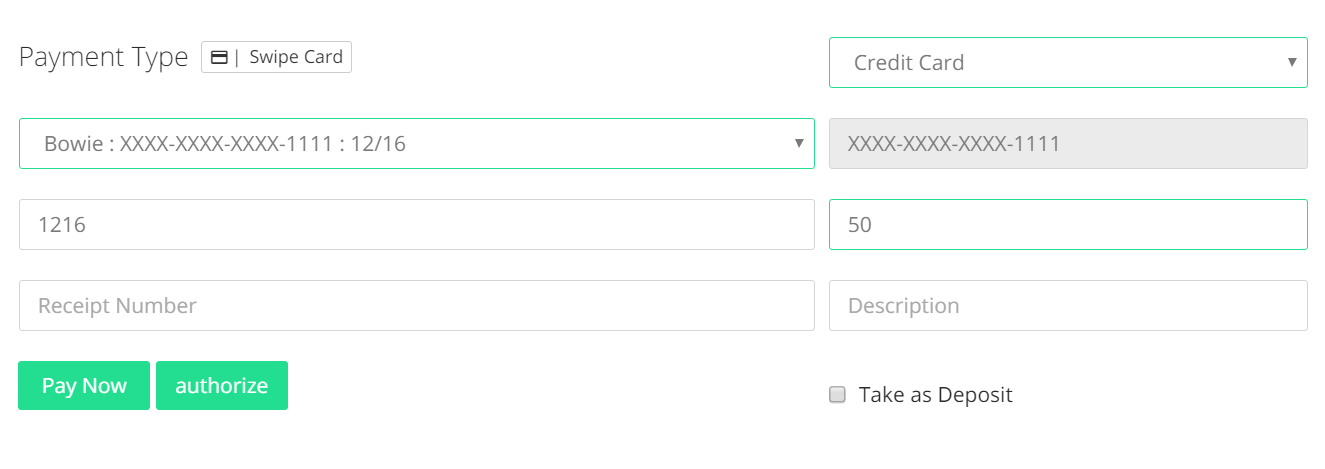
- When Payment Gateway is active you will have the option to either charge the card, or authorize it:
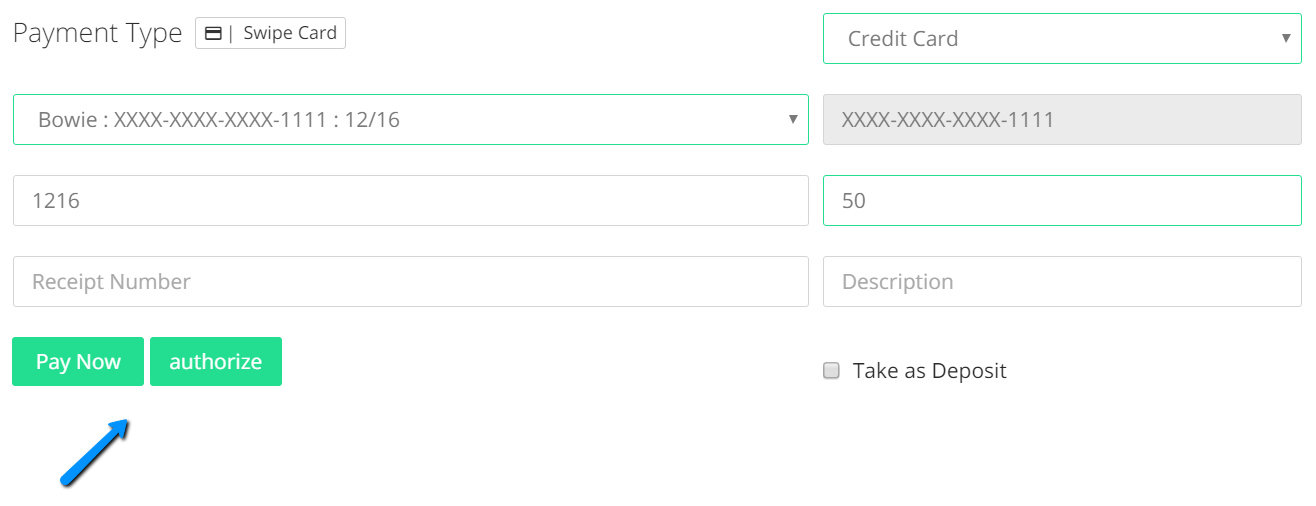
Authorizing the card will place a hold on the guest’s card for the amount you selected.
Pay Now will automatically charge the guest’s card for the selected amount.
- If you choose to authorize the card, you will receive a Payment Successful message on the screen. You can open the Payments drop down menu to look up the authorization: the latter will appear in a blue color:
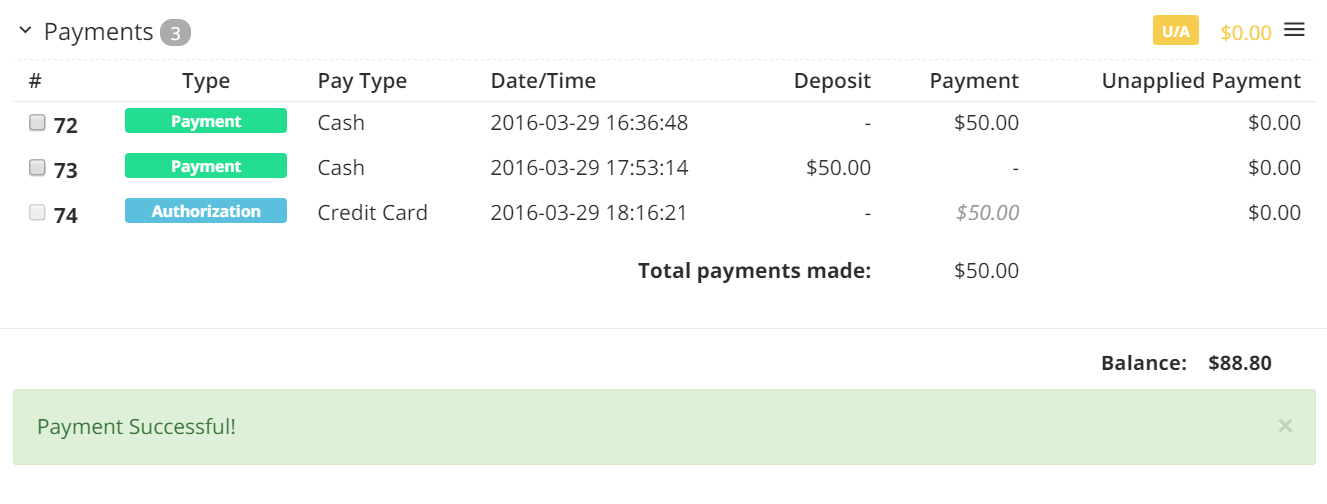
The amount corresponding to the authorization appears in light grey, and the overall balance is not affected by it.
- If you click on the Authorization blue button, you will be able to access the details and see the available actions that you can perform:
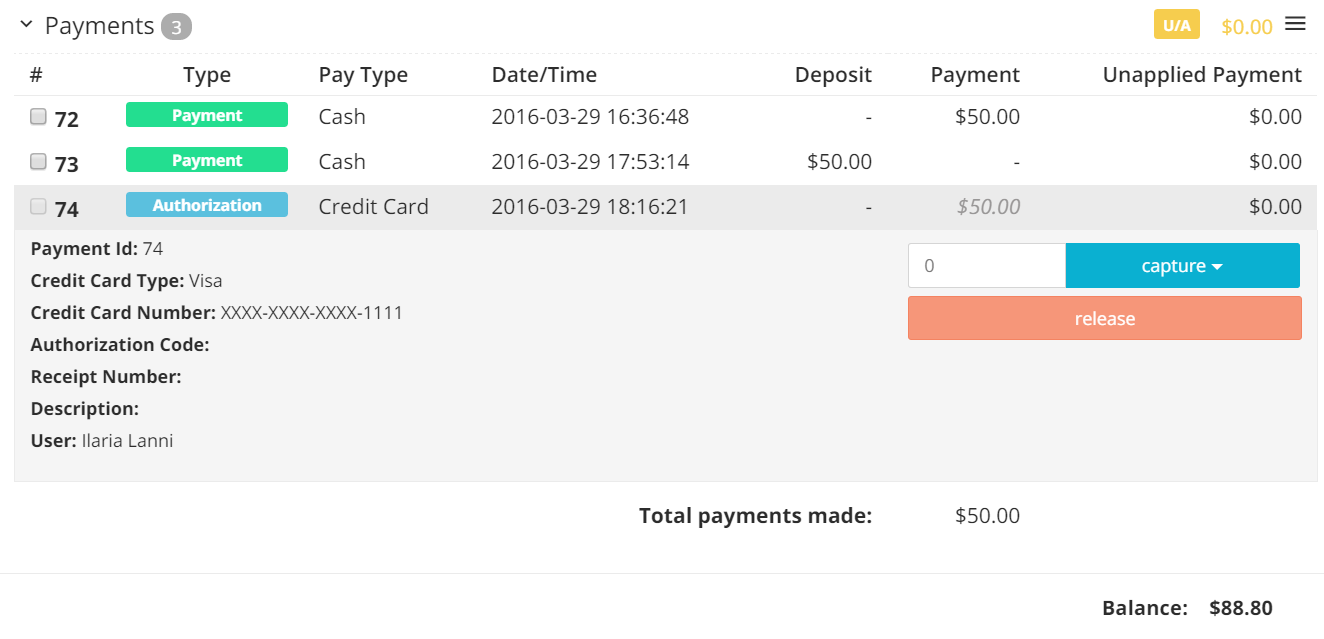
- If you need to release the authorized amount, simply click on the red button Release:
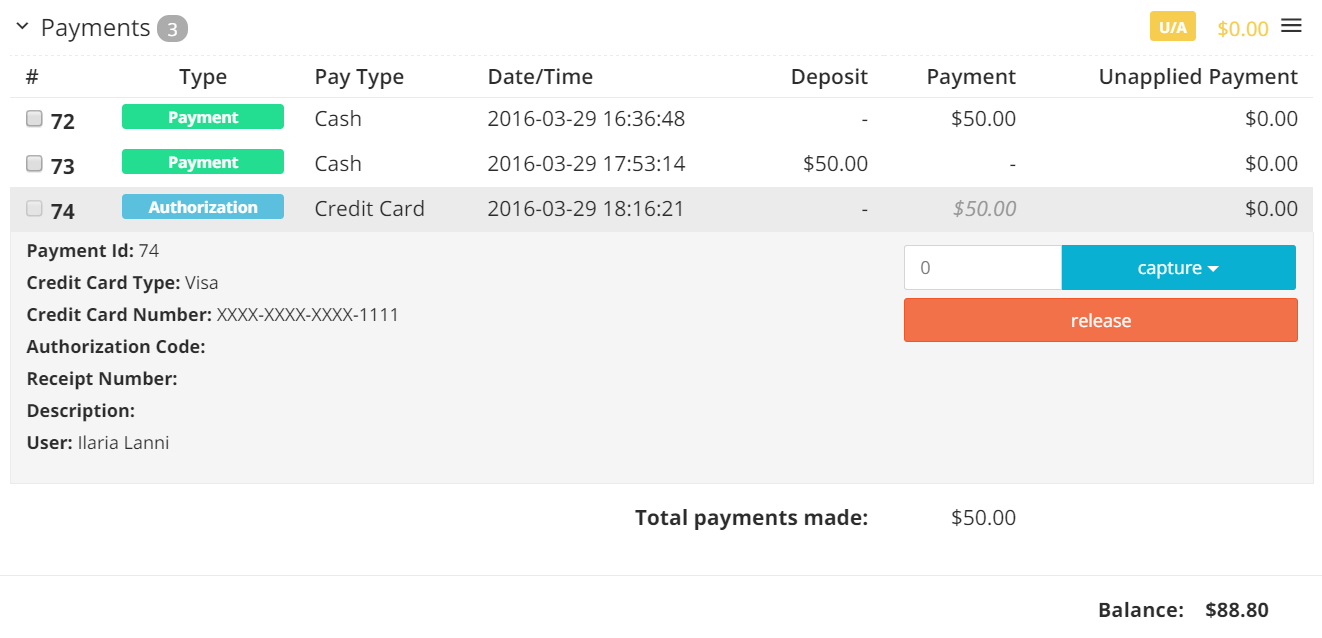
- If you want to capture the amount, or part of the authorized amount, insert the relevant value in the box and click on the blue button Capture:

Important: When connected to a Payment Gateway, you will still able to convert payments to deposit, void them or refund them. However, the refund option is only available for charges that have already been processed by the merchant account; if you have only just processed a payment and you want to refund it, you can void it and re-place the charge. Charges voided within the day of charge won't be processed by the merchant account.
Transferring Charges
You have the ability to transfer all or part of a folio charges either to another folio or to a Profile.
###Transferring Charges from Folio to Folio
Before you follow the instruction below, make sure you note down the folio number you wish to send the charges to.
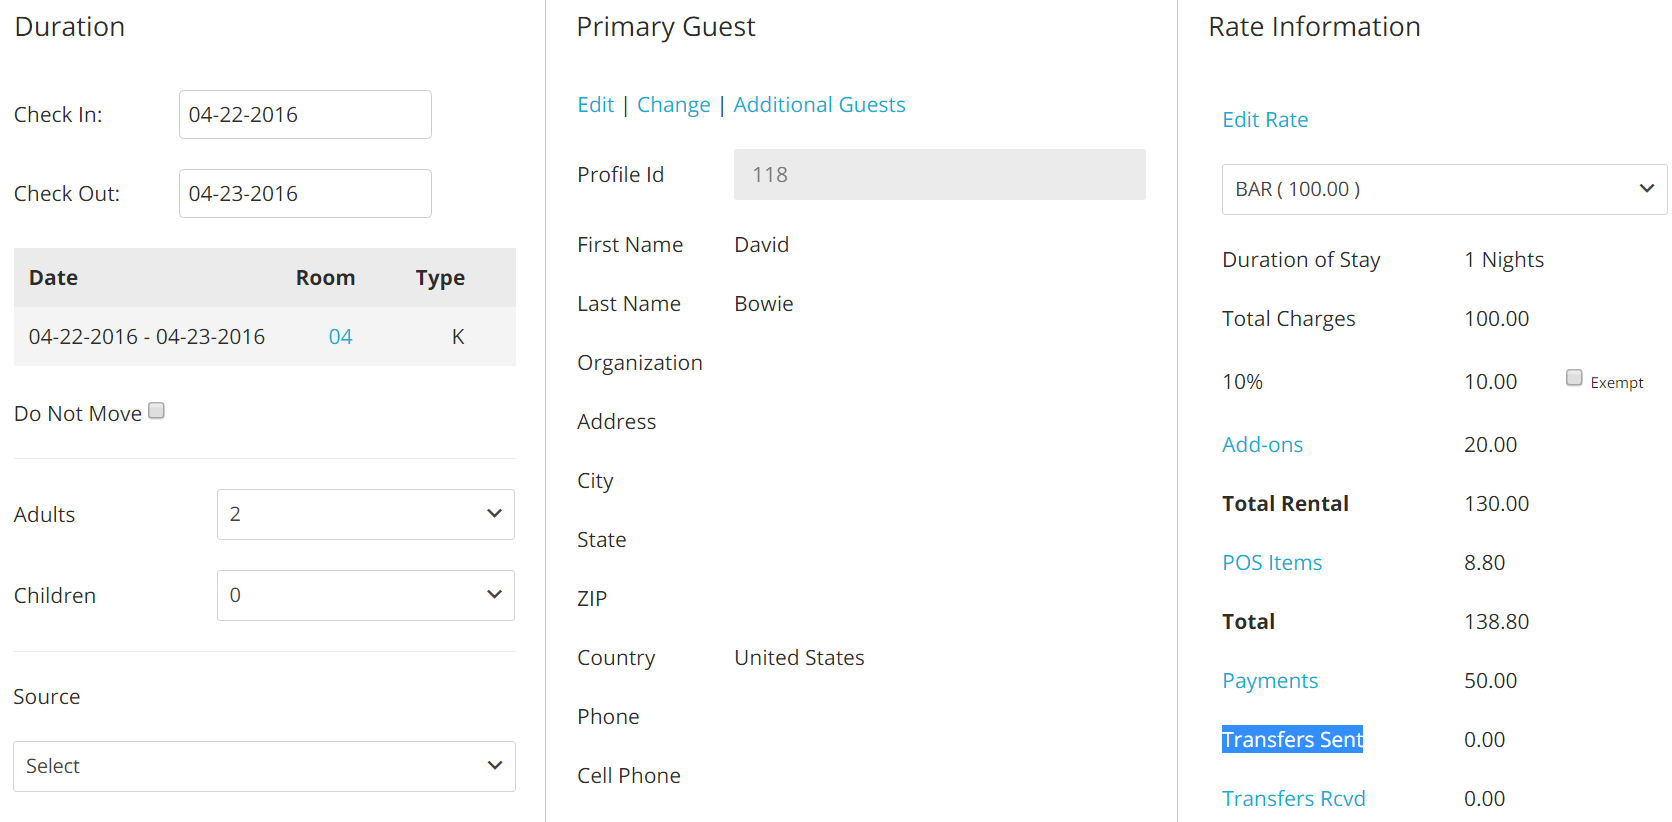
- Pull up the folio from which you want to transfer all charges and click on the blue link Transfers Sent, on the right hand column:
- Another panel will pop-up, and you will see a breakdown of all charges by night. Note that the column Amount will list the charges without taxes, while the column Total Amount will list the same charges with the total amount of taxes.
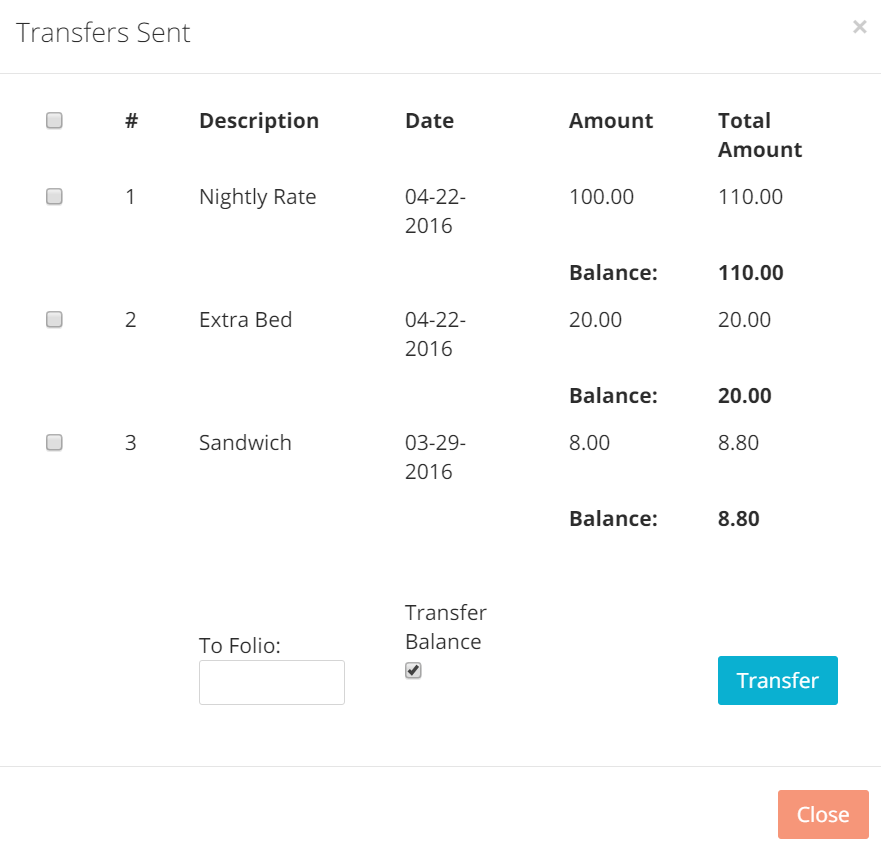
- Using the check-boxes on the left hand side of each charge, select the ones you wish to transfer:
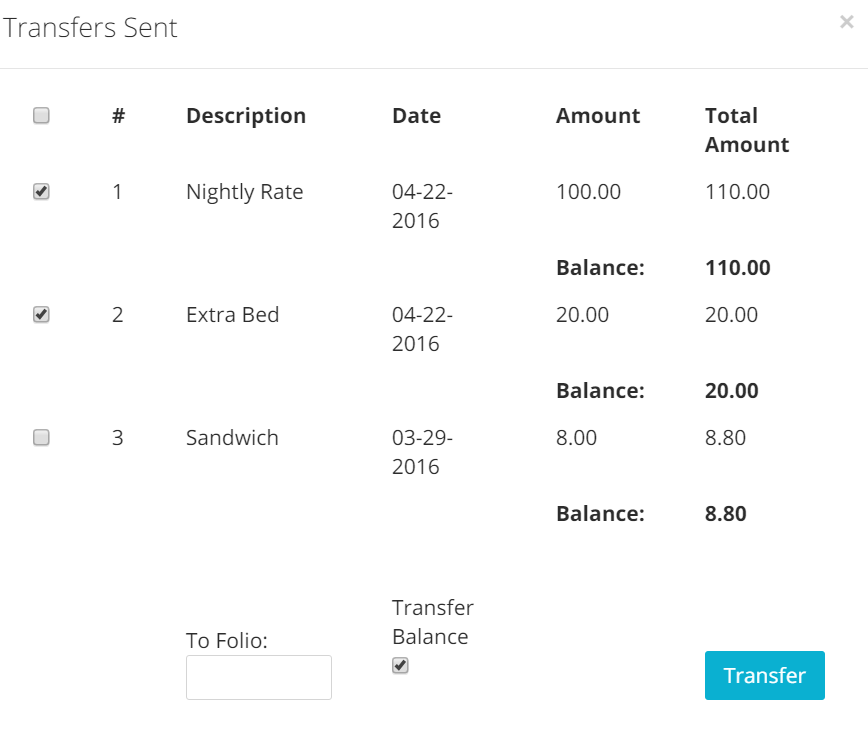
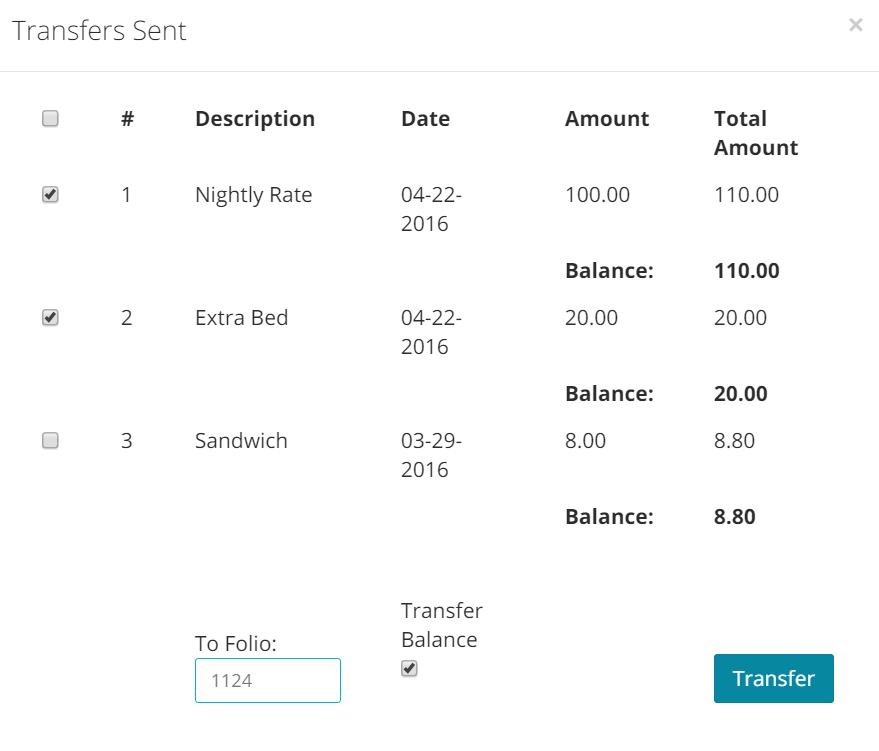
- Insert the folio number where you want those charges to be sent and click on the blue button Transfer:
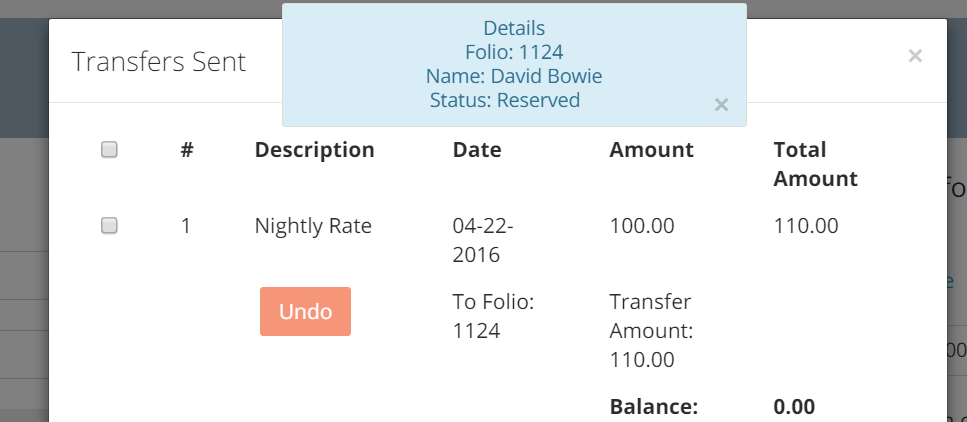
- Once the Transfers have been sent out, you can undo your action by clicking on the red buttons Undo:
- If you now go back to the folio screen, you will see that the sum you chose to transfer will appear next to the link Traansfer Sent:
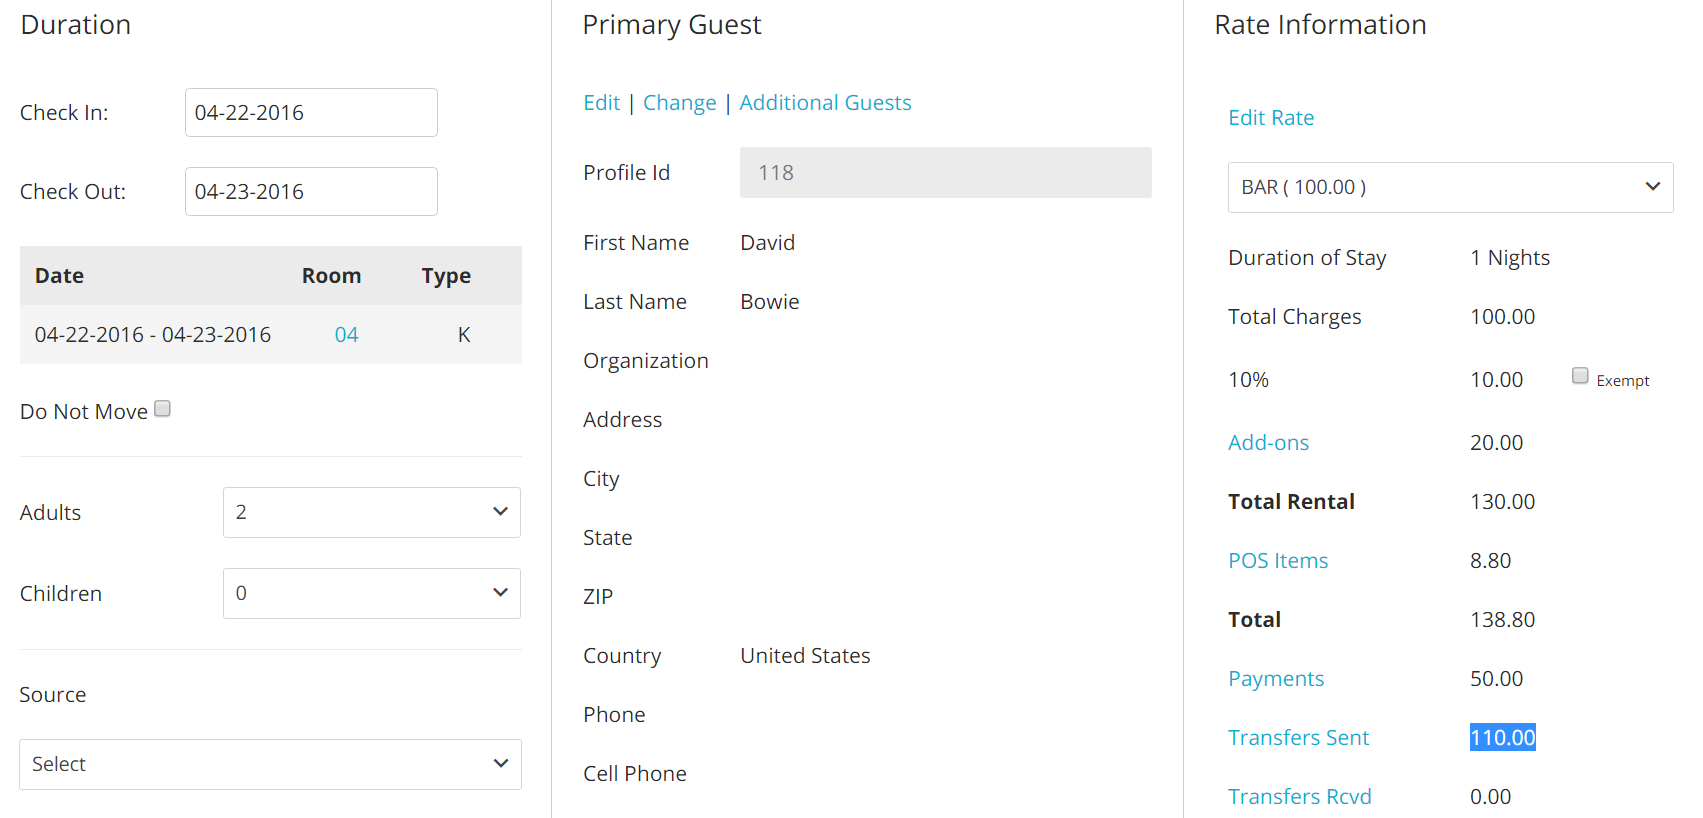
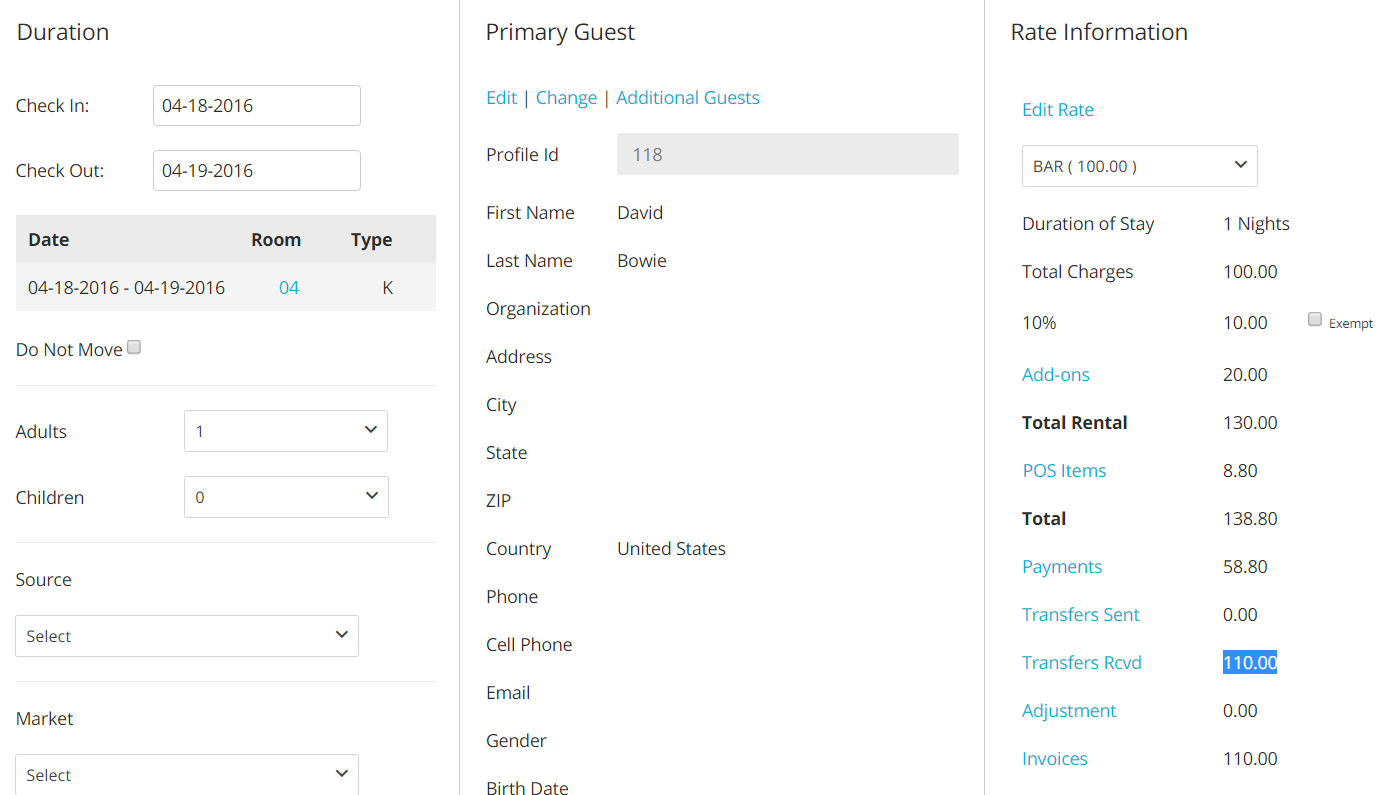
- Similarly, the folio that has received the charges, will have the corresponding amount appearing next to the link Transfers Received:
Transferring Charges from Folio to a Profile
You will be able to send charges from a folio to a Profile invoice. Before you follow the instructions below, make sure that the Profile you want to send charges to has at least one invoice created; if it does not, you will need to create one. You can follow instructions here.To do so, follow the instructions on the Profile section of this manual. It is also recommendable having the Profile ID number handy, in order to avoid confusion in case there are multiple profiles with the same name.
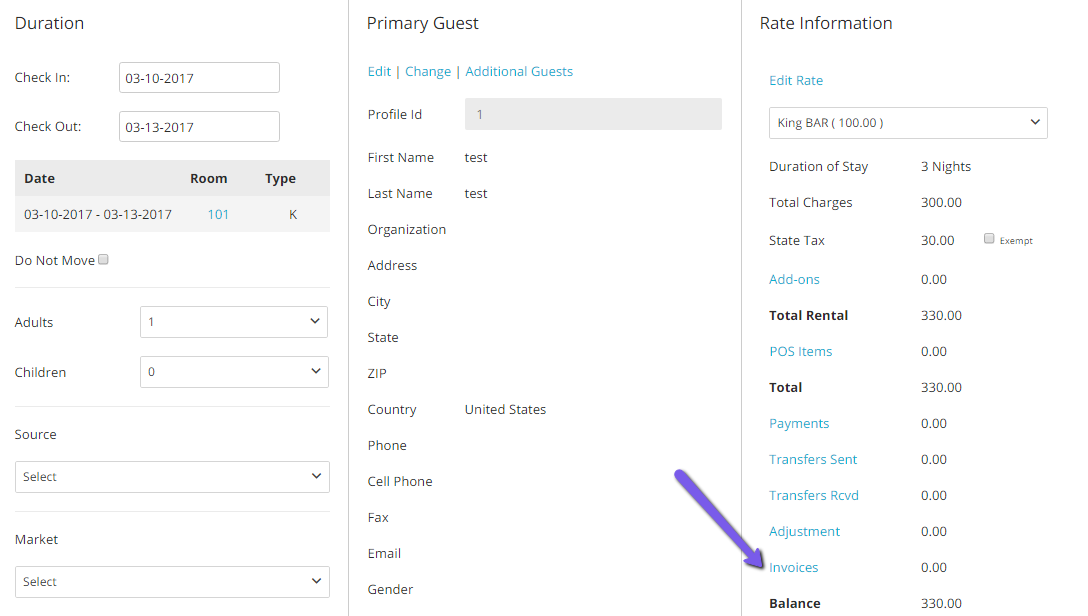
- Access the Invoice panel in the folio you wish to transfer the charges from:
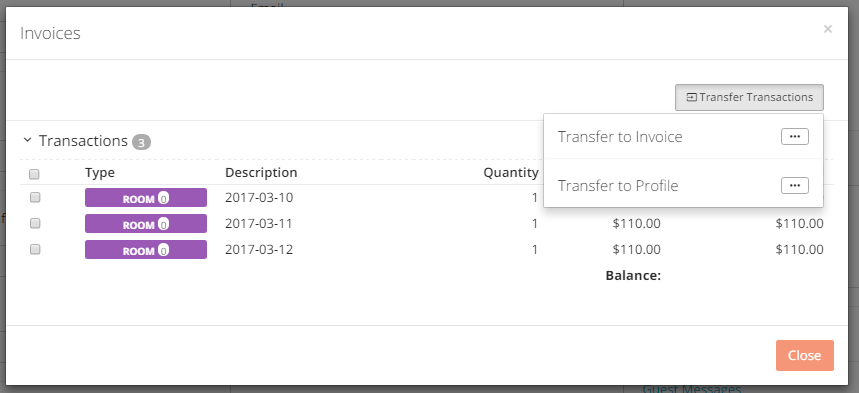
- Expand the Transactions drop down menu to visualize the charges in the folio, and then click on the button Transfer Transactions :
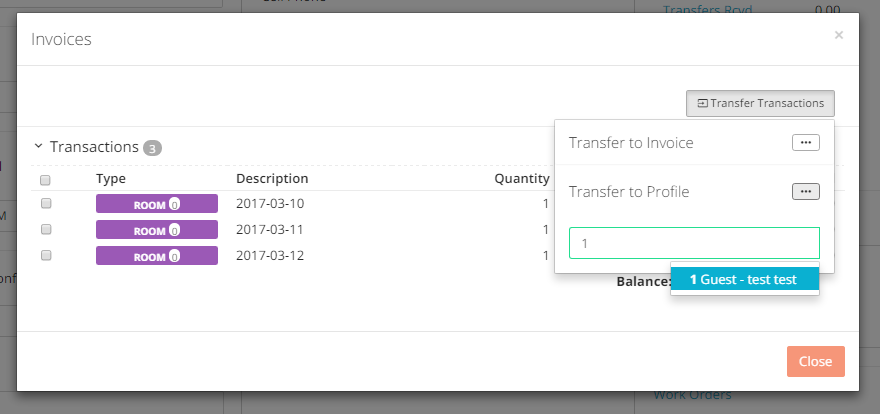
- Click on the three dots button next to the tag Transfer to Profile. A search field will come up, enter the profile id number or the name of the profile you want to send the charges to. Search results will immediately appear underneath the search box: click on the suggestion as shown below:
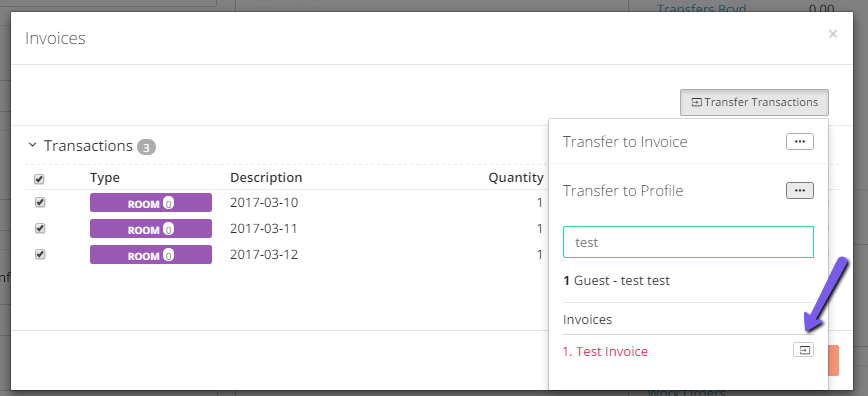
- Once the profile is selected, the system will automatically list all invoices that have been created for that profile. Select the right invoice, then select the charges you wish to transfer and click on the small arrow button to initiate the transfer:
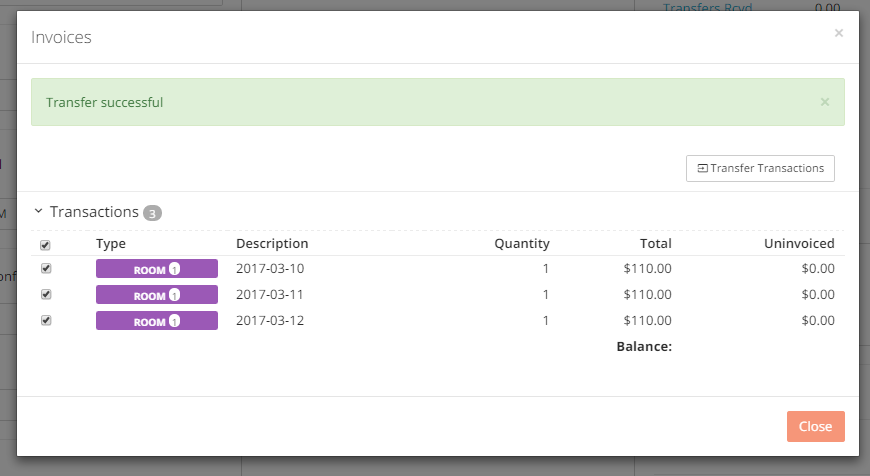
- A successful message will come up on the top of the screen in green and the transactions list will show a $0 under column Uninvoiced, for those transferred charges:
- If you now go back to the profile you will see transferred charges listed under the selected invoice:

Applying Payments to Charges
When you transfer charges to different invoices, you will need to reflect payments that are relative to those charges, so that the invoice will show a balance of $0.
We call this feature Apply Payments: it is the ability to associated payments to certain charges.
Note: payments can only be applied to those charges that are listed under an Issued invoice.
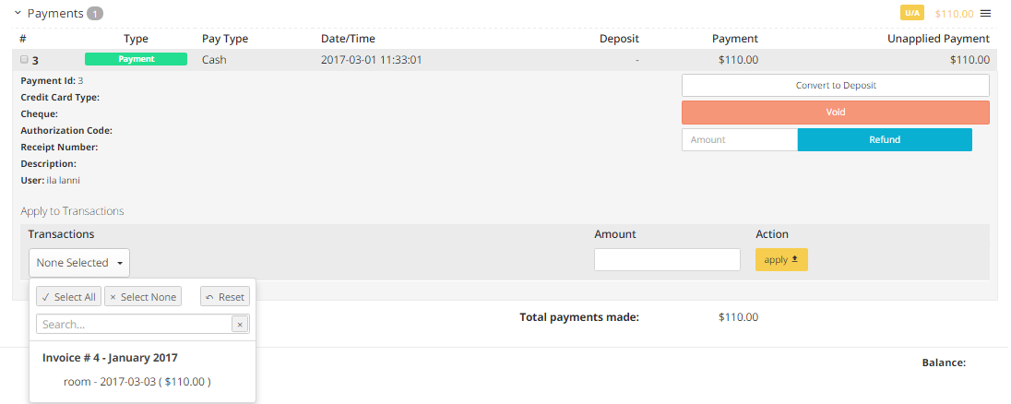
- Expand the payment you wish to apply and click on the drop down menu none selected under tag Transactions: the system will give you a list of the existent issued invoices created for that profile:
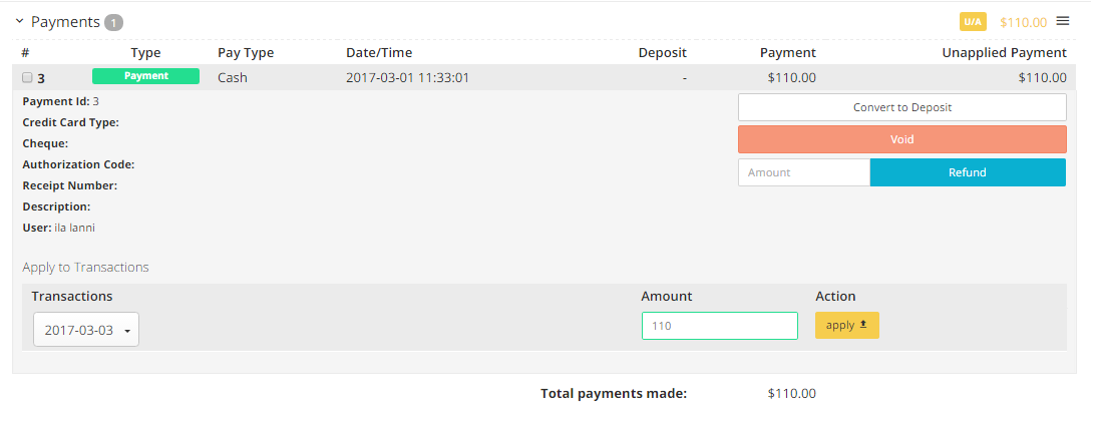
- Once the right invoice is selected, enter the amount you want to apply to those charges: note that you can either apply a partial amount or the total amount. Click on the yellow button Apply once done:
- Going back to the invoice tab, if the invoice shows $0 balance, it will appear with the tag paid in yellow. To print or send the invoice via email, click on the three bar on the right side of the module and click on the link Invoice :

Adjustments
You will be able to perform adjustments to charges, directly from each folio:
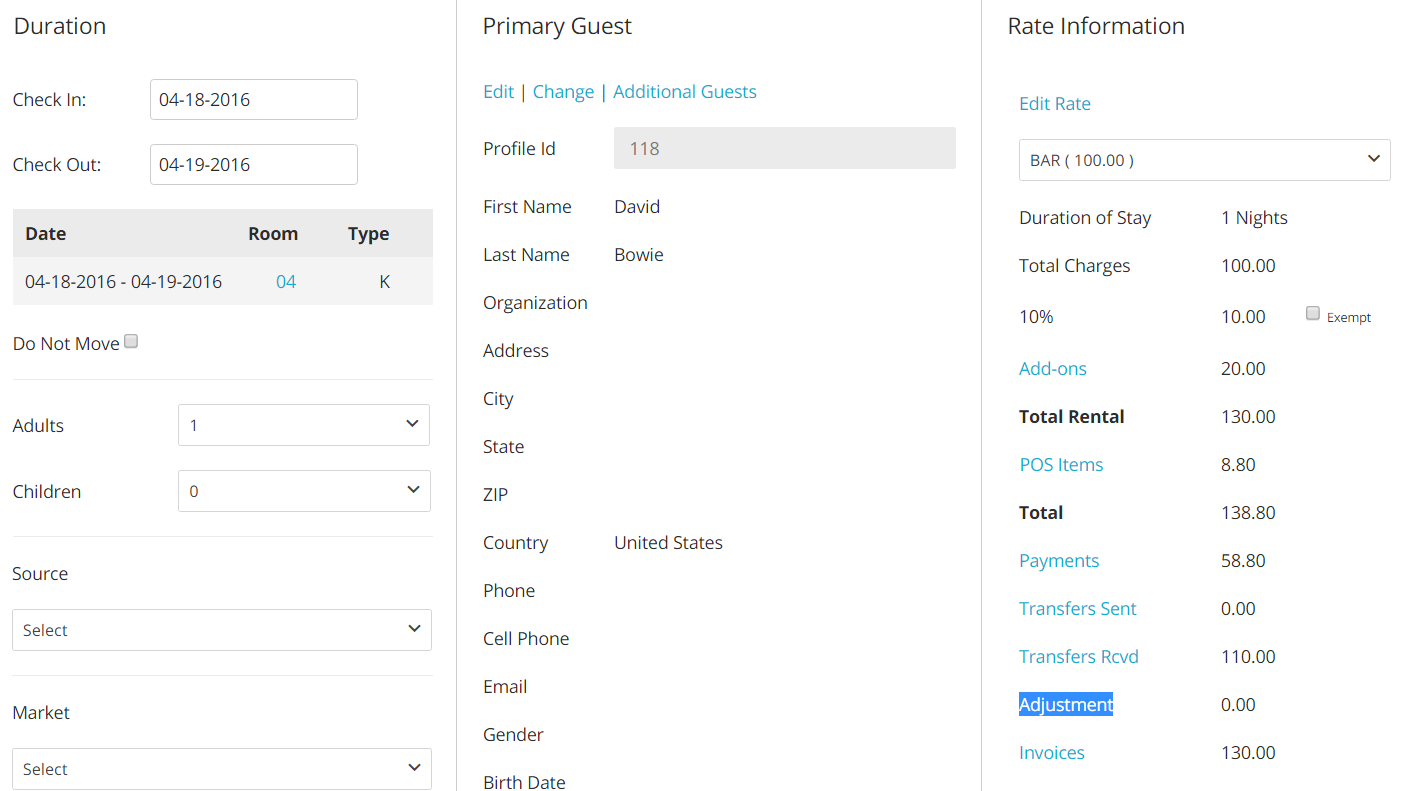
- Click on the blue link Adjustments on the right hand side of the reservation folio:
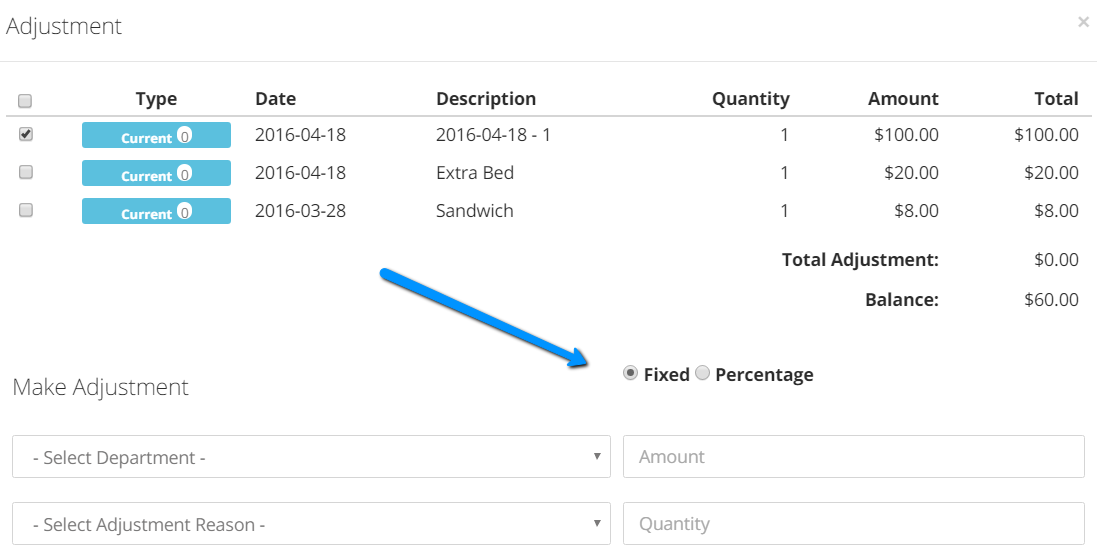
- Another panel will pop up: you will be able to see a list of all charges. Select the charges on which you want to perform the adjustment by checking the relevant box:

- Choose whether to adjust a percentage or a fixed amount by clicking on the right circle-box:
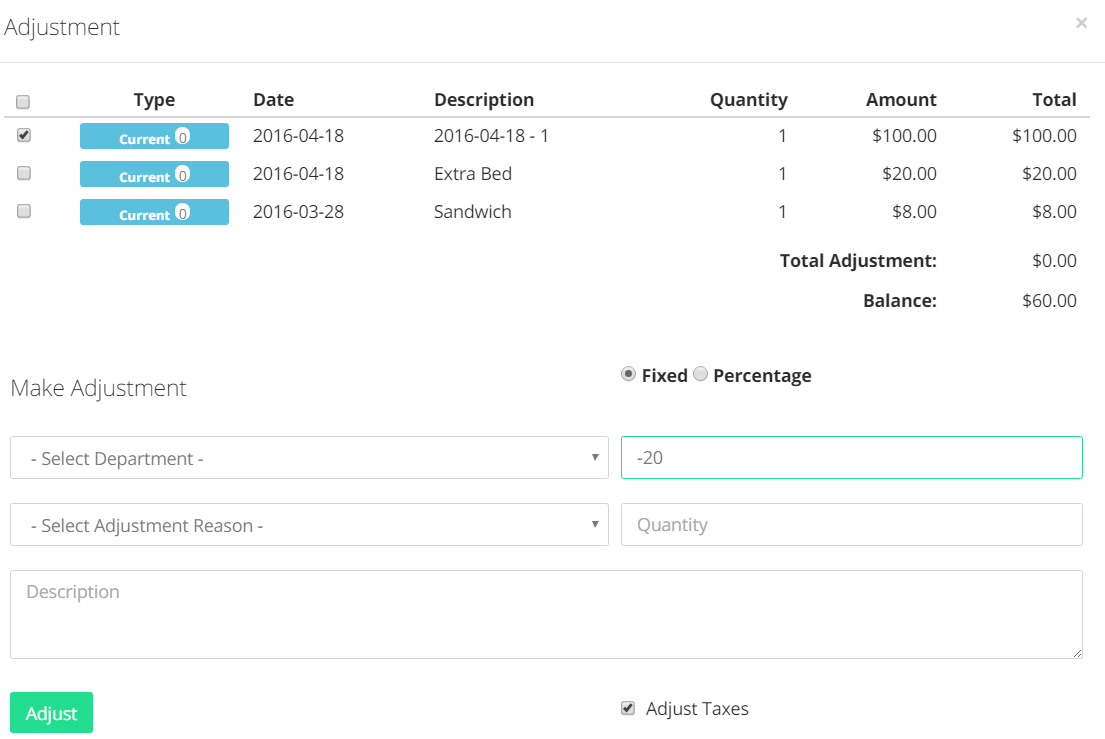
- Select a Department, if applicable, and place the adjustment amount (fixed or percentage). If you give a discount, be advised you need to place a ‘-‘ sign in front of the amount. The amount you set will be taken off from each of the charge item you chose to adjust:
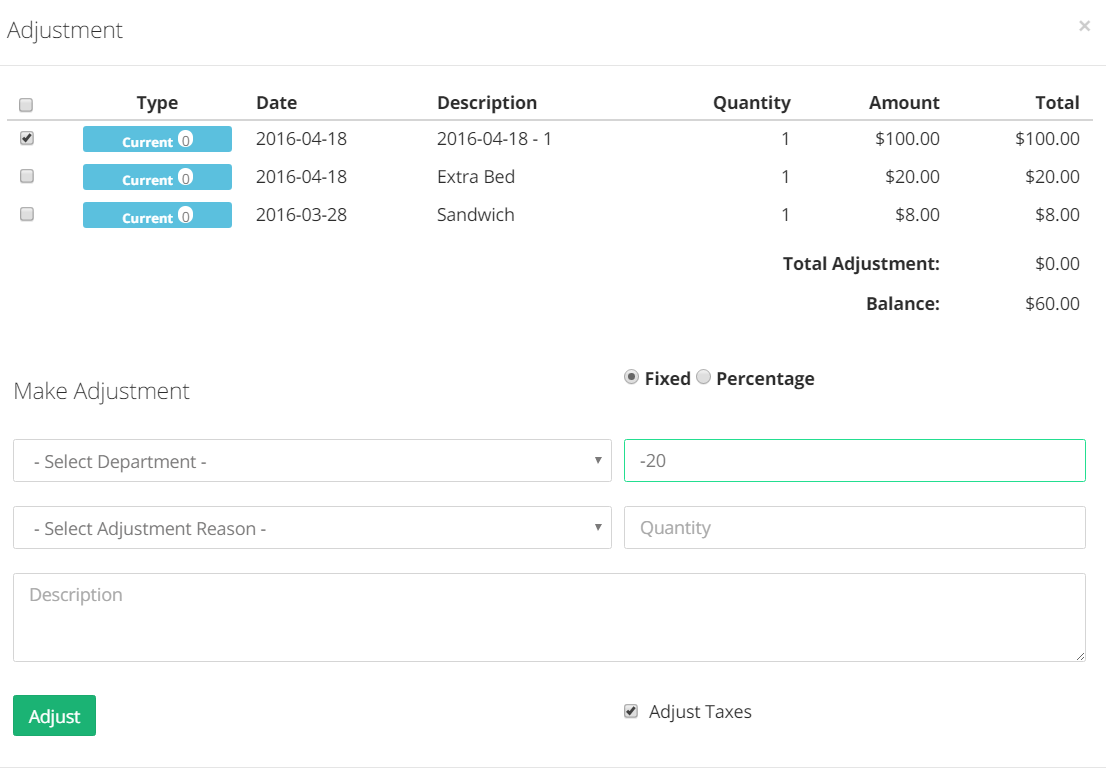
- Select the Adjustment Reason, if applicable, and check the box next to the tag Adjust Taxes if you wish to have the tax value adjusted, too. When finished, click on the green button Adjust:
- Adjustments will be shown in the folio, in the apposite area:
Tags: