This section covers everything you need to know about rates set-up, taxes, fees and add-ons. We will start with tax and fee creation before going into the different ways you can reproduce your rate structure into Frontdesk Anywhere.
Taxes and Fees
As a first thing, you will need to set up all applicable fees and taxes.
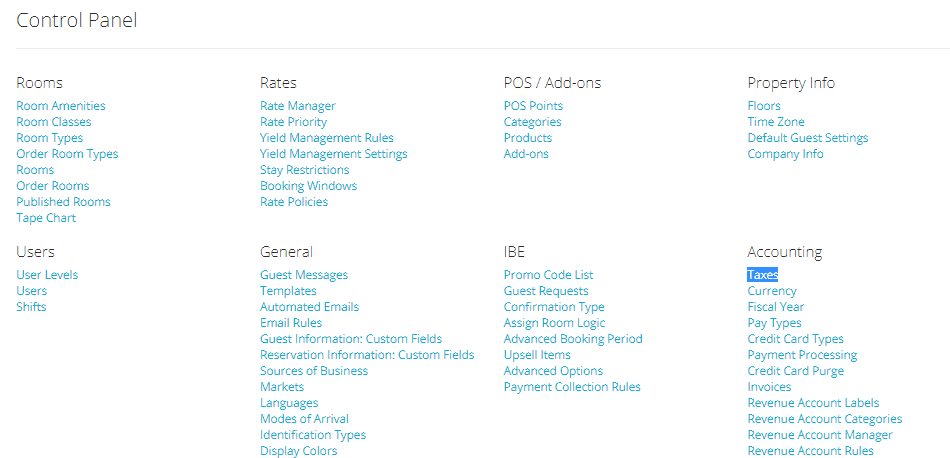
- In the Admin Settings, click on the link Taxes under section Accounting:
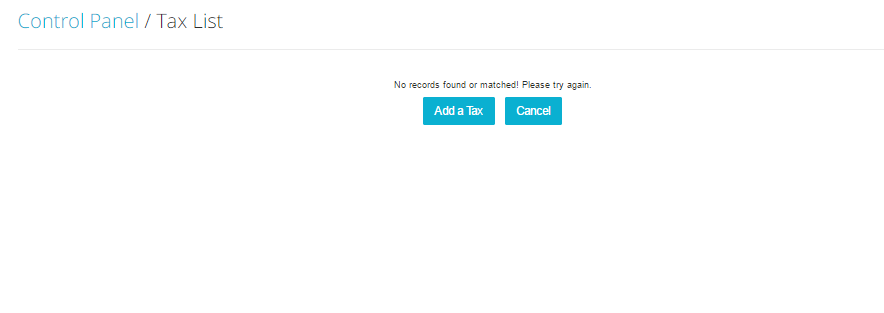
- To add a tax, click on the blue link Edit on the right hand side of the tax you want to amend:
- Insert all information requested: the Tax Title will appear in each reservation where the tax is applied, so we advise it to keep the name simple.
You will need to choose whether to make the tax a fixed amount or a percentage by clicking on the right circle box. If you choose to make the tax a flat fee to be added, specify whether the amount has to be added on a per reservation or per night basis:
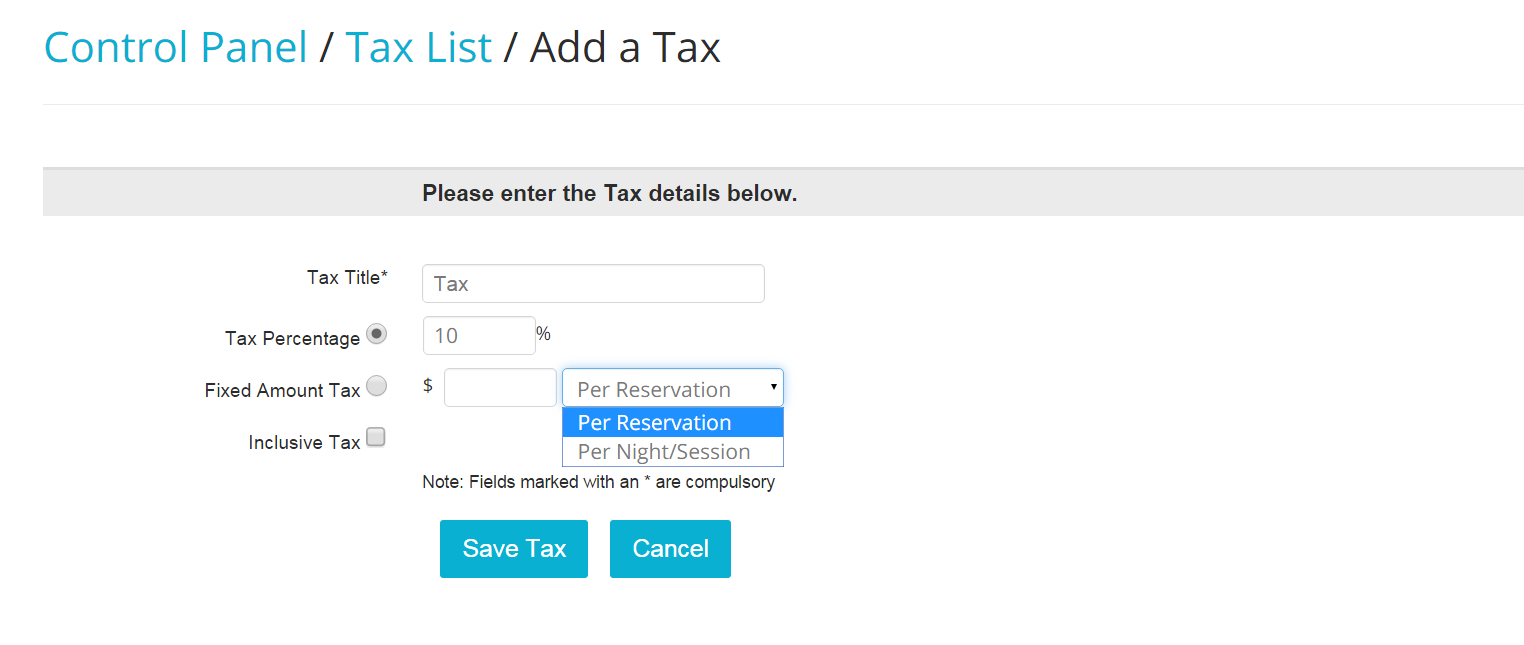
- If you are creating an inclusive tax, tick the box with the tag Inclusive Tax: if this box is checked, the tax will only appear when reporting, and it won’t show anywhere in reservations. Please consult with a qualified tax professional before creating an inclusive tax.

Note: In Frontdesk Anywhere, the inclusive tax price is included in the charge that it is applied to. This means that you must enter the calculated tax percentage in the value field when defining your inclusive taxes.
As a basic example, a rate of $100 with a 7% inclusive tax applied to it means that the $100 is actually 107%. Therefore, you should enter 6.54206% (7/107 * 100) as your tax value. This results in a rate of $93.45794 ($93.46) and tax of $6.54. Expressed as a formula it is:
Tax Rate ÷ (Tax Rate + 100)
Multiply the result by 100 to get the integer to enter into Frontdesk Anywhere.
We advise you to speak to your accountant to go over these important details.
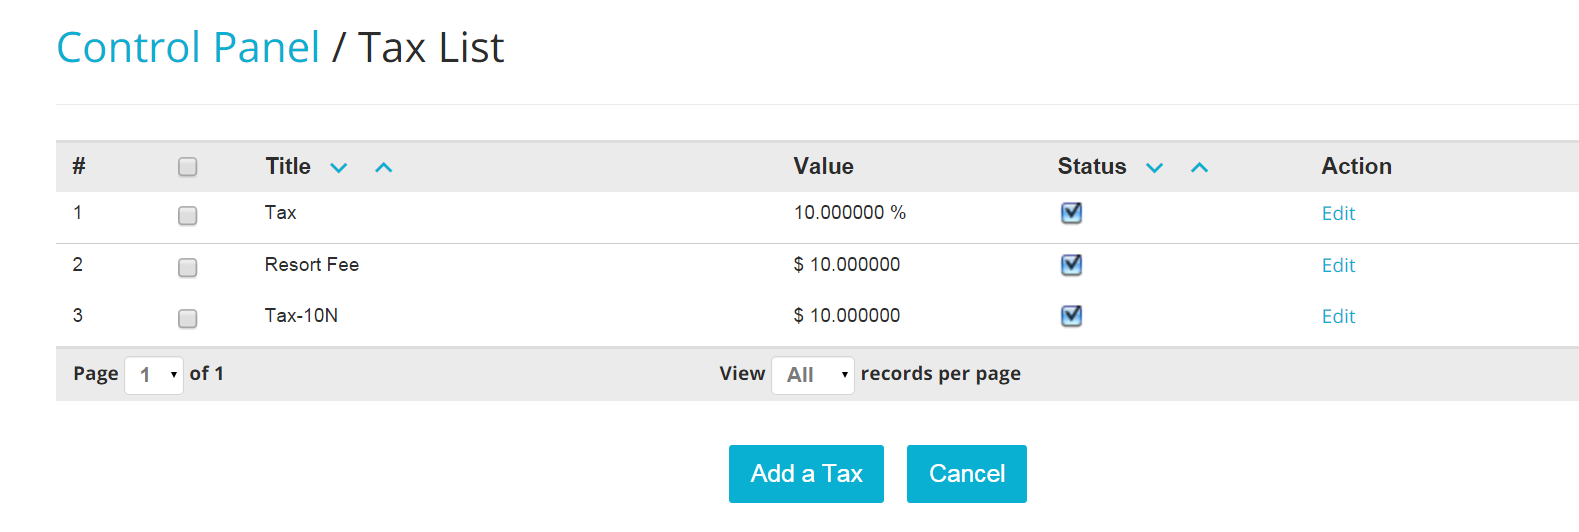
- Once done, click on the Save button: if you need to create a new tax, click on the blue button Add a Tax; the process is the same as editing one:
Tax Operations
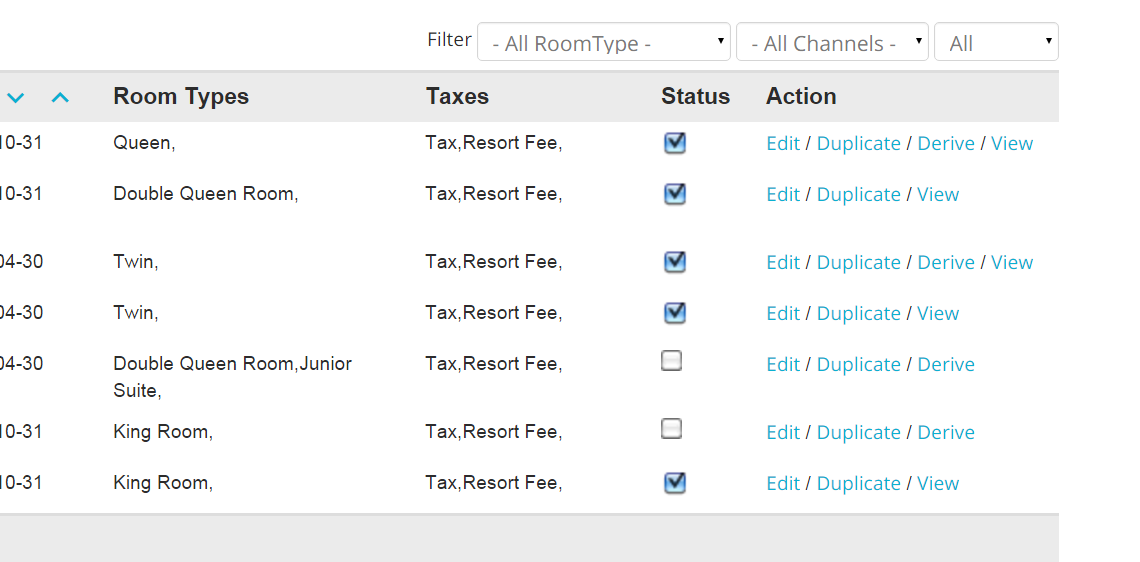
Deactivate To make a tax inactive, simply uncheck the box under column Status, on the right hand side of the relevant tax:

Note: It is currently not possible to erase a tax: making a tax inactive will ensure that the tax won't show up anywhere in the system. Note that if a tax is made inactive, existing reservation where that is applied won't change the tax value. In order to update all taxes to a new tax value, you will need to reselct the rate on those reservations.
Rates Set-Up
There are different ways you can create and operate on a rate in Frontdesk Anywhere, but before starting it would be good to spend a few words on our terminology: this will make you become more familiar with the instructions written below.
A Rate Class is the heart of your rate configuration: from here you can define the type of rate you want to create, decide the channels on which it is to be distributed, apply taxes, and create Season Periods.
A Season Period is the area of the Rate Class where you place the actual price for your rooms and charges for extra occupancy. As the name suggests, Season Periods are intended to be used to set up rates for extended periods of time, like for high/low season. You will still be able to change the price on a daily basis by using the Daily Rate Grid.
The Daily Rate Grid is where you can view and perform adjustments on the rate for any day of the year.
Rate Classes
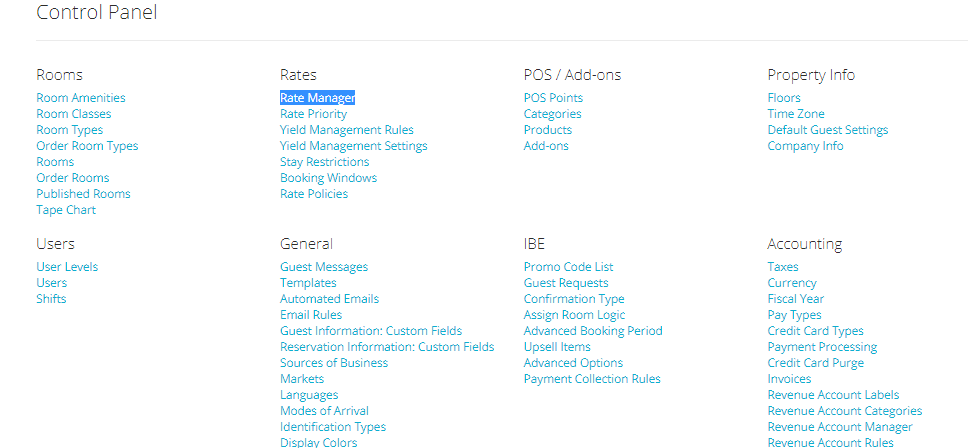
- In the Admin Settings, click on the blue link Rate Manager under section Rates and click on the blue button NEW at the bottom of the page:
- You are now in the heart of a rate configuration, and you will see different information to fill in. Let’s start by placing a name for your new rate, next to the tag Rate Code, and a brief description of the rate:
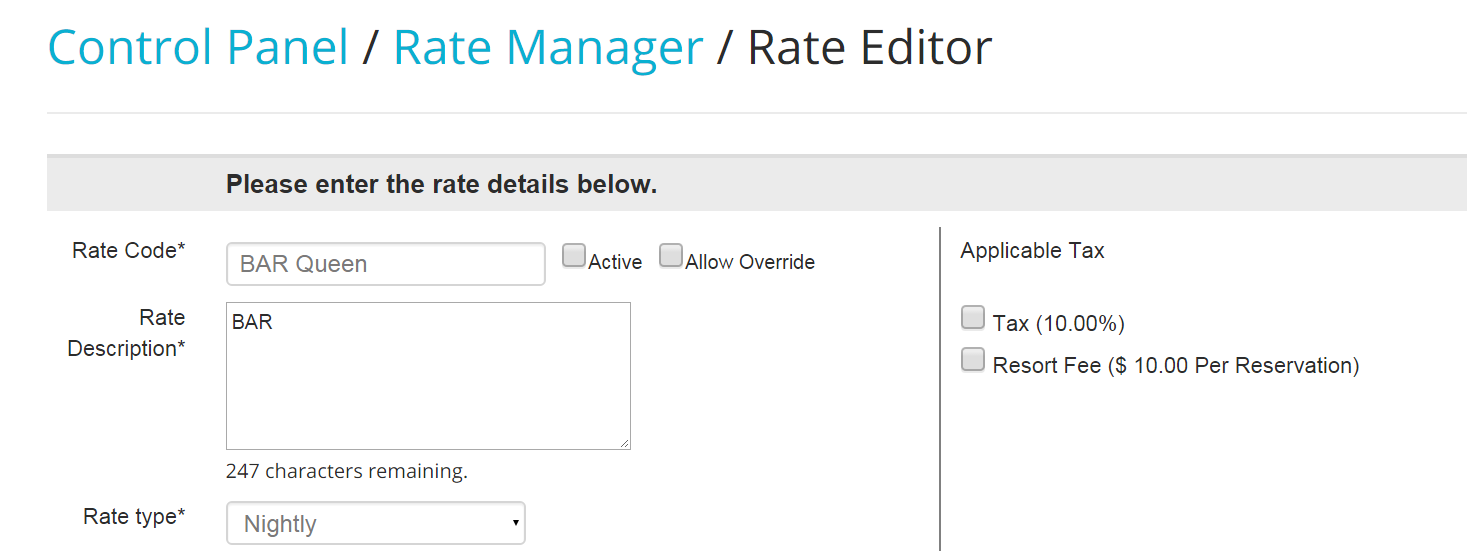
If you are using the Frontdesk Anywhere booking engine, you will see the description show up underneath the name of the rate, when a guest is trying to make reservation online: for this reason, we advise to keep the description simple.
- Check the box Active if you want the rate to be enabled upon creation, and check the box Allow Override if you want to enable the possibility to edit the rate on a reservation basis. Also, check the boxes for all the rate’s applicable taxes:
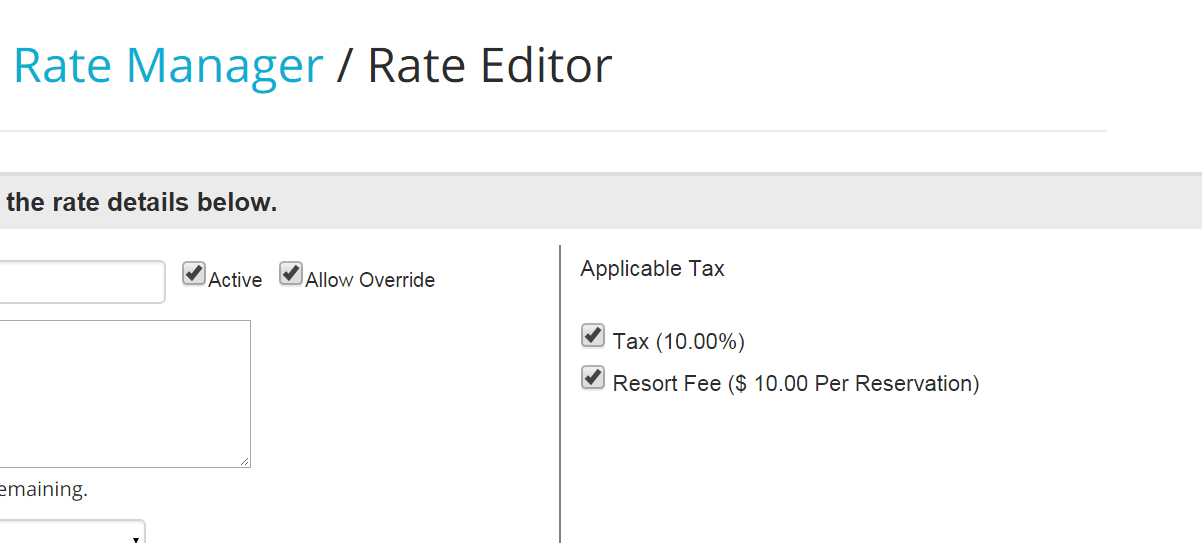
If you choose to check the Allow Override box, the rate will become editable on the reservation folio. This means that the Edit Rate link will become clickable.
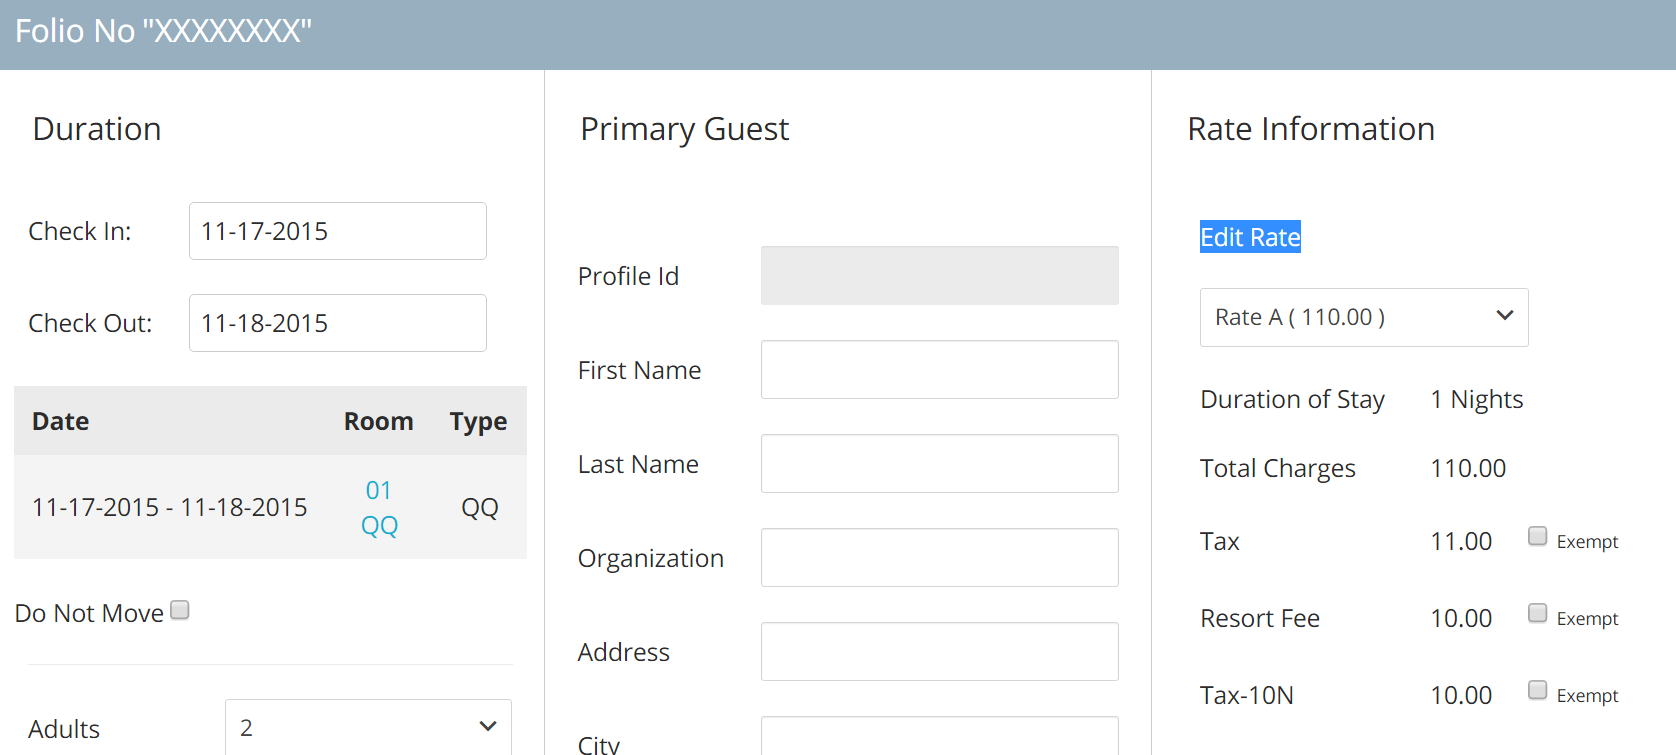
For more information on how to edit a rate on a per reservation basis, click here.
- Specify the type of rate you are creating by selecting the right option in the scroll down menu, next to the tag Rate Type:
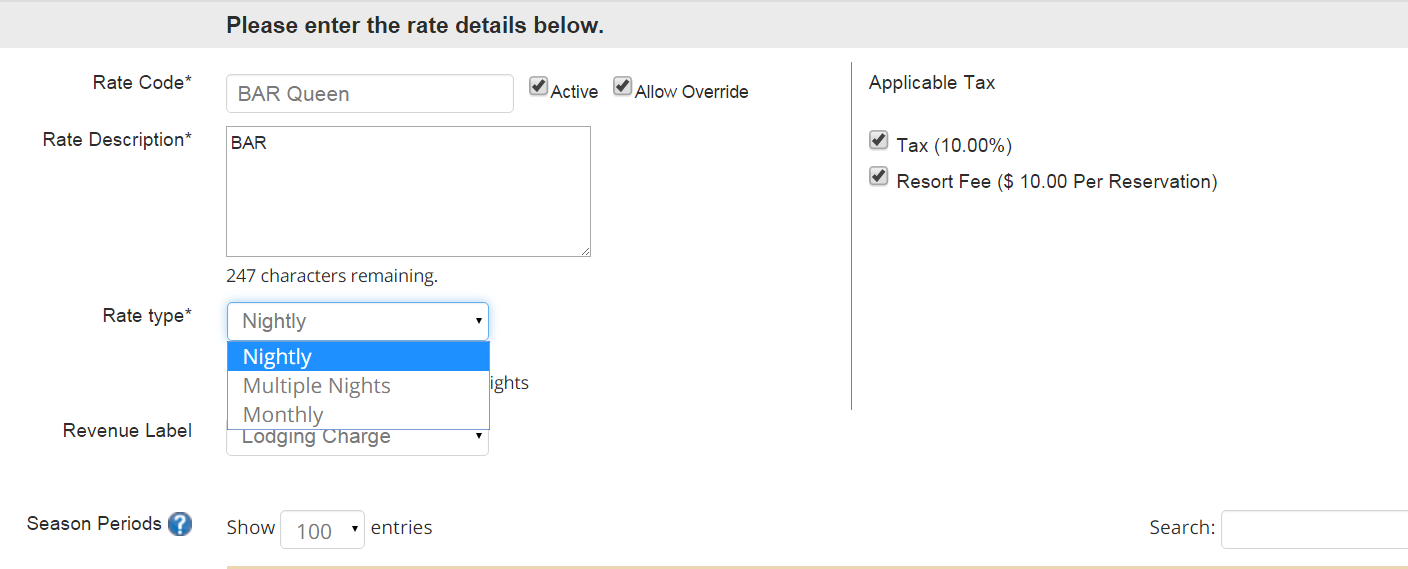
If you choose the option Nightly rate, the value you will insert will be considered as the nightly price.
If you choose the option Multiple Nights, you will need to specify how many nights the rate is valid for. You can place a numeric value in the box Rate Is Valid For. The value you insert will be considered as the total price for the number of nights you define in that box.
In the example below I am creating a weekly rate:
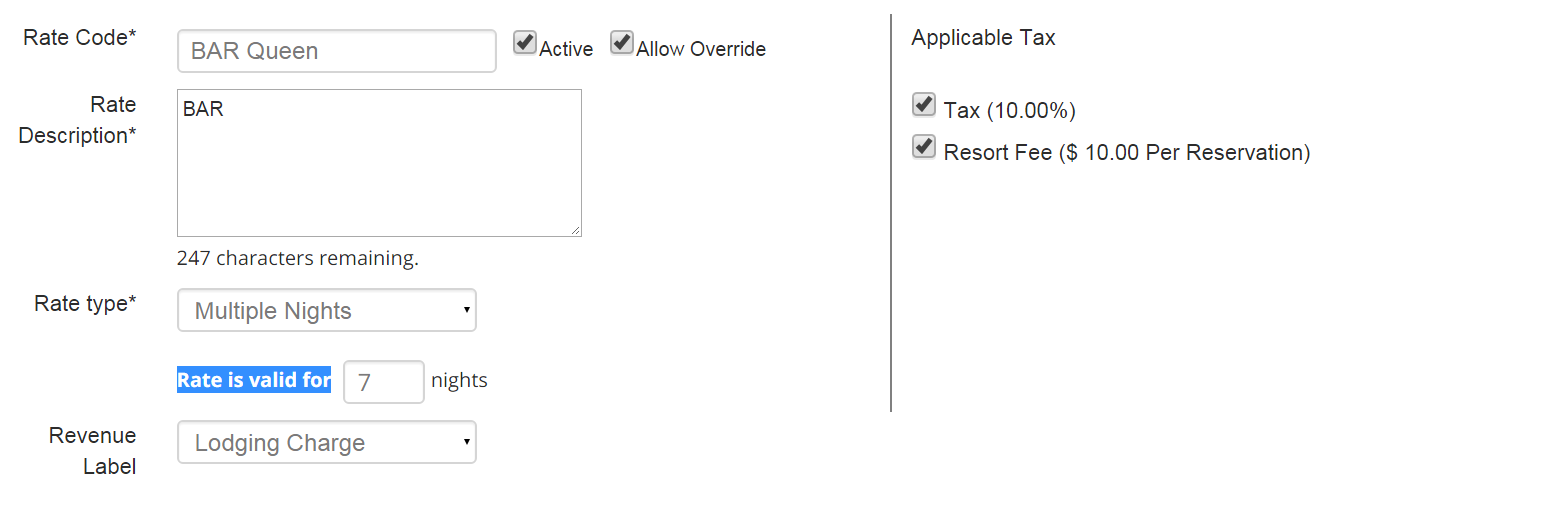
Keep in mind that if you create a multiple nights rate, the latter will not show up anywhere unless the minimum number of nights are selected.
Important: If you create a Nightly rate, you will still be given the option to place a minimum night stay requirement:
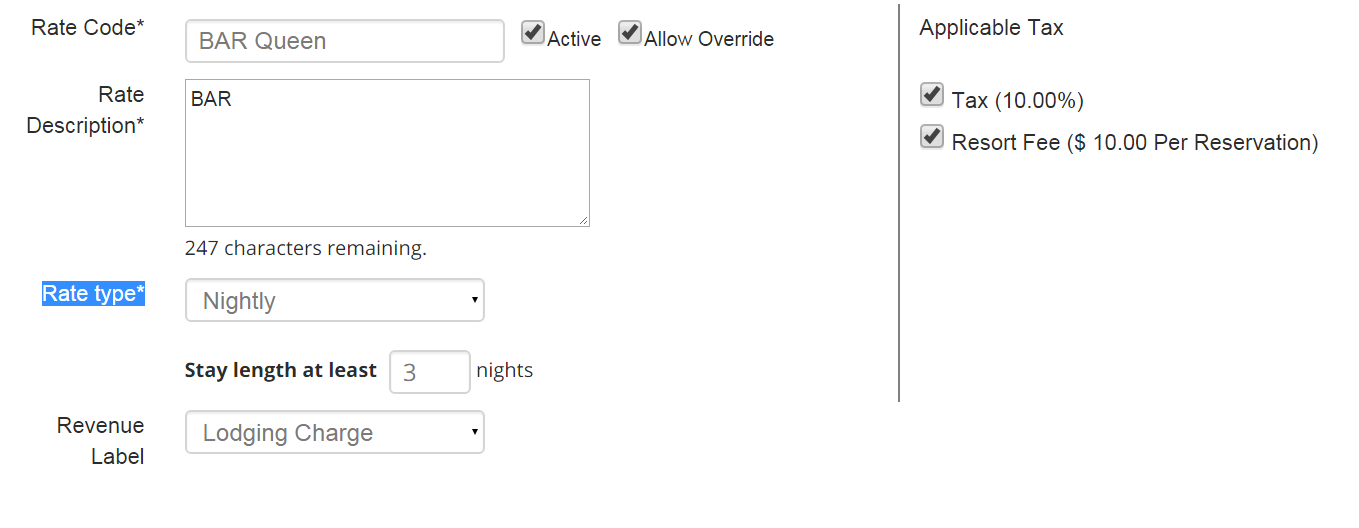
However, note that differently from the Multiple Nights Rate, the value you place for the rate will be the nightly price.
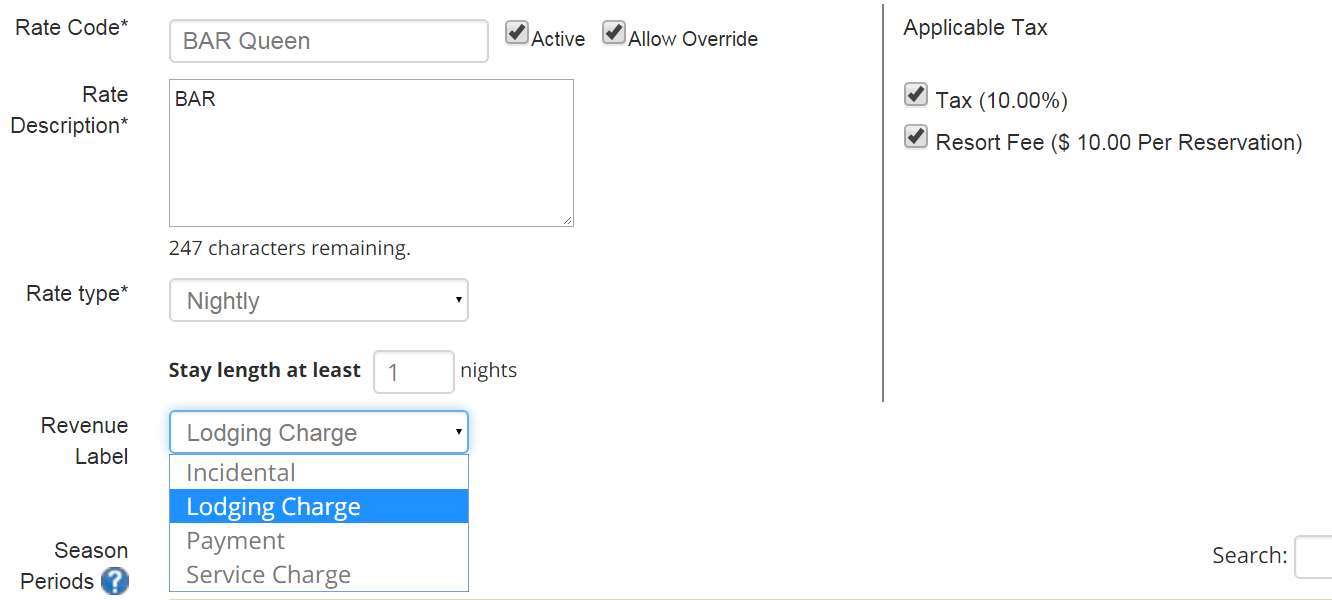
- Select the right Revenue Label in the drop down menu next to the tag Revenue Label:
Season Periods
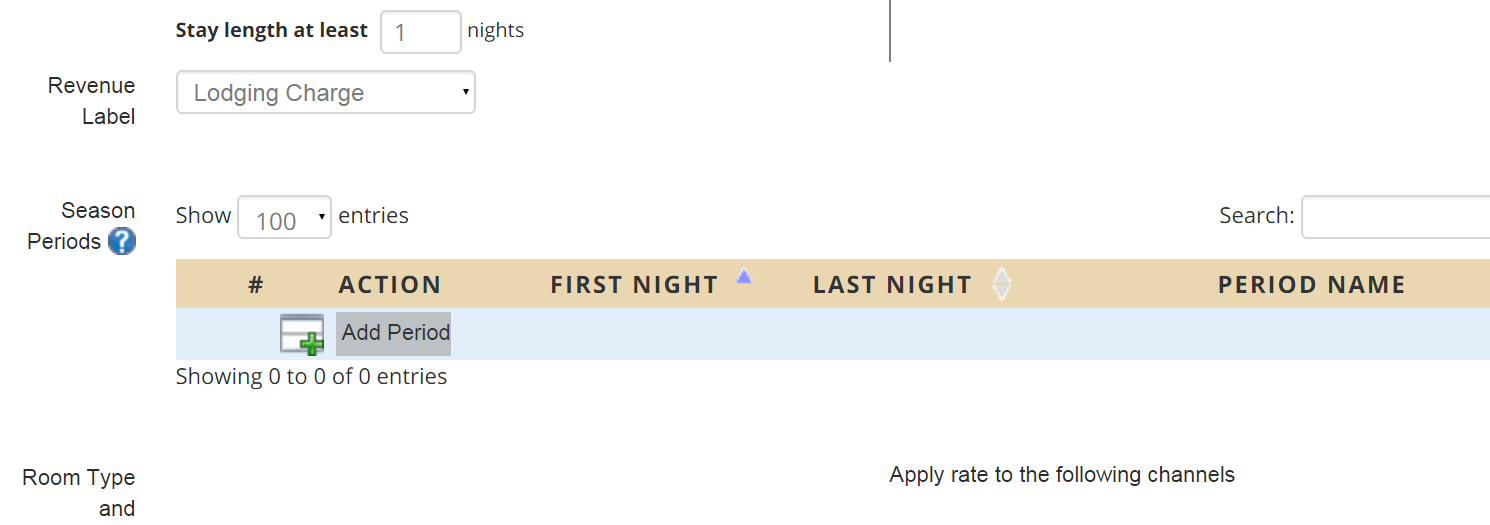
- It is now time to set up the value for your rate. This will be done via the Season Periods: a Season Period is what allows you to build different rates for different times of the year within one rate, and also to create prices for different days of the week. Think of a Season Period as correspondent with seasons rates, as for example ‘High Season’, ‘Low Season’, etc.
You can start by clicking on the little icon next to the tag Add Period:
- Insert all information requested: use the scroll down calendars to select the starting and ending date for the rate, place a description if necessary, select the days of the week you want the value to be valid for, and finally place the value for the rate in the first box:
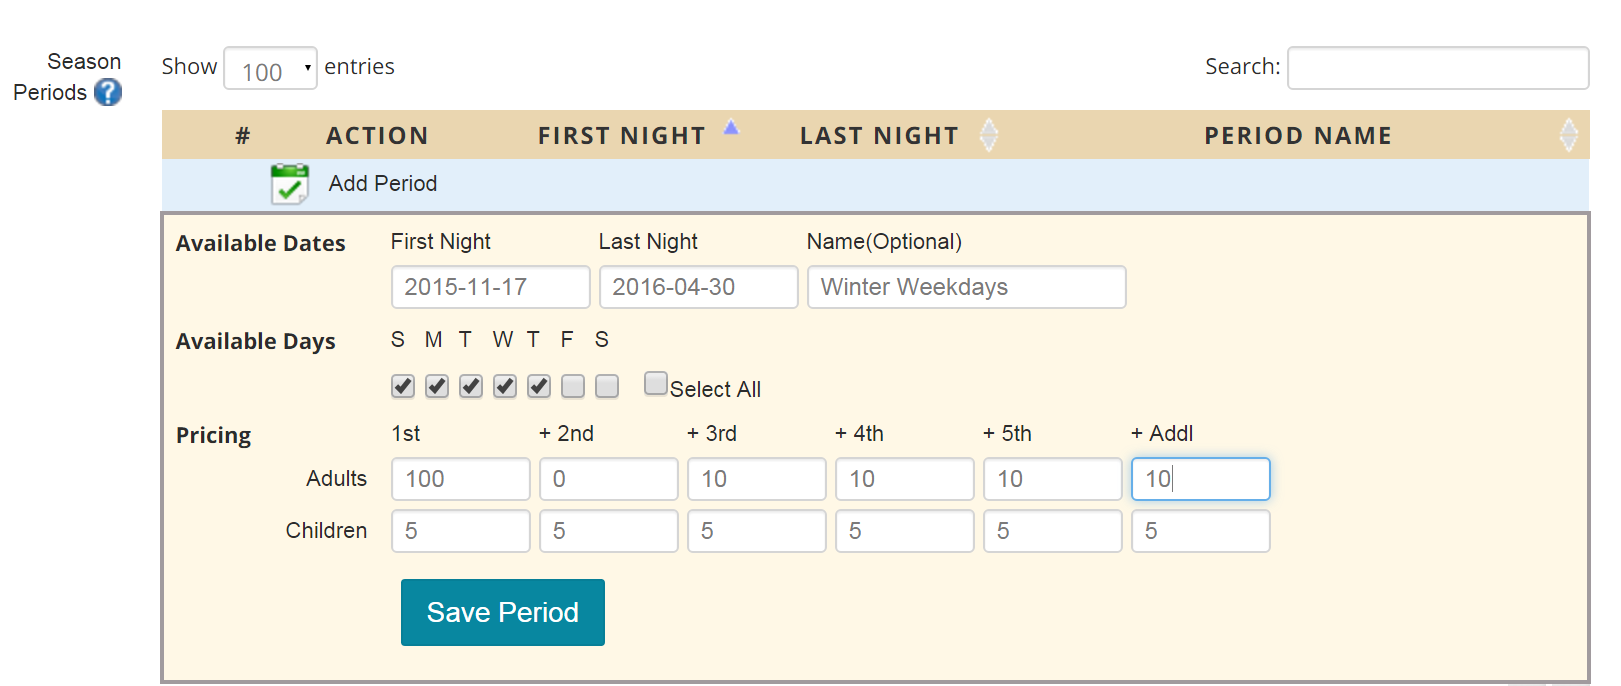
You can add additional charges in the relevant boxes, if applicable. In the example above the base rate will be $100, there is no extra charge for the second occupant, but an extra $10 for any additional person and $5 for any child.
Click on the button Save when done.
- You will now see your Season Period saved:

The three icons that appear under the column Action are used to visualize/edit the season period, cancel it and duplicate it. Hovering on the icon will also explain to you what each one does:

- Duplicating a season period comes handy when you are building a weekend rate that is different from the weekly one: indeed, the starting/ending date for the season period will be the same, what is different is the value and the days of the week to which the rate applies. Hence, click on the icon to duplicate the season period and amend the relevant fields:
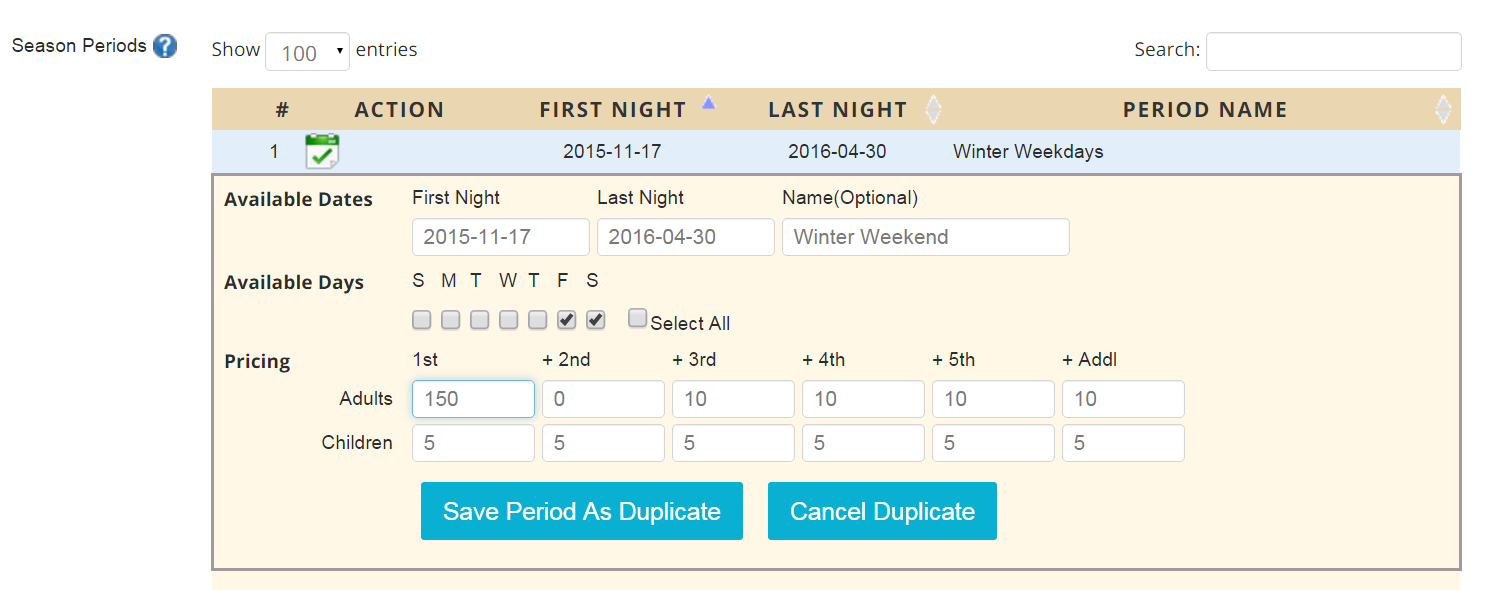
Click on Save Period As Duplicate when finished.
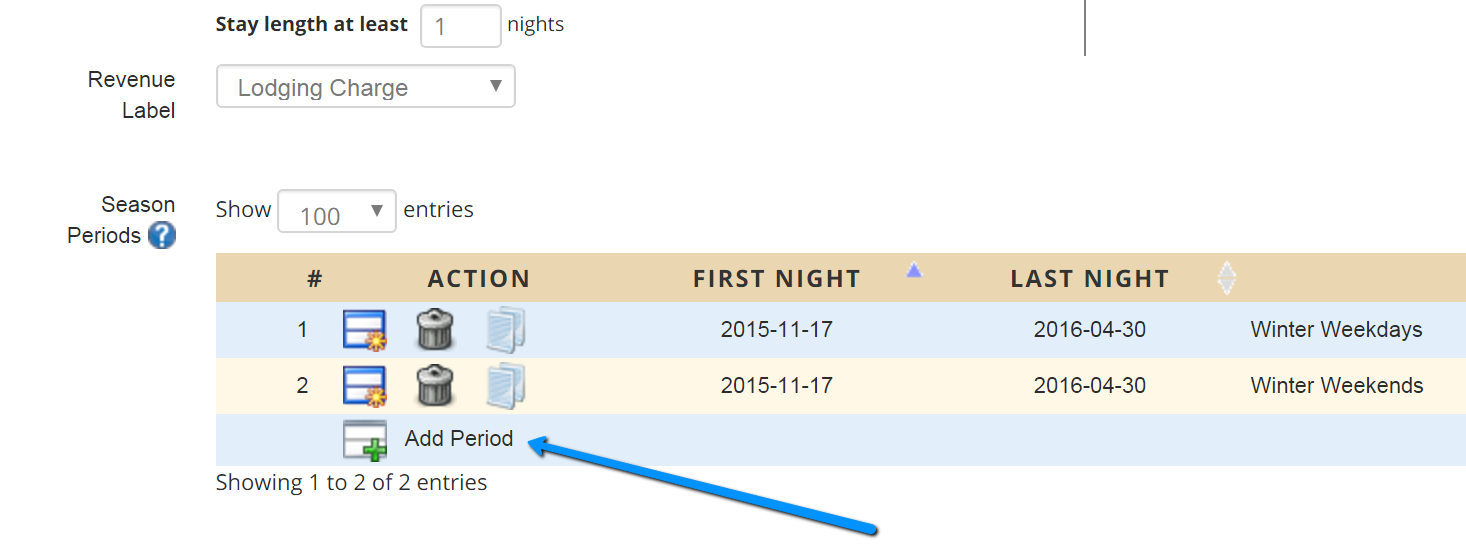
- You can continue to create more Season Periods by clicking on the button Add Period:
- Finally, you will need to choose what are the room types to which the rate will be applied to, and the channels on which it will be available:
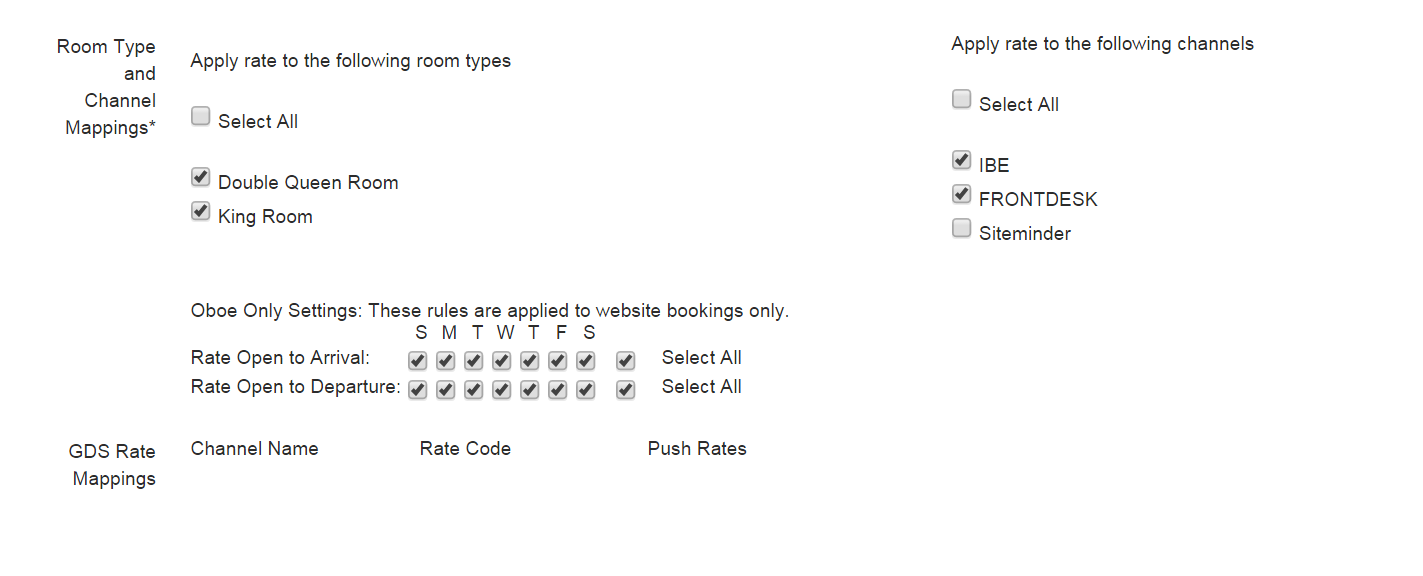
You will see a list of available channels (IBE, Frontdesk, Innlink, Zen, etc.): most of these channels are only available for integration purposes, hence you can ignore them as they require the assistance of one of our integration member team. You can take care of the first two, IBE and FRONTDESK: the first box will enable the rate on your online booking engine, the second will enable it for your Tape Chart
- Once all information are placed, you can save the rate. There are different ways you can save a rate: clicking on the button Save will save the rate and remind you to the list of existing rates; clicking on the button Save & Duplicate Rate will save the rate and create a duplicate one.
Duplicating a Rate
Duplicating a rate will come handy when you are trying to set up different rates for different room types. We are starting from the idea that although the value of the rate will be different, your Season Periods will probably be the same: a High Season, for example, is defined by the starting/ending date. Hence, instead of having to re-build all Season periods for each of your room type, you can duplicate an existing Rate Class with all its Season Periods, and simply place a different value in it!
- In the Rate Classes, click on the button Duplicate on the right hand side of the relevant rate:

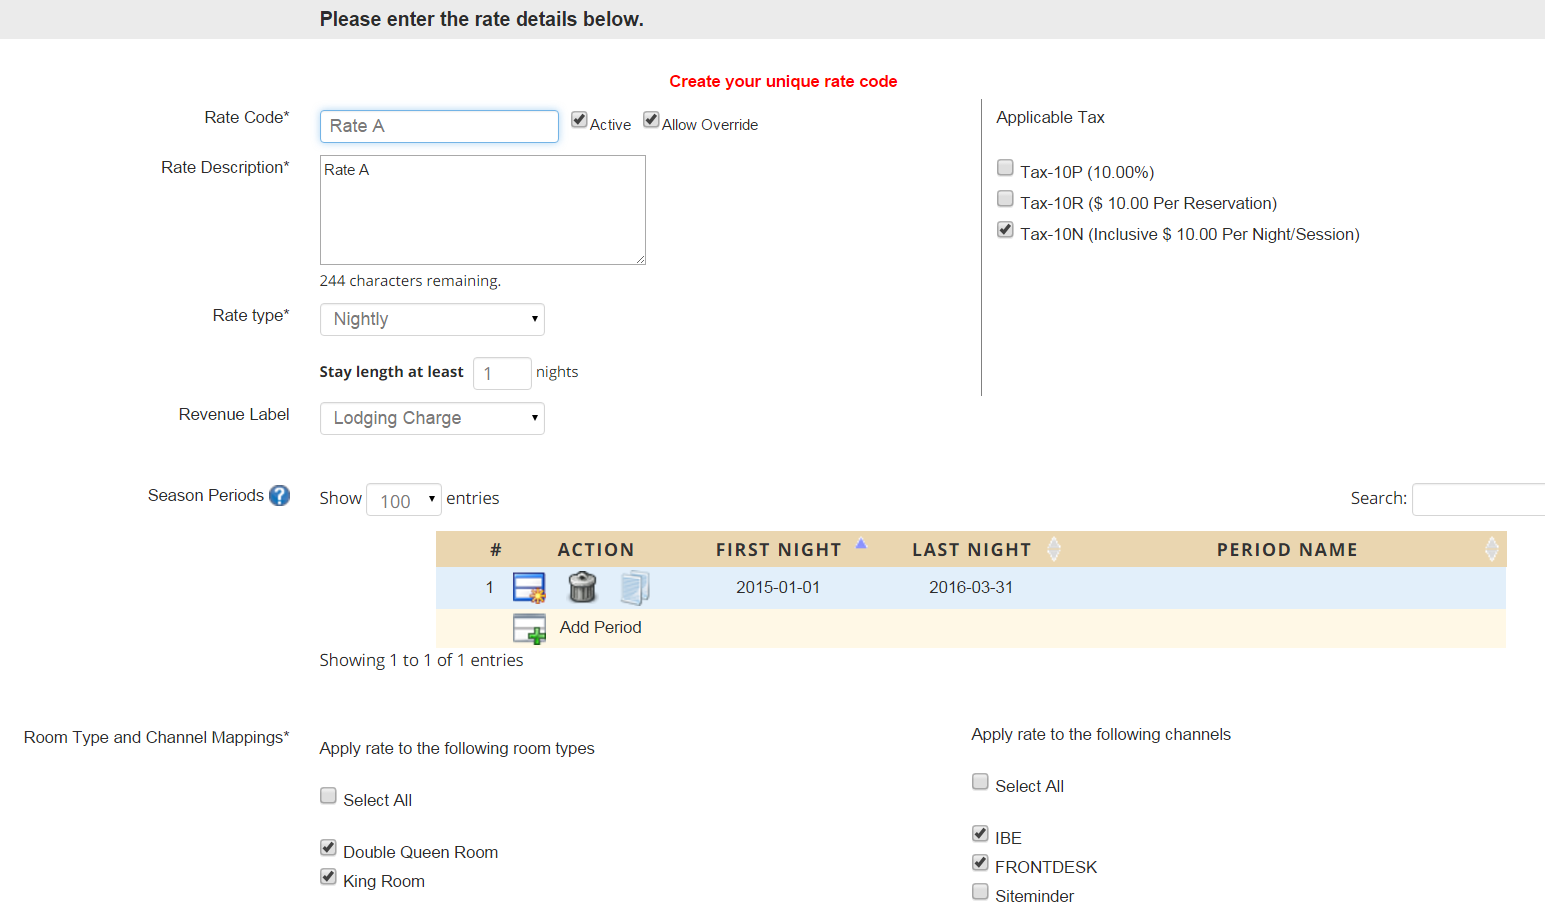
- You will now need to amend all the information that is different from the rate you are duplicating from: commonly these are Rate Code, Rate Description, vlaue in each Season Period and Room Type applied:
Daily Rate Breakdown - Rate Grid
The Rate Grid is the tool via which you can see and change the rates on a daily basis. It is also a great tool to change rates for shorter time frames like ‘New Years Eve’!
- In the Rate Classes, click on the blue link View on the right hand side of any rate:

- You will see a daily breakdown of the rate you have set up in the corresponding Rate Class:

- All the boxes are editable, so you can just amend the rate by inserting a new value for any day:
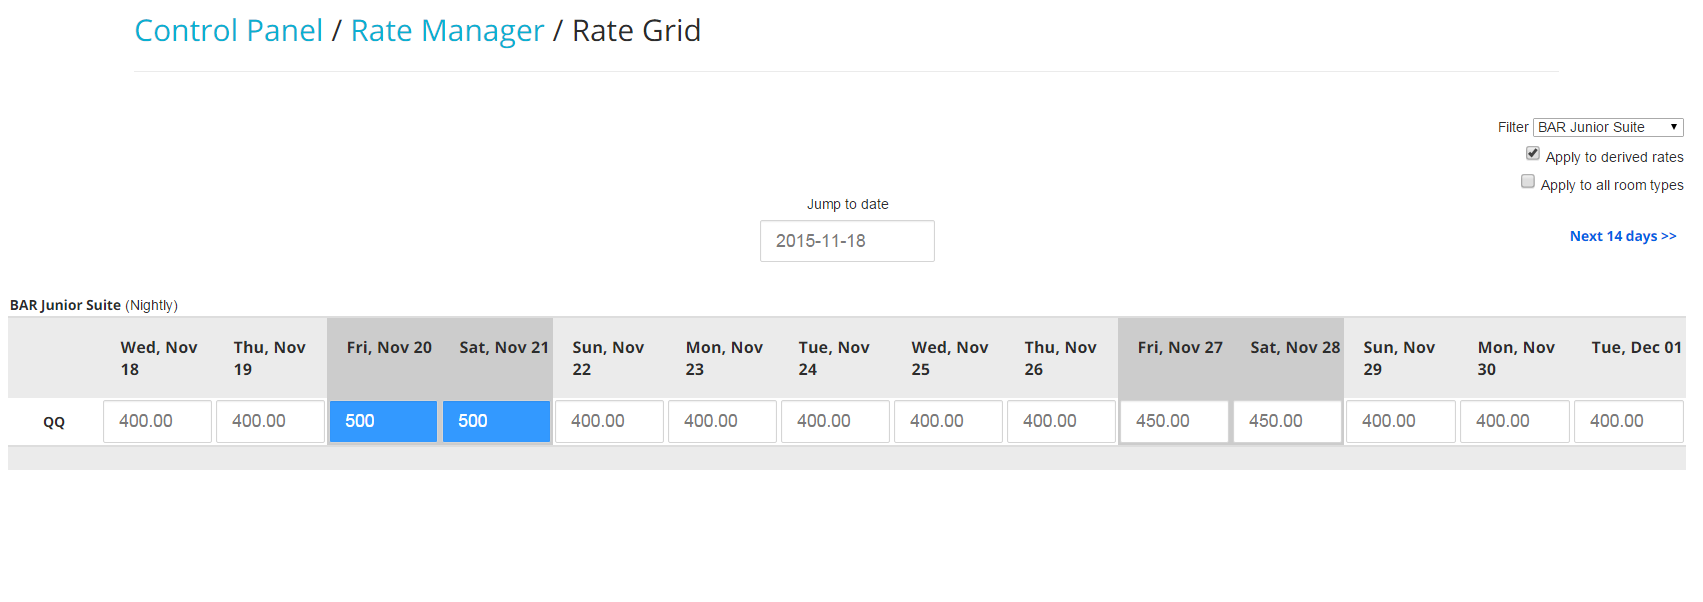
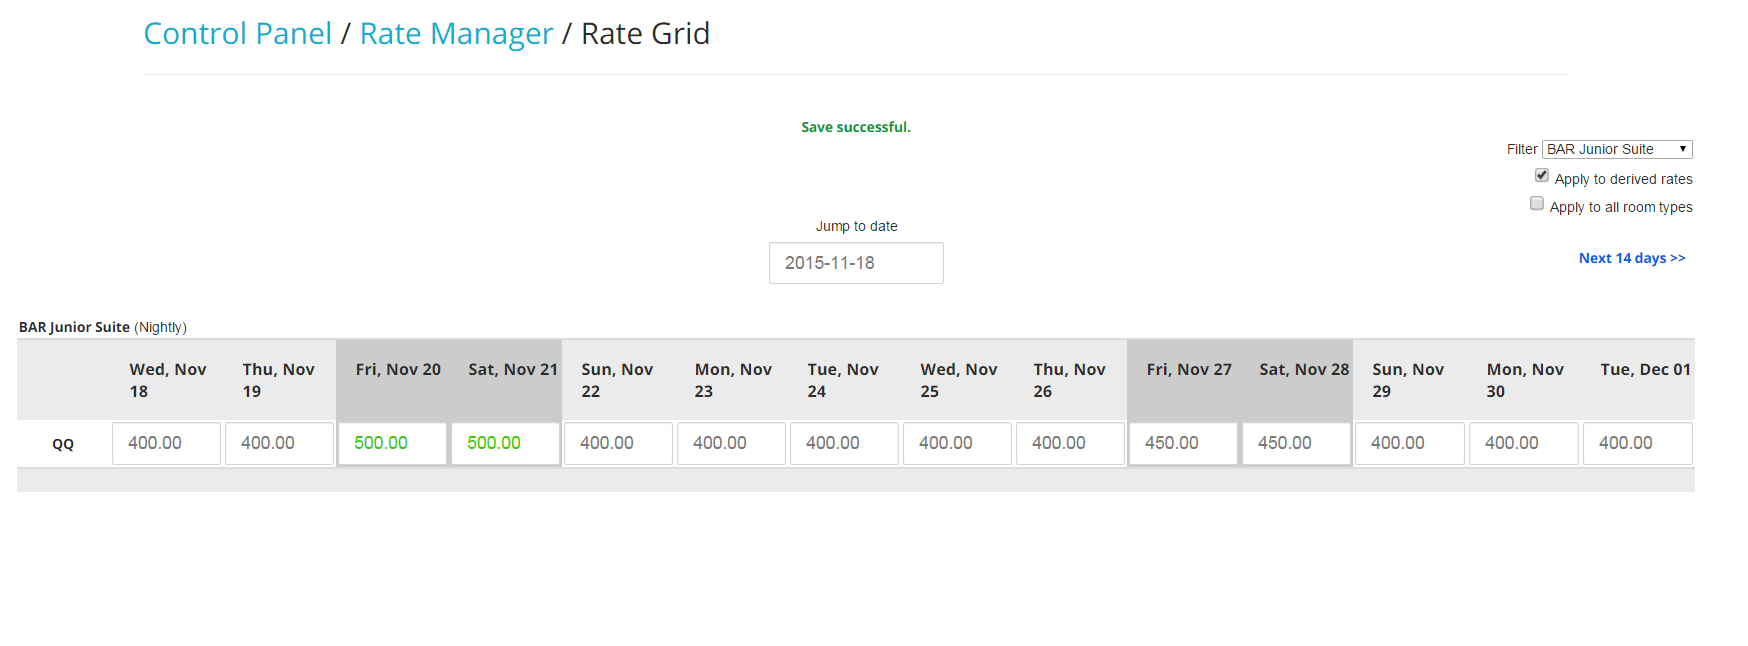
- Once you amend and save the rate, you will see that the adjusted rate appears ina different color; the rate will be green if you are going over the rate set up in the Rate Class:
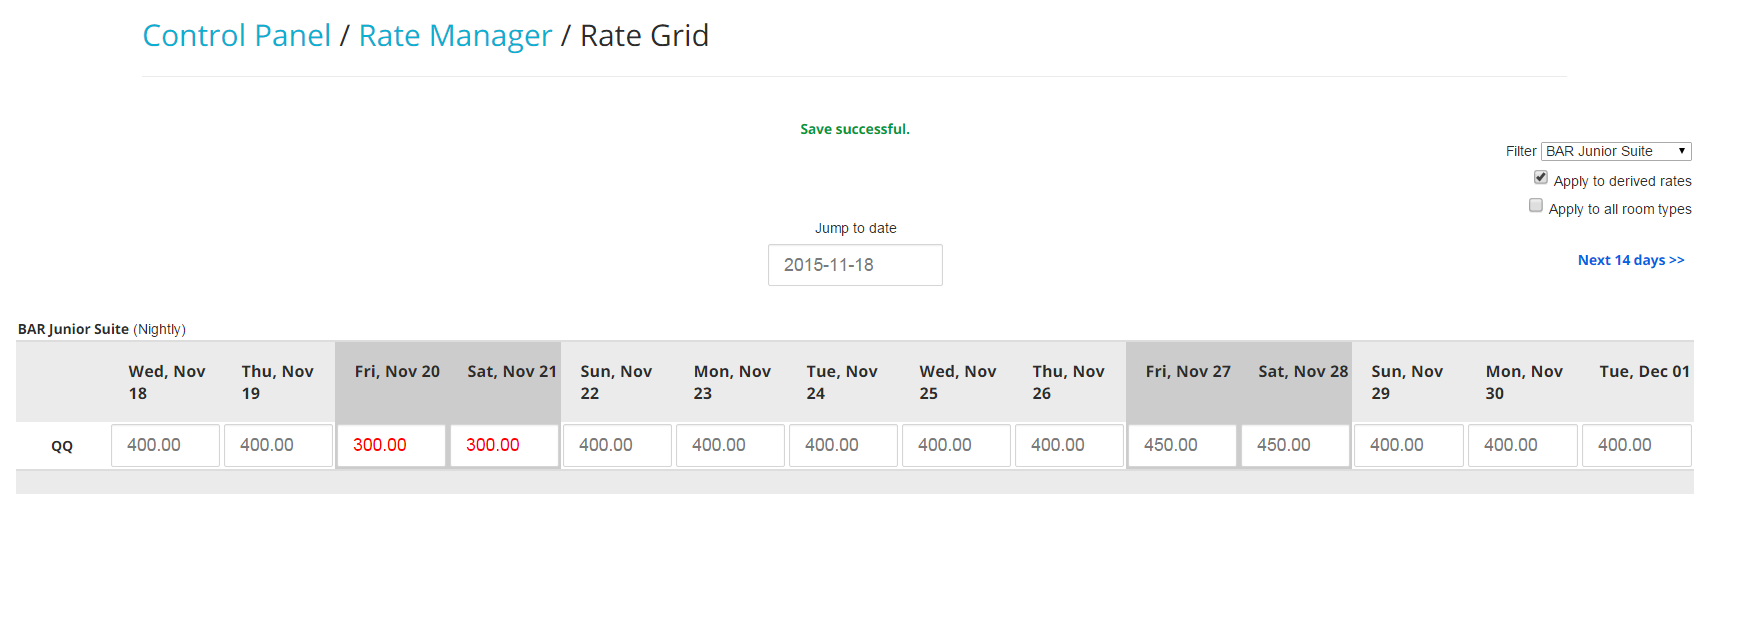
- It will show in red, if instead you are going below your base rate:
- In order to see what was the rate set up in your Rate Class, just hover the mouse over the boxes:

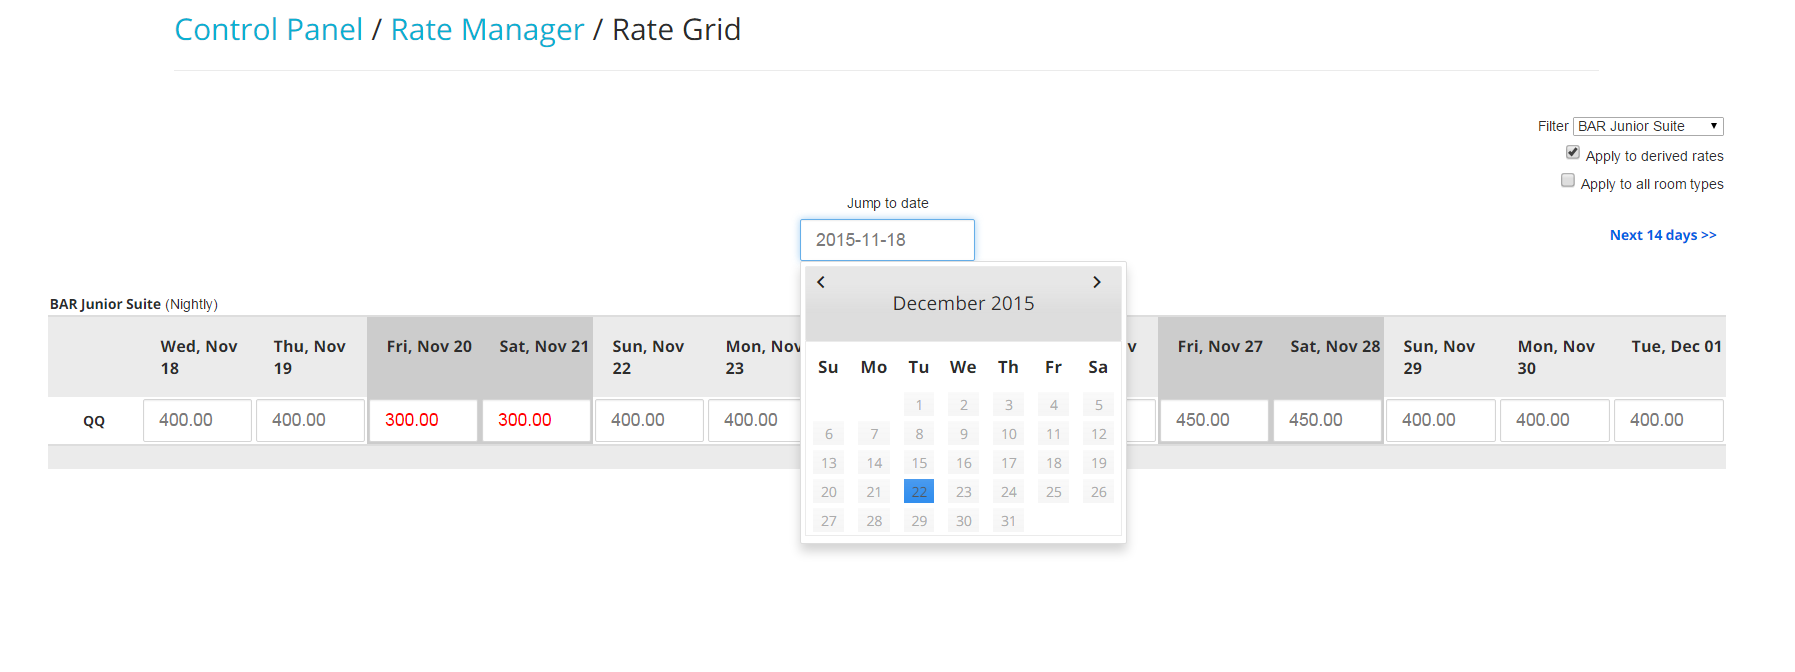
- Use the scroll down calendar to move across dates:
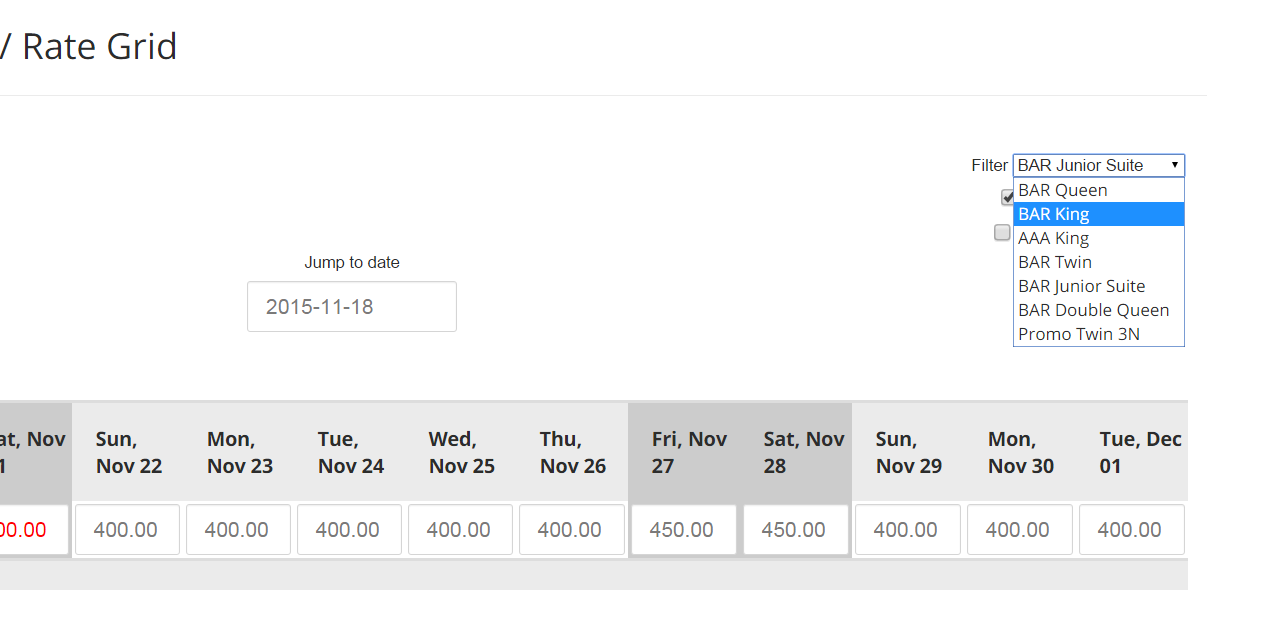
- You can also move across rate classes by selecting another rate from the scroll down calendar on the right hand side of the screen:
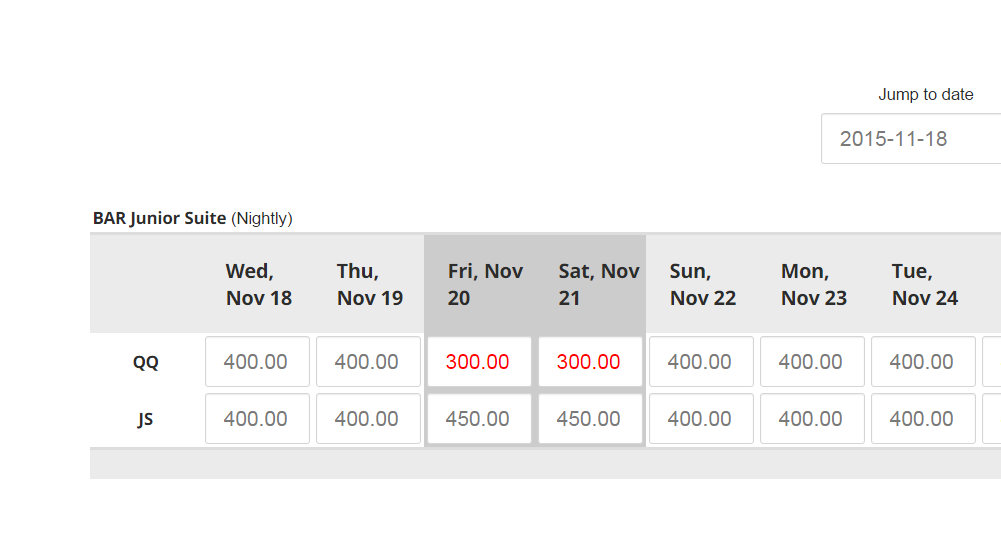
- If your rate is applied to different room types, you will have a row for each of those types, so that you can easily edit them:
- If the rate you are viewing has a derived rate linked to it, the latter will automatically change accordingly any time that the Master rate is changed,:
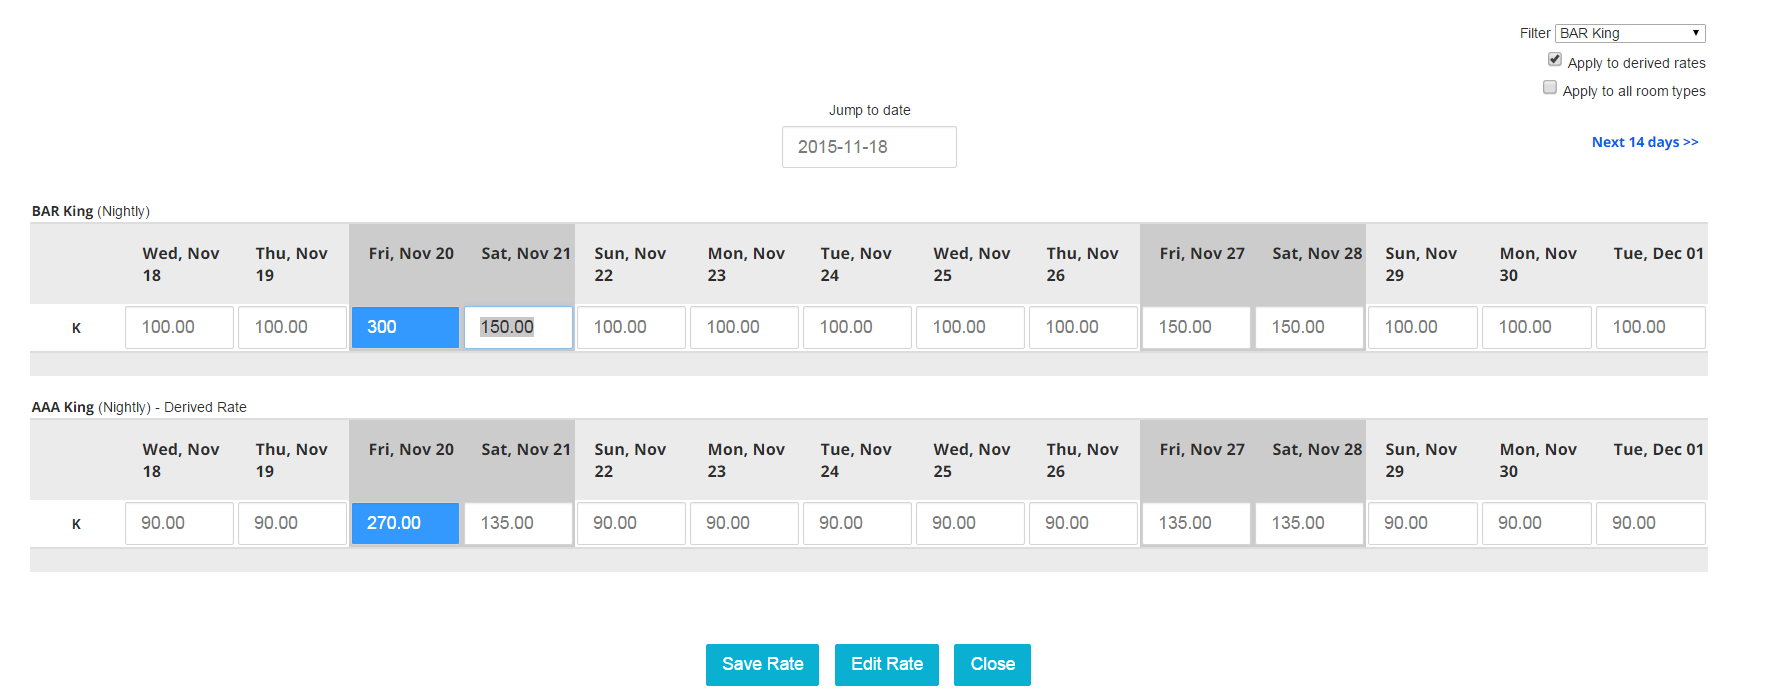
- If you do not wish the derived rate to be changed, you can un-check the box with the tag Apply to Derived Rates:

- If your the derived rate is applied to different room types, note that the rate will change only for those Derived Rates applied to the same room type as the Master Rate; if you want it to apply to all room types, then check the box next to the tag Apply to All Room Types:

Deriving a Rate
You can create a new rate by applying a certain discount/premium on the value of an existing Rate Class: the new rate is called a Derived Rate. Derived rates are linked to the master rate (the one you are deriving them from) in virtue of a certain adjustment you set up. For example, if you are running a 10% promotion for returning guests, you can create these promotional rates by deriving it from the master rate and set an adjustment of a 10% discount. Every time you change the master rate, the derived rate will also be automatically calculated.
- In the Rate Class list, click on the blue link Derive under column Action:

- Type in a name for the new rate and a new description, and select the type of adjustment you want to make:
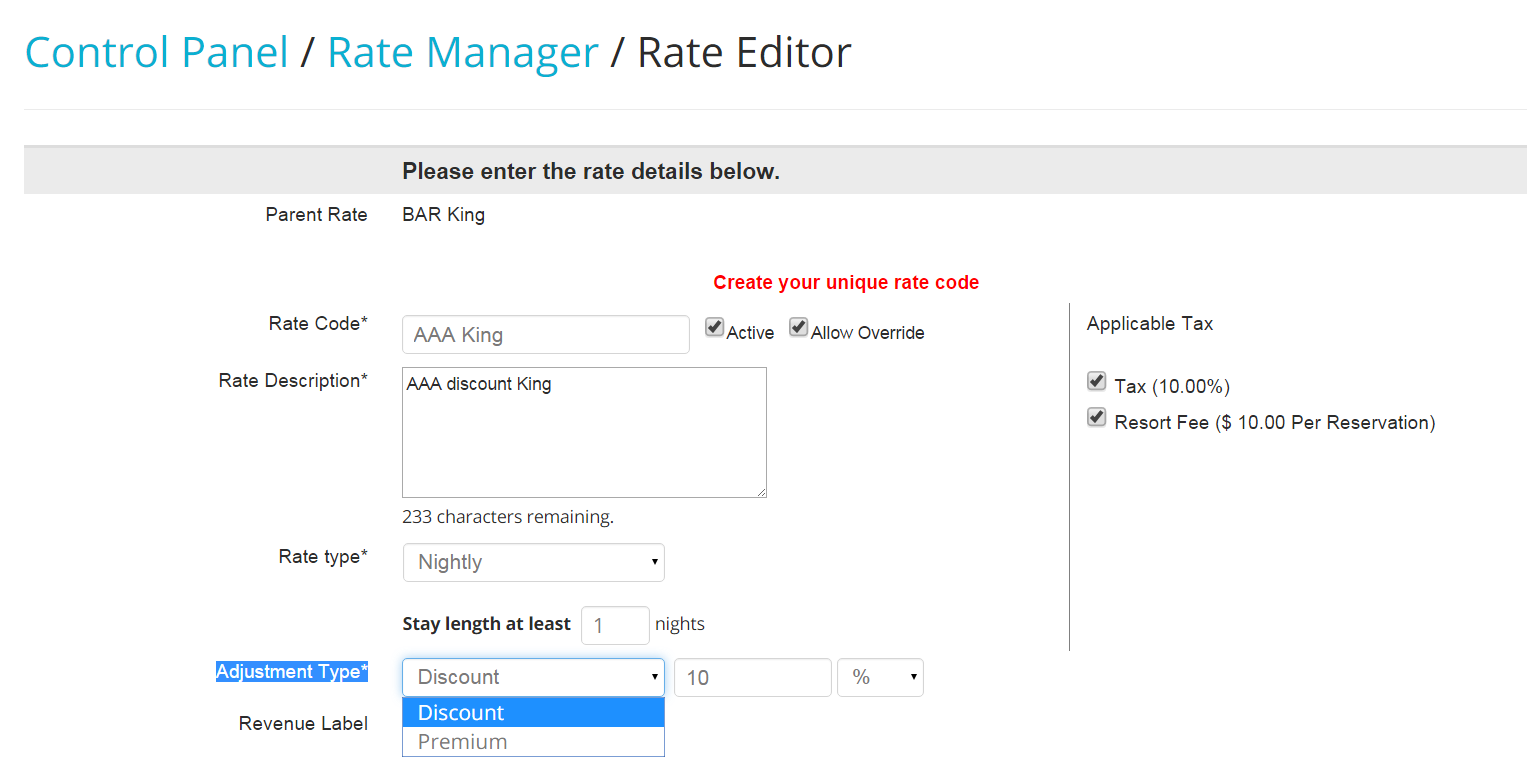
You can either discount a rate or increase it (Premium), and you can select whether the adjustment has to be a percentage or a fixed value over the Master Rate.
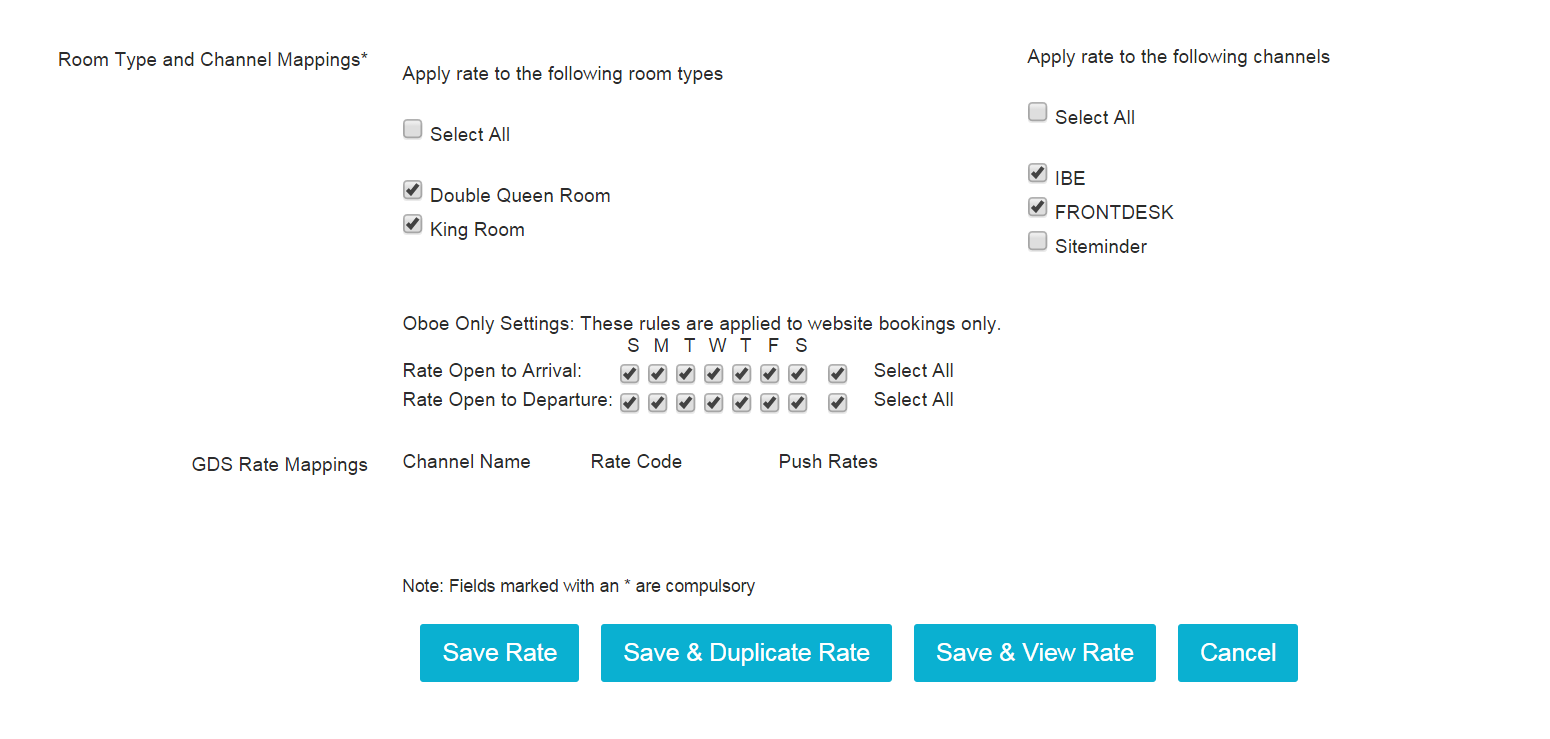
- Select the rooms to which the rate is to be applied and the channels and click on the blue button Save when finished:
- If you go back to the Rate Class List, you will notice that the derived rate appears in that list marked with a capital, bold D and an arrow. The latter points to the Derived Rate’s Master Rate:

Making a Rate Inactive
As for rooms, rates cannot be completely erased from the system; however, you can make them inactive by unchecking the box under the column Status for any row:
Rate Priority
If you are building different rates for the same room type, you may want to control what is the default rate that comes up when an agent is making a reservation.
When you open a folio, all applicable rates for the room type appear in the scroll down menu on the right hand side of the panel:
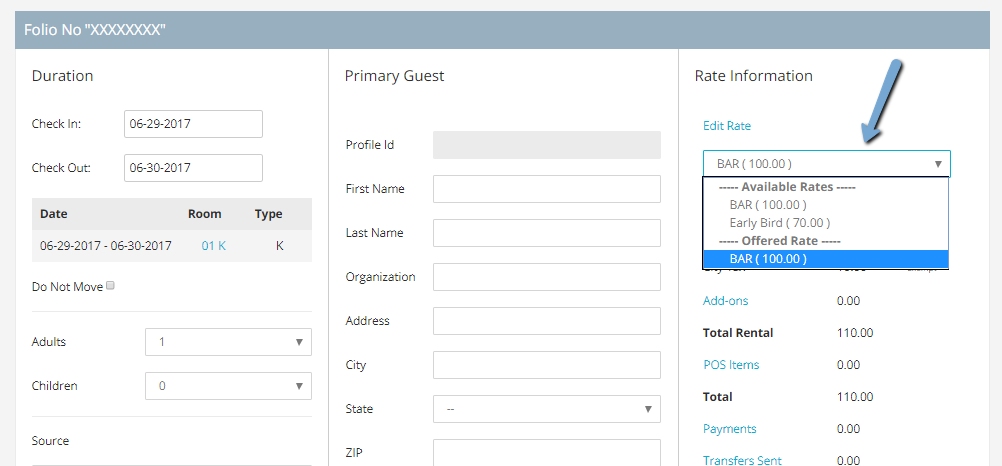
Unless you order your rates, they will appear randomly in the folio: for example, in the picture above my AAA rate shows up before the BAR rate.
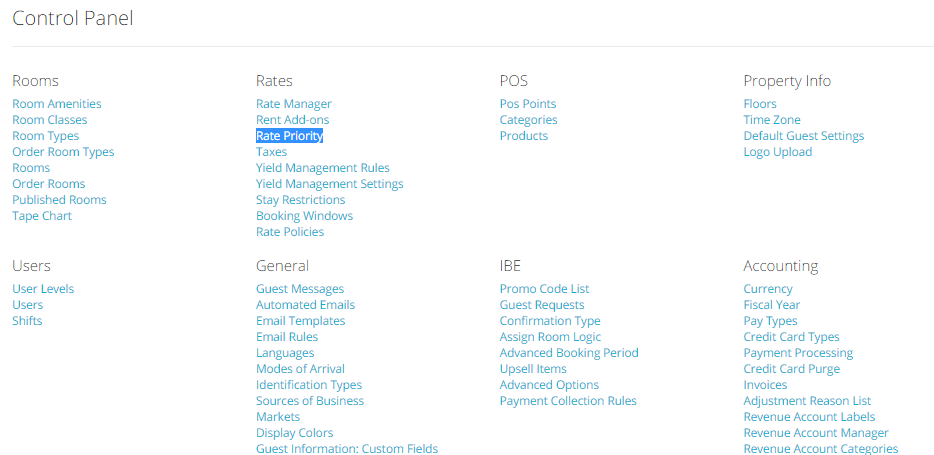
- In the Admin Settings, click on Rate Priority under section Rates:
- You will see a list of all the rates you have created in the system, independently of the room types where they are applied:
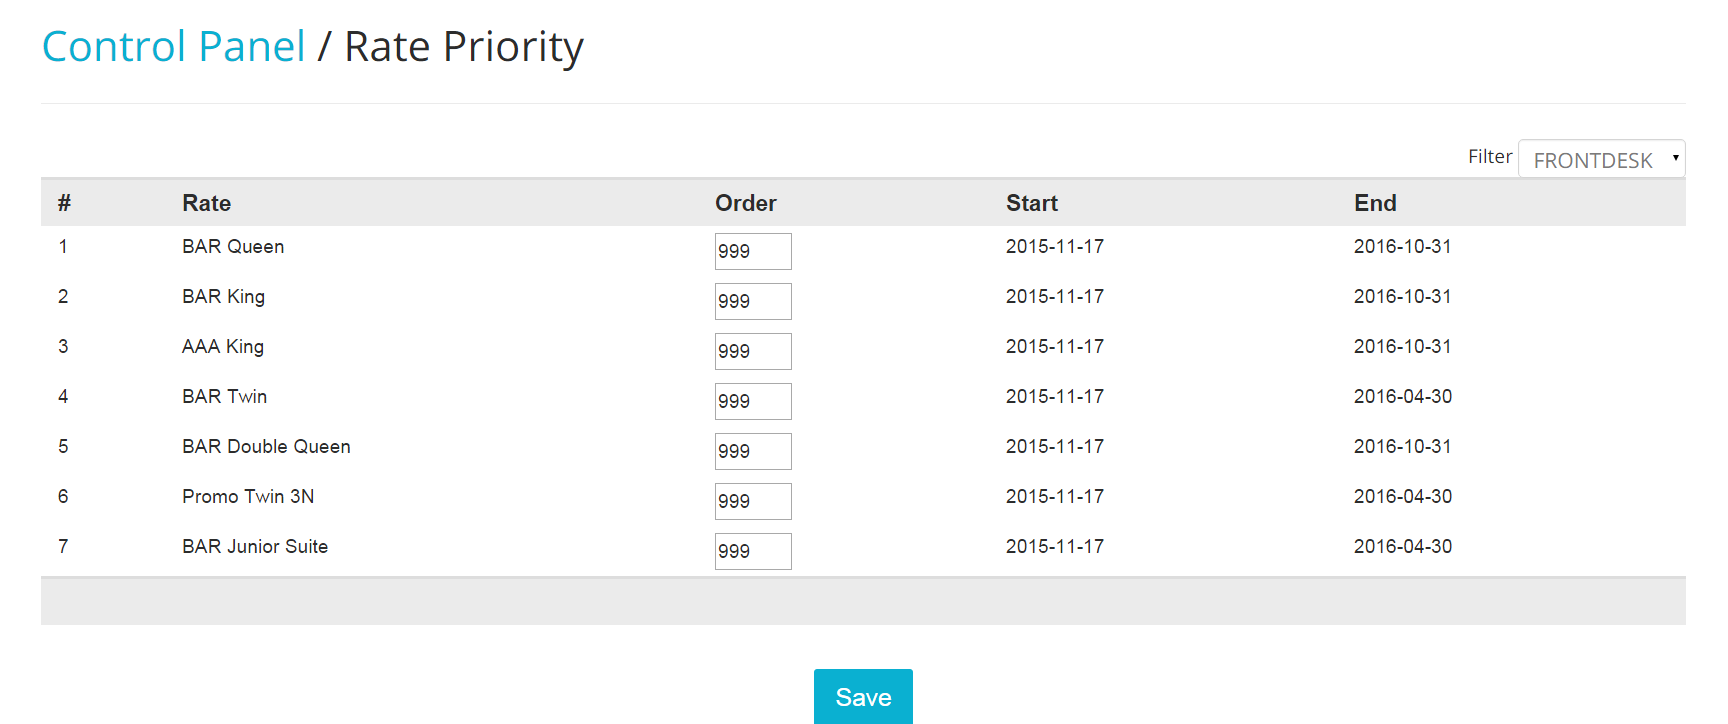
- Replace the 999 number with a progressive numeric order: in the example below I am setting my BAR rates to show up first:
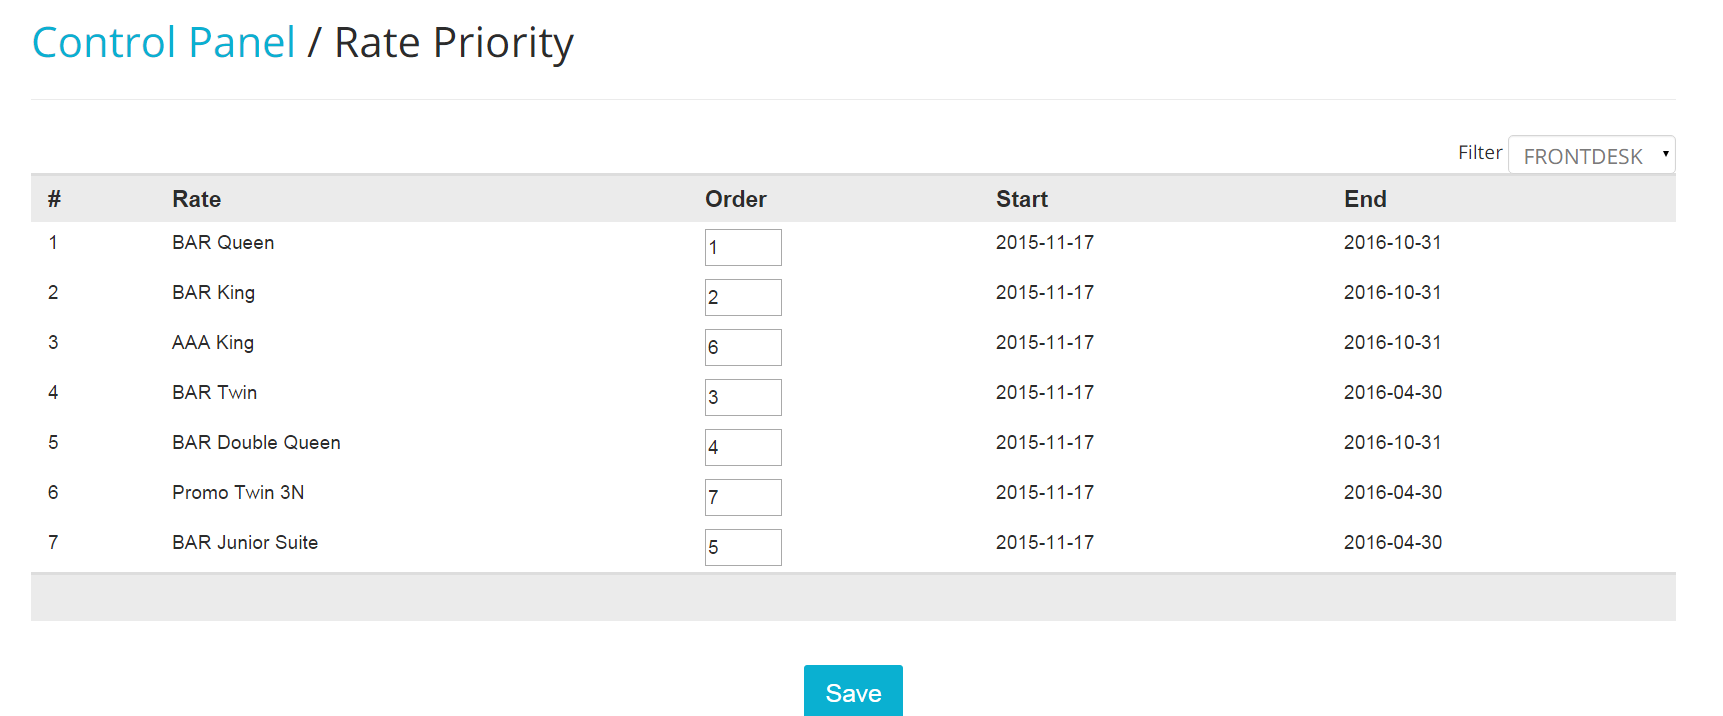
- Click on the blue button Save, and you will see your rates in the order you placed.
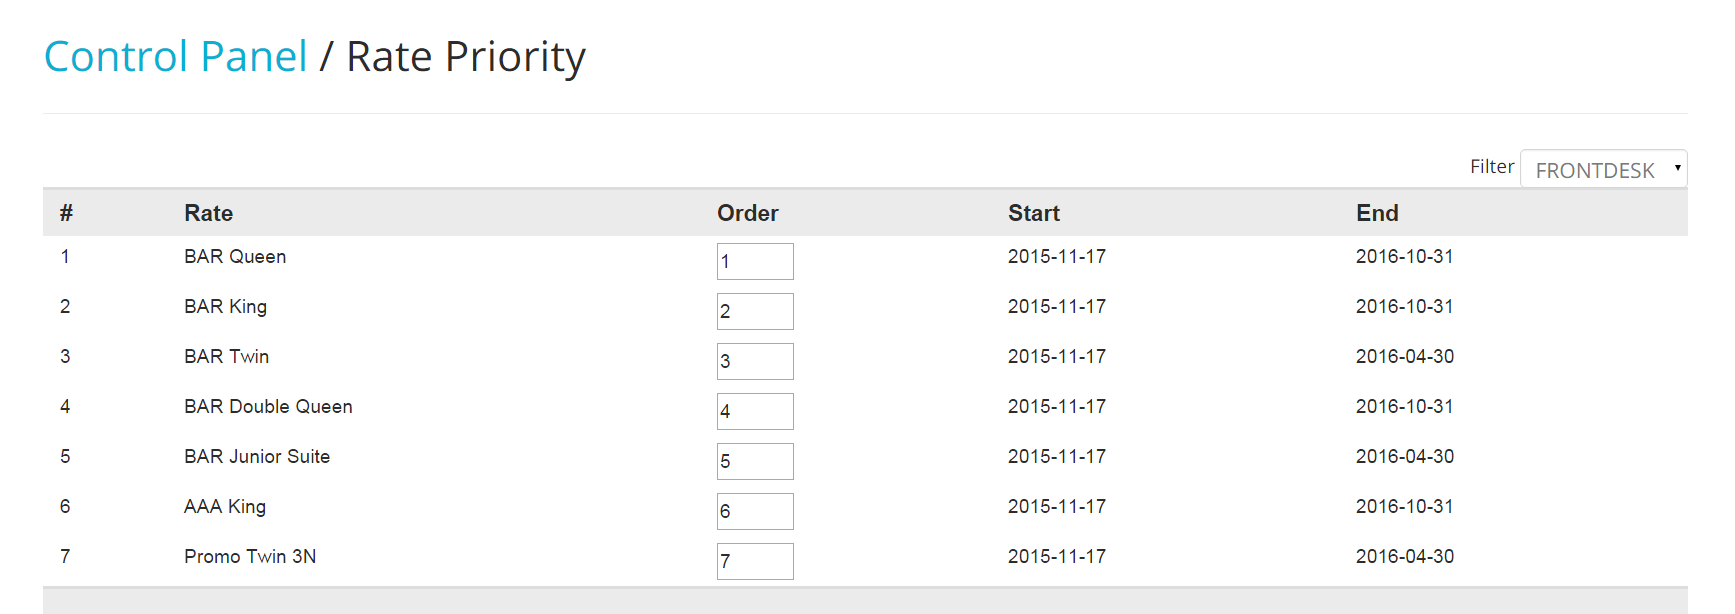
You might need to log out and log back into the system in order to see changes being effective!
Booking Window
This functionality allows you to specify a certain booking window for a specific rate. Promotional rates usually have booking restrictions: for example, an Early Bird type of promotion allows price reduction for guests booking 60 or 90 days in advance
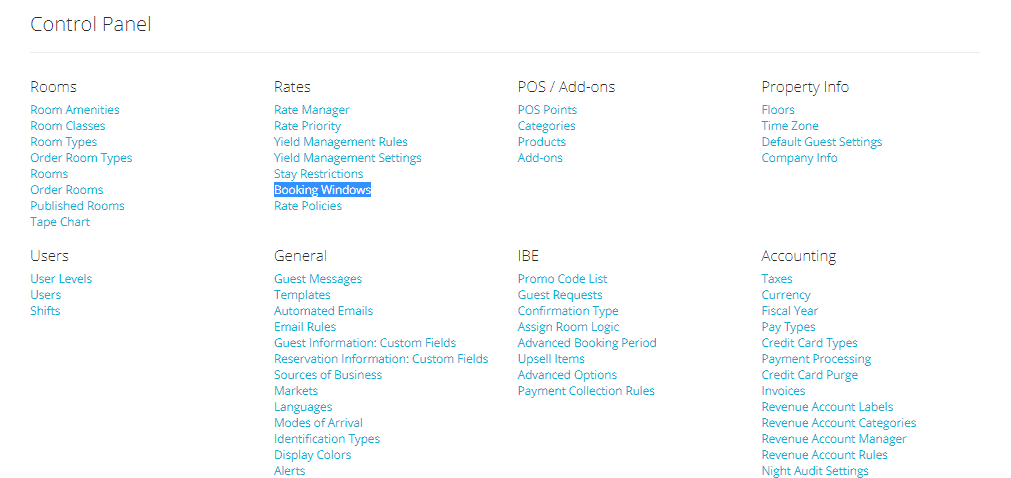
- Click on the link Booking Window under section RATES:
- Click on the blue Add button:

- Type in a title for the booking window, and place a short and meaningful description:
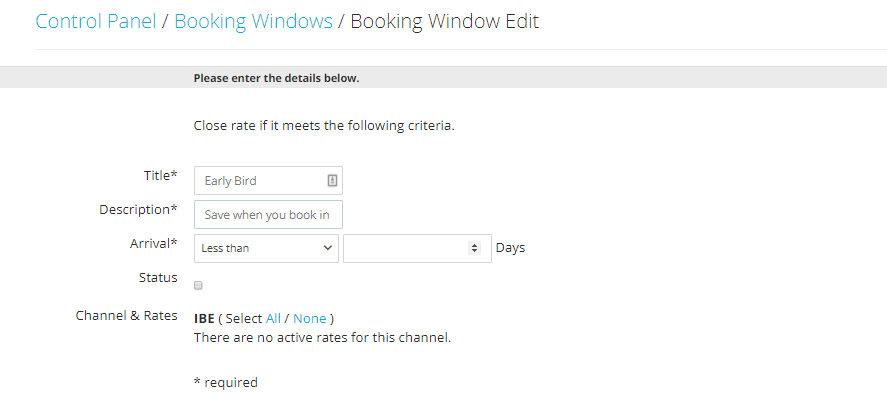
- The wirrten highlighted below describes how the restrictin applies to the rate: the rate will appear unavailable if the guest’s arrival date is greater/less than X number of days.
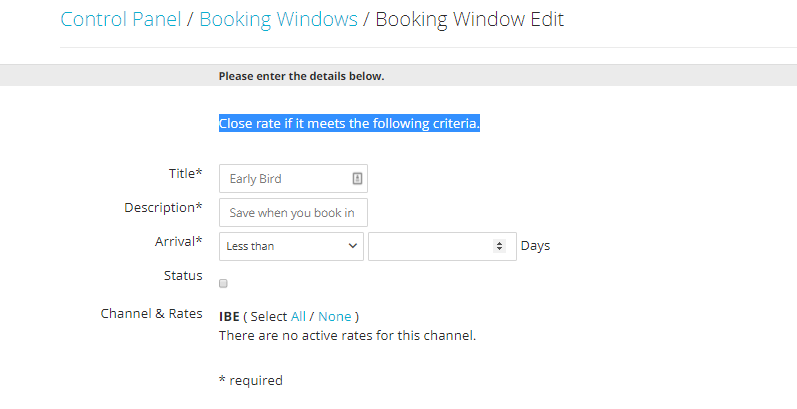
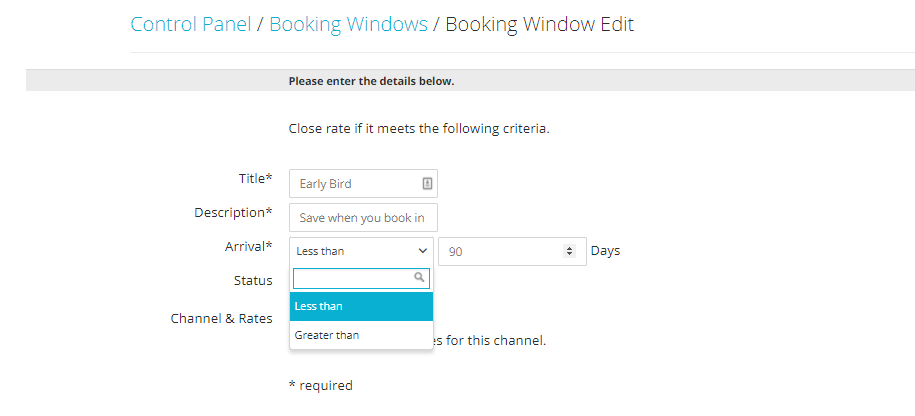
- Configure the booking conditions choosing an option from the Arrival drop down menu and specify the number of days in the apposite box:
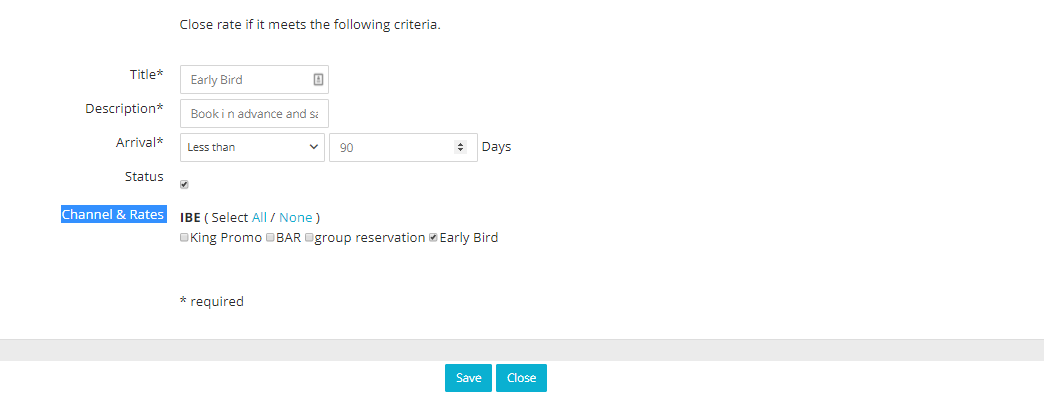
- Make sure the Status box is checked, and select the rates where the restriction should apply. When finished, click on the button Save:
Rate Policies
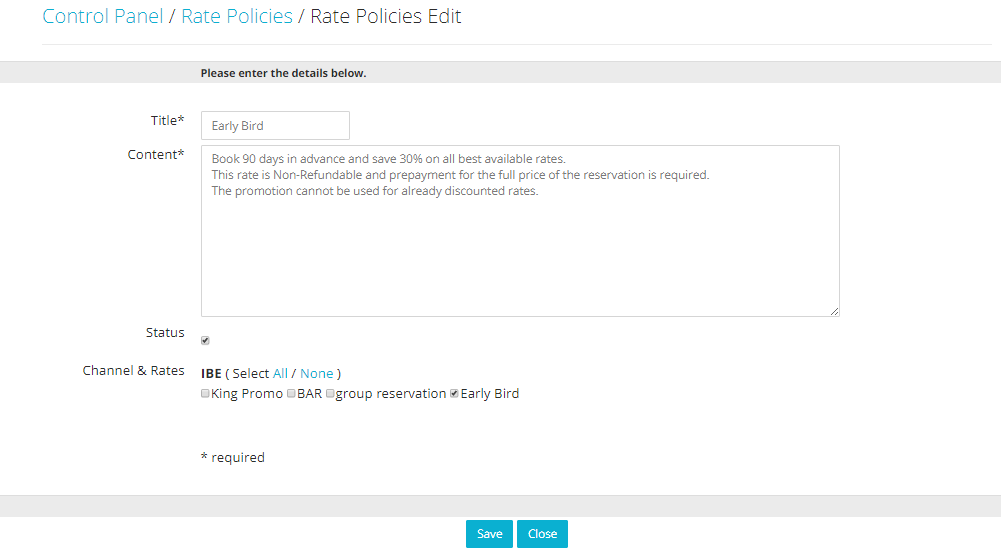
Specifis terms and conditions for a selected rate can be configured via the Rate Policies.
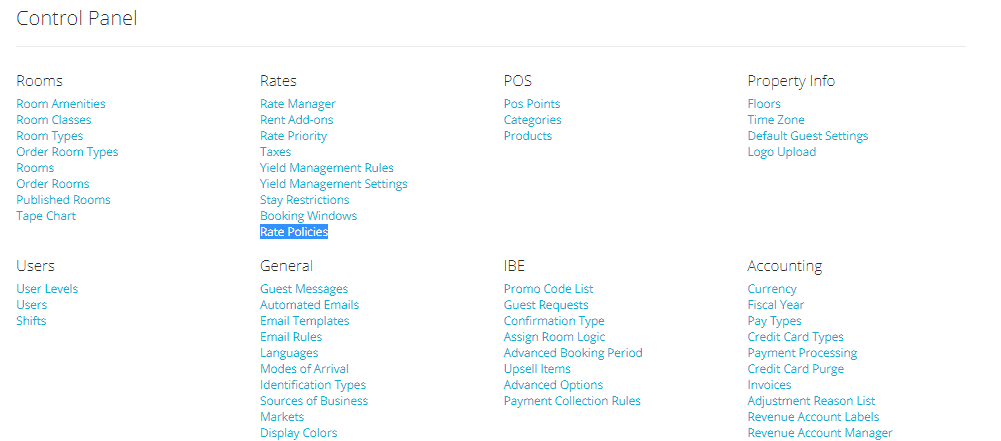
- Click on the link Rate Policies under section Rates:
- Click on the blue Add button:

- Type in a name for the policy: this can be the same as the name of the rate linked to it. Also type in the policy content in the second box:
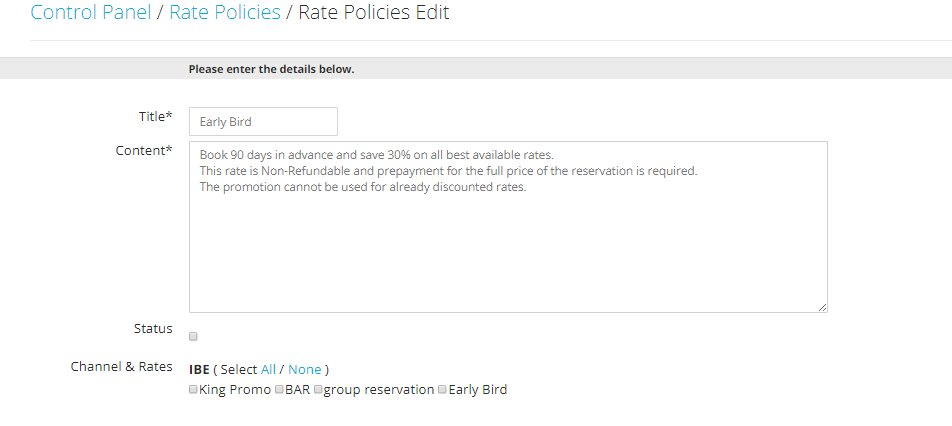
- Activate the policy by checking the Status box and select the rates where the policy should apply. When finished, click on the button Save:
